

Setting up welcome messages
A ข้อความต้อนรับ (Welcome message) is what the bot sends when a customer messages you for the first time, or comes back after a long time away. You can include text, 1 image and a menu customers choose from by typing a number, such as see promotions or contact an admin.
The shop owner and every admin can set up welcome messages. One account can be in one welcome set. New shops get a ข้อความต้อนรับหลัก (Main welcome message) set that is turned off; you can turn that one on or edit it, or create a new set for some pages. Parts every topic shares, such as status, testing and history, are explained in Using the auto-reply bot.
Creating a welcome message
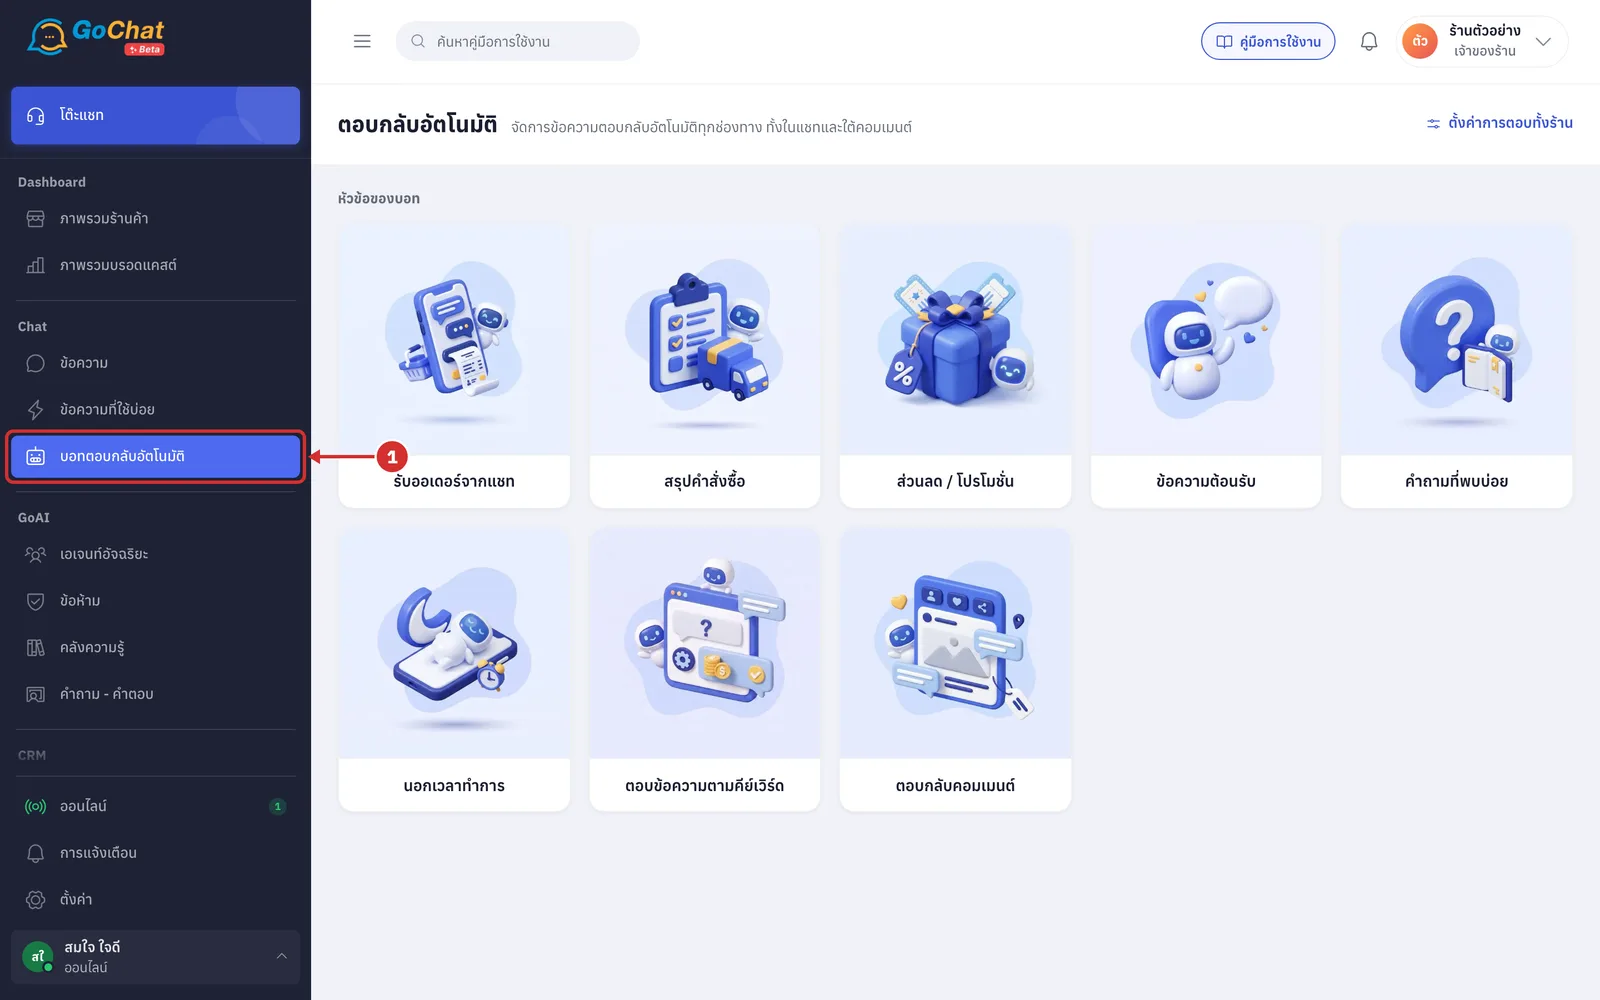
Go to the บอทตอบกลับอัตโนมัติ (Auto-reply bot) menu under Chat in the left menu bar
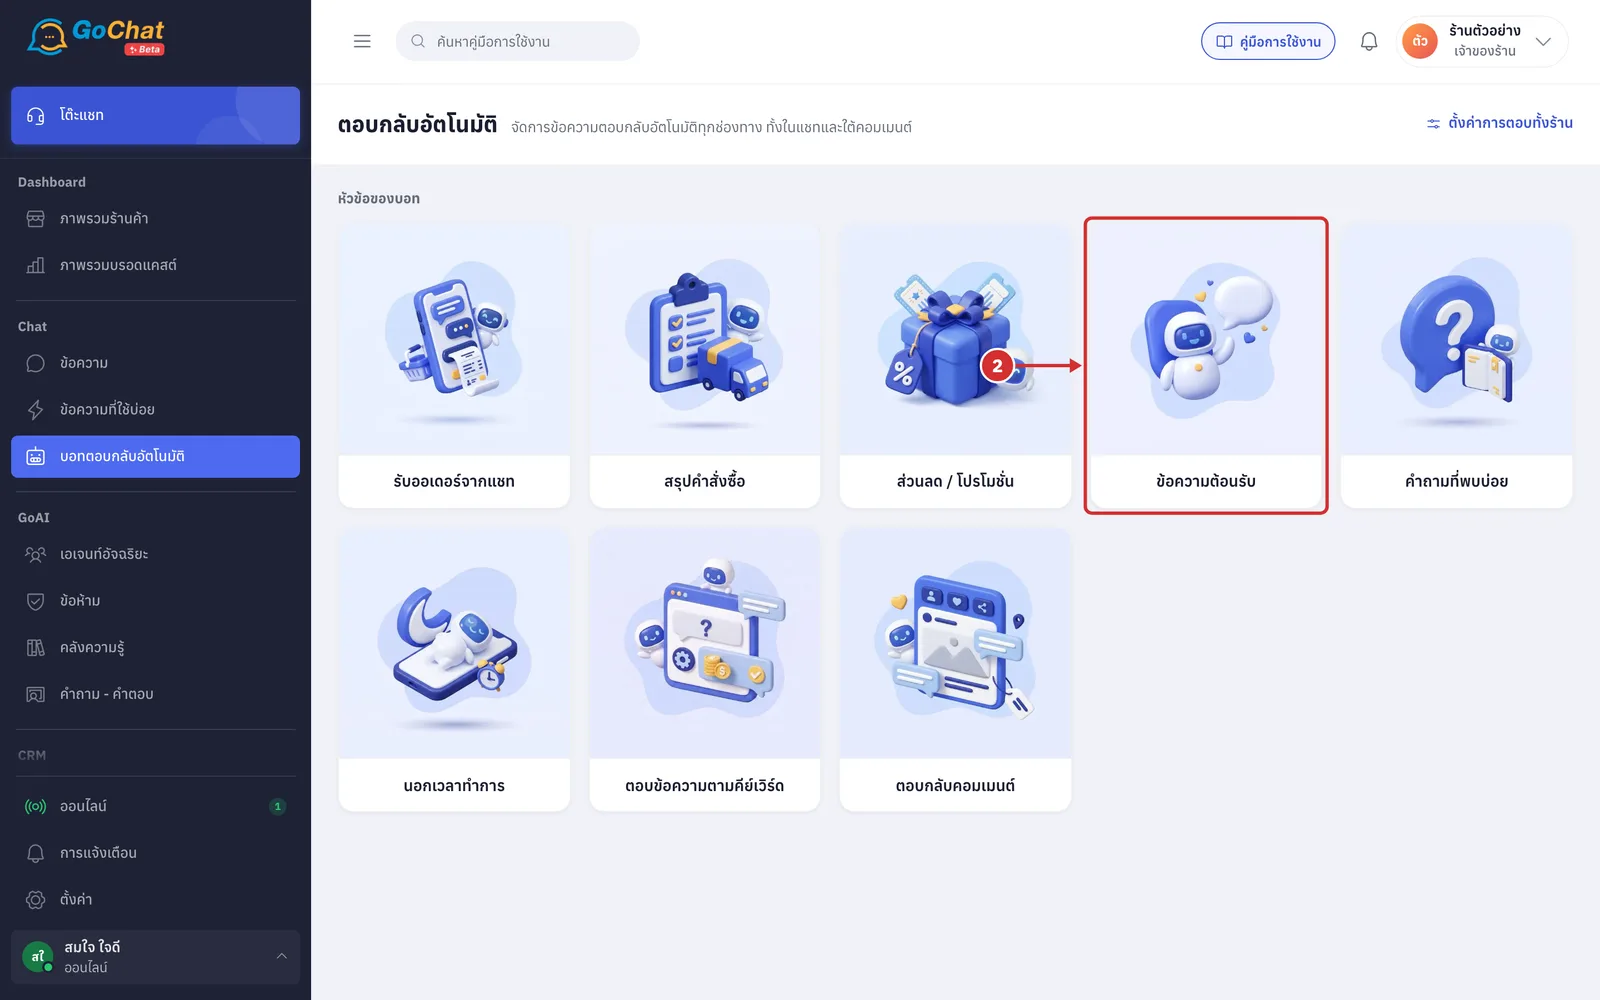
Click the ข้อความต้อนรับ (Welcome message) card
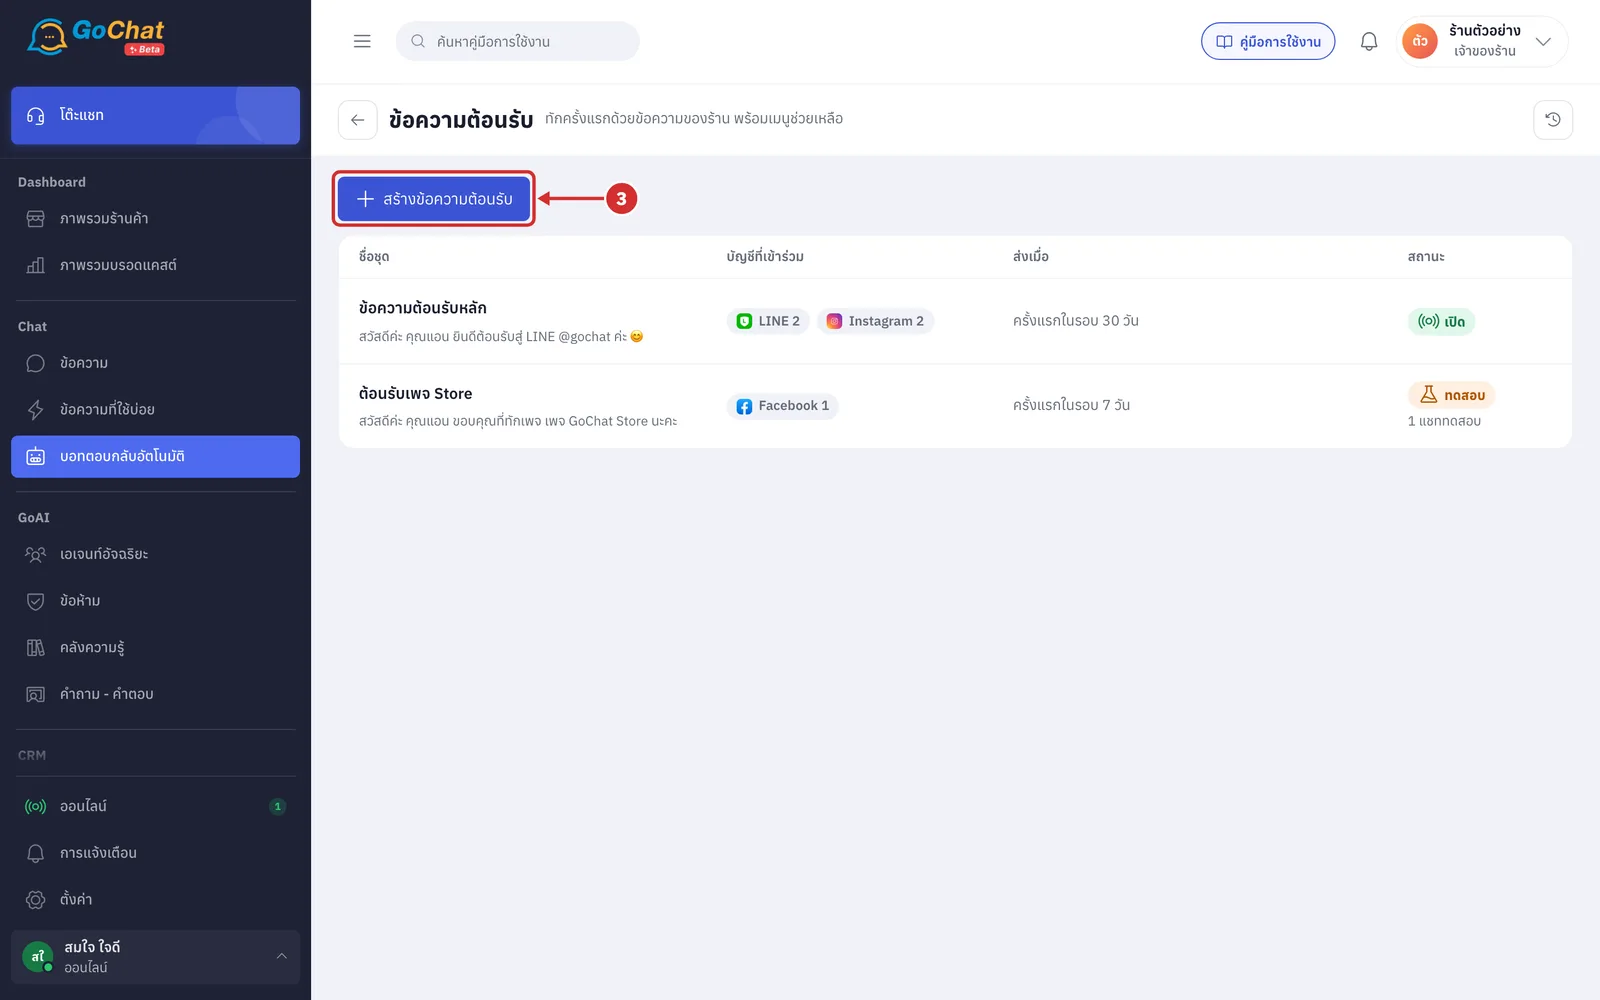
Click สร้างข้อความต้อนรับ (Create welcome message) (to edit an existing set, click its name in the list instead)
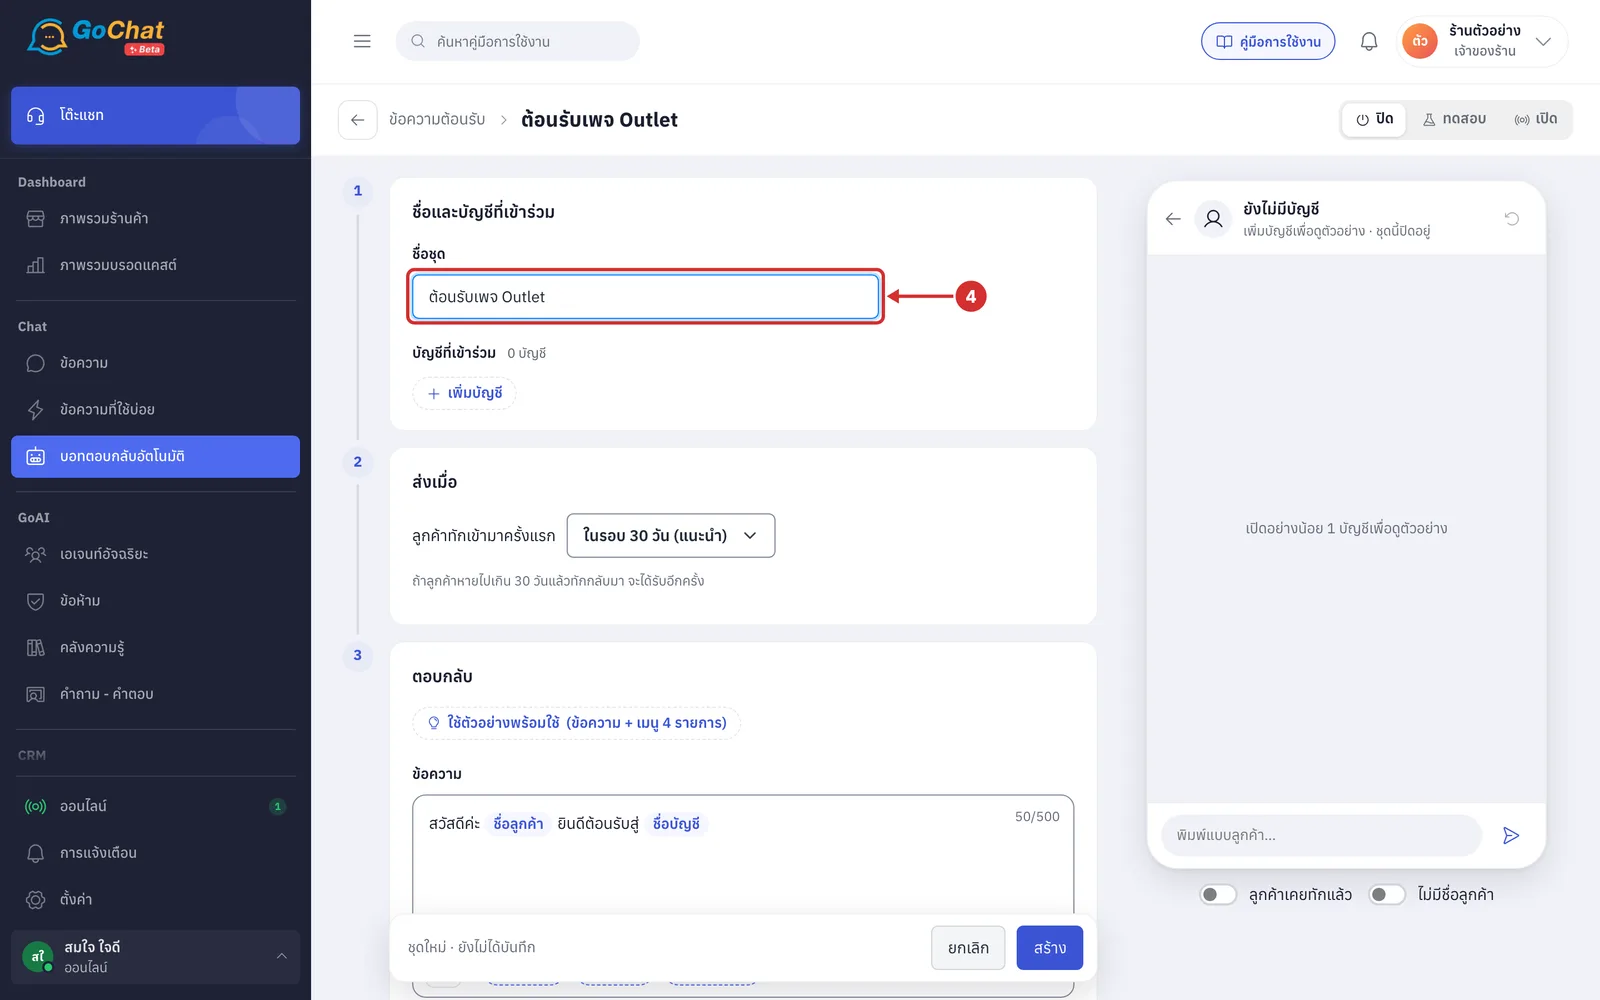
In ชื่อชุด (Set name), enter a name for the set, such as ต้อนรับเพจ Outlet
This field is required, up to 60 characters
Your team sees the set name in the list; customers do not
Click เพิ่มบัญชี (Add account) and tick the pages or accounts that will use this message
Accounts already in another welcome set show a lock and อยู่ใน (In) the set's name
Those accounts cannot be chosen; remove them from that set first
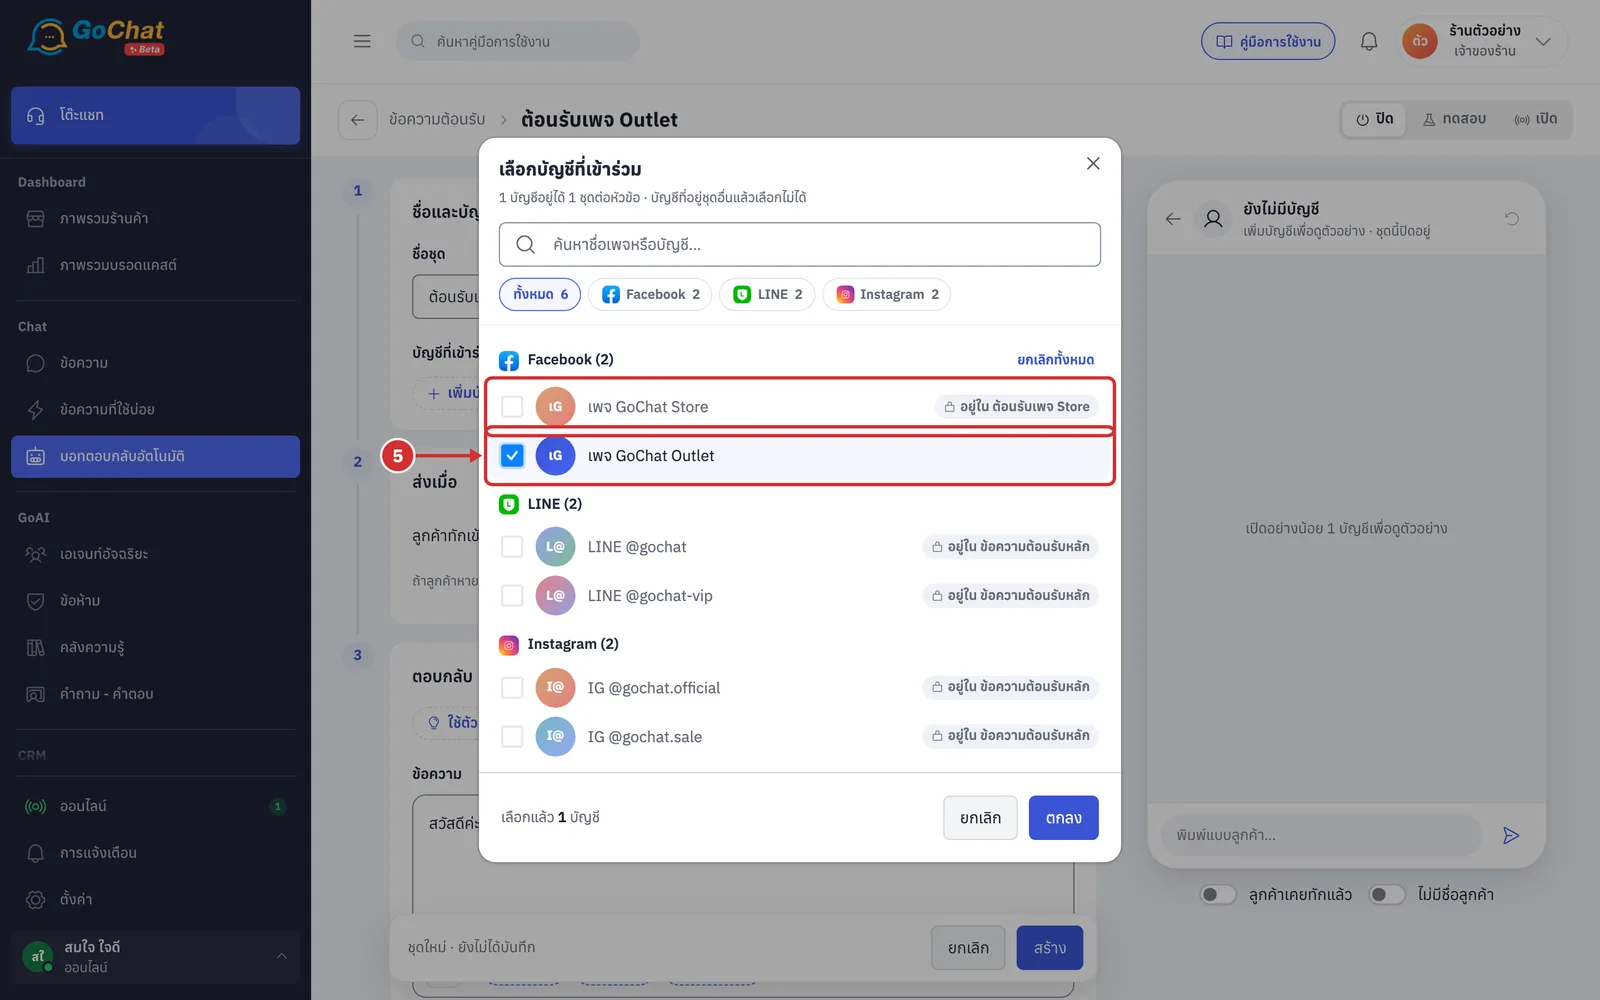
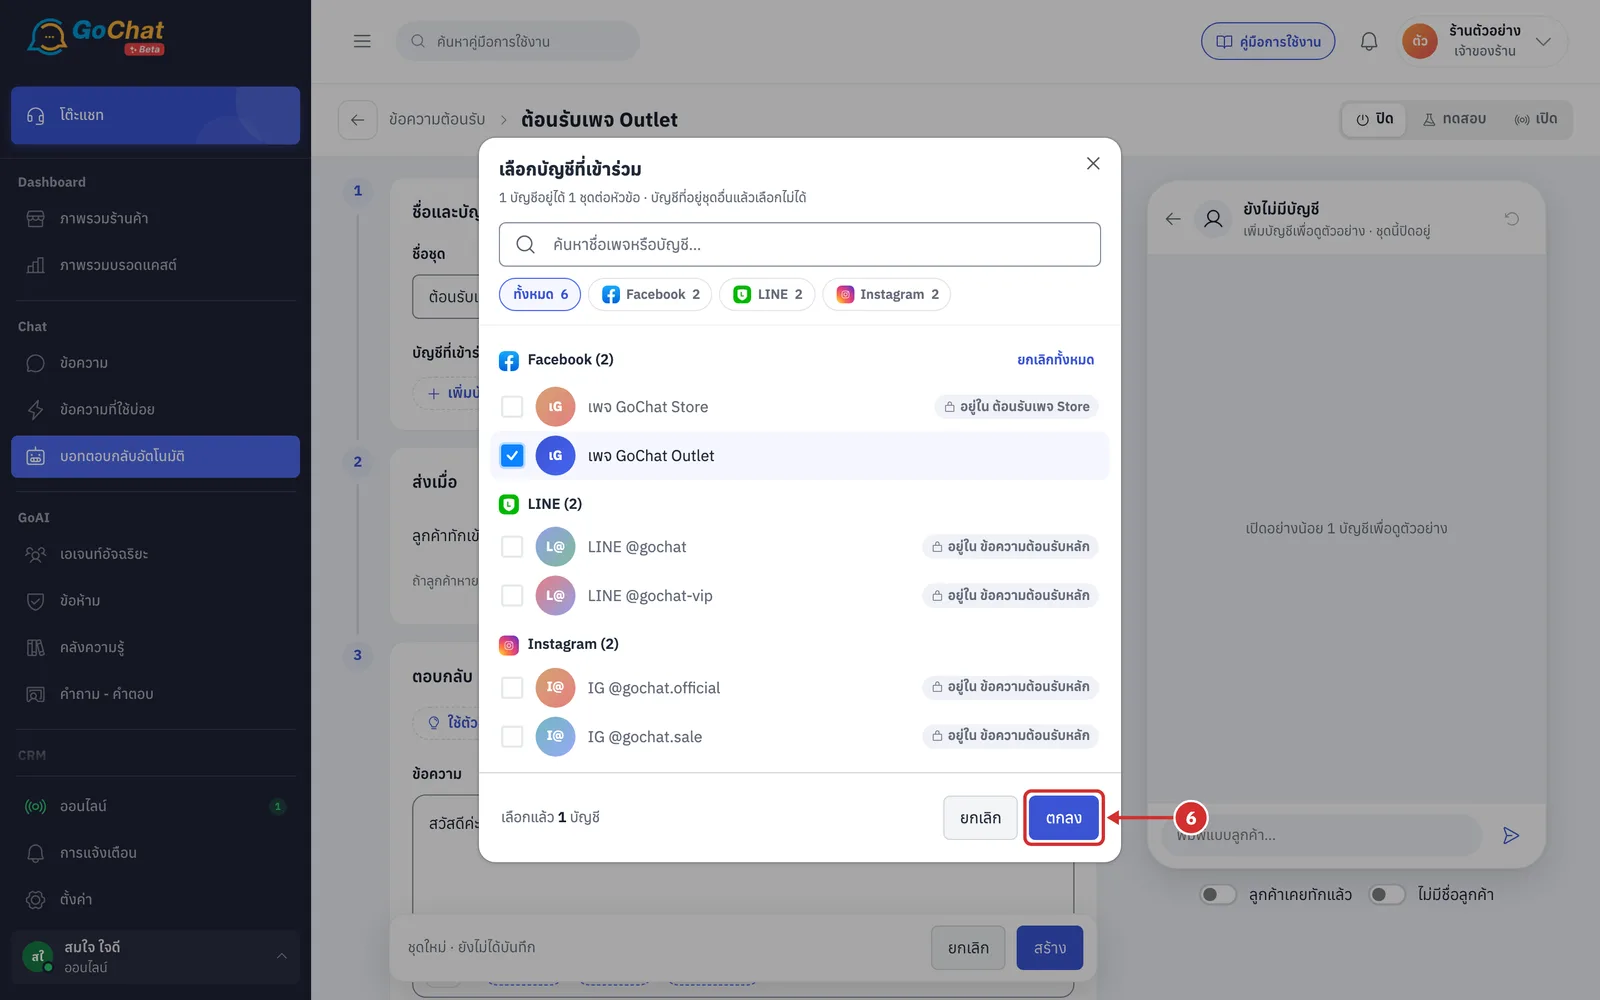
Click ตกลง (OK). The chosen accounts appear under บัญชีที่เข้าร่วม (Accounts)
Setting when it is sent
In the ส่งเมื่อ (Sends when) step, use ลูกค้าทักเข้ามาครั้งแรก (Customer's first message) to choose when the same customer gets the welcome message again. The line under the field explains the option you chose. The options are
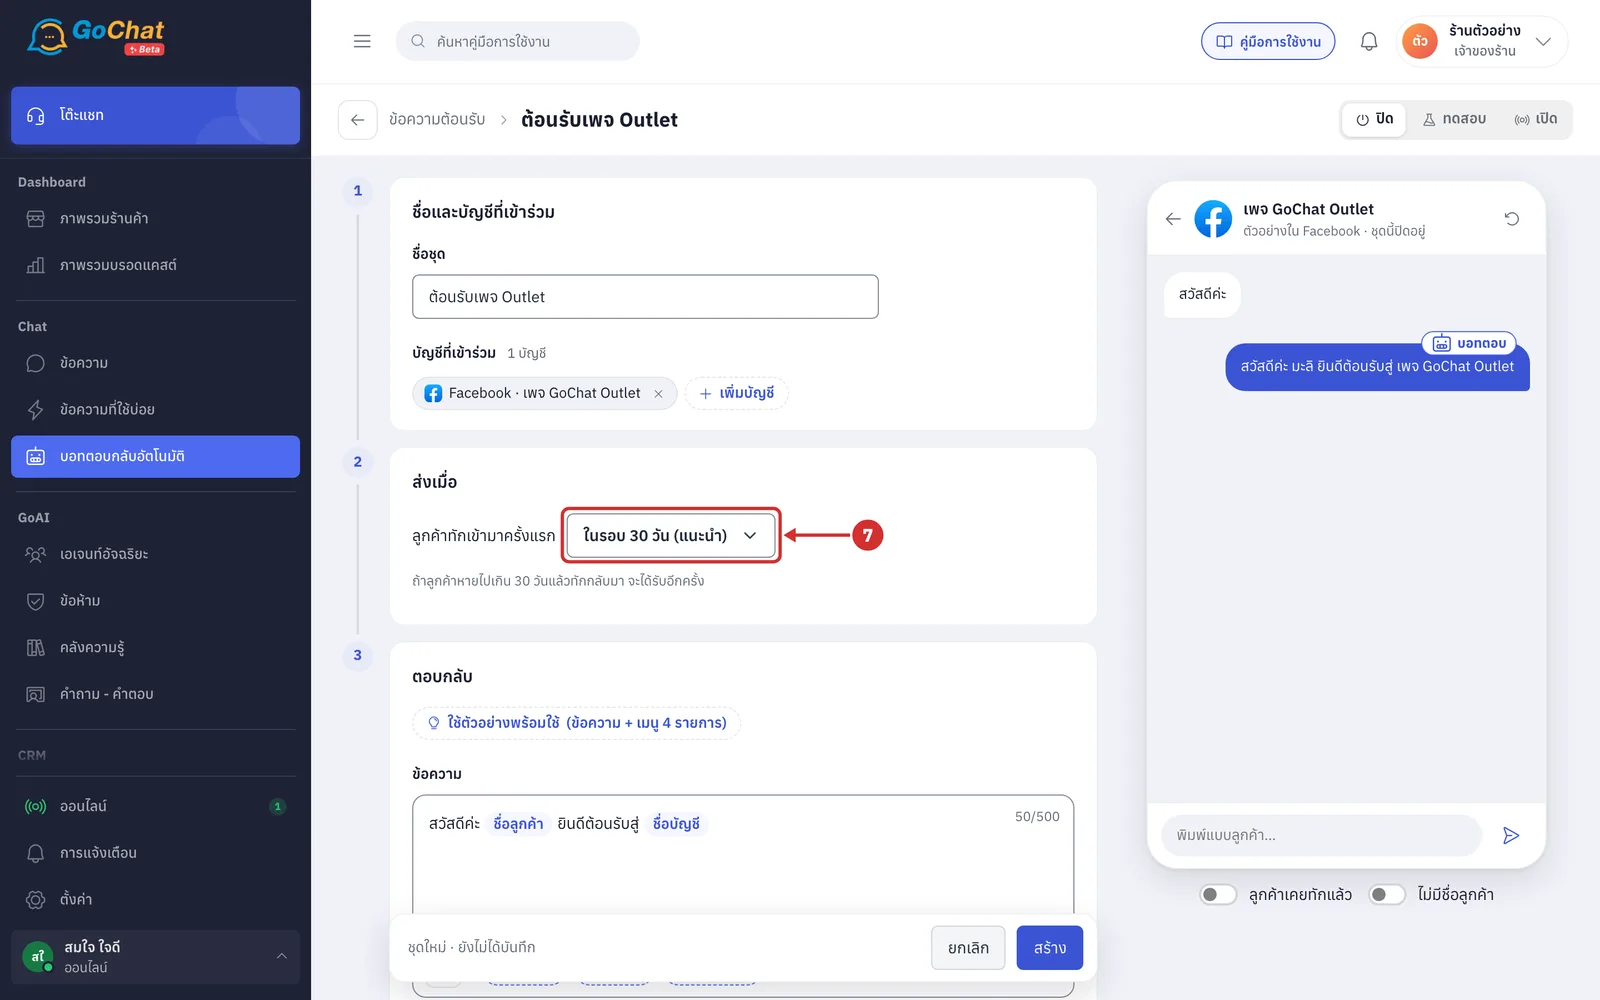
ครั้งเดียวเท่านั้น (Only once): sent once; the same customer never gets it again
ในรอบ 7 วัน (Within 7 days): if the customer has been away more than 7 days and messages again, they get it again
ในรอบ 30 วัน (แนะนำ) (Within 30 days, recommended): if the customer has been away more than 30 days and messages again, they get it again
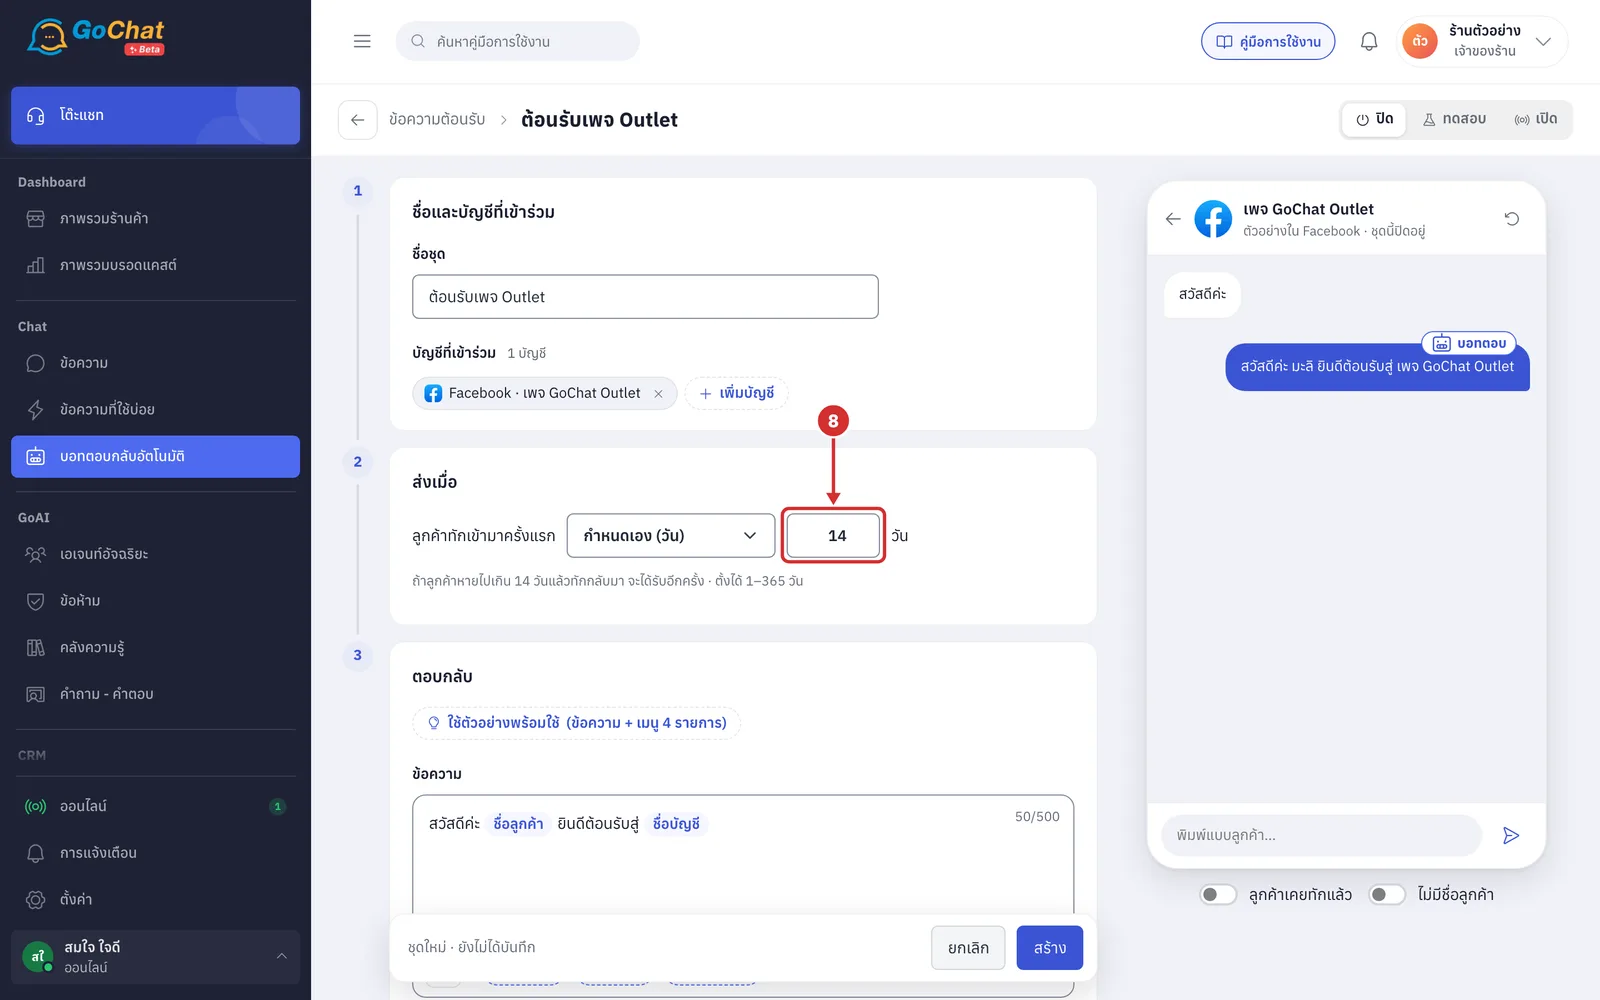
กำหนดเอง (วัน) (Custom, days): set your own number of days (step 8)
If you choose กำหนดเอง (วัน) (Custom, days), enter the number of days in the box that appears, from 1 to 365 days
Setting the reply
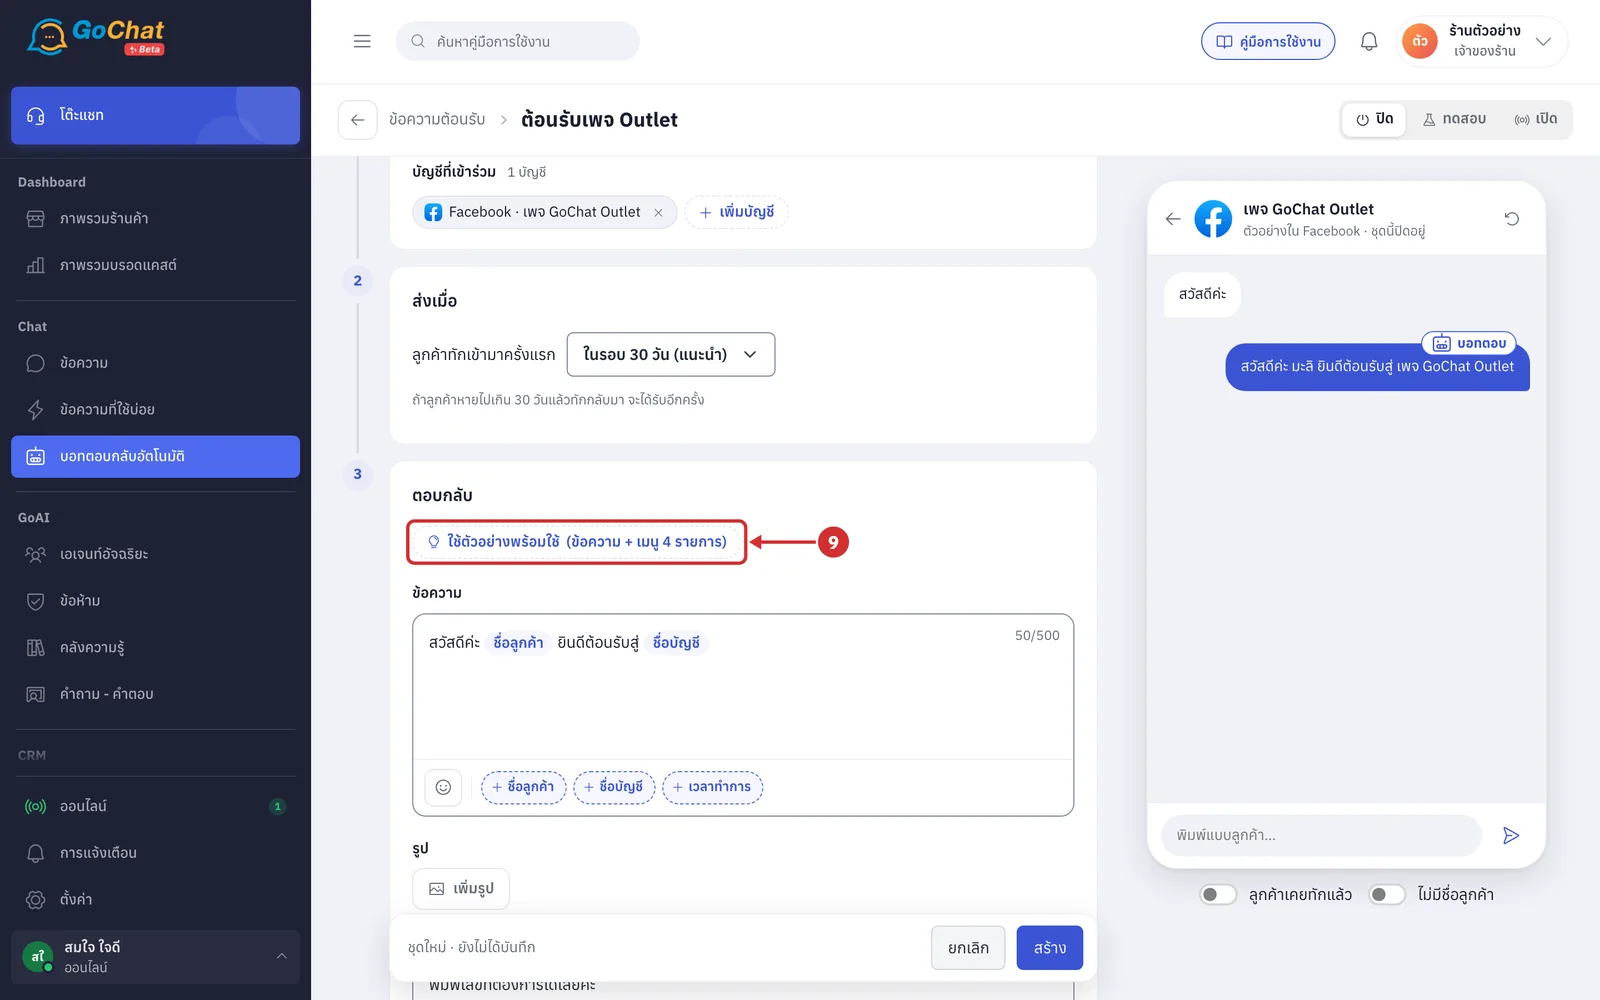
In the ตอบกลับ (Reply) step, click ใช้ตัวอย่างพร้อมใช้(ข้อความ + เมนู 4 รายการ) (Use ready-made example (message + 4-item menu)) to fill in a greeting and a 4-item menu, then edit them
The button only appears on new sets where this part has not been changed
It only fills the form and does not save
Shops without an address get 3 menu items
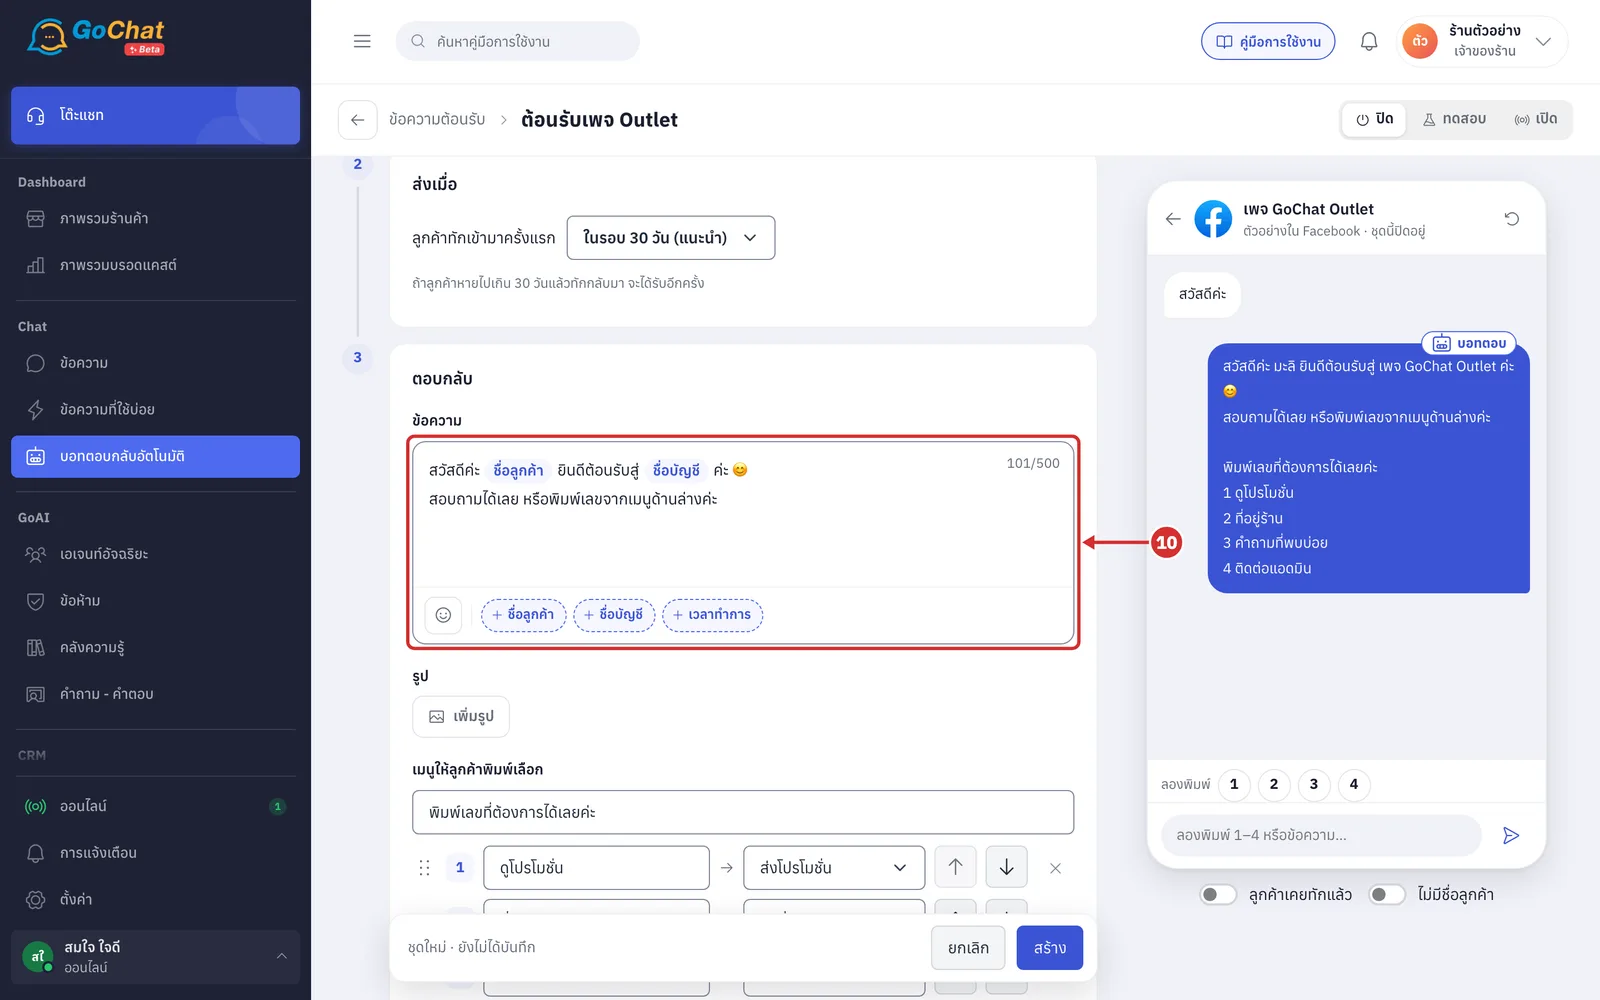
In ข้อความ (Message), edit the message the bot will send. You can use these variables
ชื่อลูกค้า (Customer name) — “คุณลูกค้า” (Dear customer) is used when there is no name
ชื่อบัญชี (Account name) — the page or LINE OA the customer messaged
เวลาทำการ (Business hours) — see step 11
More details
A message or an image is required
The message can be up to 500 characters
How to insert variables is explained in Using the auto-reply bot
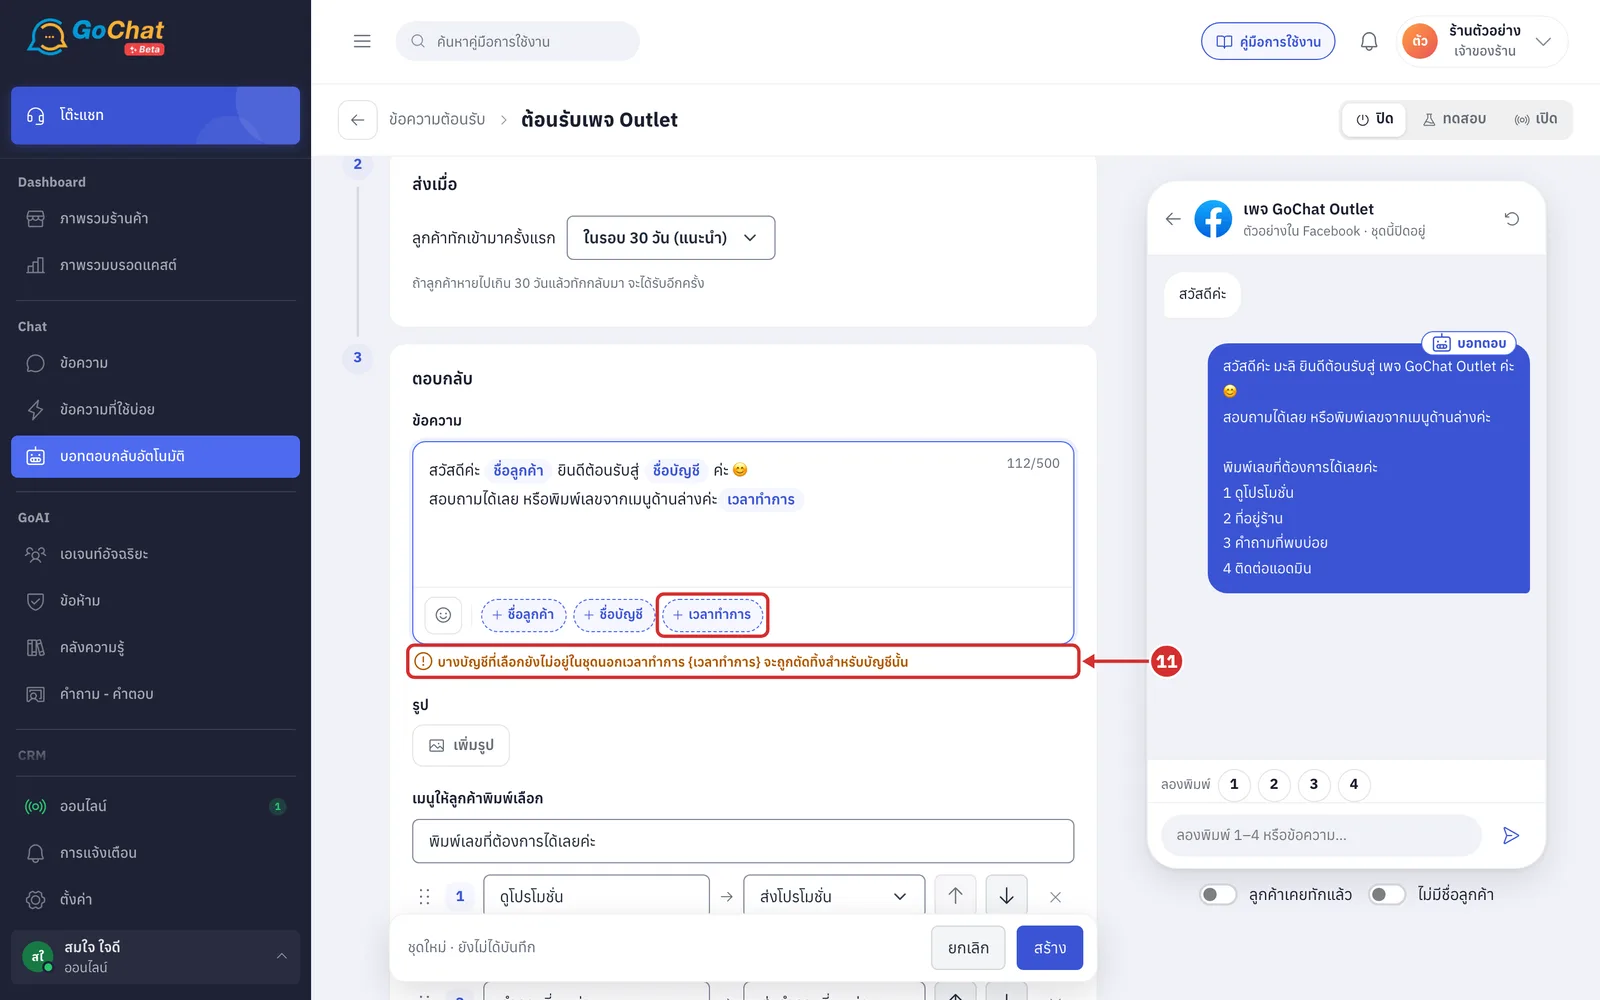
If you insert เวลาทำการ (Business hours), the value comes from each account's นอกเวลาทำการ (After hours) set that is turned on. If an account is not in an after-hours set that is on, you see the warning บางบัญชีที่เลือกยังไม่อยู่ในชุดนอกเวลาทำการ {เวลาทำการ} จะถูกตัดทิ้งสำหรับบัญชีนั้น (Some chosen accounts are not in an after-hours set; {Business hours} will be removed for those accounts)
Customers of that account get the message without business hours
Set up an after-hours set in Setting up after-hours messages
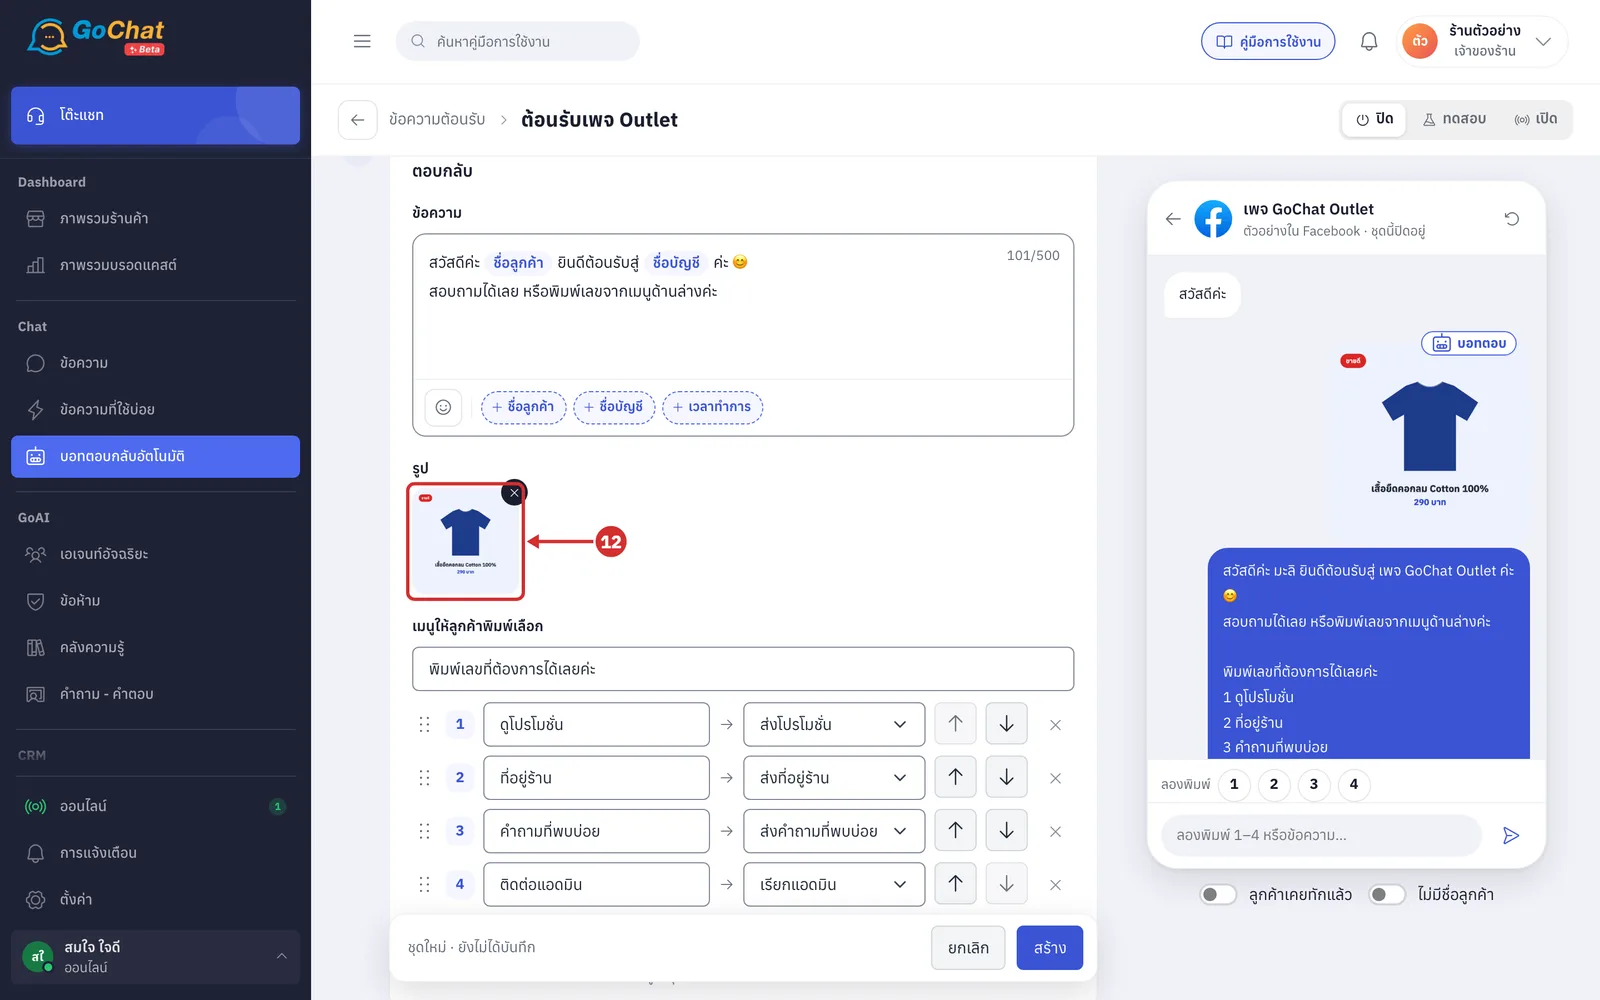
Under รูป (Image), click เพิ่มรูป (Add image) and choose 1 image from your computer
The bot sends the image before the text
The image goes into your shop's image library as soon as you choose it, but is linked to the set when you save
To remove the image, click × on it
Under เมนูให้ลูกค้าพิมพ์เลือก (Menu customers choose by number), set the menu the bot sends after the message so customers can type a number to choose. It has these parts
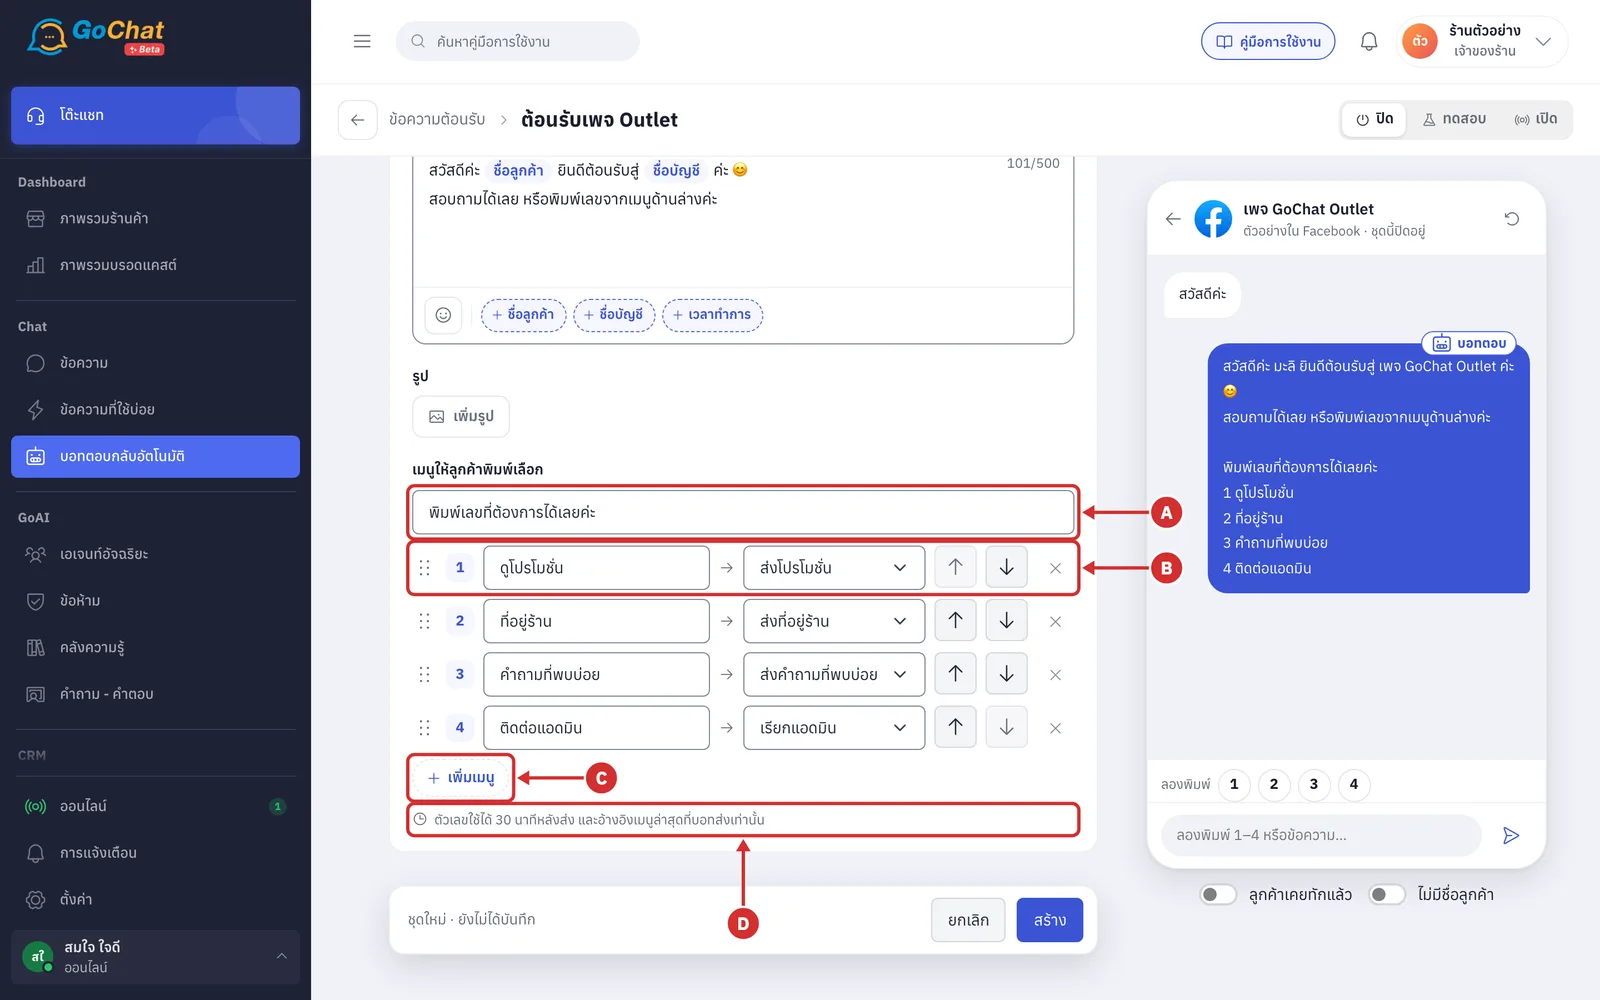
A Menu lead line — the text above the menu items, such as พิมพ์เลขที่ต้องการได้เลยค่ะ (Type the number you want) (up to 80 characters)
B Menu row — each row has
The item number
The ชื่อเมนู (Menu name) customers see, which is required and up to 40 characters
What the item does (step 14)
Up and down arrows, or a handle on the left to drag, to reorder
× to delete the item
C เพิ่มเมนู (Add menu item) — add up to 5 items. The button disappears when the menu is full, and the menu can also be left empty
D How long numbers work — ตัวเลขใช้ได้ 30 นาทีหลังส่ง และอ้างอิงเมนูล่าสุดที่บอทส่งเท่านั้น (Numbers work for 30 minutes after sending and refer only to the latest menu the bot sent). You can change the minutes in เมนูตัวเลขหมดอายุ (Number menu expires) under ตั้งค่าการตอบทั้งร้าน (Shop-wide reply settings)
In each menu item's action box, choose what the bot does when the customer types that number
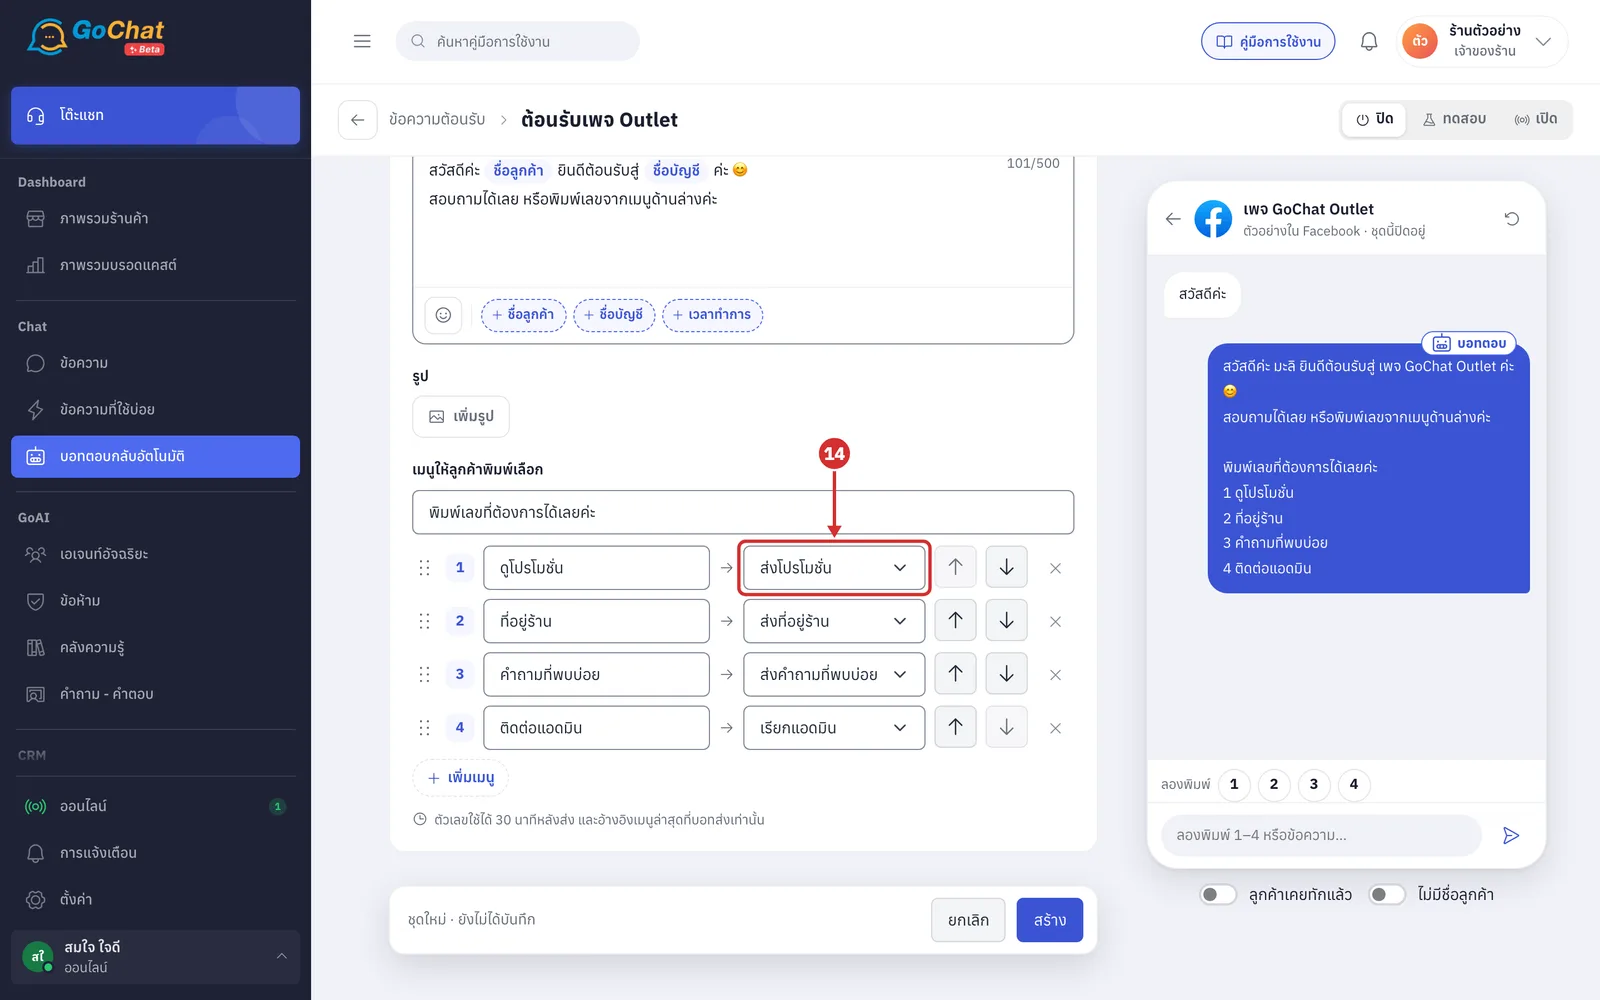
ส่งโปรโมชั่น (Send promotions) — sends the account's promotions that are active now. With none, the bot replies “ช่วงนี้ยังไม่มีโปรค่ะ” (No promotions right now). Set promotions up in Setting up discounts and promotions
ส่งที่อยู่ร้าน (Send shop address) — sends the address from ตั้งค่า › ข้อมูลร้าน (Settings › Shop info), adding opening hours if the account is in an after-hours set that is on. If your shop has no address yet, a warning appears under the menu and the bot does not answer this item
ส่งคำถามที่พบบ่อย (Send FAQ) — sends the question list from the account's FAQ set that is on, for the customer to choose by number (set it up in Setting up FAQs)
เรียกแอดมิน (Call an admin) — the bot replies that an admin will answer, then stops answering that chat until an admin replies (up to 24 hours)
Trying it in the chat preview
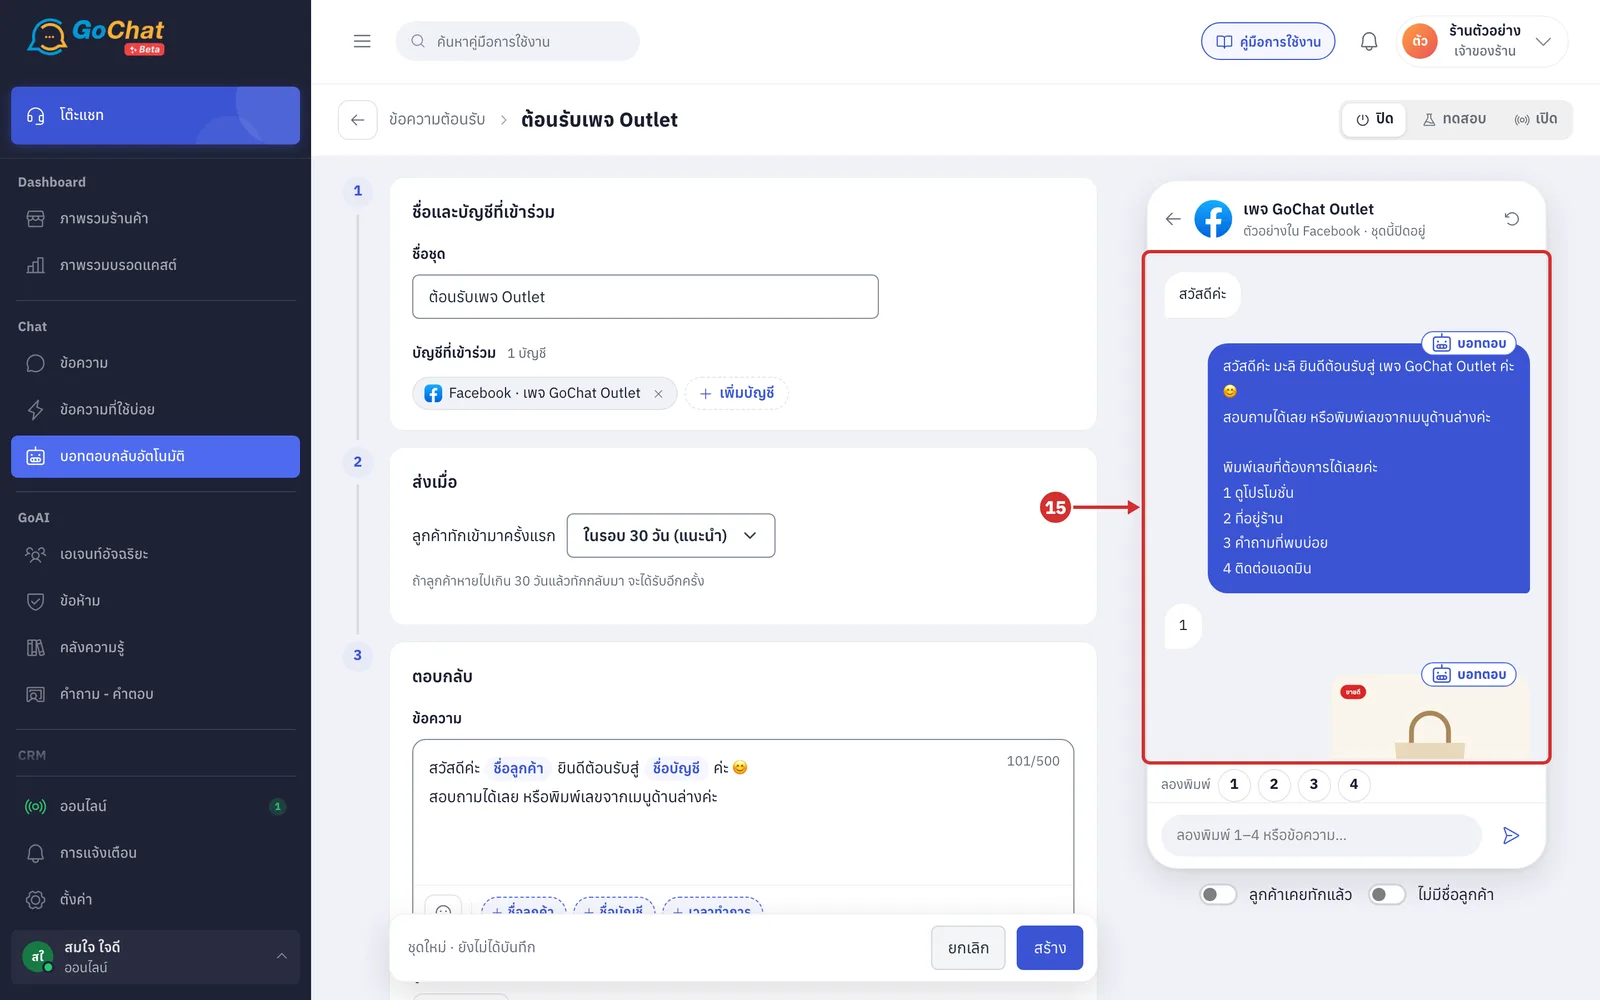
The chat preview on the right shows the welcome message the bot would send. The sample customer types สวัสดีค่ะ (Hello), then the welcome message appears using the form's values, even before you save.
Click a number in the ลองพิมพ์ (Try typing) row, such as 1, to see how the bot answers that menu item (the promotions item sends the promotions active now for the set's first account)
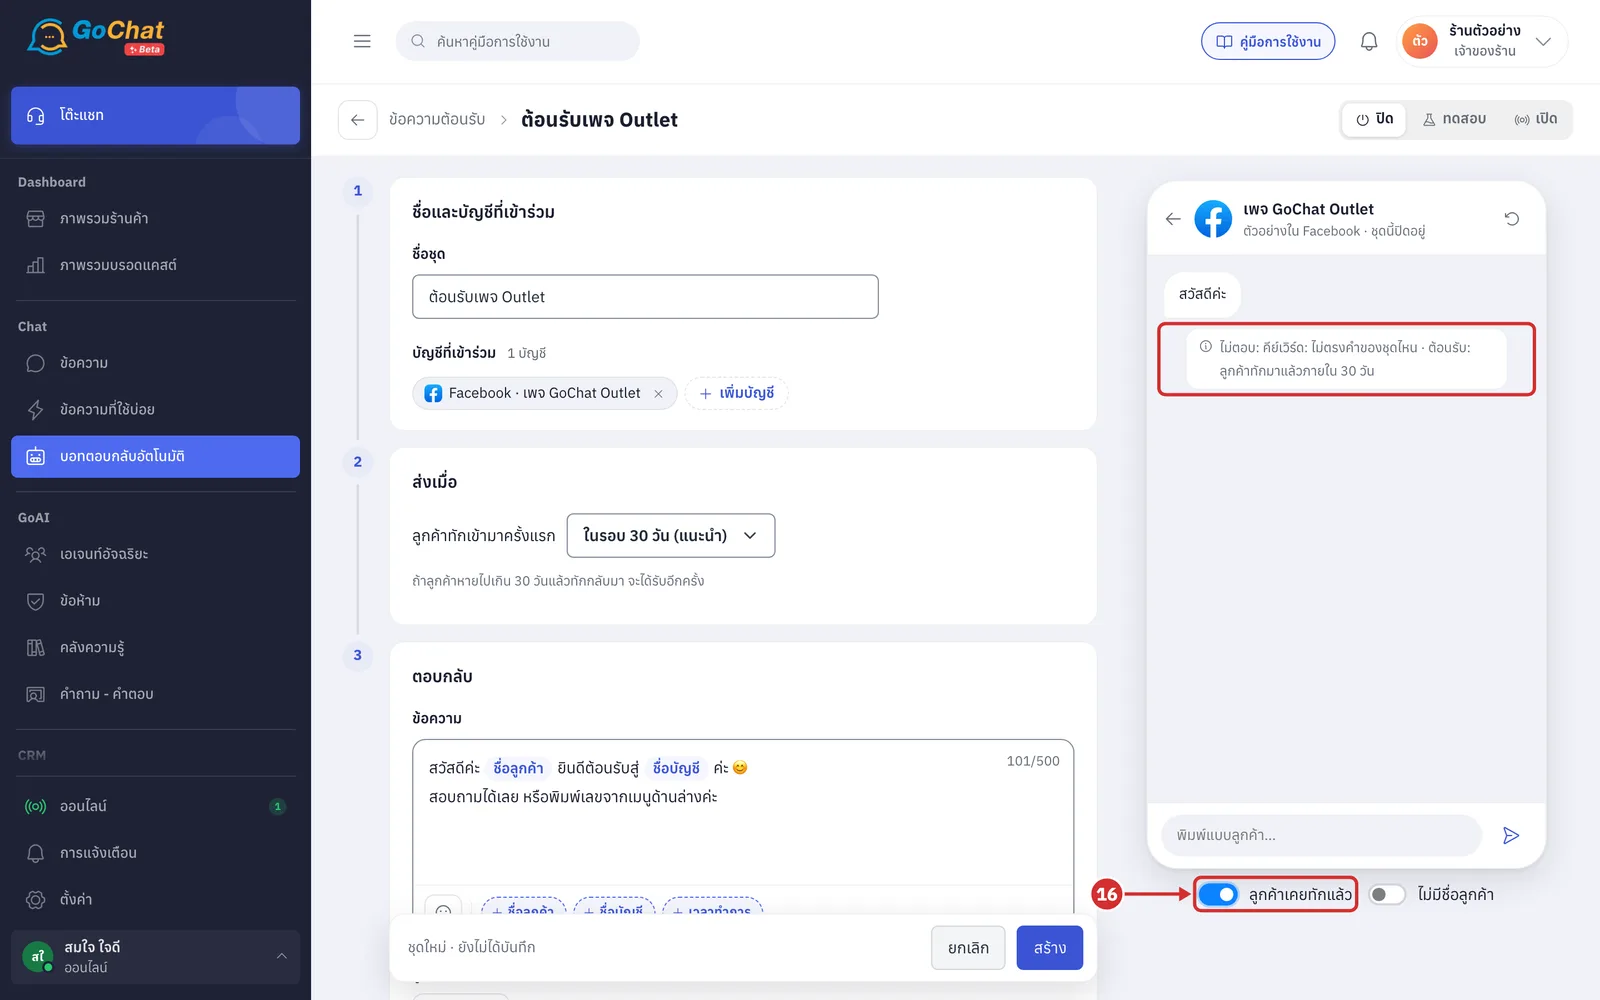
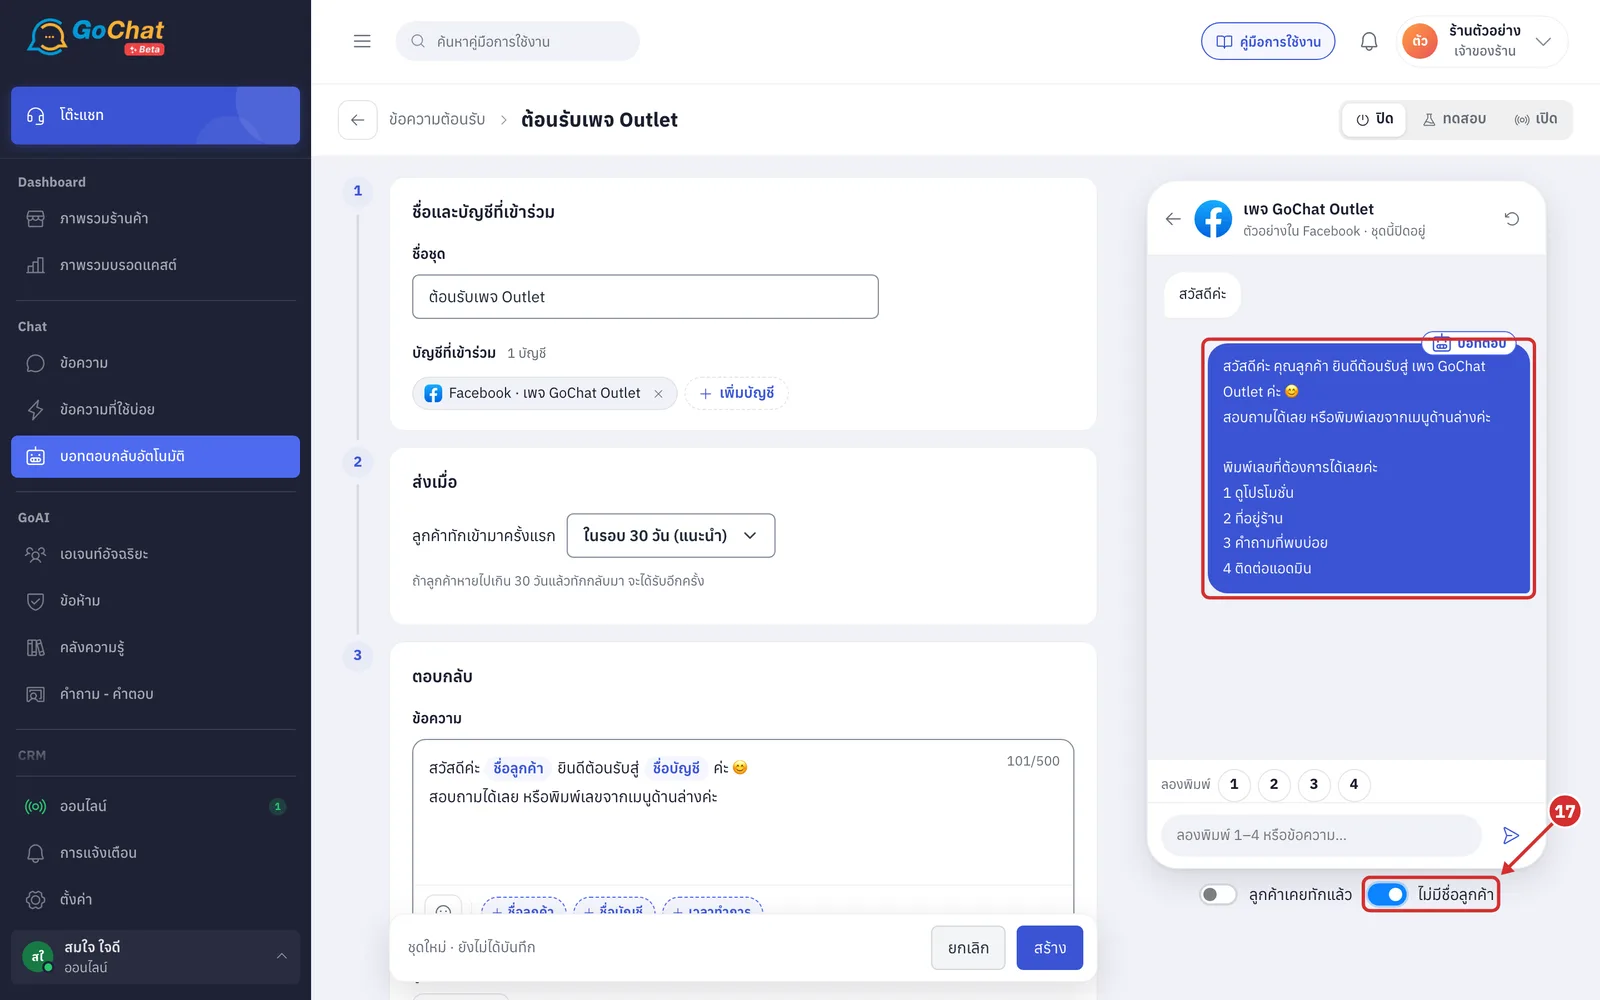
Turn on the ลูกค้าเคยทักแล้ว (Customer has messaged before) switch to see a customer who already messaged within the period you set
The bot does not send the welcome message and shows the reason, such as ไม่ตอบ: ต้อนรับ: ลูกค้าทักมาแล้วภายใน 30 วัน (No reply: Welcome: customer already messaged within 30 days)
Sets in test status send every time according to ส่งซ้ำได้ทุก (Can resend every), so you still see the welcome message
Turn on the ไม่มีชื่อลูกค้า (No customer name) switch to see the message when the app does not know the customer's name (the customer name variable becomes คุณลูกค้า (Dear customer))
Saving
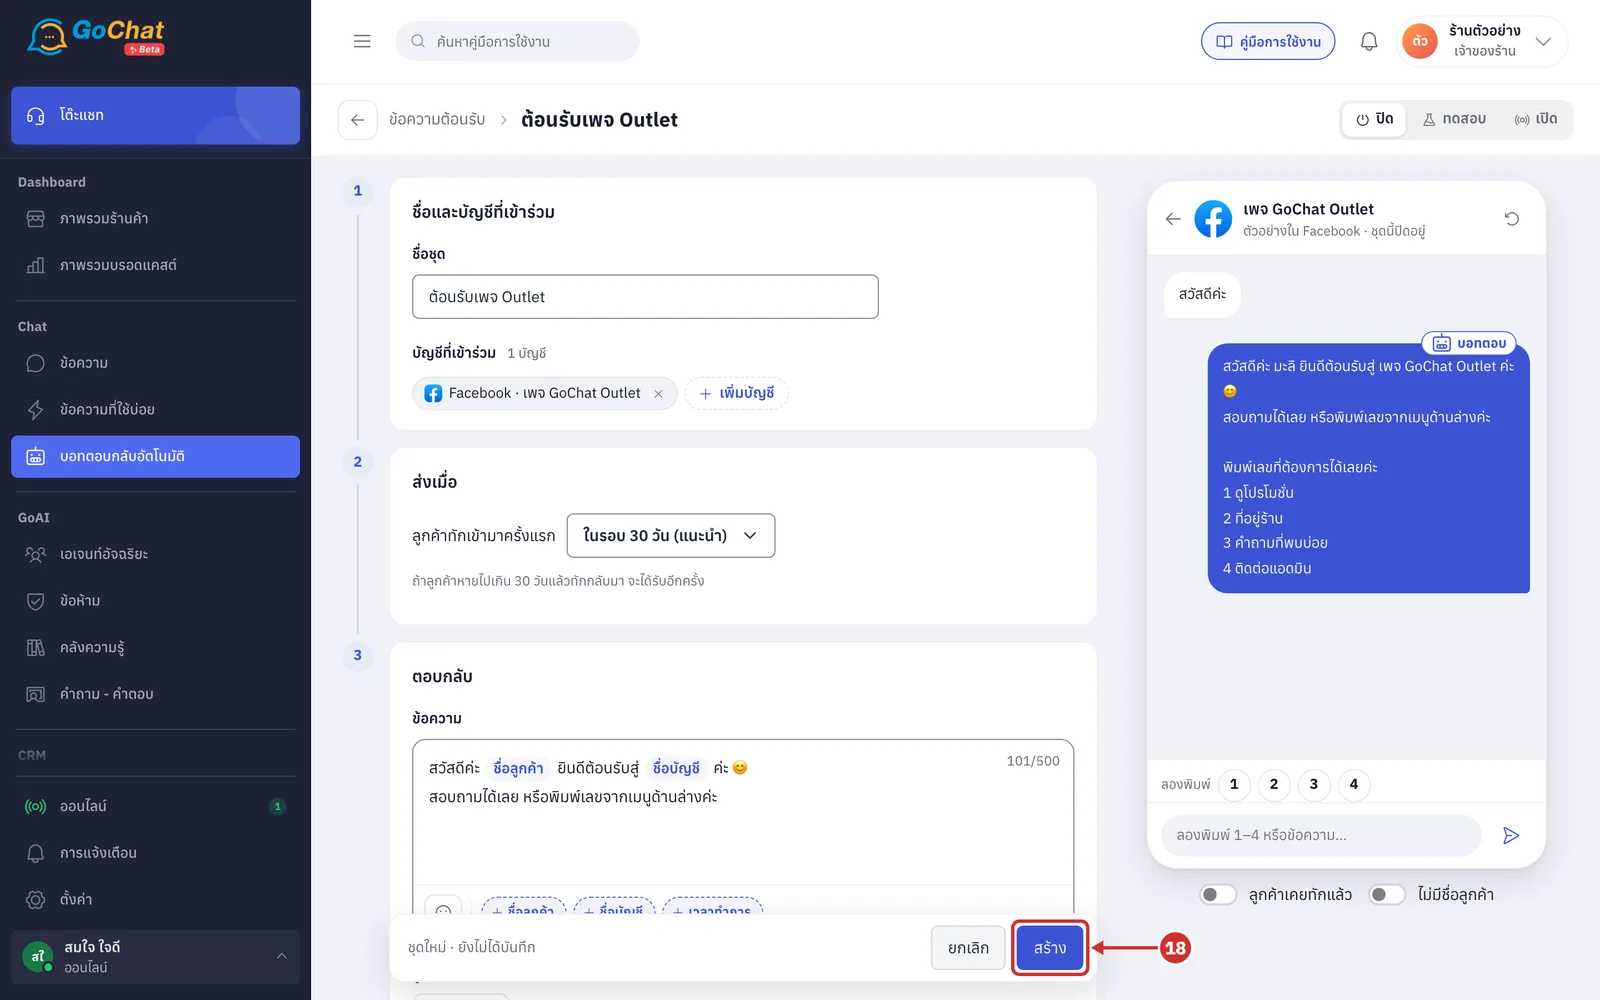
Choose a status at the top right, then click สร้าง (Create)
New sets are ปิด (Off)
ทดสอบ (Test) — try it with your team's chats
เปิด (On) — go live
The statuses are explained in Using the auto-reply bot
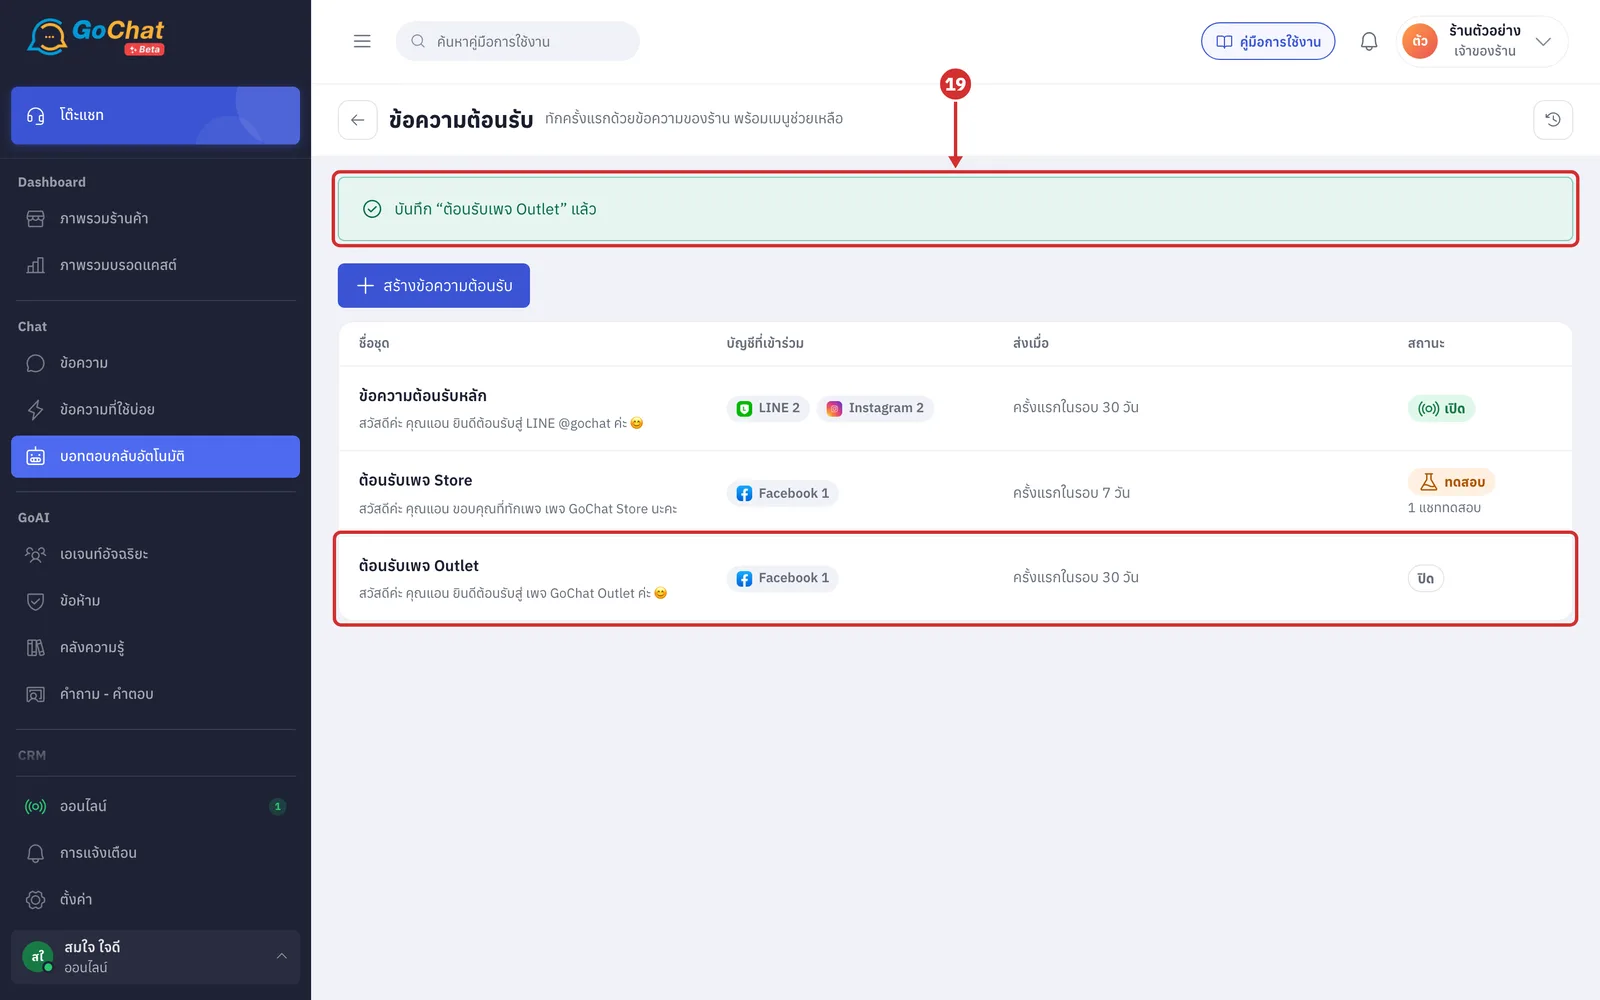
The app goes back to the list, shows บันทึก “ต้อนรับเพจ Outlet” แล้ว (Saved “ต้อนรับเพจ Outlet”) and the new set appears in the list
How welcome messages work
The bot sends the welcome message when a customer types a message in a chat that has no messages from the customer and has not had a welcome message within the period you set. With ครั้งเดียวเท่านั้น (Only once), it is sent once per chat
Following your LINE OA or clicking an ad without typing does not count as messaging
The bot keeps track per chat, so one customer who messages two of your accounts gets it from both
If your shop messaged that customer first within 30 days, for example an admin wrote to them or a LINE broadcast reached them, the bot does not send the welcome message, because the customer is not messaging for the first time
When the customer's message also matches another topic, such as an FAQ, the bot sends the welcome message first, followed by that answer
Welcome messages do not count towards the limit on messages the bot starts
About welcome sets
New shops get a ข้อความต้อนรับหลัก (Main welcome message) set that is off, linked to every account connected when the auto-reply page is first opened
To use a new set on those accounts, remove them from the old set first
Welcome messages the bot has sent are shown in Viewing auto-reply chat history