

Adding and editing saved replies
The add and edit page lets you set a title and shortcut, choose the category and channels, write the text with variables and attach images. One saved reply can hold 1–10 messages, and each message can have its own images. When it is used in a chat, the messages are sent one by one in order: the text first, then that message's images.
Everyone in the shop can add and edit replies, and once saved, every teammate's chat page gets the latest version straight away. Browsing, searching and organising replies is covered in Managing saved replies.
Adding a reply
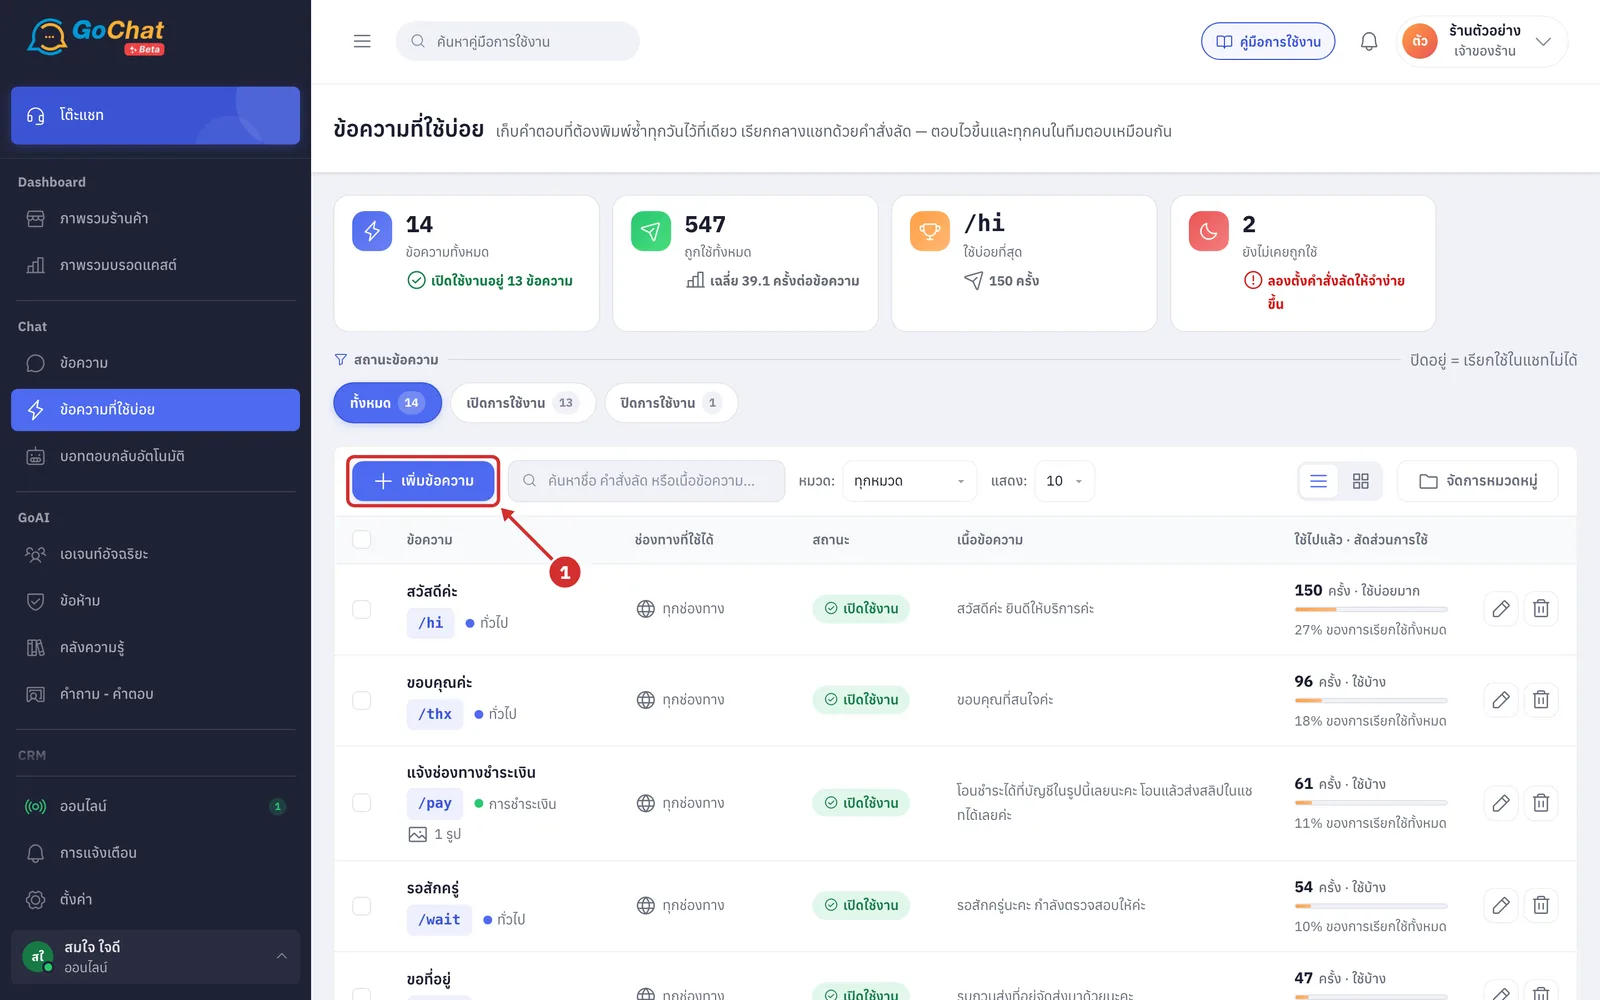
On the ข้อความที่ใช้บ่อย (Saved replies) page, click เพิ่มข้อความ (Add reply) (a shop with no replies yet shows เพิ่มข้อความแรก (Add your first reply))
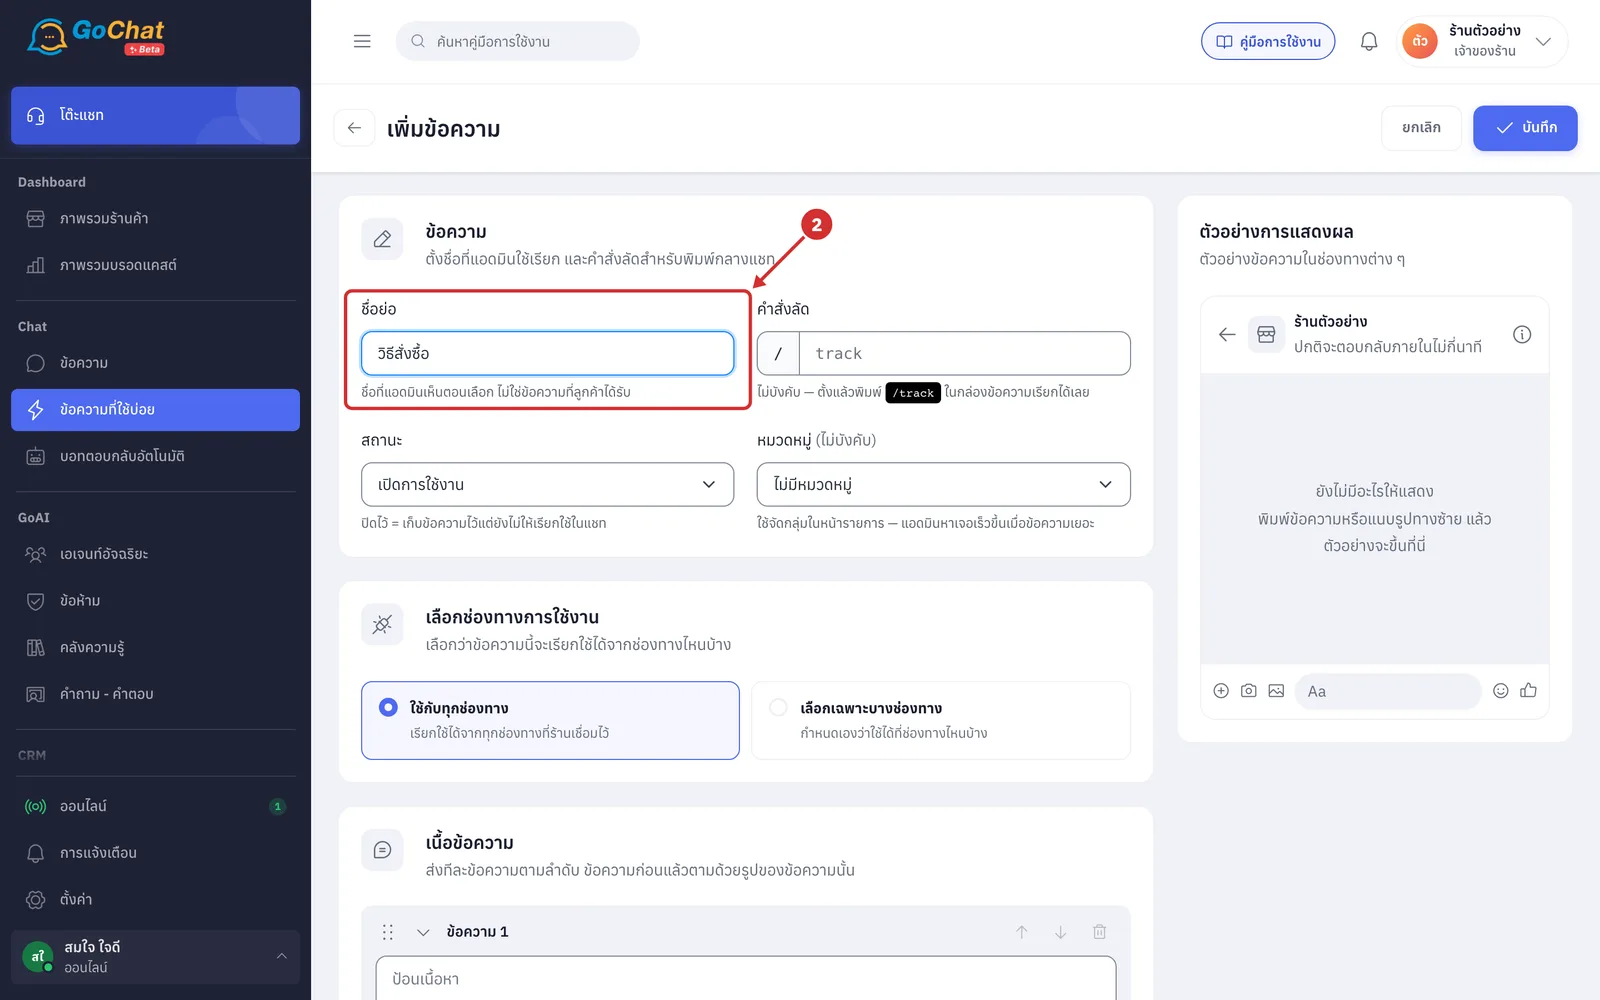
In the ข้อความ (Reply) card, type a name in ชื่อย่อ (Title), such as วิธีสั่งซื้อ (How to order)
It is required, up to 60 characters
Admins see this name when picking a reply; customers never see it
It must not match another reply in the shop; a duplicate shows มีข้อความชื่อนี้อยู่แล้ว (A reply with this name already exists)
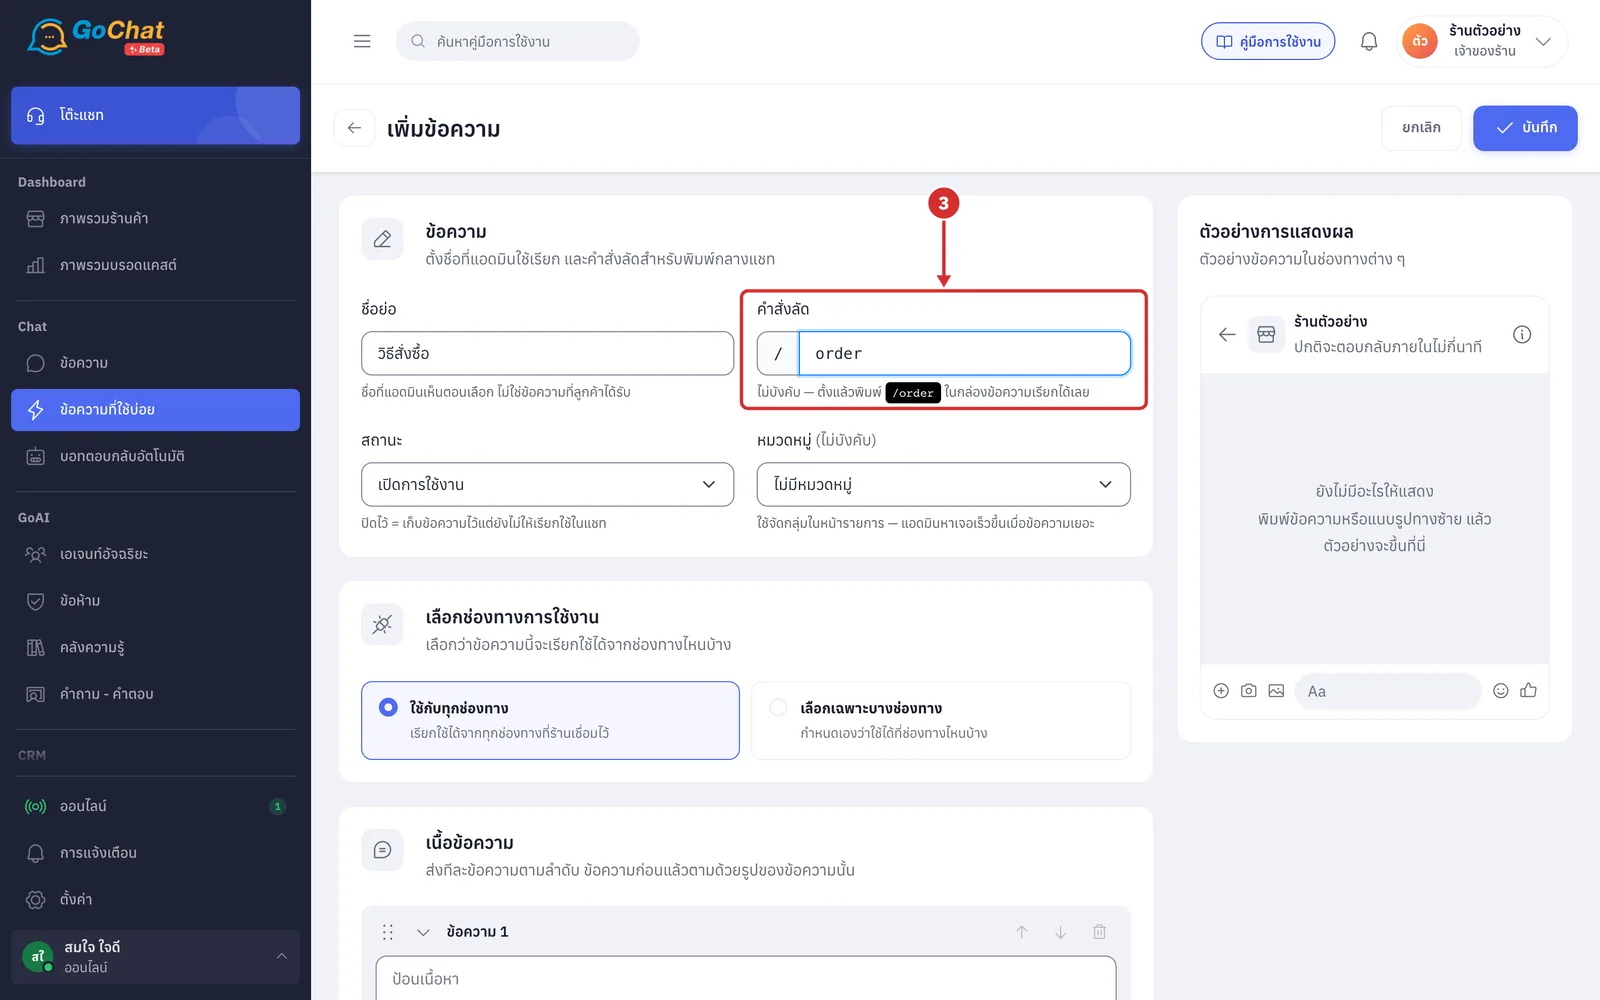
In คำสั่งลัด (Shortcut), set a short word that is easy to remember, such as order
It is optional, up to 24 characters
Once set, type /order in the chat message box to bring up this reply straight away
You do not need to type the / yourself in this field
Spaces are removed and English letters become lowercase
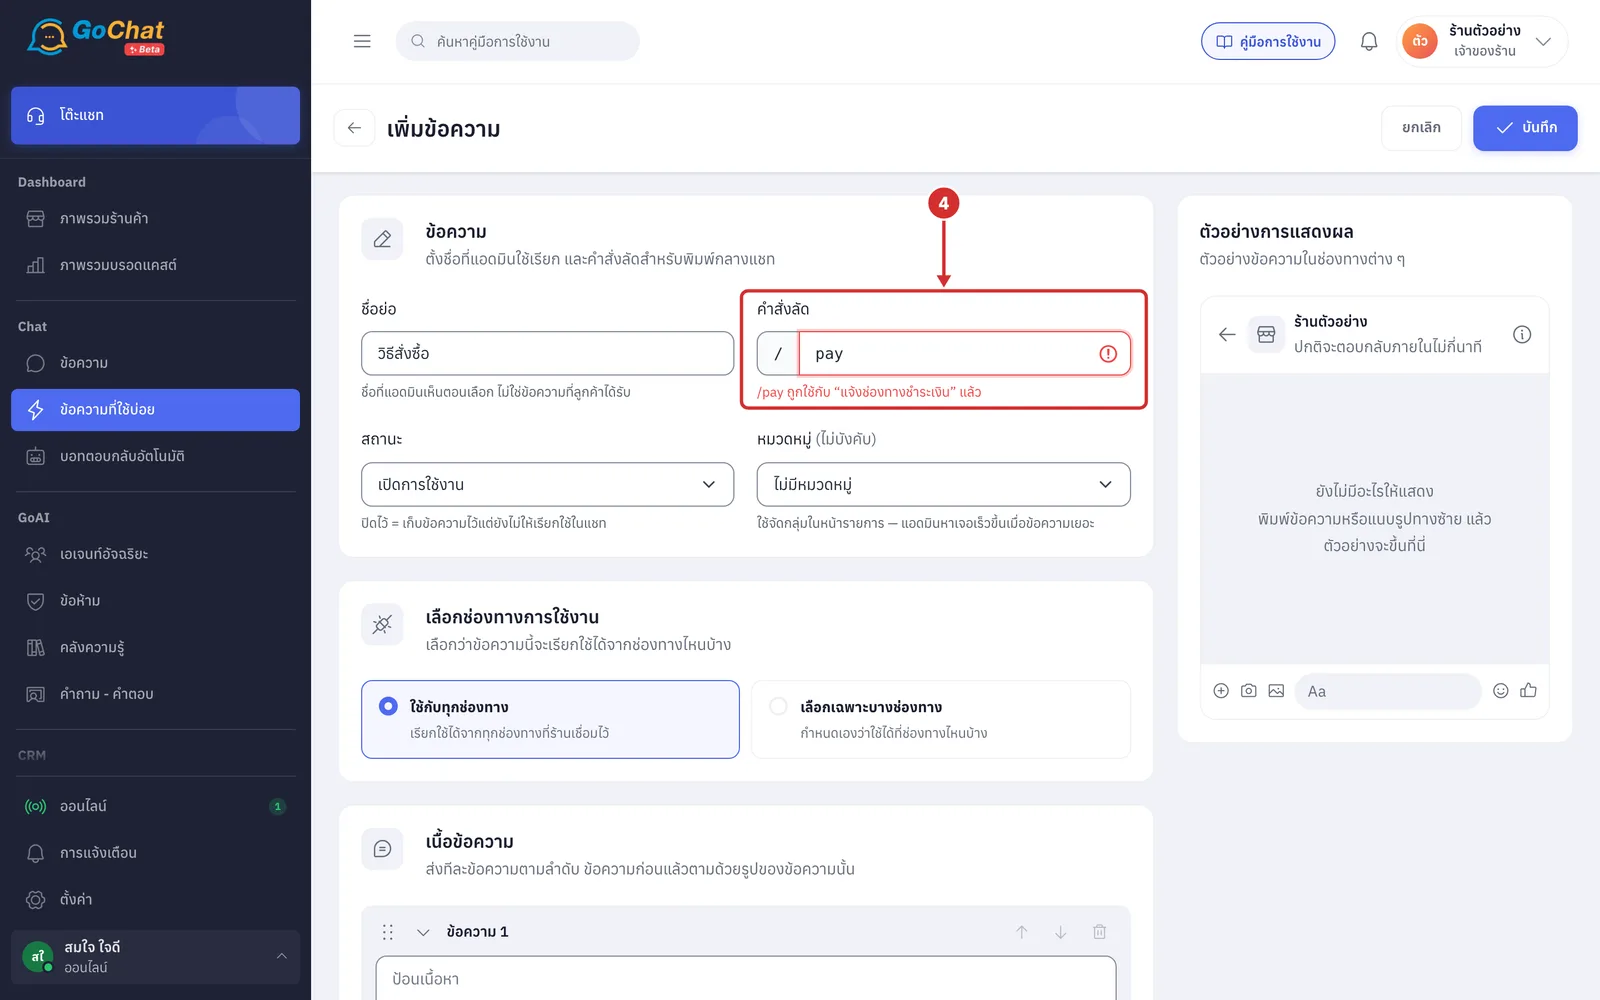
If the shortcut is already used by another reply, a warning appears under the field straight away, such as /pay ถูกใช้กับ “แจ้งช่องทางชำระเงิน” แล้ว (/pay is already used by “Payment details”), and you cannot save until you change it
In สถานะ (Status), choose the status of the reply
เปิดการใช้งาน (On): the default; the reply can be used in chats
ปิดการใช้งาน (Off): the reply is kept but cannot be used in chats yet, such as a promotion that has not started
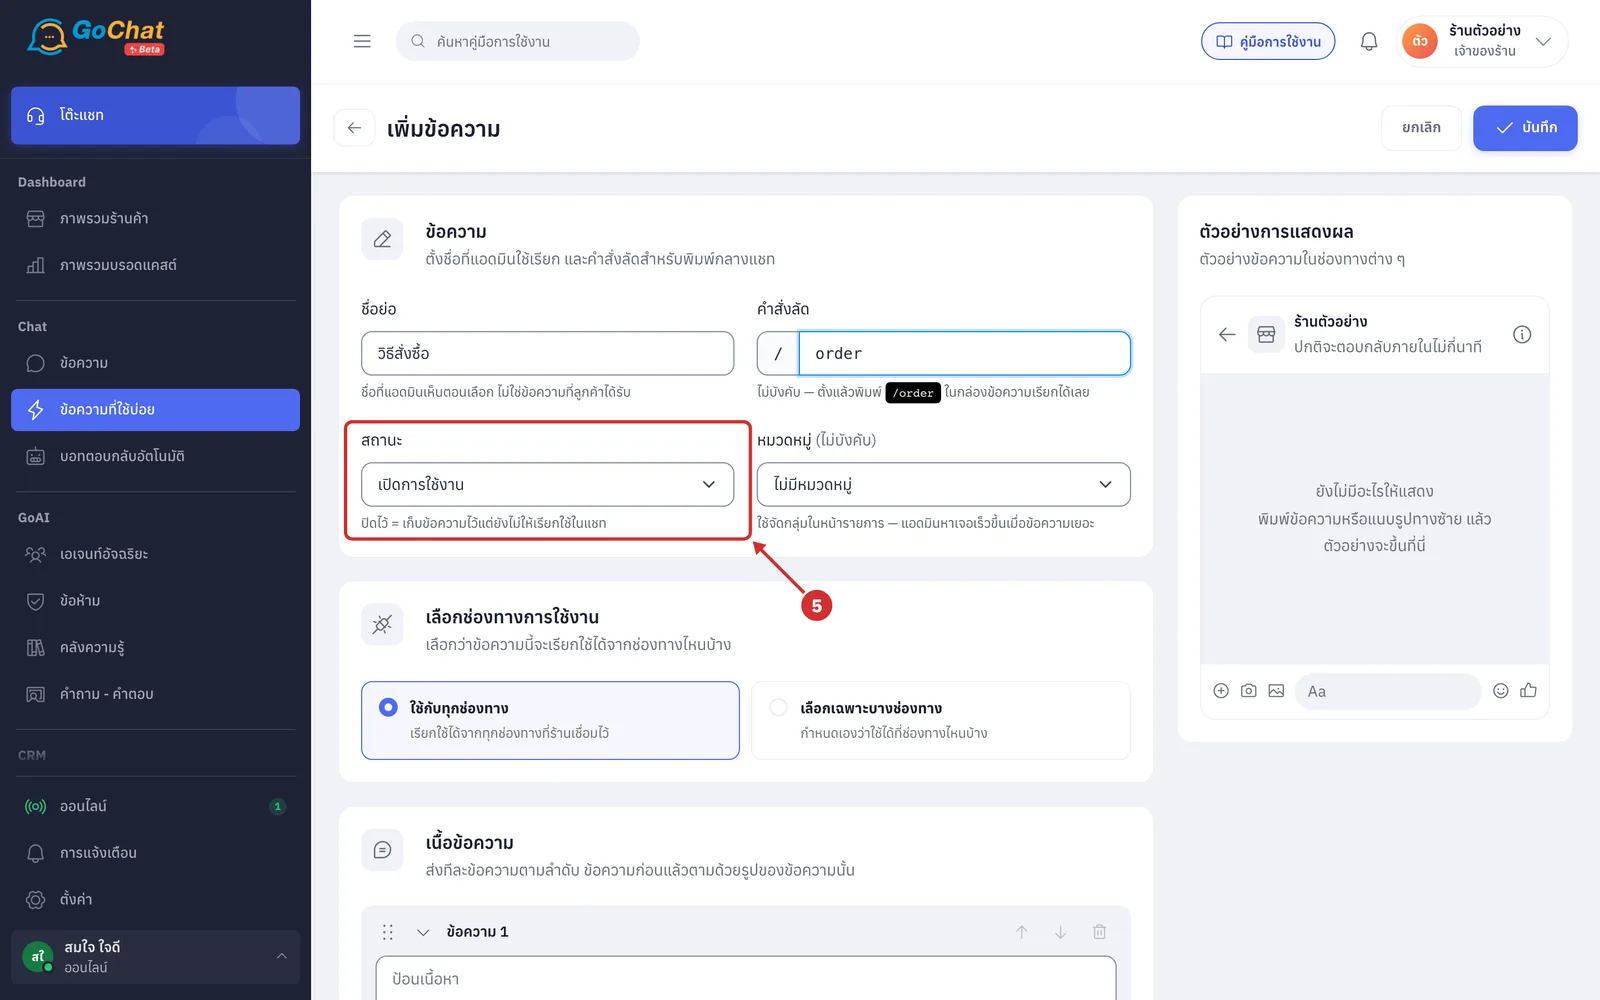
In หมวดหมู่ (ไม่บังคับ) (Category, optional), choose the category for this reply
The default is ไม่มีหมวดหมู่ (No category)
Categories group replies on the list page and in the saved replies window of the chat, so admins find them faster when there are many
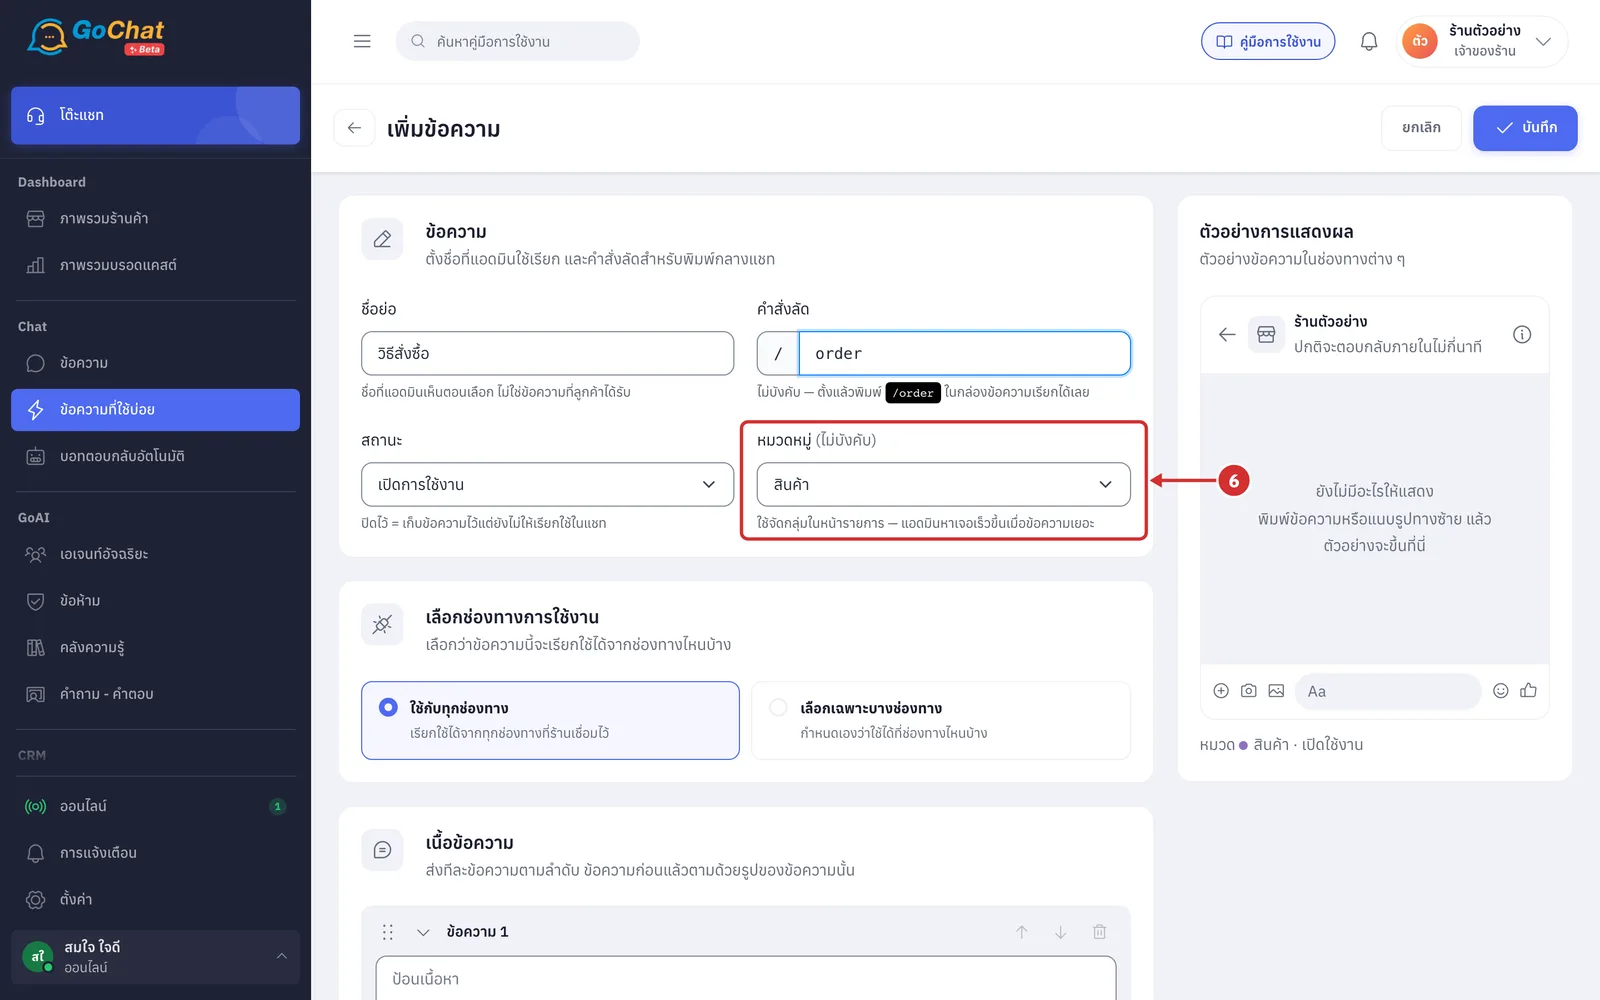
If the category you need does not exist, choose + สร้างหมวดใหม่… (+ New category…) in the same field, type a name, choose a colour, then click เพิ่ม (Add). The category is created straight away and selected for this reply
Category names can be up to 40 characters
Click ยกเลิก (Cancel) to go back to picking an existing one
Choosing where the reply can be used
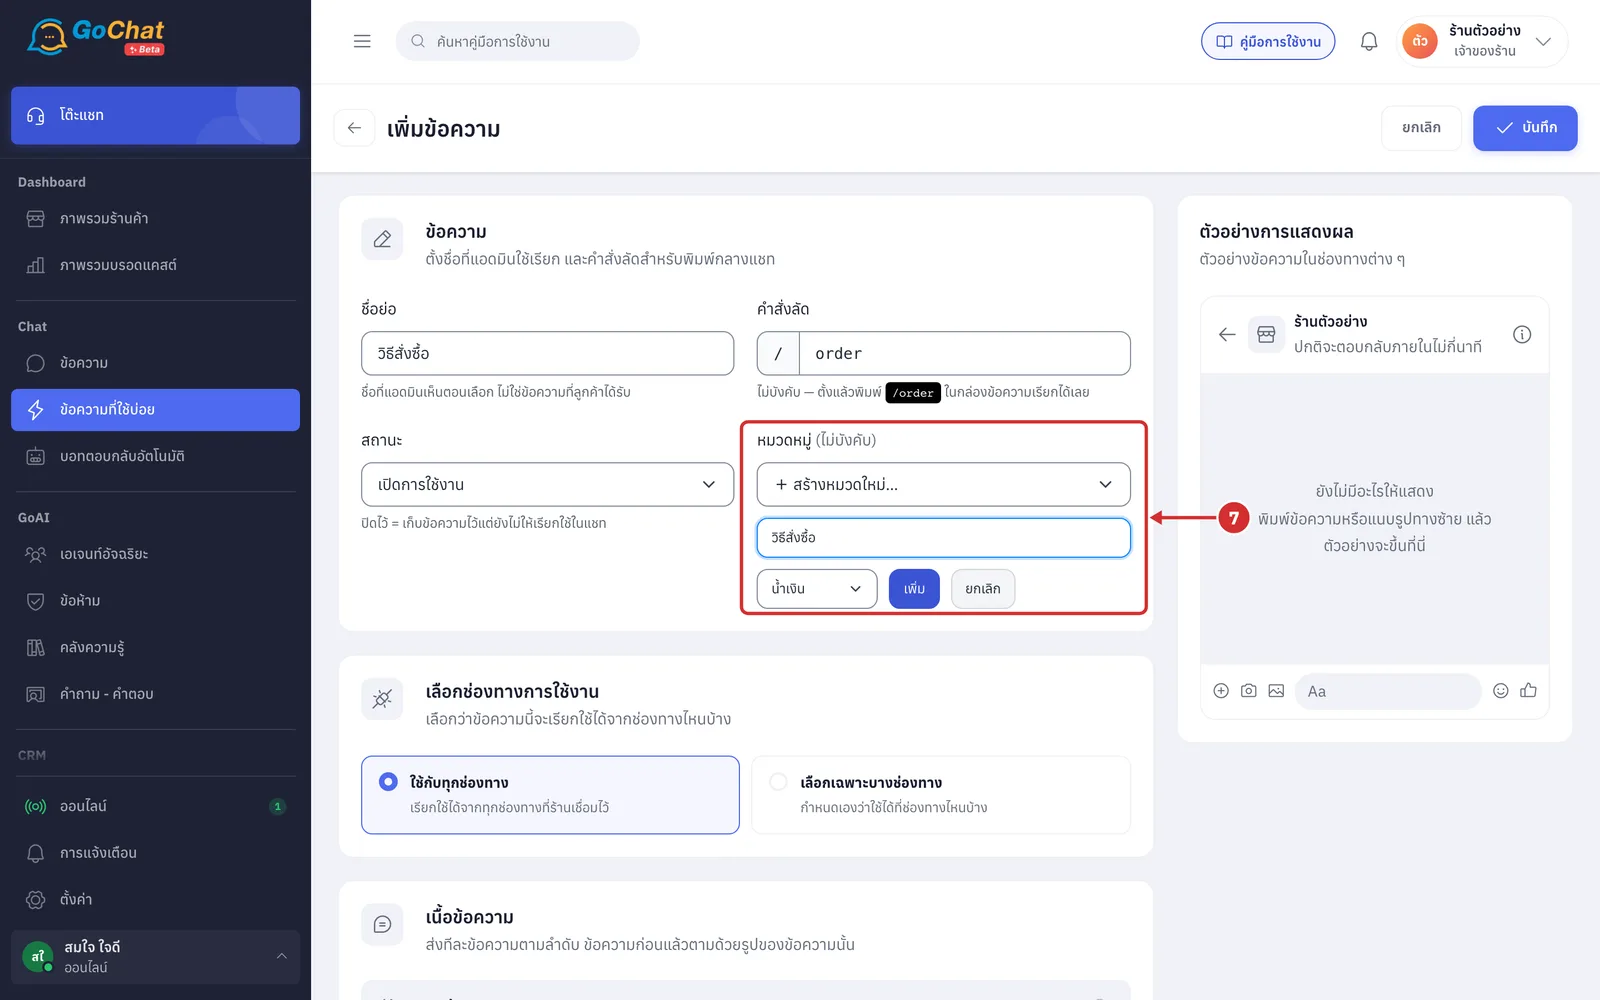
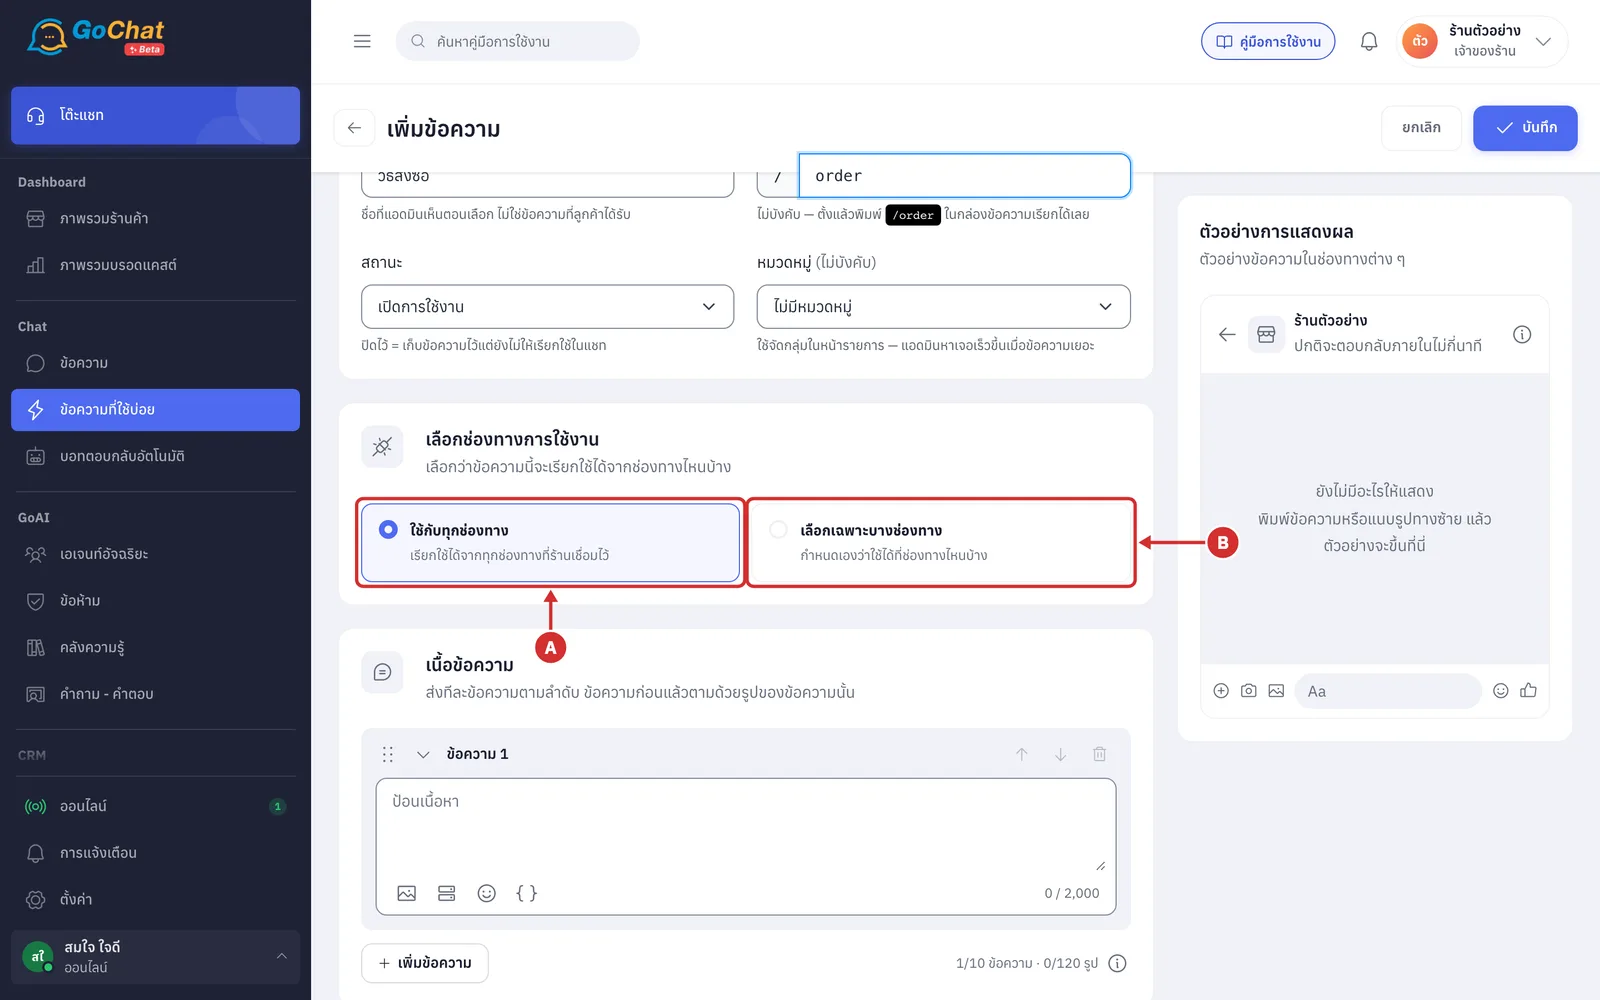
In the เลือกช่องทางการใช้งาน (Choose channels) card, choose which chats can use this reply. There are 2 options:
A ใช้กับทุกช่องทาง (All channels) usable from every channel the shop has connected (the default)
B เลือกเฉพาะบางช่องทาง (Only some channels) choose the pages or accounts yourself, such as a members-only reply for the shop's LINE; chats on other channels will not see it
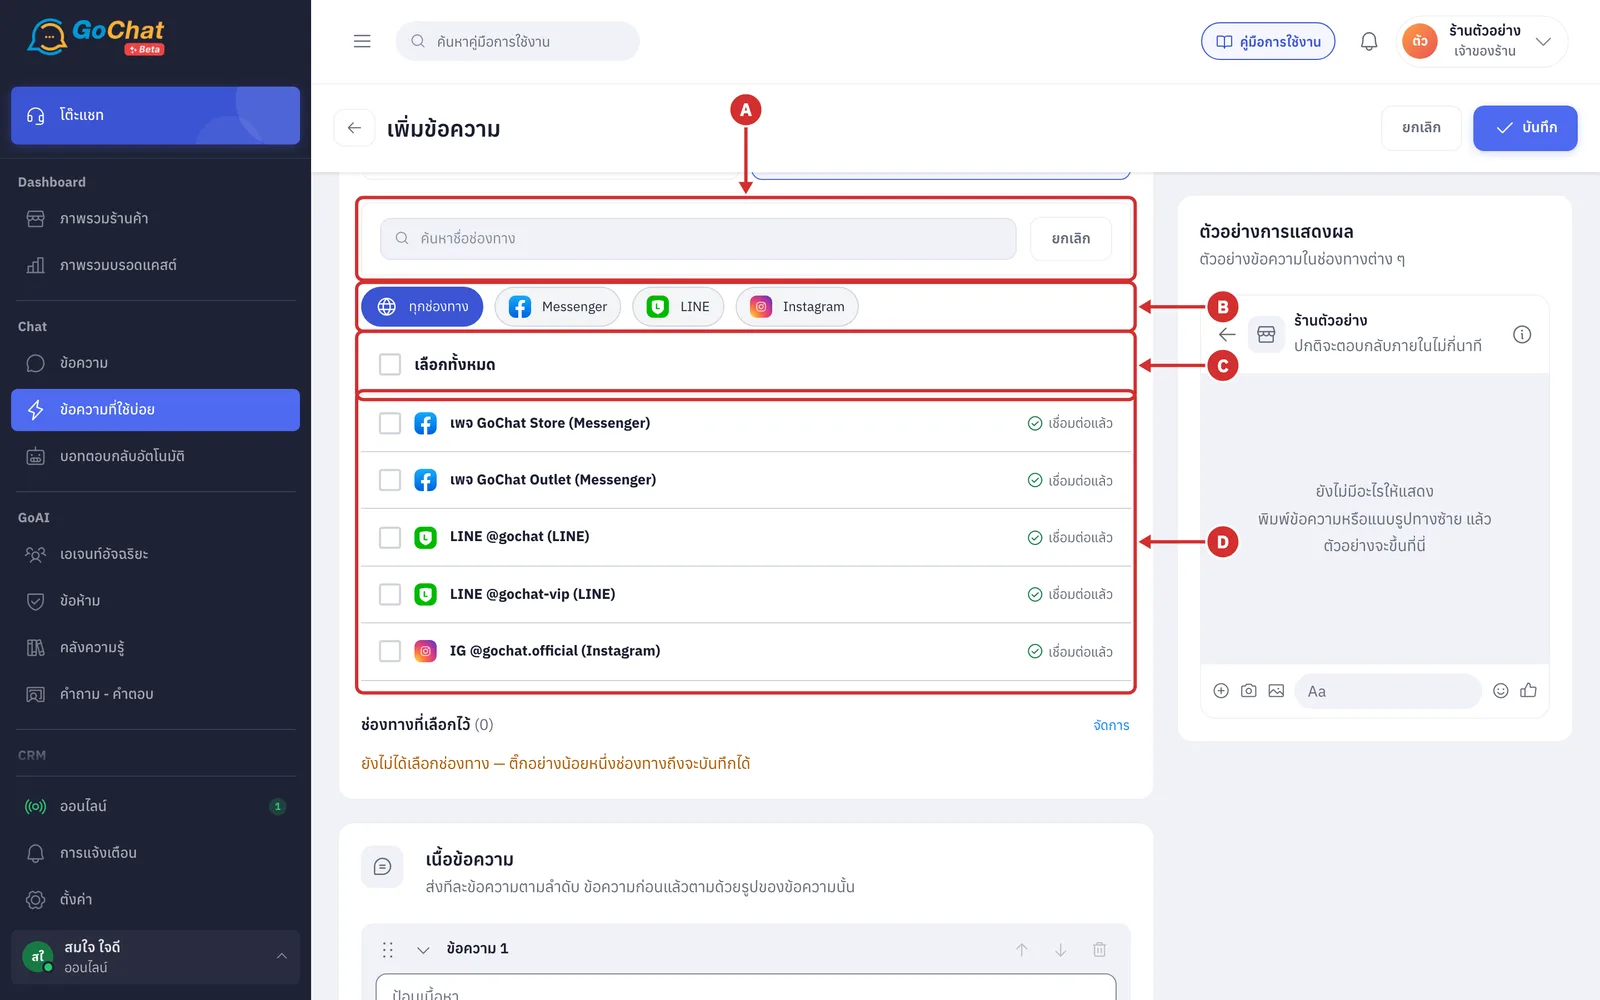
When you choose เลือกเฉพาะบางช่องทาง (Only some channels), the shop's channels appear below
A Search box ค้นหาชื่อช่องทาง (Search channel name) type a page or account name (click ยกเลิก (Cancel) to clear the search and filters)
B Platform buttons ทุกช่องทาง (All) · Messenger · LINE · Instagram show one platform at a time; only platforms the shop has connected appear
C เลือกทั้งหมด (Select all) ticks every channel you can see right now; after searching or filtering, only the ones left in the list
D Channel list each page or account with its platform in brackets and its status on the right
เชื่อมต่อแล้ว (Connected): shown with a green icon
An orange status means the channel has a problem, such as หลุดการเชื่อมต่อ ต้องเชื่อมใหม่ (Disconnected, reconnect needed). You can still pick it, but nothing is sent until it is reconnected on the channels page
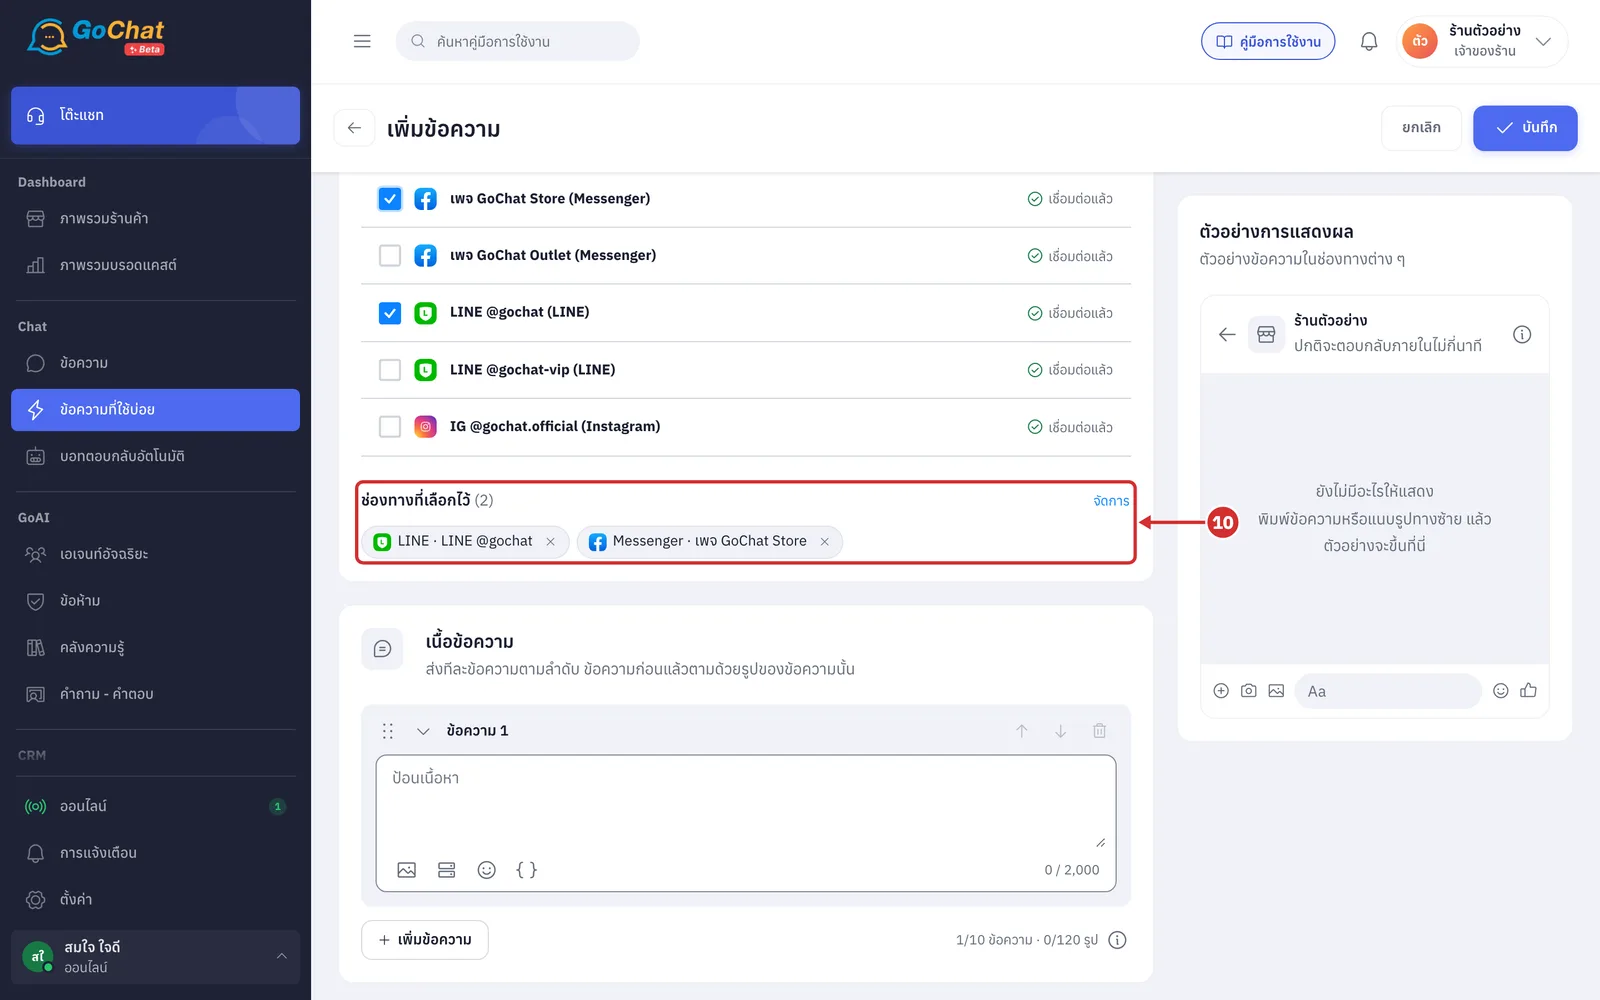
Tick the channels you want. They appear under ช่องทางที่เลือกไว้ (Selected channels) with a count
Click ✕ on a channel to take it off the list; it does not remove the channel from the shop
Click จัดการ (Manage) to open the channels page
With nothing ticked it shows ยังไม่ได้เลือกช่องทาง — ติ๊กอย่างน้อยหนึ่งช่องทางถึงจะบันทึกได้ (No channel selected — tick at least one to save)
Writing the text
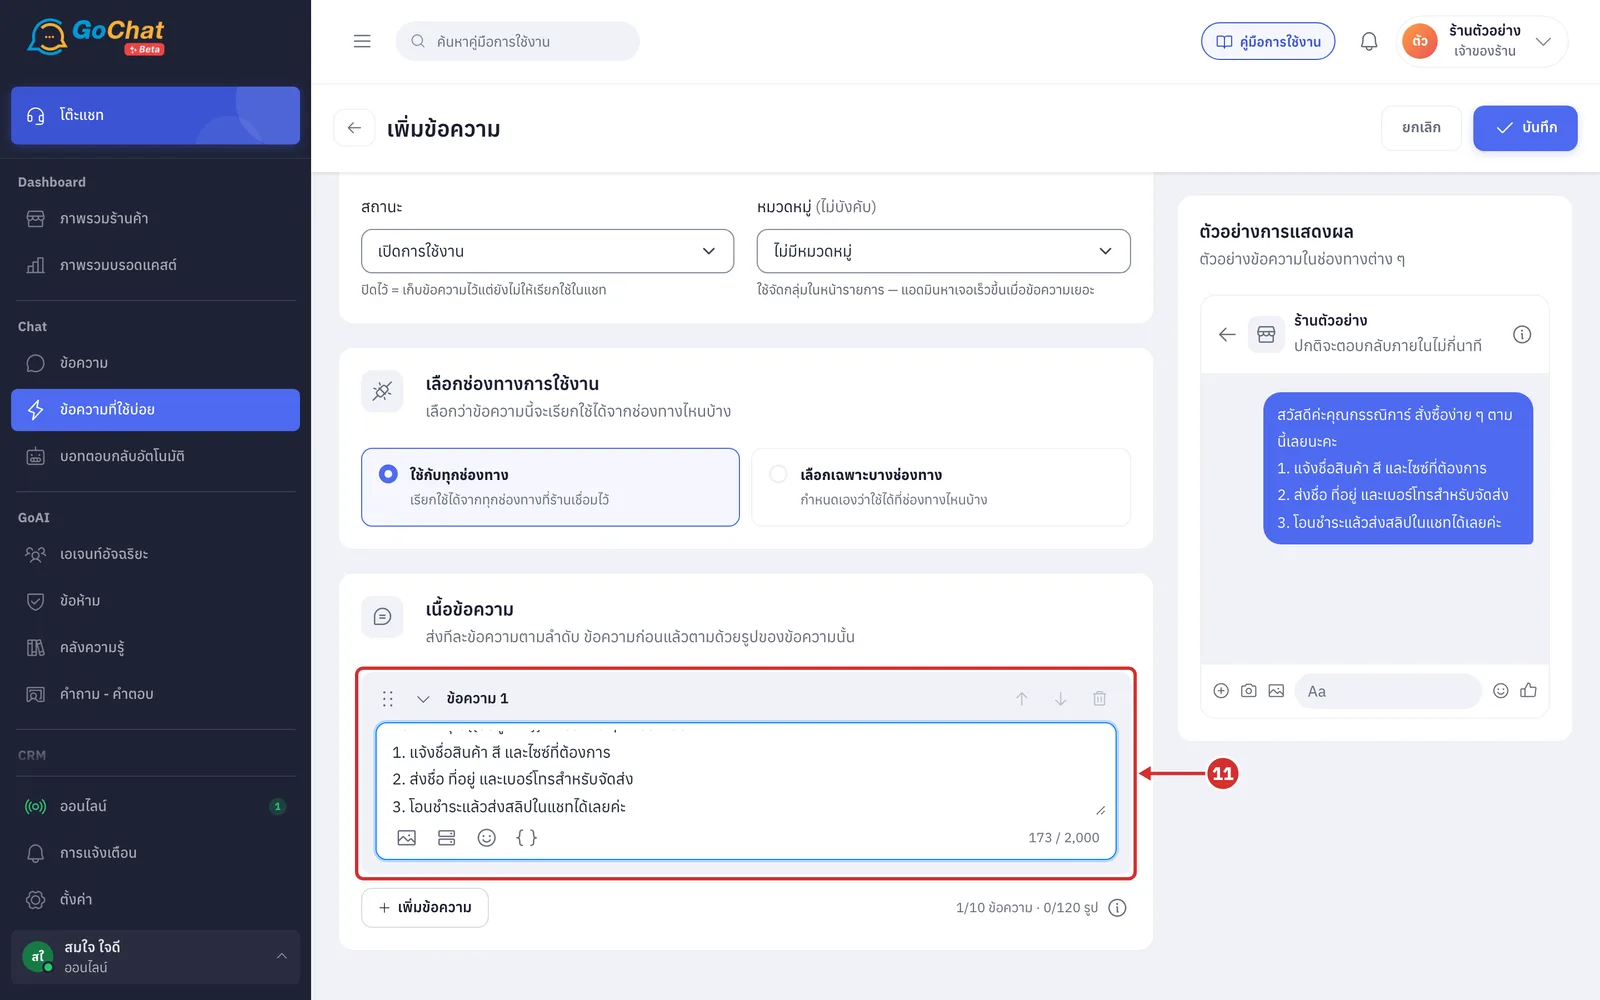
In the เนื้อข้อความ (Text) card, type what the customer will receive in ข้อความ 1 (Message 1)
It is required, up to 2,000 characters per message, with a counter at the bottom right
You can use new lines
The icons under the box are attach image, pick from the shop drive, emoji and insert variable
The panel header has a drag handle, a fold button, up and down arrows and a bin, used when there are several messages
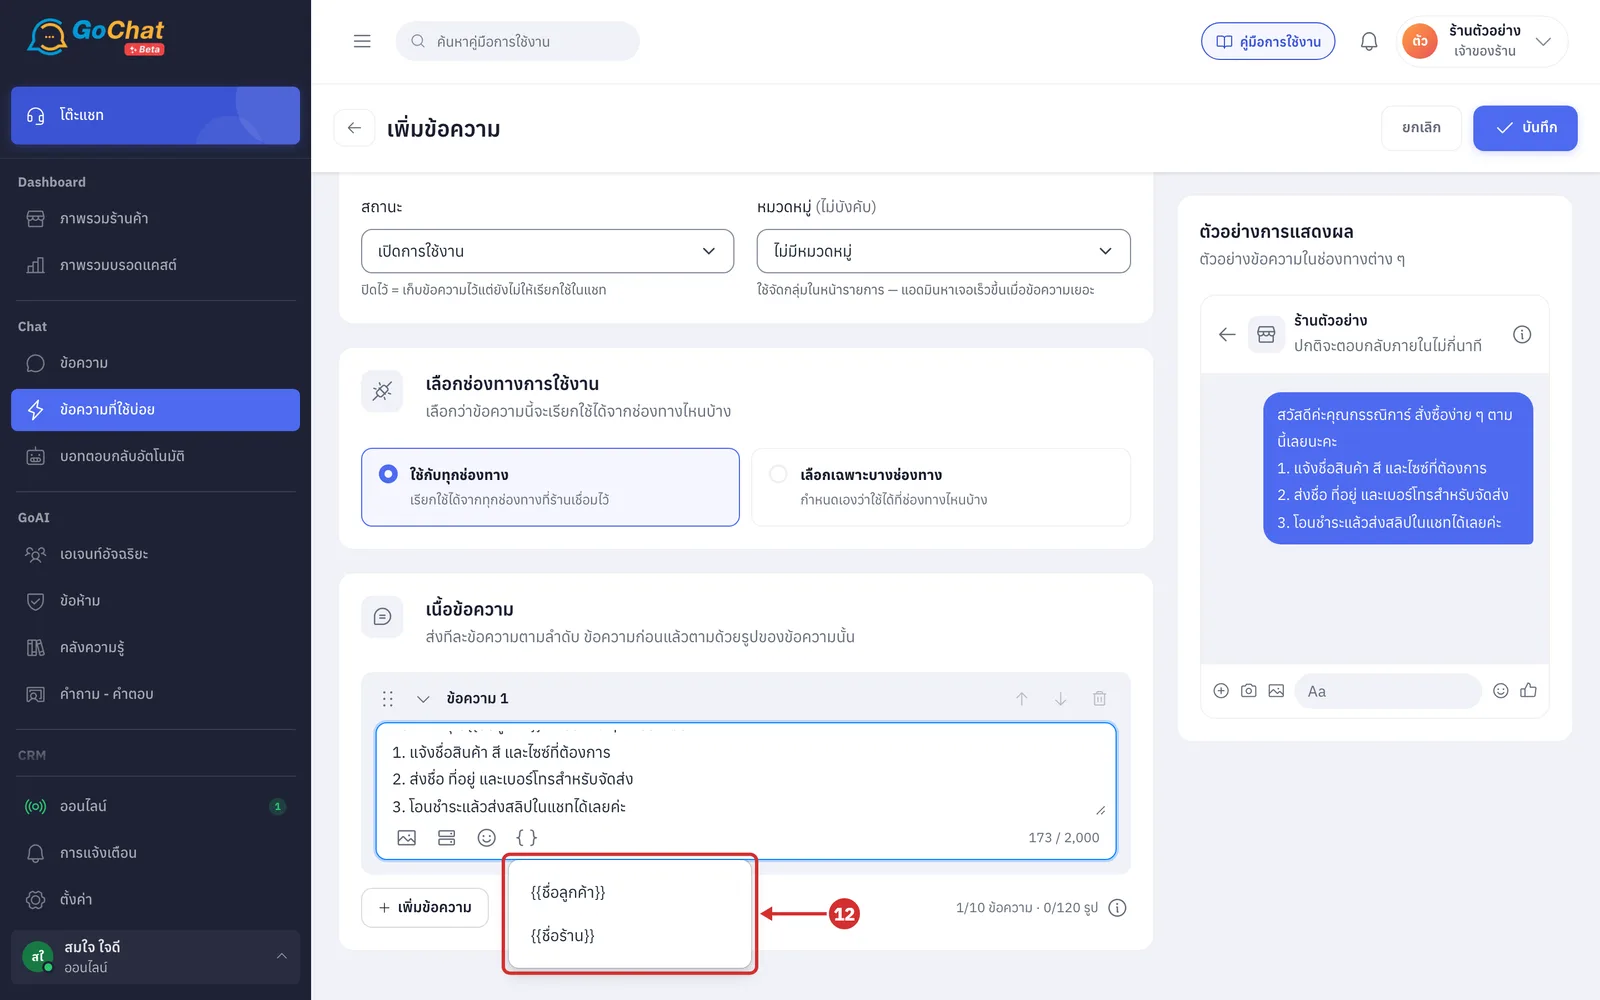
Click the curly brackets icon แทรกตัวแปร (Insert variable) and choose {{ชื่อลูกค้า}} (customer name) or {{ชื่อร้าน}} (shop name). It is inserted at the cursor
In a chat, {{ชื่อลูกค้า}} is replaced with the customer's display name in that chat and {{ชื่อร้าน}} with your shop name
In a chat where the customer's name is not known yet, {{ชื่อลูกค้า}} stays in the message box so the admin can type the name before sending
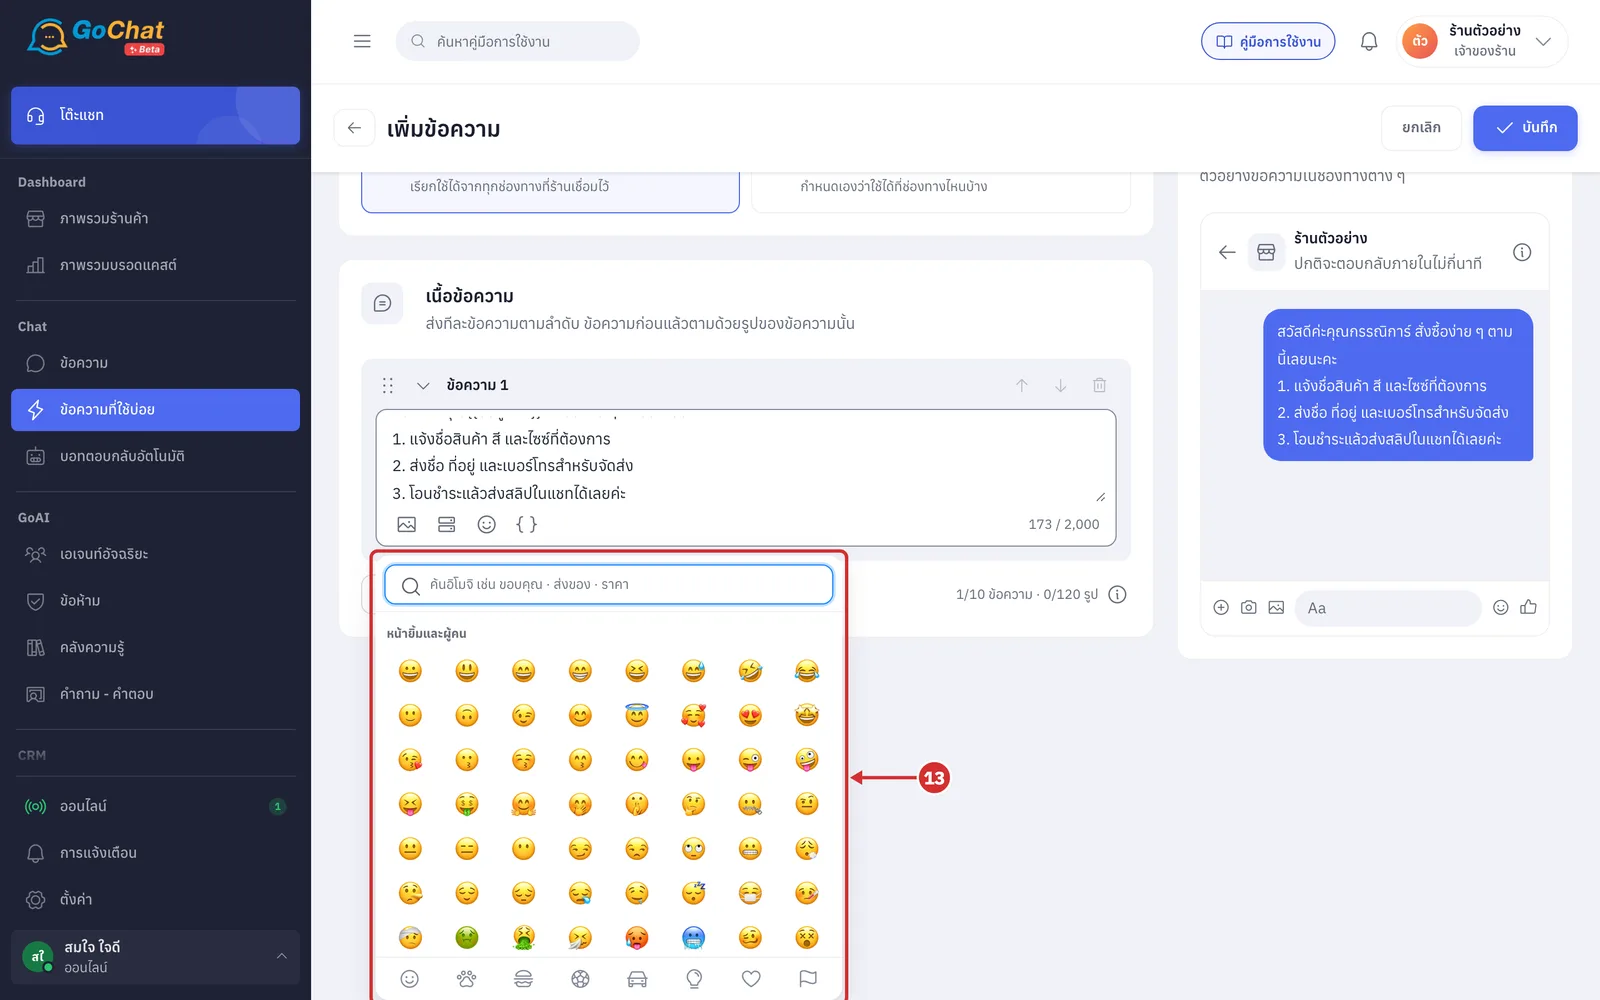
Click the smiley icon เลือกอิโมจิ (Emoji) to open the emoji panel
You can click several emoji in a row; the panel stays open
It has a search box, recently used emoji and categories
Press Esc or click the icon again to close it
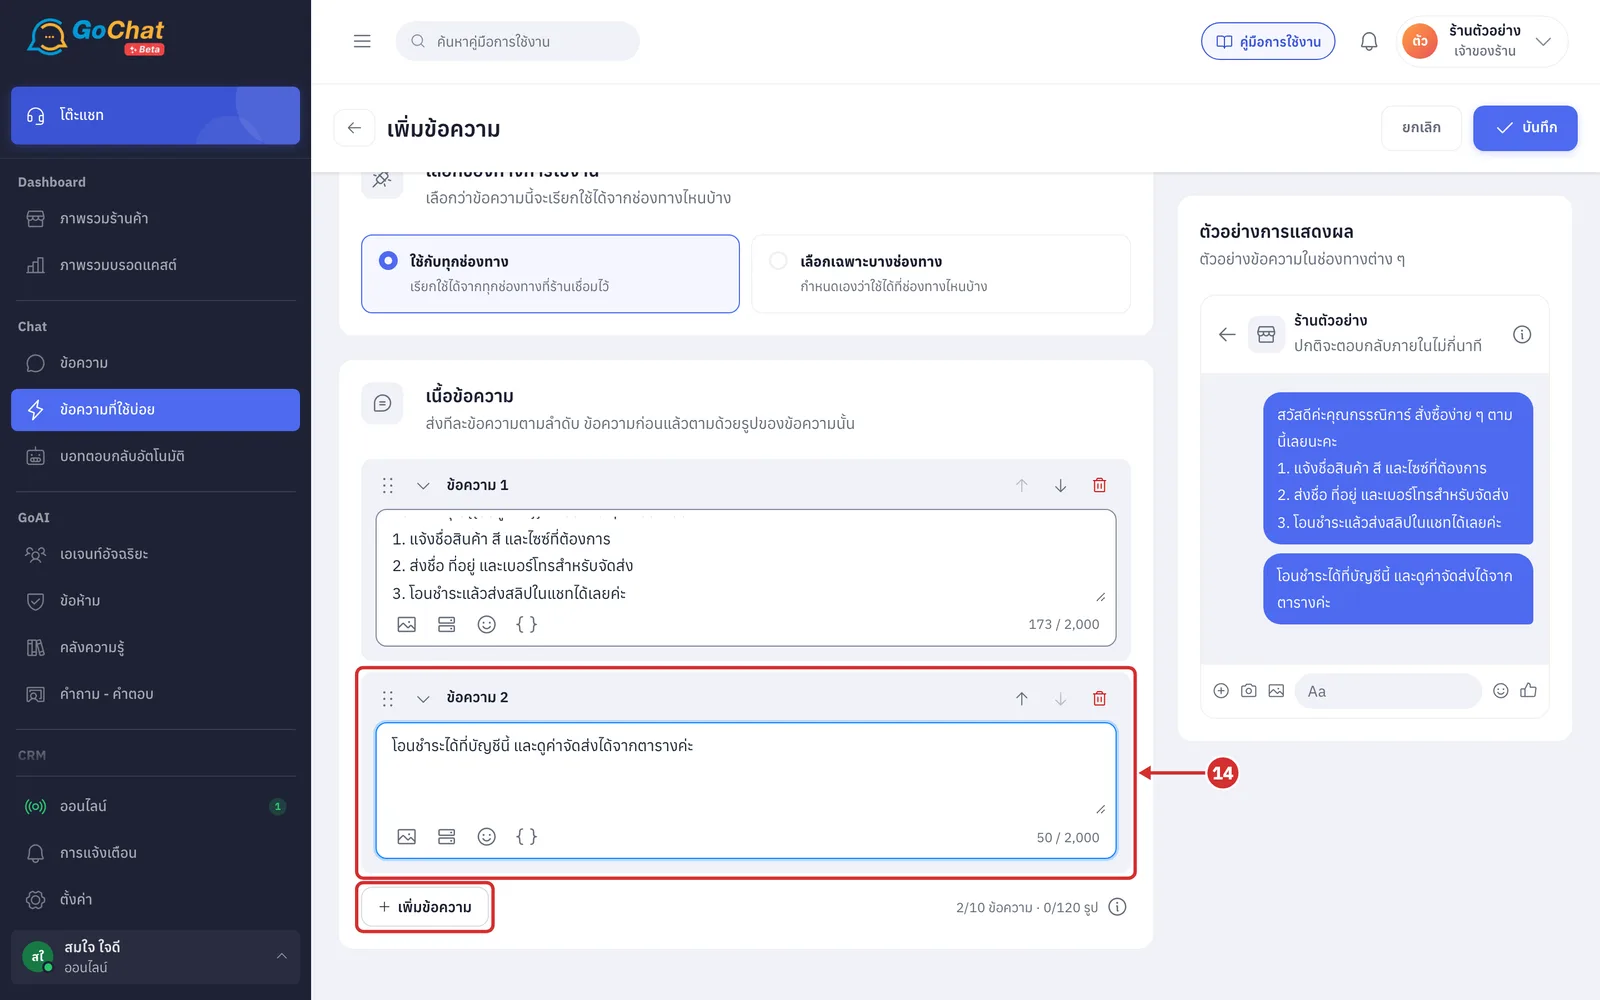
To send several messages in a row, click เพิ่มข้อความ (Add message) under the panel. ข้อความ 2 (Message 2) is added with its own box and icons
Up to 10 messages; when full the button reads ครบ 10 ข้อความแล้ว (10 messages reached)
From message 2 on, a message can be images only
Use the arrows or drag the handle to reorder
Click the bin to remove that message
Attaching images
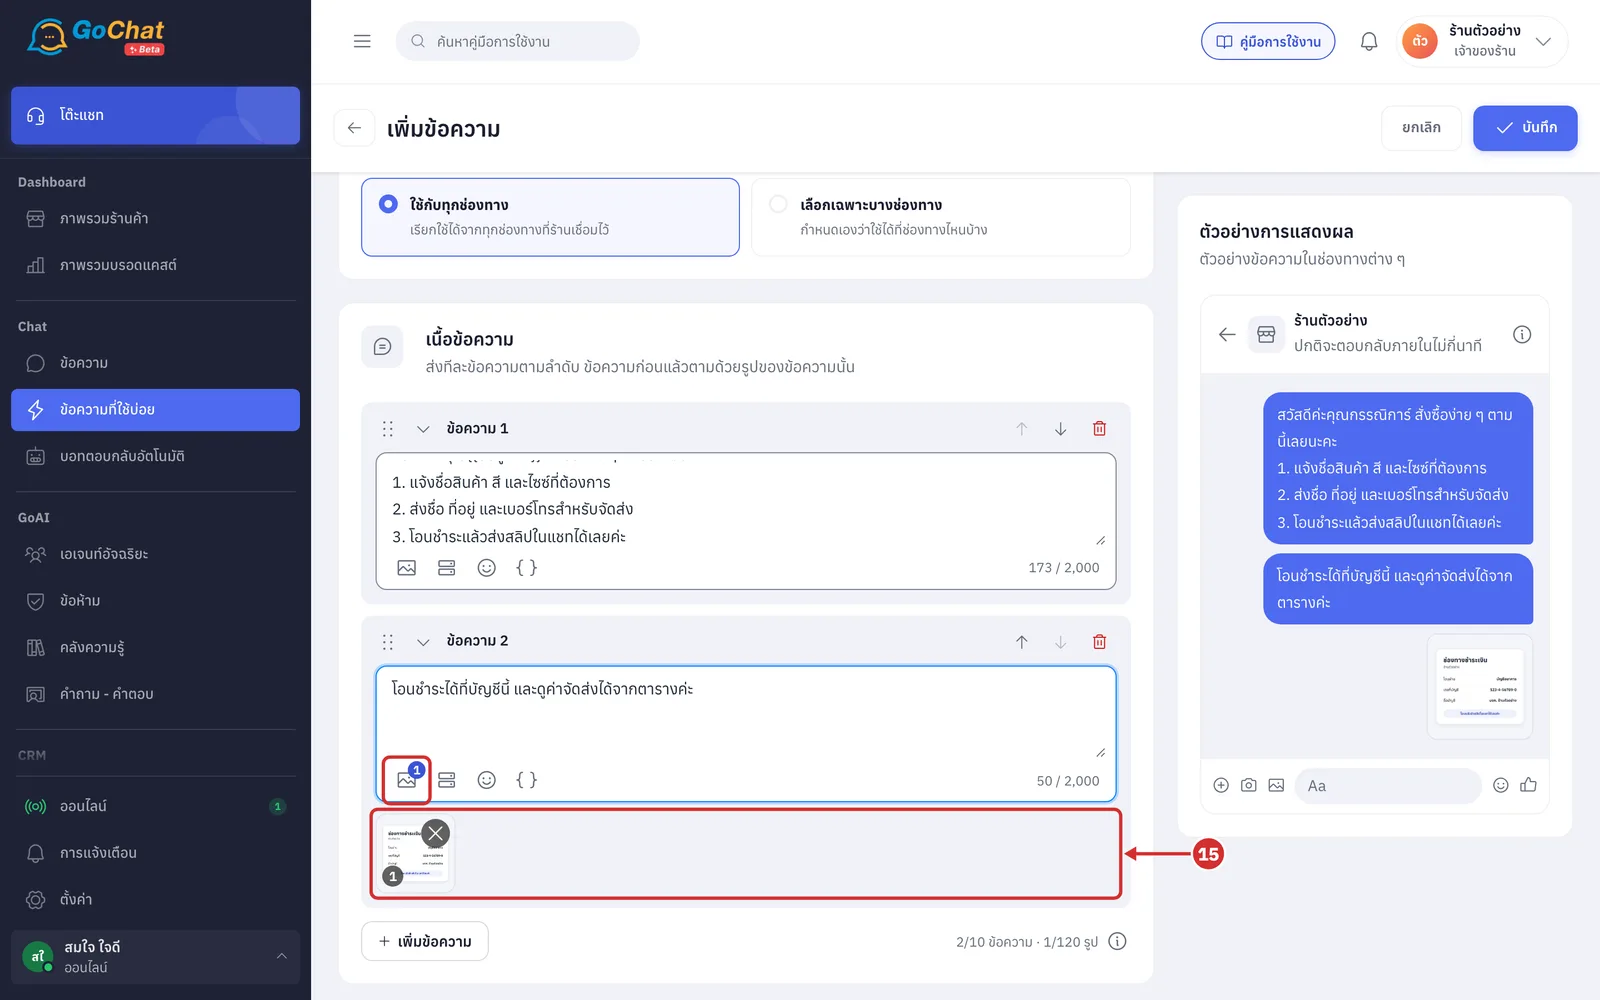
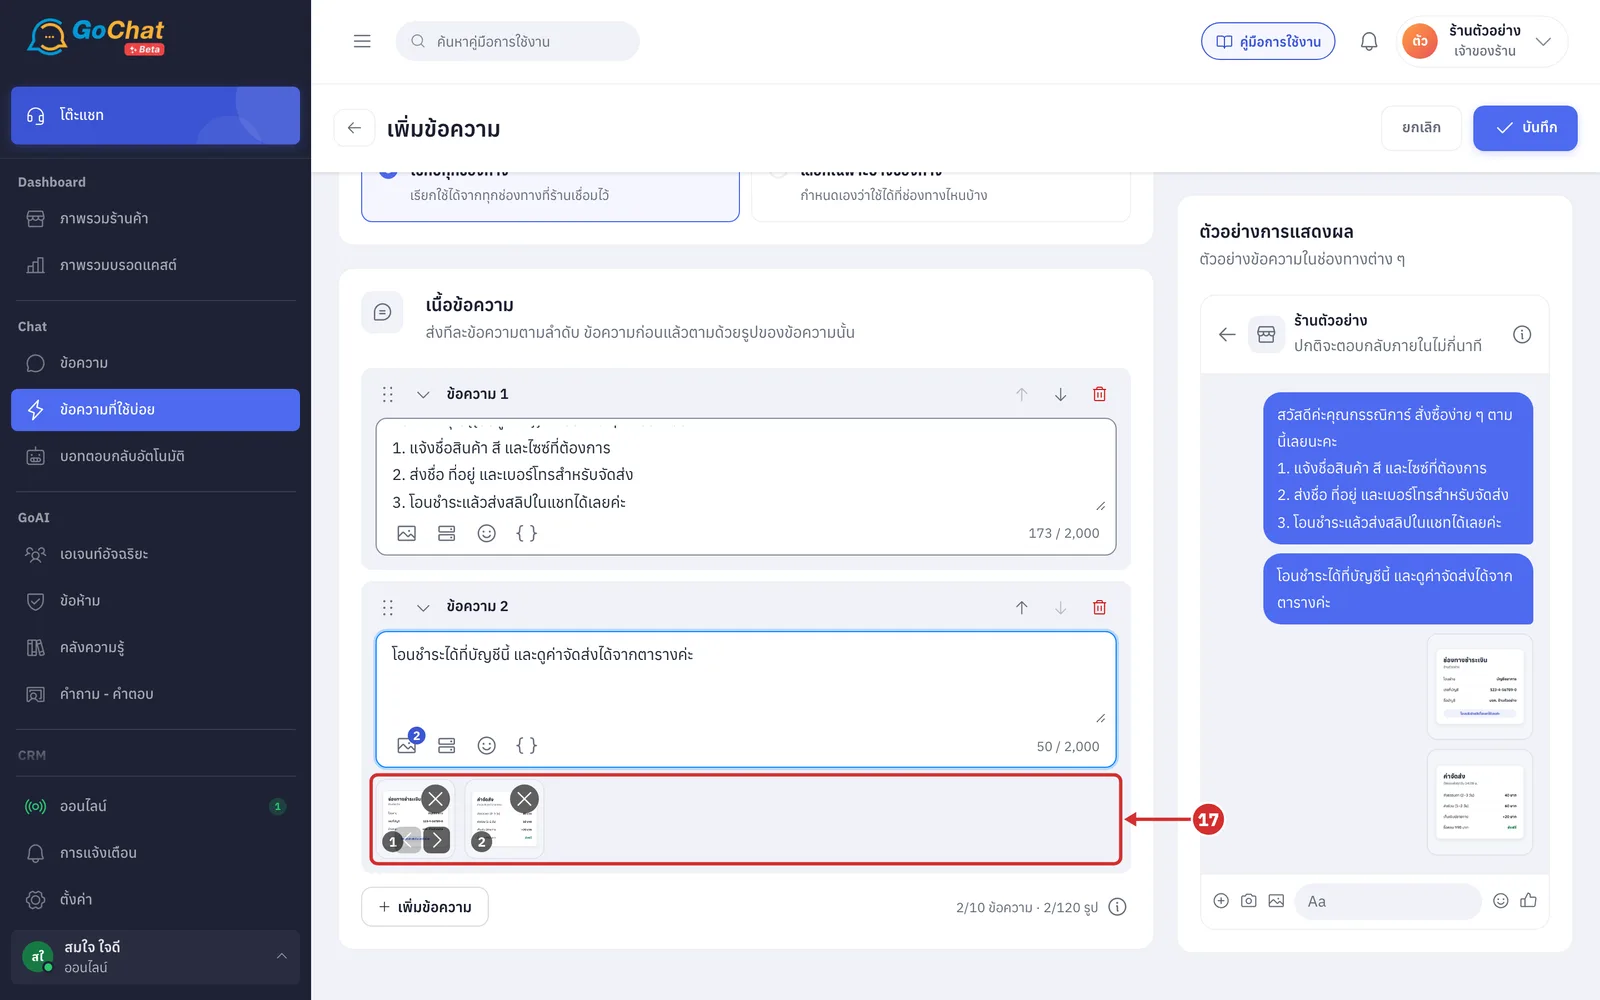
Click the image icon แนบรูป (Attach image) of the message you want and pick images from your device. The images appear under the box and the icon shows how many that message has
JPG, PNG and GIF files up to 5MB each
You can pick several at once, or drag image files onto the message panel
Uploaded images are also kept in the shop drive
Images that break the rules show the reason in a yellow bar, such as … — ใหญ่เกิน 5MB (… — larger than 5MB)
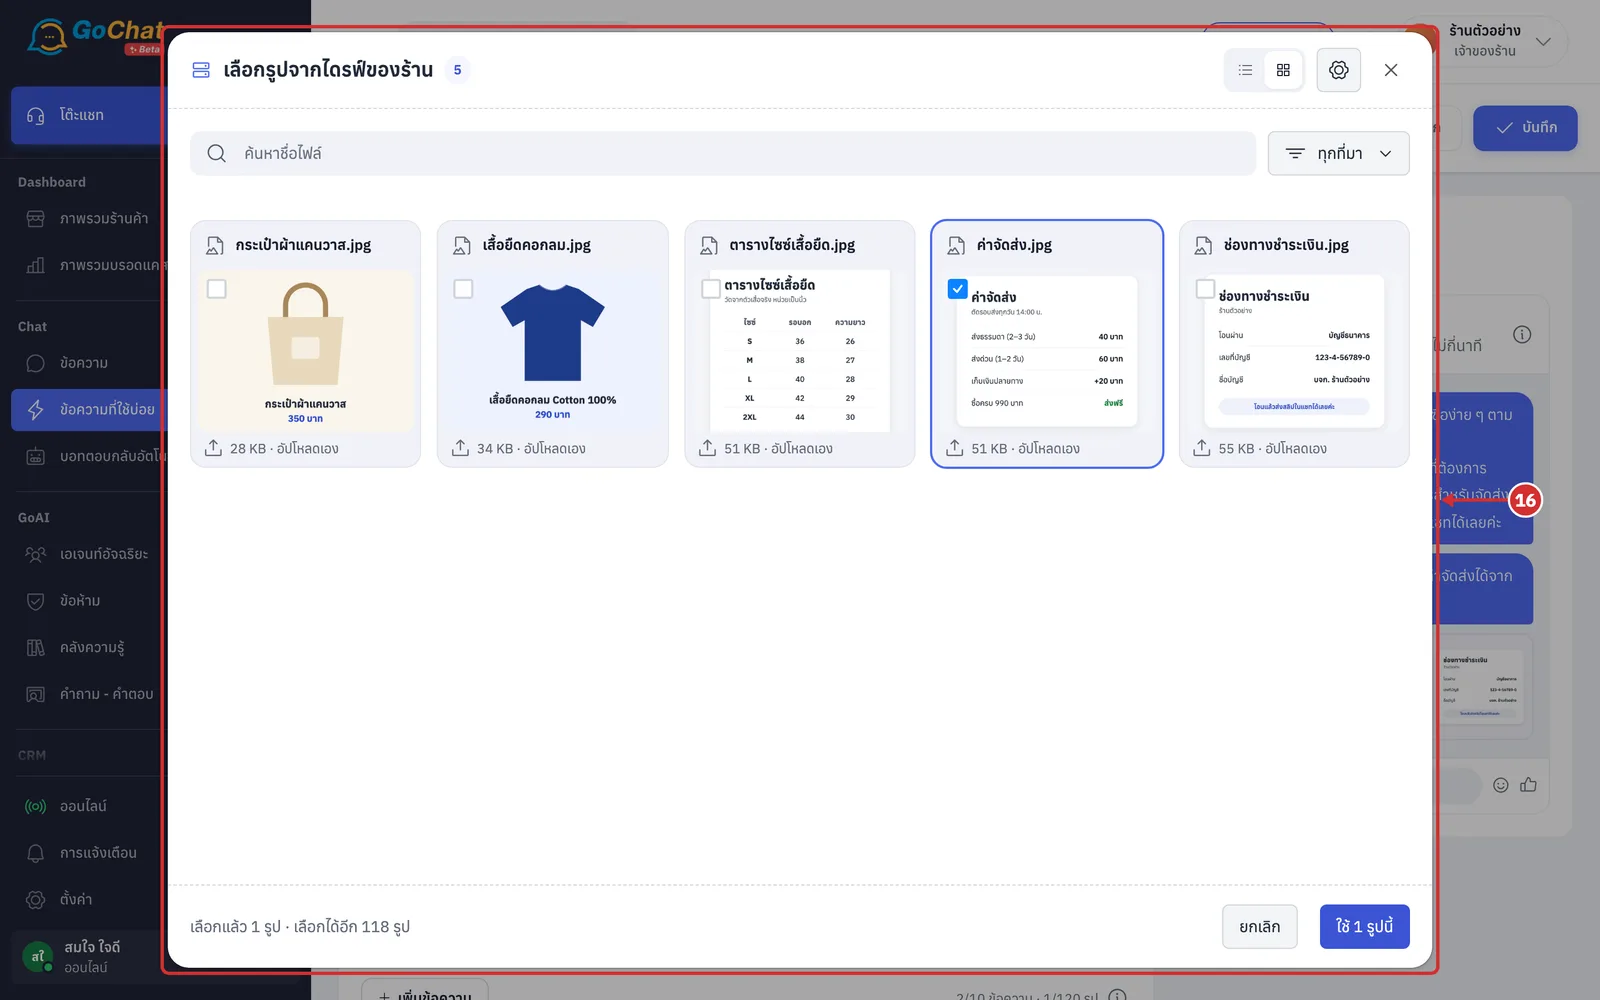
Click the เลือกรูปจากไดรฟ์ของร้าน (Pick from shop drive) icon to reuse an image you already have. The เลือกรูปจากไดรฟ์ของร้าน window shows folders (if any) and every image in the drive. Click images to select them, then click ใช้ … รูปนี้ (Use these … images)
Search by file name or filter by source: อัปโหลดเอง (Uploaded), จากแชท (From chats) and ข้อความที่ใช้บ่อย (Saved replies)
Several images are fine; the bottom of the window shows เลือกแล้ว … รูป · เลือกได้อีก … รูป (… selected · … more allowed)
Images already in the drive take no extra space
The icons at the top right switch between list and card view
The gear จัดการรูป (Manage images) lets you upload, rename or move images to the trash
The number on each image is the order the customer receives them. Point at an image to use the left and right arrows to reorder, or click ✕ to remove it
An image still uploading shows a spinner; click ✕ to cancel
If the connection drops while uploading it shows … อัปโหลดไม่สำเร็จ — การเชื่อมต่อหลุดระหว่างส่ง (… failed — connection lost while sending); click ลองใหม่ (Try again)
An image attached twice to the same message is skipped
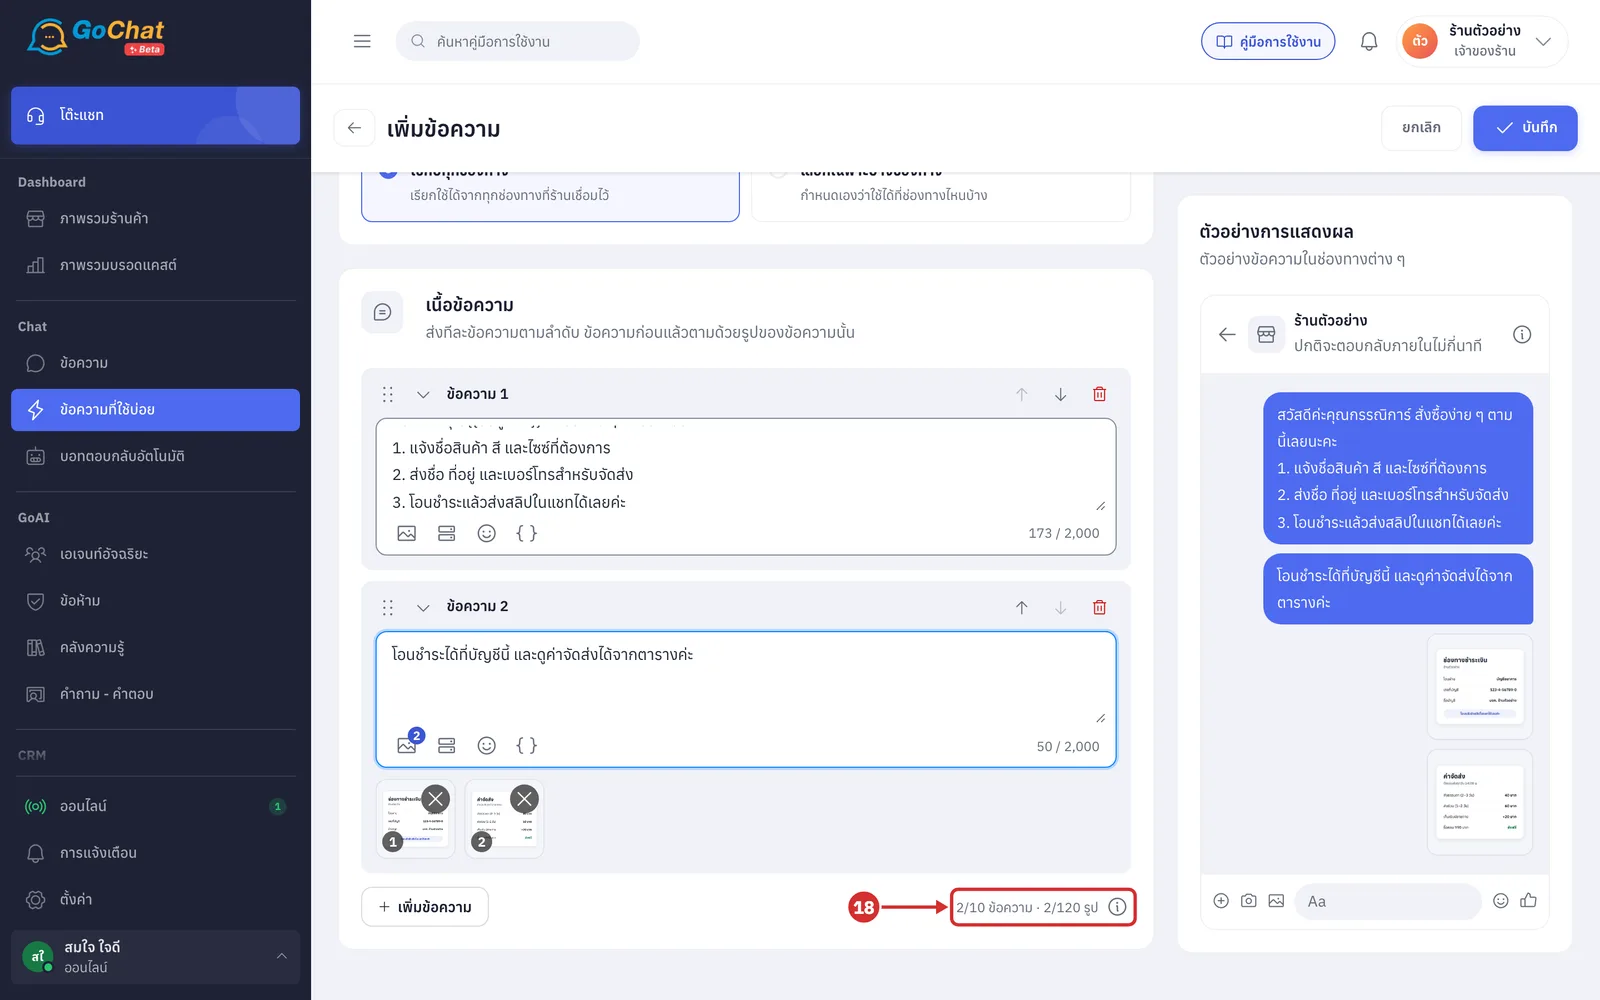
The bottom of the card shows how much of the reply you have used, such as 2/10 ข้อความ · 2/120 รูป (2/10 messages · 2/120 images). Click the (i) icon to see every limit
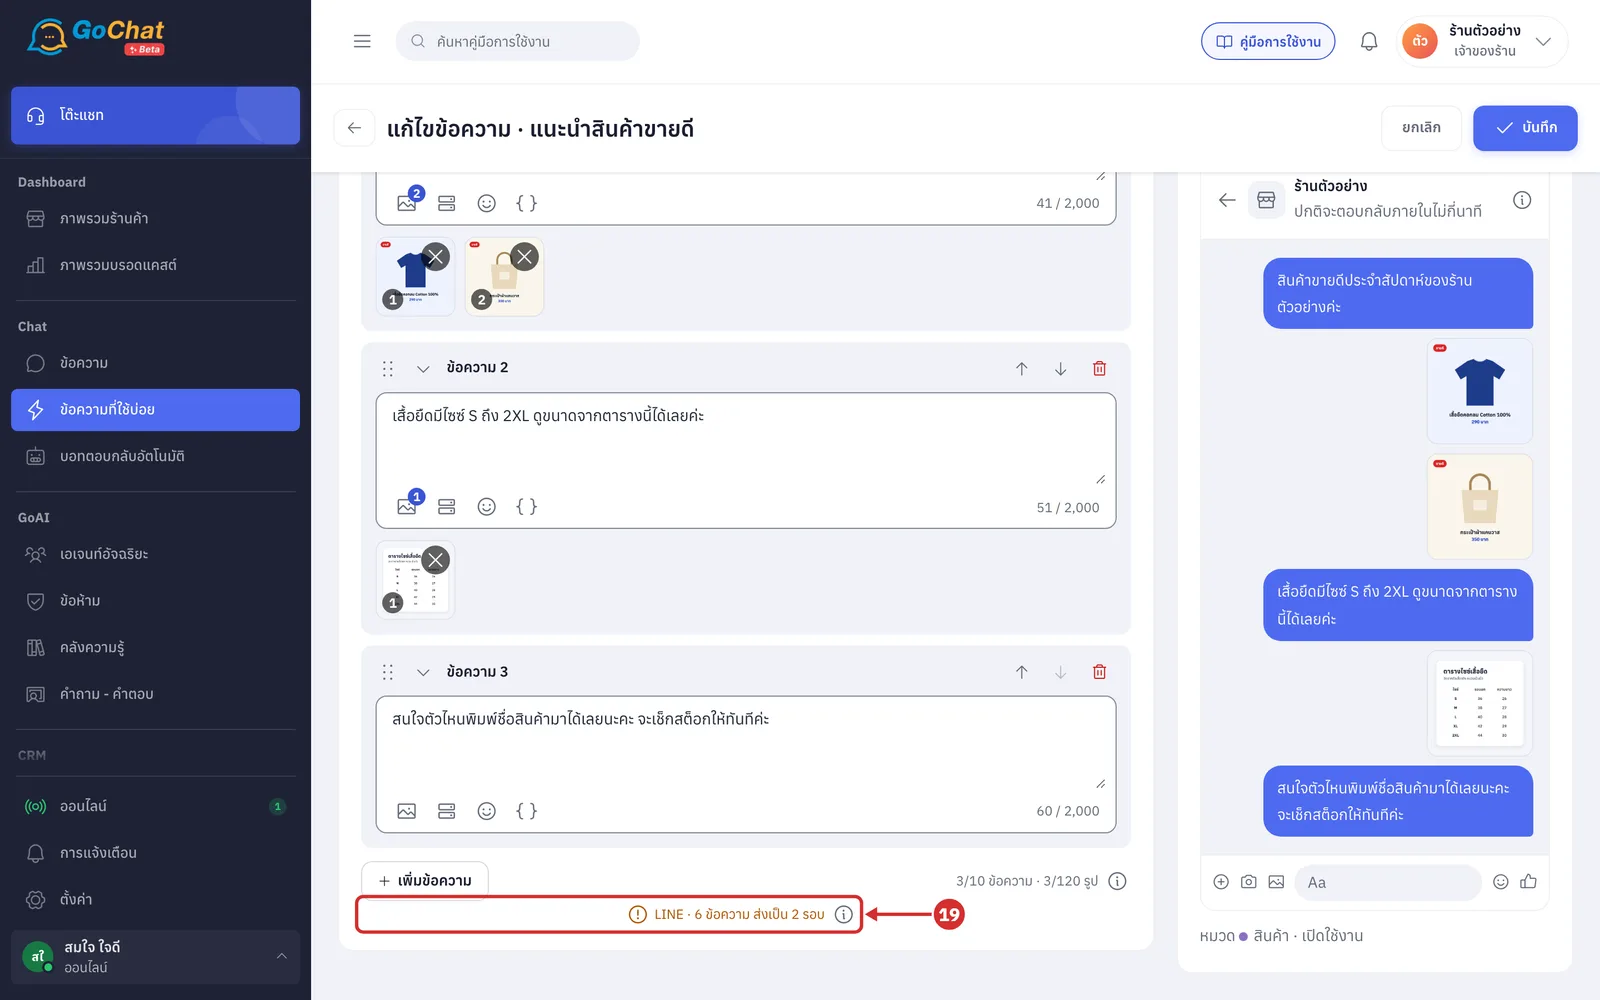
If the reply is used on LINE and has more than 5 bubbles, an orange line LINE · … ข้อความ ส่งเป็น … รอบ (LINE · … messages sent in … rounds) appears. Click the (i) icon for details
Each text or image counts as 1 bubble
LINE takes 5 bubbles at a time; bubble 6 onward goes in the next round
Each round counts once against the shop's LINE message quota per chat
You can still save as usual
Note: Some channels limit what can be sent:
Channels with a text length limit, such as Instagram, show a warning under the card when a message is close to or over the limit, such as Instagram · เหลือราว … ตัวก่อนเกินที่ Instagram รับ (Instagram · about … characters left). You can save, but a message that is too long cannot be sent in Instagram chats
If a chosen channel cannot send images from saved replies yet, a warning says that chats on that channel will get the text only
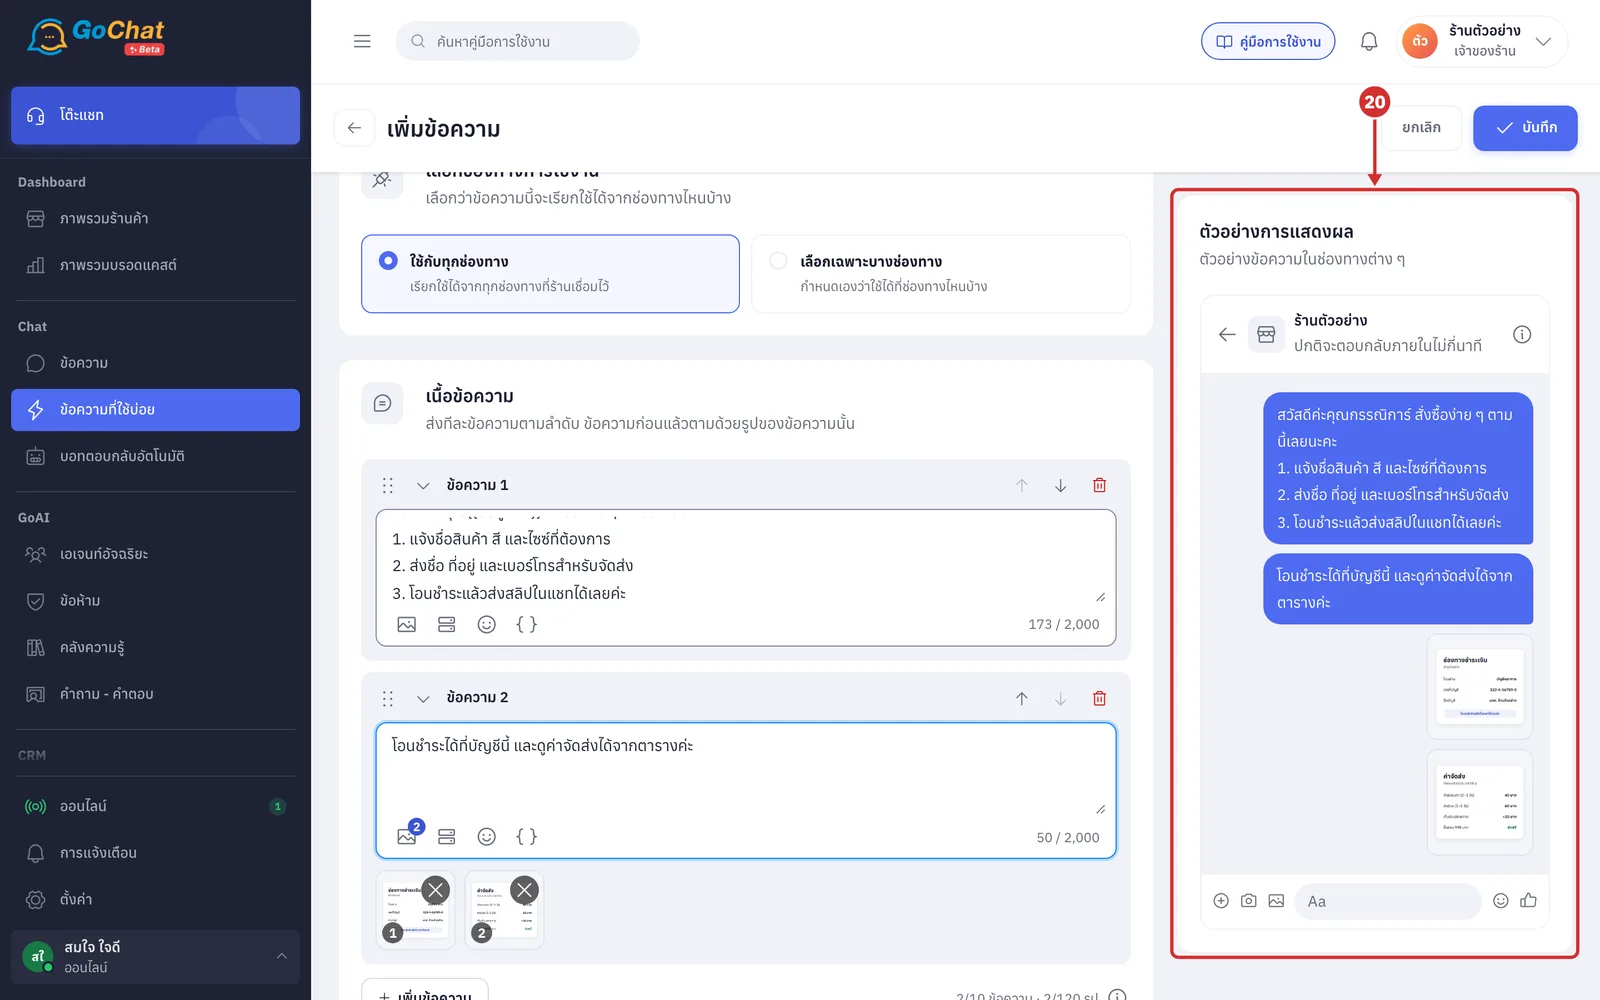
See what the customer will get in the ตัวอย่างการแสดงผล (Preview) panel on the right. Text and images are in send order
Variables use sample names; the sample customer is กรรณิการ์
The shop name is your real shop name
Below the panel are the category and status of the reply
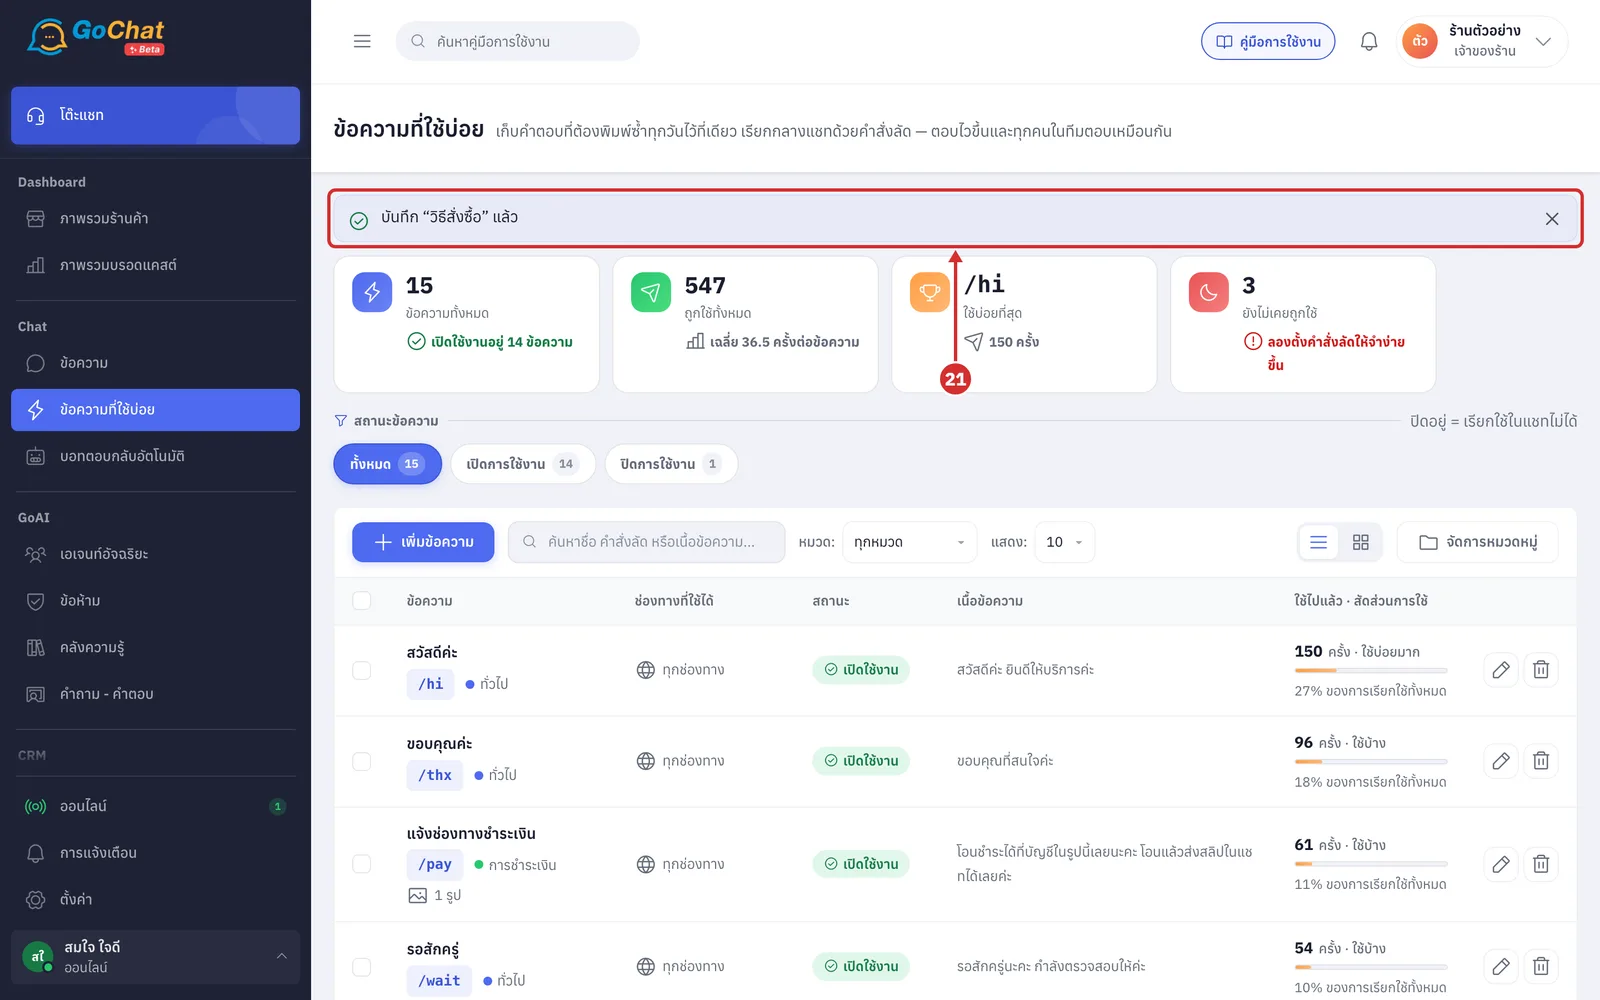
Click บันทึก (Save) at the top right. You return to the list with the bar บันทึก “…” แล้ว (Saved “…”), and the reply can be used in chats straight away
The button works once the title, message 1 and channels are filled in, nothing is duplicated and images have finished uploading
While images are uploading it reads รออัปโหลด … รูป… (Waiting for … images…)
Editing a reply
On the list, click the title or the pencil of a reply. The แก้ไขข้อความ · … (Edit reply · …) page opens with every field filled in; edit it the same way as when adding
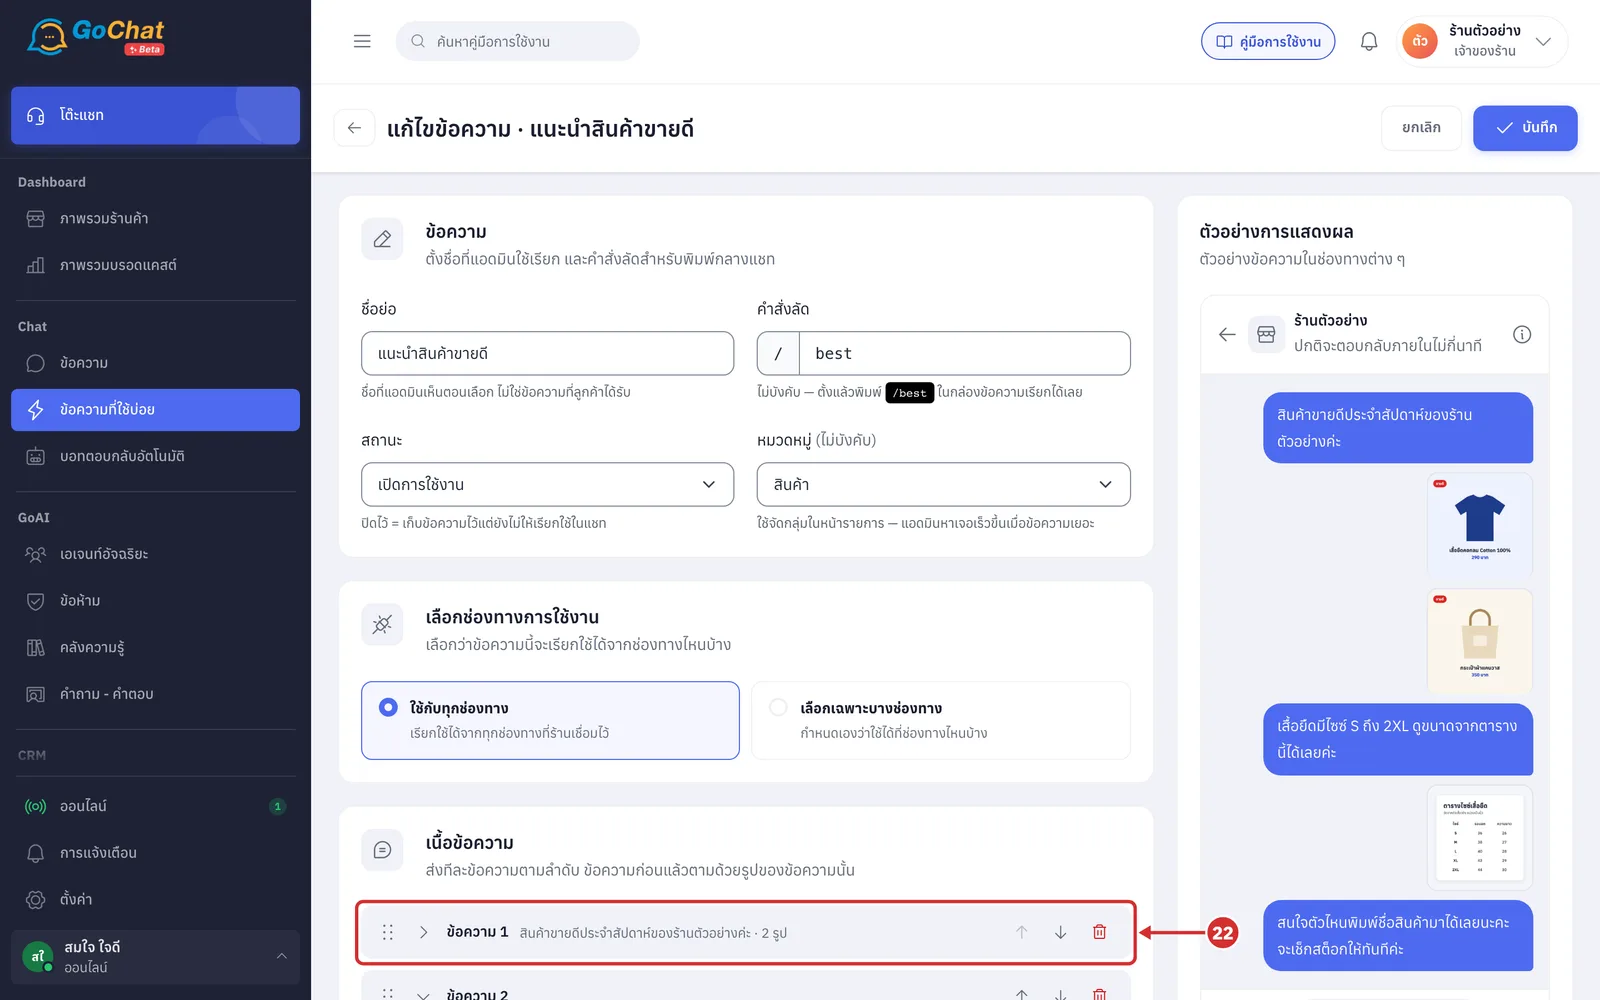
Click the arrow in front of ข้อความ 1 (Message 1) to fold the panel down to a one-line summary with the image count, handy for seeing every message of a long reply
Click the arrow again to unfold it
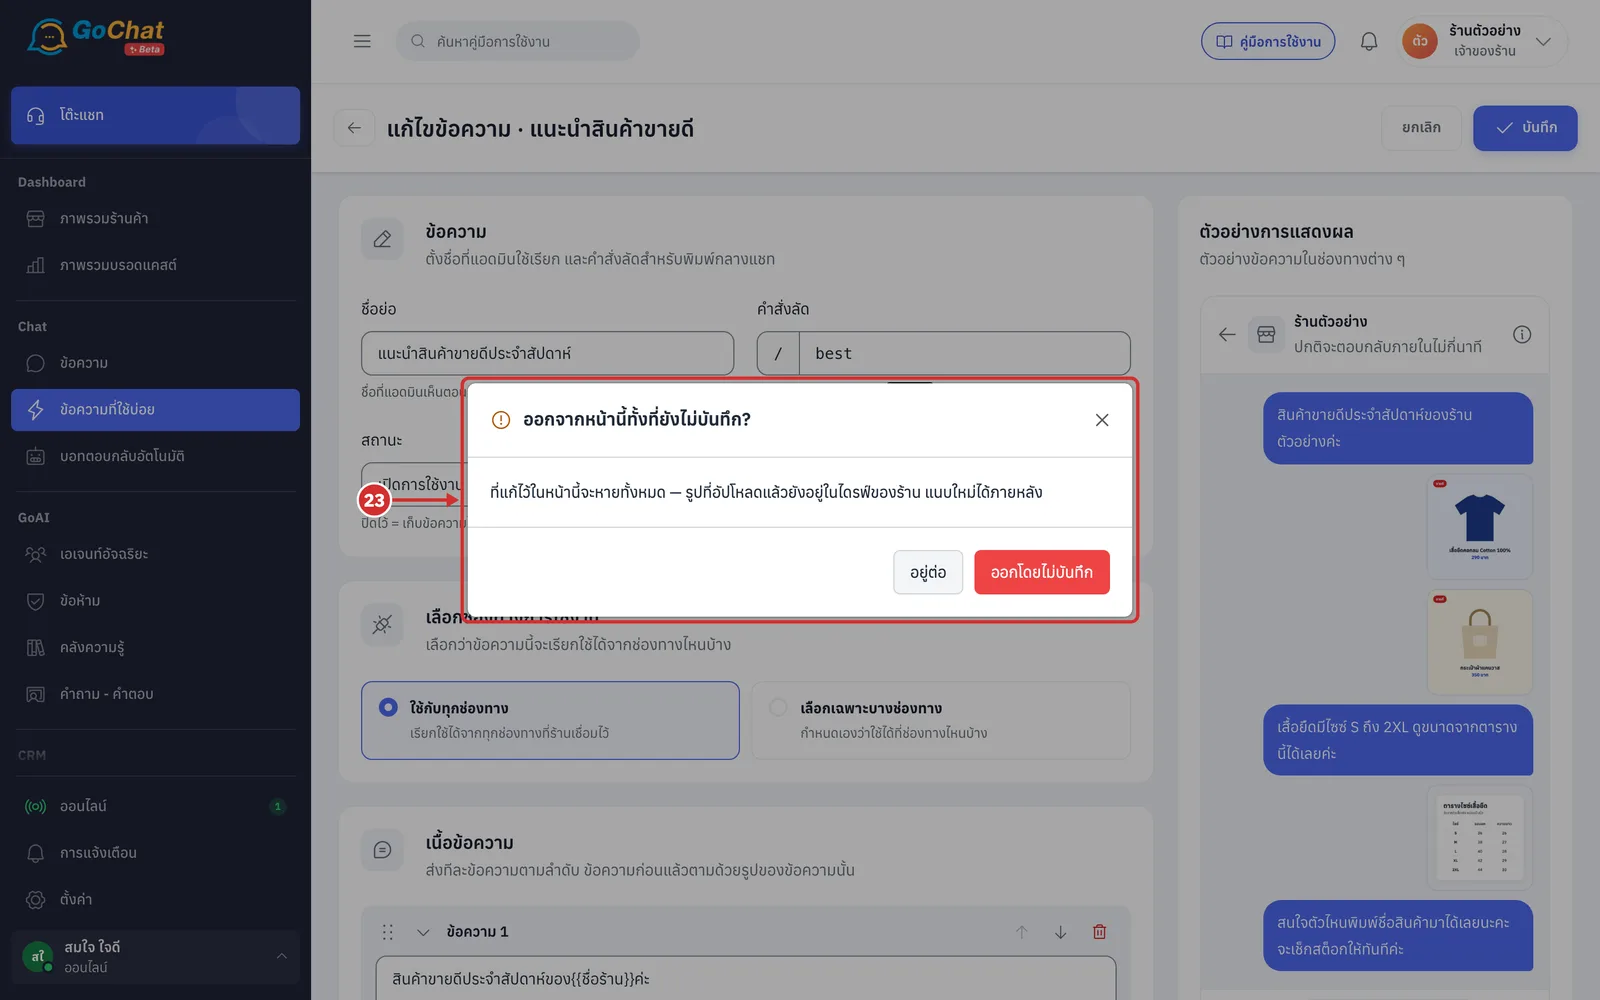
If you leave without saving, whether with ยกเลิก (Cancel), the back arrow or another menu, the ออกจากหน้านี้ทั้งที่ยังไม่บันทึก? (Leave without saving?) window asks first. Click อยู่ต่อ (Stay) to keep editing or ออกโดยไม่บันทึก (Leave without saving)
If you leave without saving, your changes on this page are lost
Uploaded images stay in the shop drive and can be attached again later
About editing replies
To stop using a reply for a while without deleting it, change สถานะ (Status) to ปิดการใช้งาน (Off) and click บันทึก (Save)
Using replies in a chat is covered in Using saved replies in a chat