

Order summary and tracking number settings
The สรุปคำสั่งซื้อ และเลขพัสดุ (Order summary and tracking number) page creates order notification sets. When an order is placed or gets a tracking number, the system sends a summary to the customer in chat without the customer asking first. One set can cover several LINE · Facebook · Instagram accounts. Everyone in the shop can create and edit sets.
Creating an order notification set
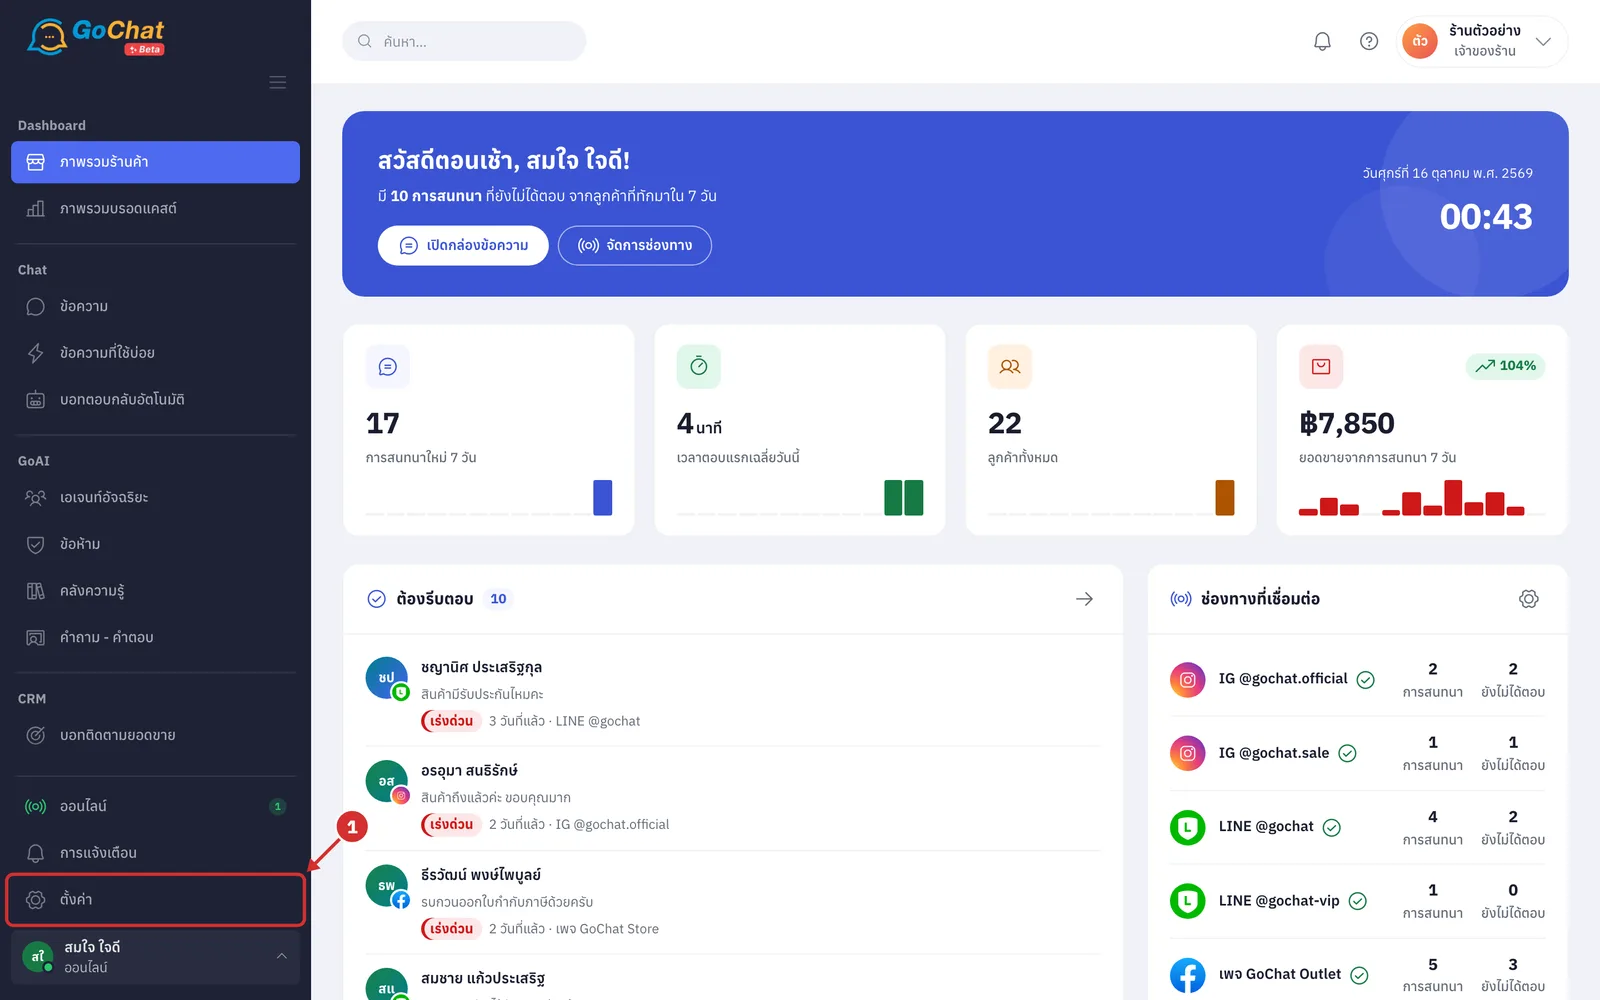
Go to the ตั้งค่า (Settings) menu in the left menu bar
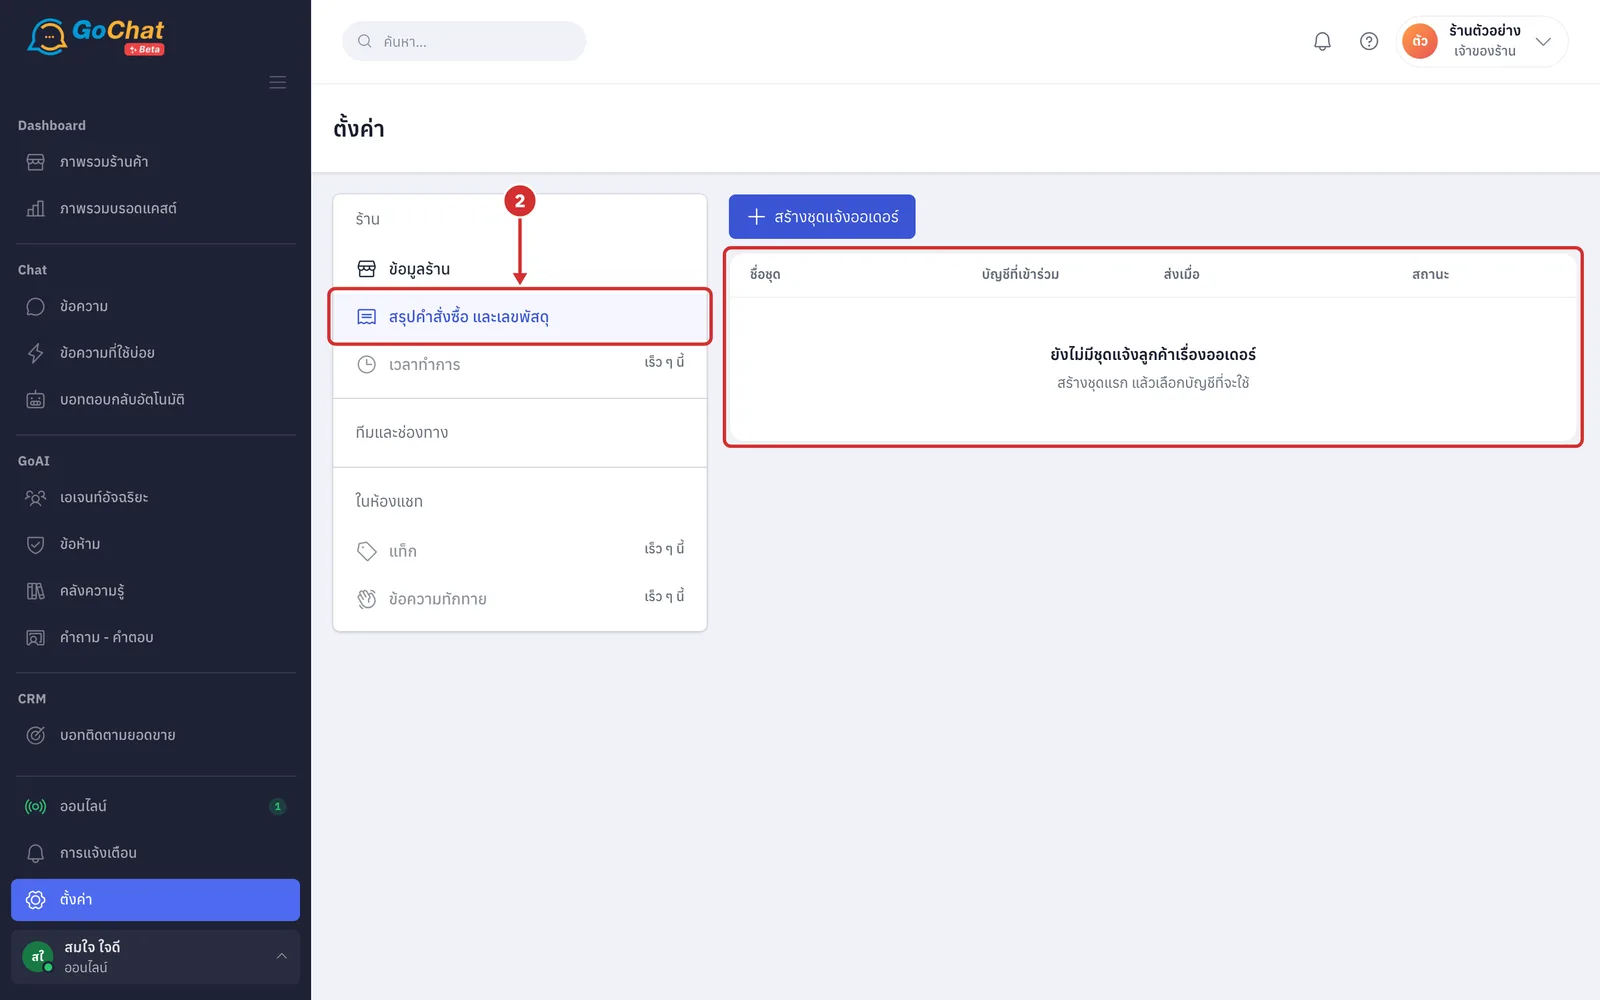
Under ร้าน (Shop), choose สรุปคำสั่งซื้อ และเลขพัสดุ (Order summary and tracking number) (the page lists every set of the shop with the columns ชื่อชุด (Set name) · บัญชีที่เข้าร่วม (Participating accounts) · ส่งเมื่อ (Sent when — for the order summary and the shipping summary) · สถานะ (Status); a shop with no sets shows ยังไม่มีชุดแจ้งลูกค้าเรื่องออเดอร์ (No order notification sets yet))
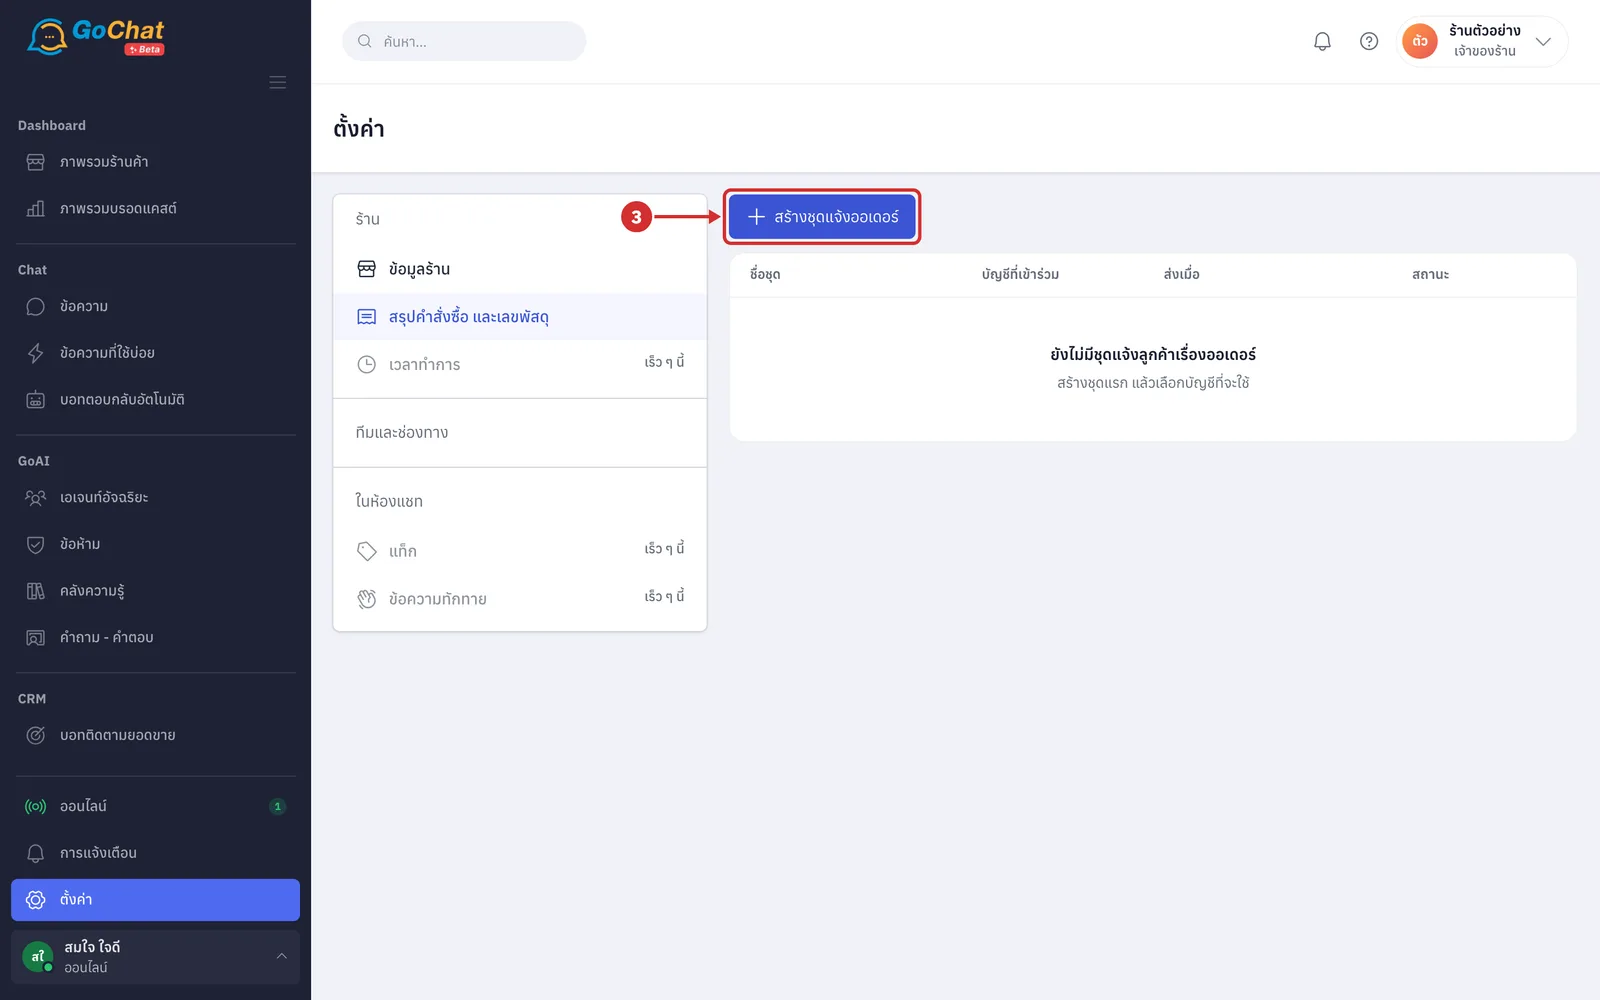
Click สร้างชุดแจ้งออเดอร์ (Create order notification set)
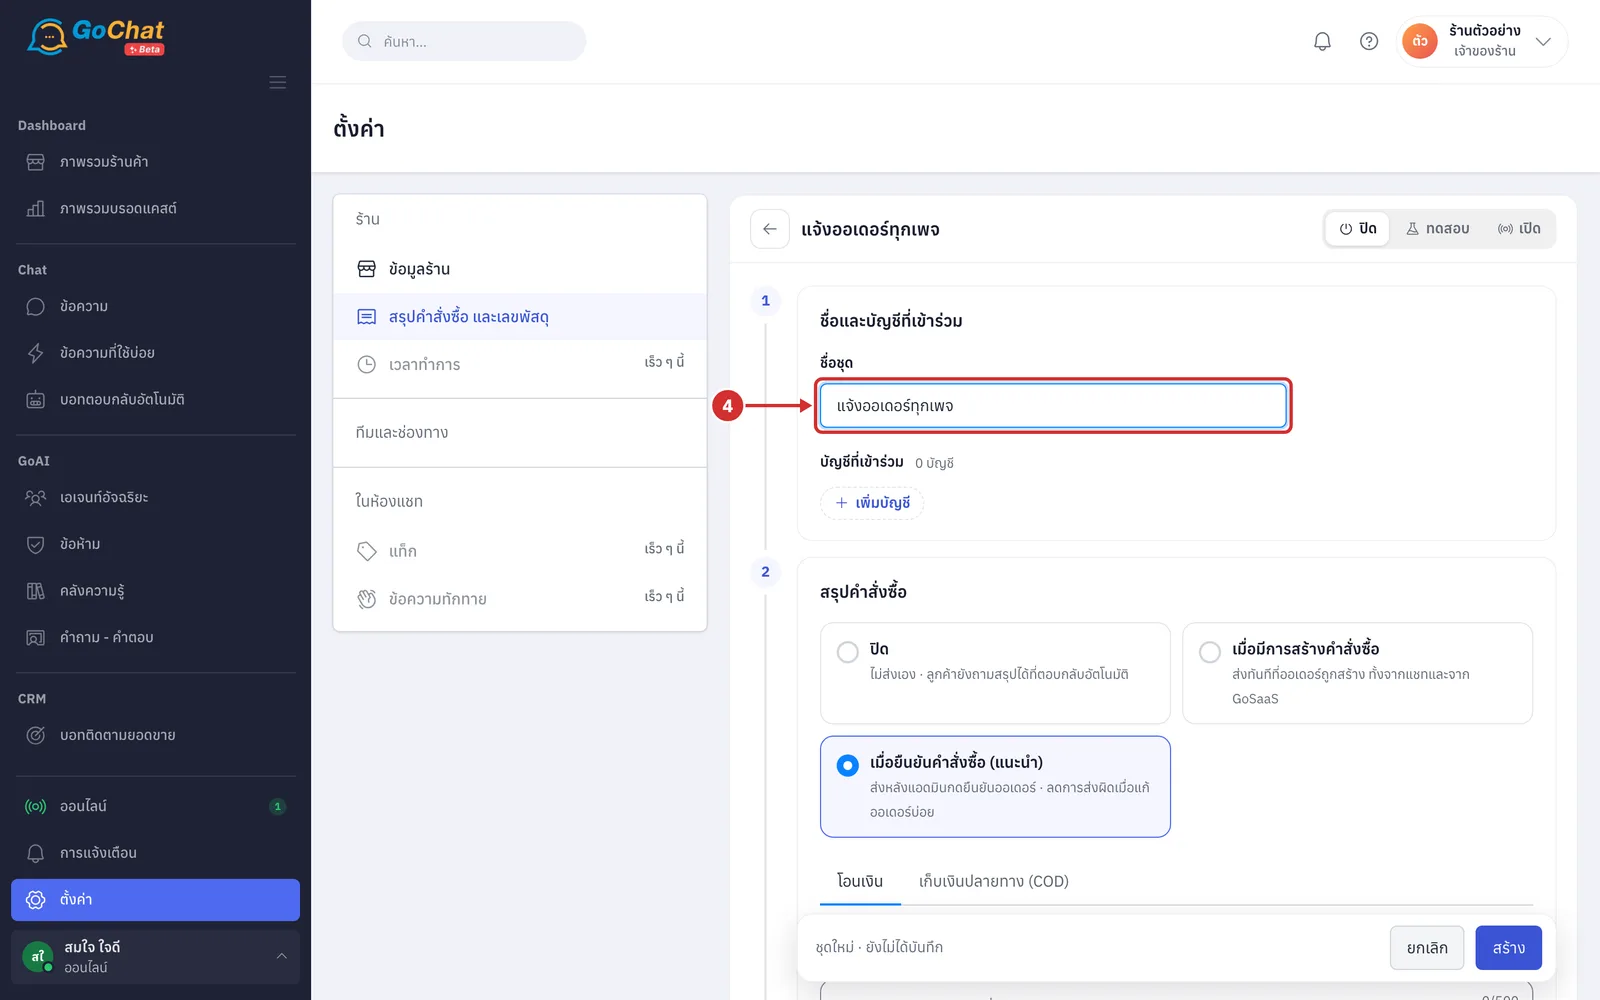
In ชื่อชุด (Set name), enter a name such as "แจ้งออเดอร์ทุกเพจ". It is required, up to 60 characters (only your team sees it, and it replaces ชุดใหม่ (New set) at the top of the set)
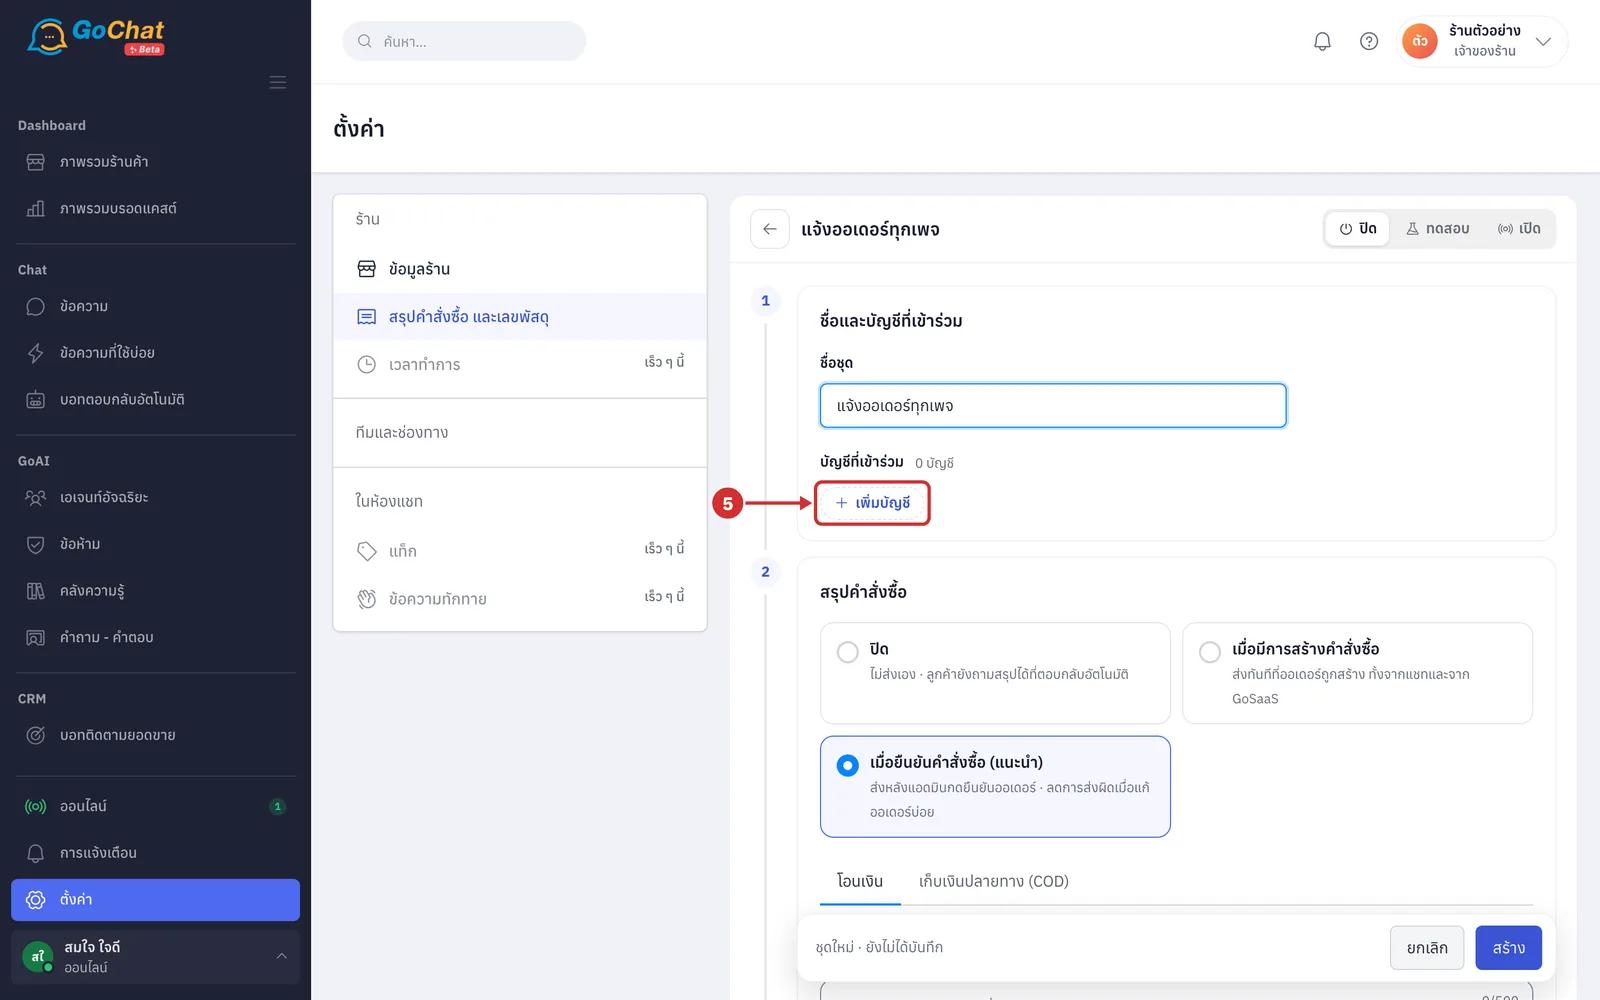
Under บัญชีที่เข้าร่วม (Participating accounts), click เพิ่มบัญชี (Add account)
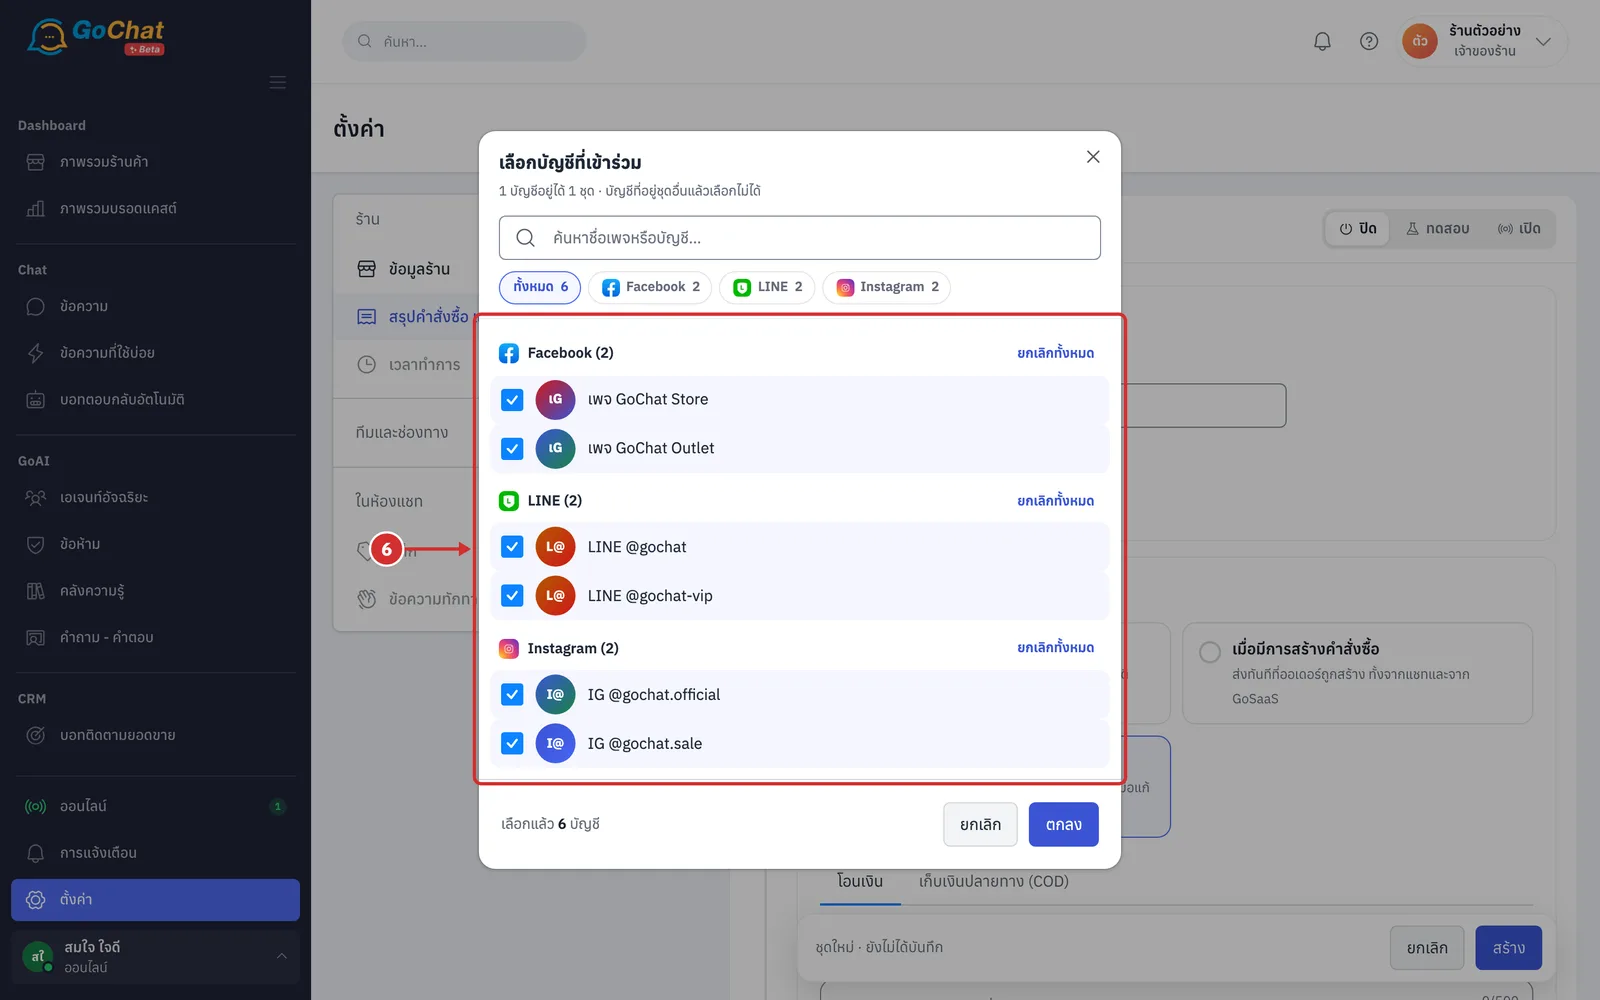
In the เลือกบัญชีที่เข้าร่วม (Choose participating accounts) window, tick the accounts that use this set, or click เลือกทั้งหมด (Select all) at the top of each channel (once all are chosen it changes to ยกเลิกทั้งหมด (Clear all) · search by page or account name in the box at the top, and filter by channel with the ทั้งหมด (All) · Facebook · LINE · Instagram buttons · an account can belong to only one set; accounts already in another set show อยู่ใน (In) followed by that set's name and cannot be chosen)
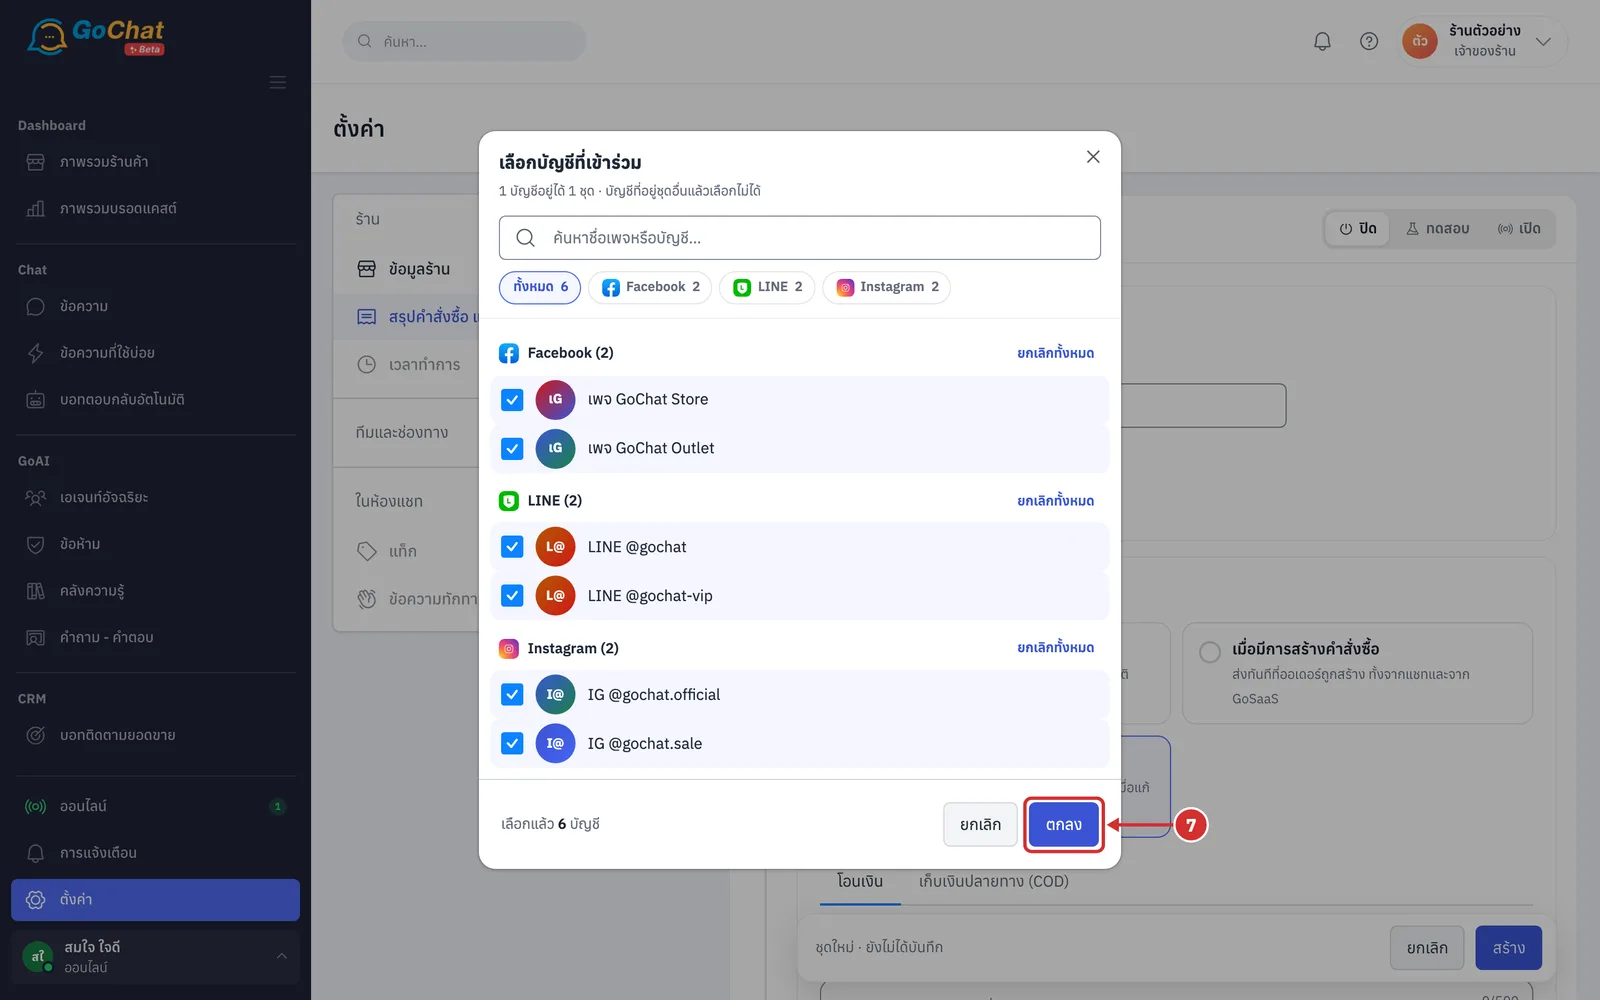
Click ตกลง (OK) (the number of selected accounts is shown to the left of the button · the chosen accounts appear under บัญชีที่เข้าร่วม (Participating accounts) with a count; click × on an account to remove it)
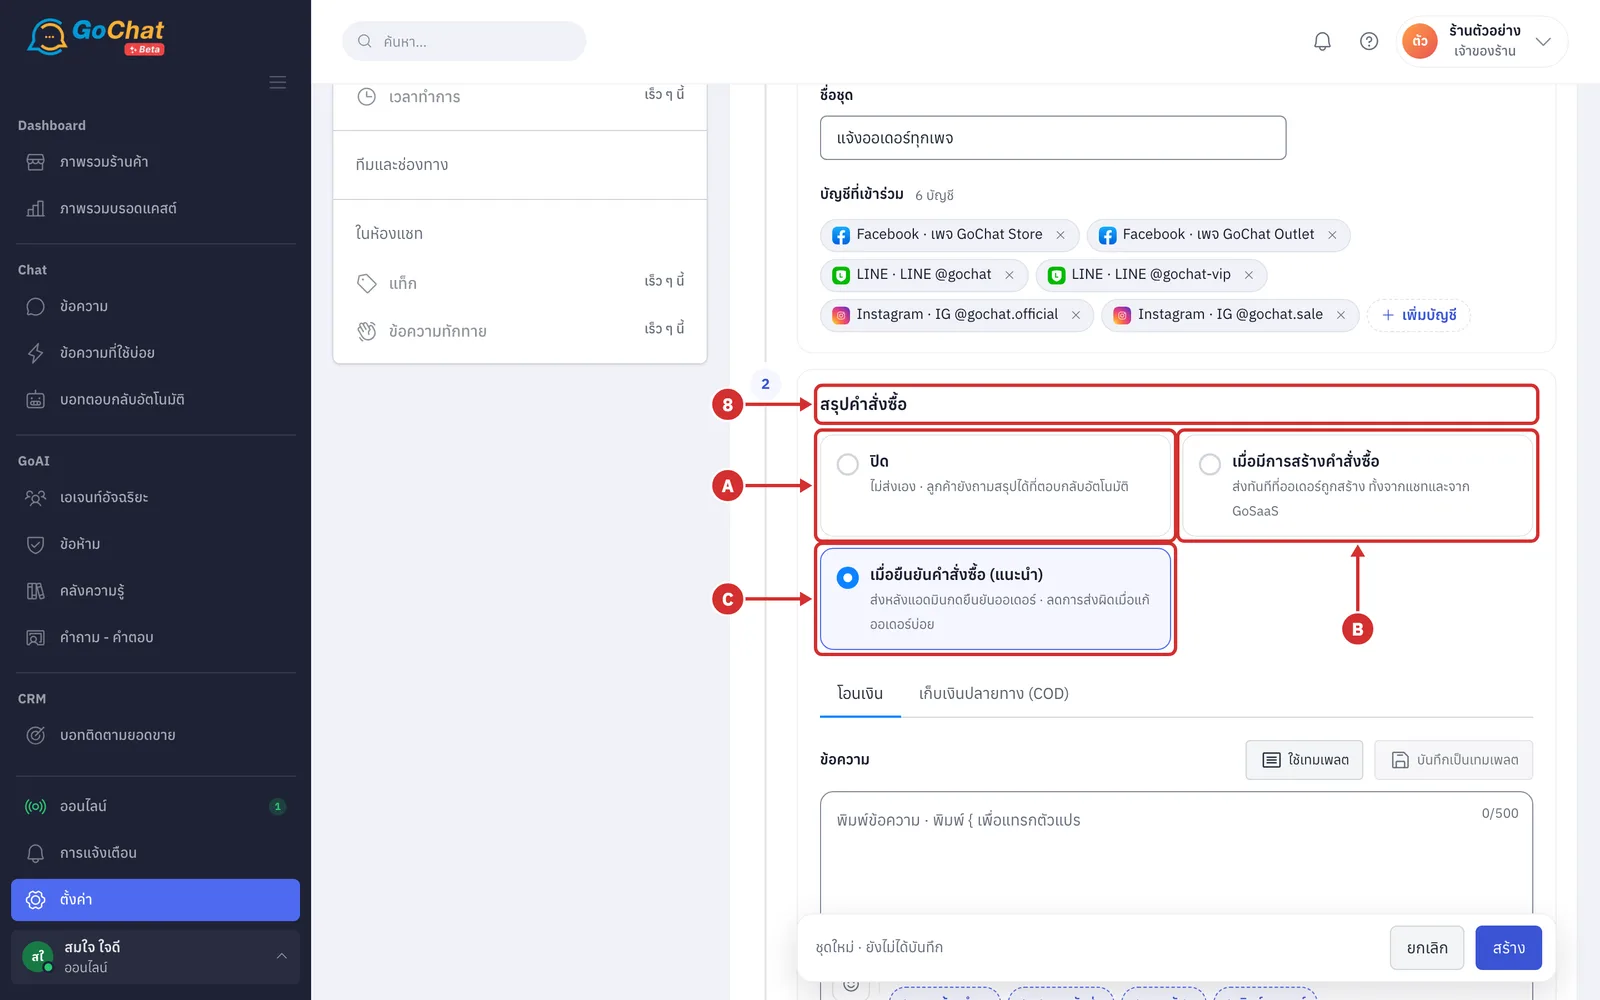
Under สรุปคำสั่งซื้อ (Order summary), choose when the system sends the order summary to the customer. There are 3 options:
A ปิด (Off) — not sent automatically; customers can still ask for the summary through auto-reply
B เมื่อมีการสร้างคำสั่งซื้อ (When an order is created) — sent as soon as the order is created, from chat or from GoSaaS
C เมื่อยืนยันคำสั่งซื้อ (แนะนำ) (When an order is confirmed, recommended) — sent after an admin confirms the order, fewer wrong messages when orders are edited often (the default for a new set)
Choose the โอนเงิน (Bank transfer) or เก็บเงินปลายทาง (COD) (Cash on delivery) tab to enter the message for each payment method. Both tabs need a message (the system sends the message that matches the order's payment method, once per order · a tab with no message shows a red warning icon after you click Create)
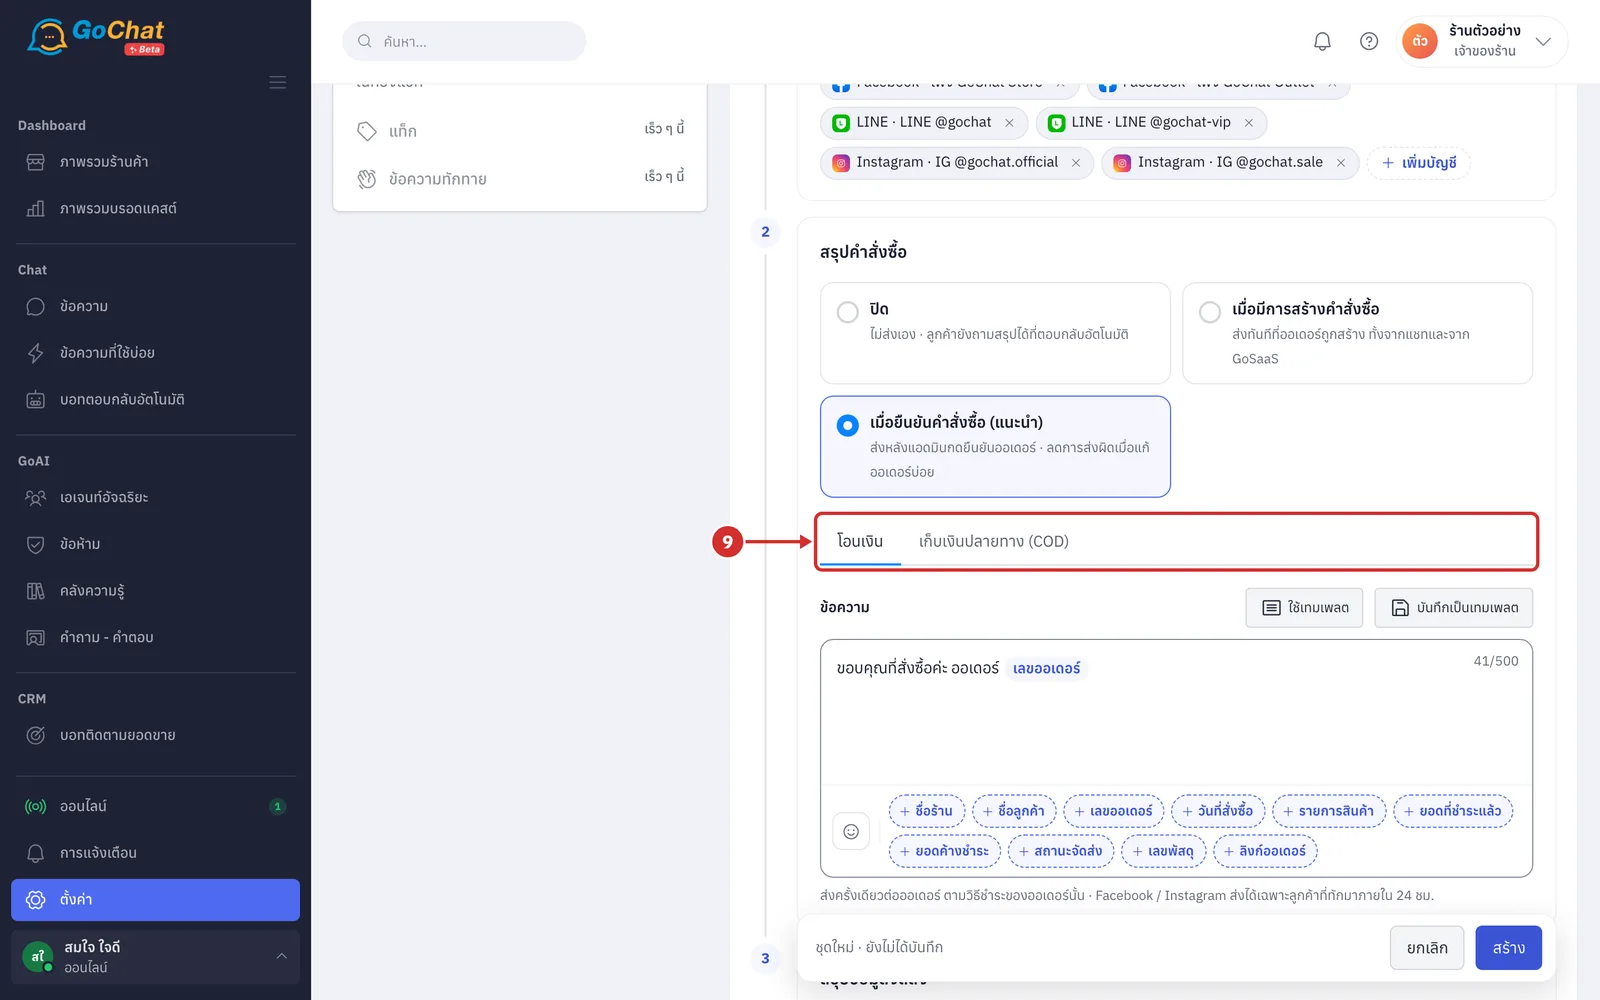
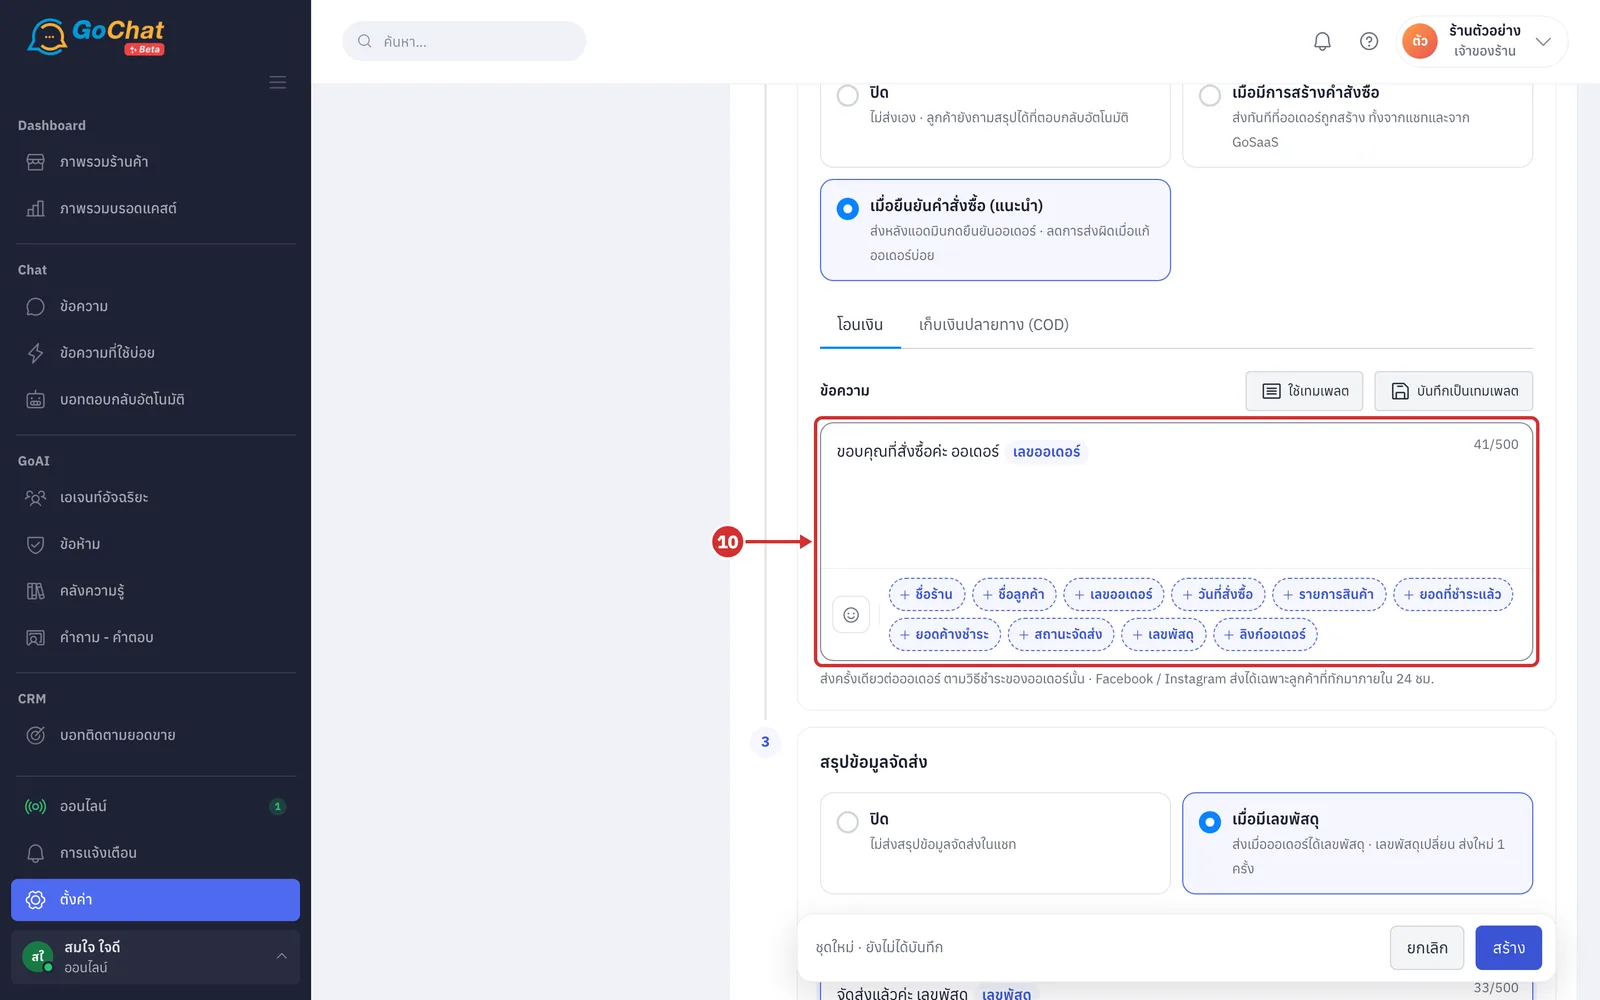
In the ข้อความ (Message) box, type the message, up to 500 characters (the character count is at the right of the box · click a variable name under the box, such as ชื่อร้าน (Shop name) ชื่อลูกค้า (Customer name) เลขออเดอร์ (Order number) รายการสินค้า (Items) ยอดค้างชำระ (Amount due) ลิงก์ออเดอร์ (Order link), or type { to insert a variable; the system replaces it with the order's real data when sending · click the smiley icon to insert an emoji)
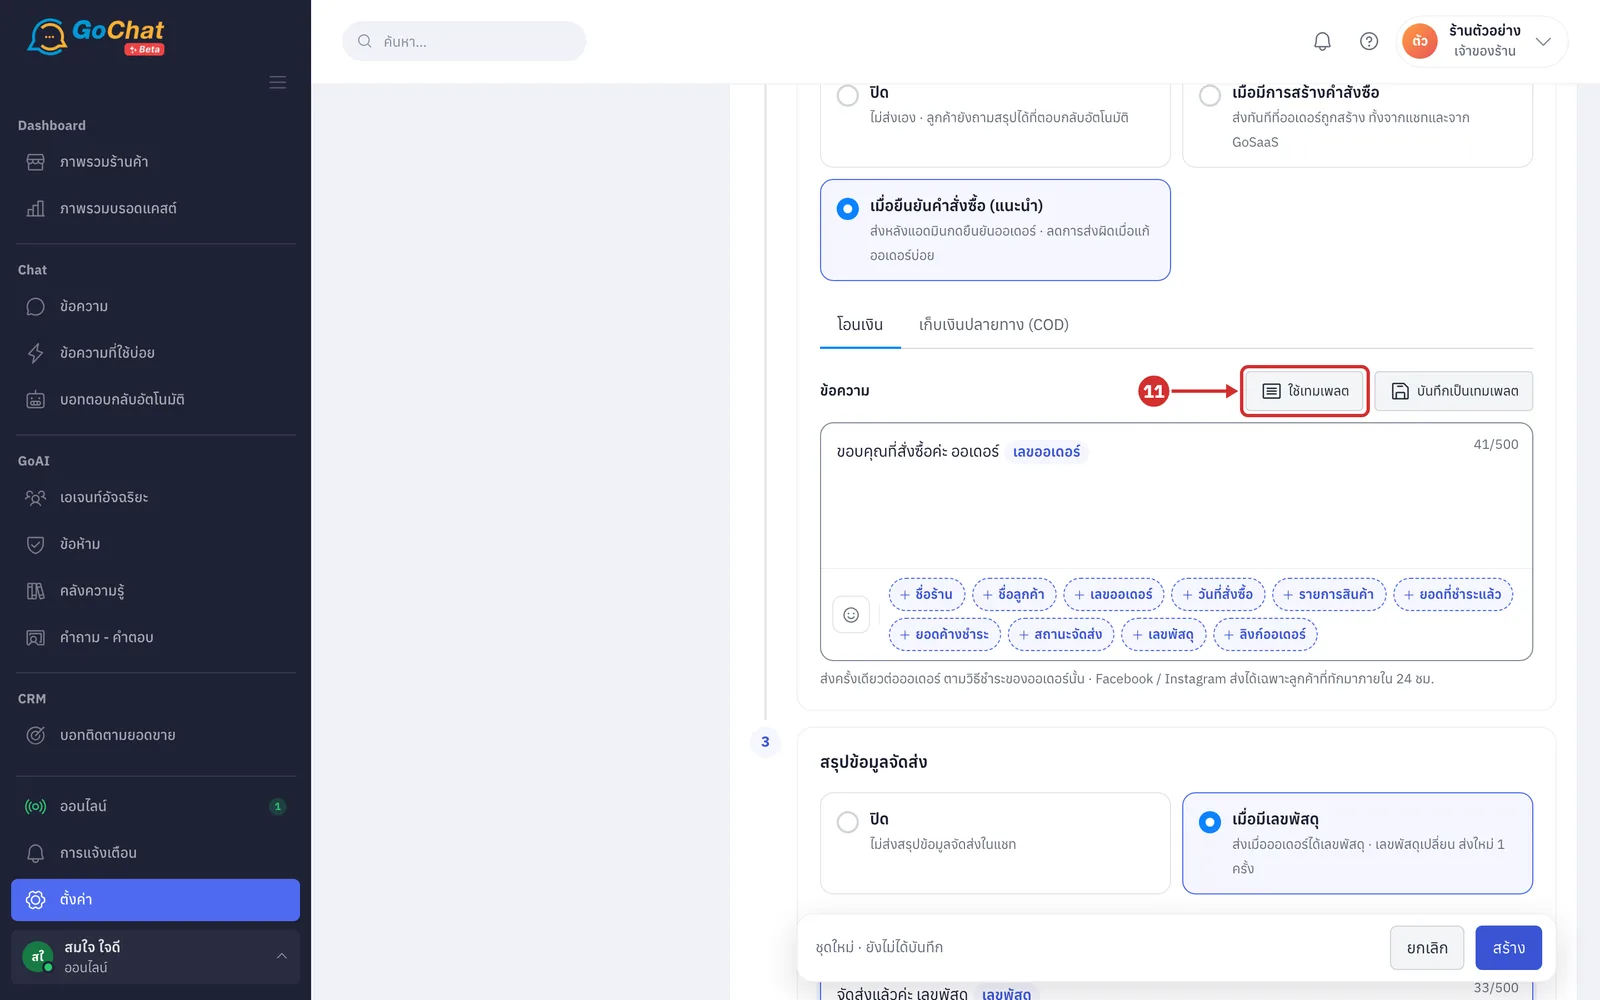
To use a message your shop has prepared, click ใช้เทมเพลต (Use template) instead of typing
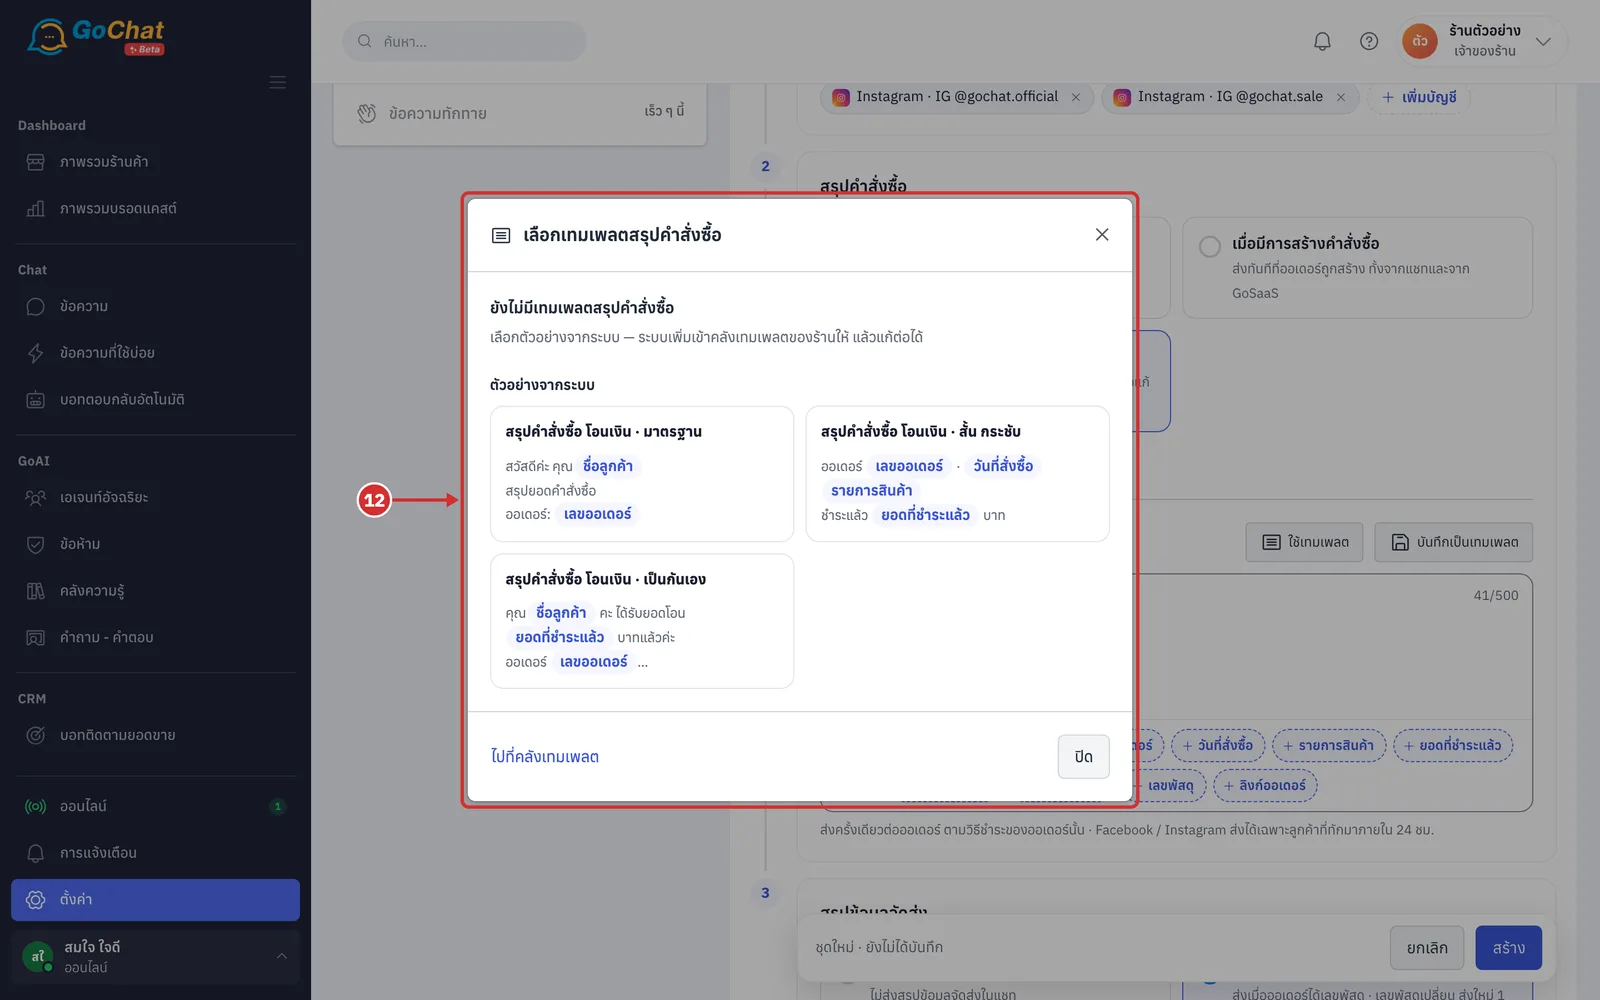
In the เลือกเทมเพลตสรุปคำสั่งซื้อ (Choose an order summary template) window, choose a template from your shop's library (if your shop has no templates yet, choose from ตัวอย่างจากระบบ (System examples); the system adds it to your shop's template library · once chosen, the message box shows the template text and cannot be edited there; use แก้ที่เทมเพลต (Edit the template), เลิกอ้างอิง แล้วแก้เอง (Unlink and edit yourself) or เปลี่ยนเทมเพลต (Change template) instead · click ไปที่คลังเทมเพลต (Go to the template library) to manage all of your shop's templates)
To keep the message you typed for other sets, click บันทึกเป็นเทมเพลต (Save as template) and name the template (type a message first · after saving, this box uses that template right away)
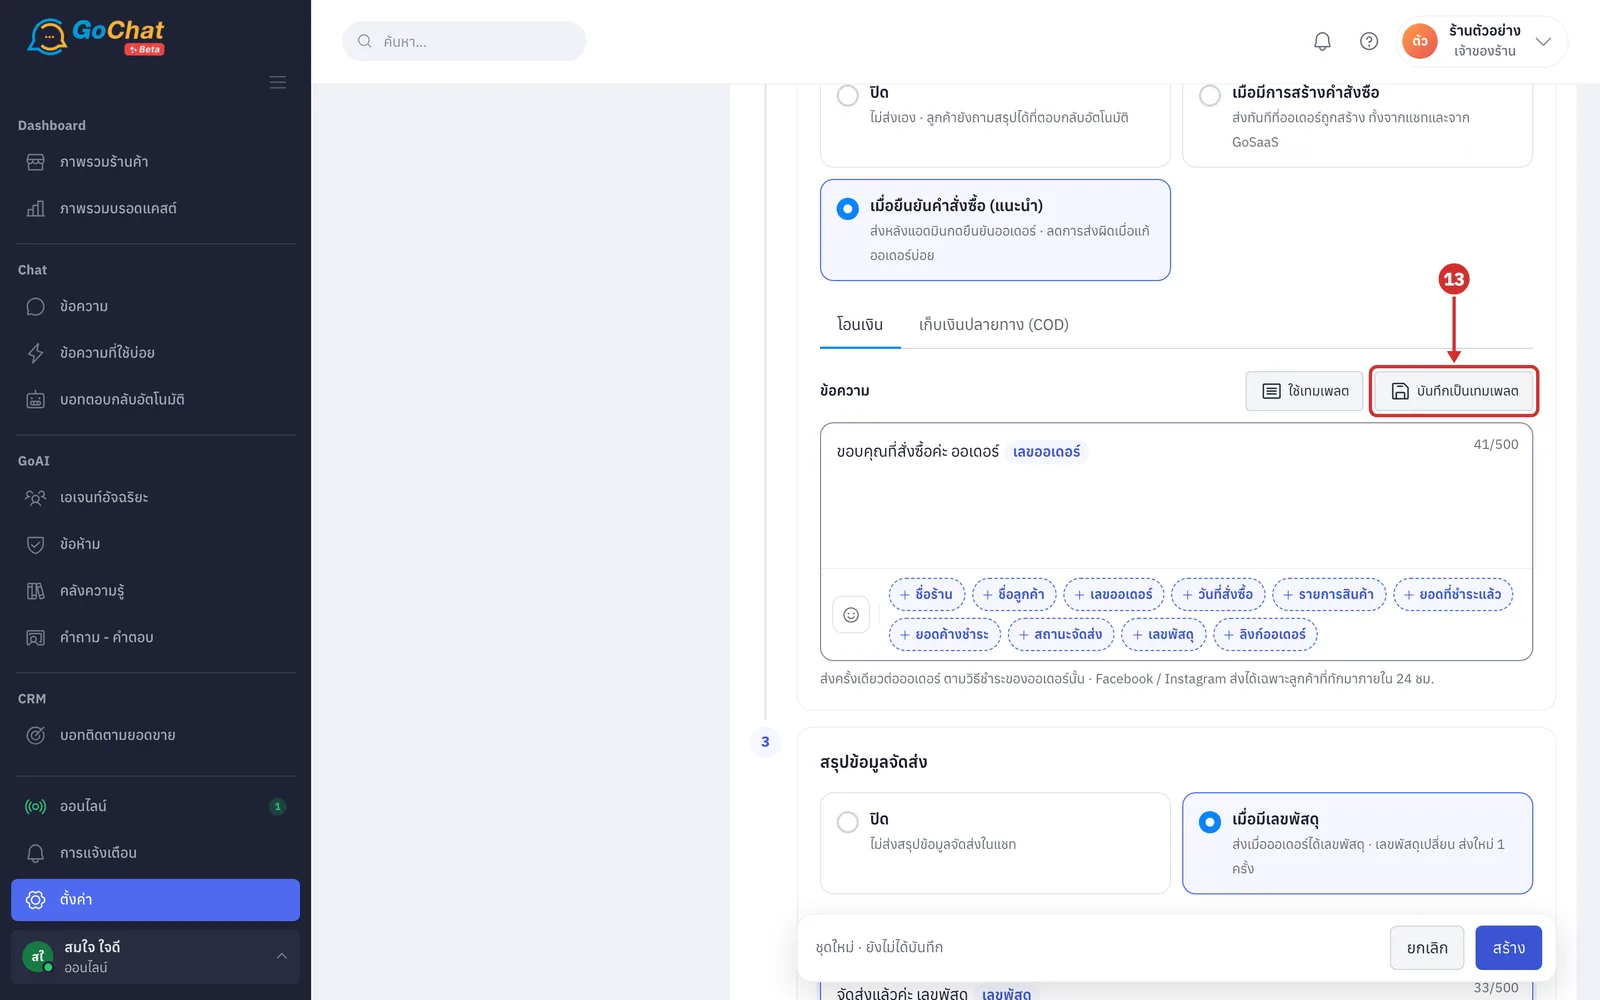
Under สรุปข้อมูลจัดส่ง (Shipping summary), choose when the system sends the shipping details to the customer. There are 2 options:
A ปิด (Off) — no shipping summary in chat
B เมื่อมีเลขพัสดุ (When there is a tracking number) — sent when the order gets a tracking number, and once more if the tracking number changes (the default for a new set)
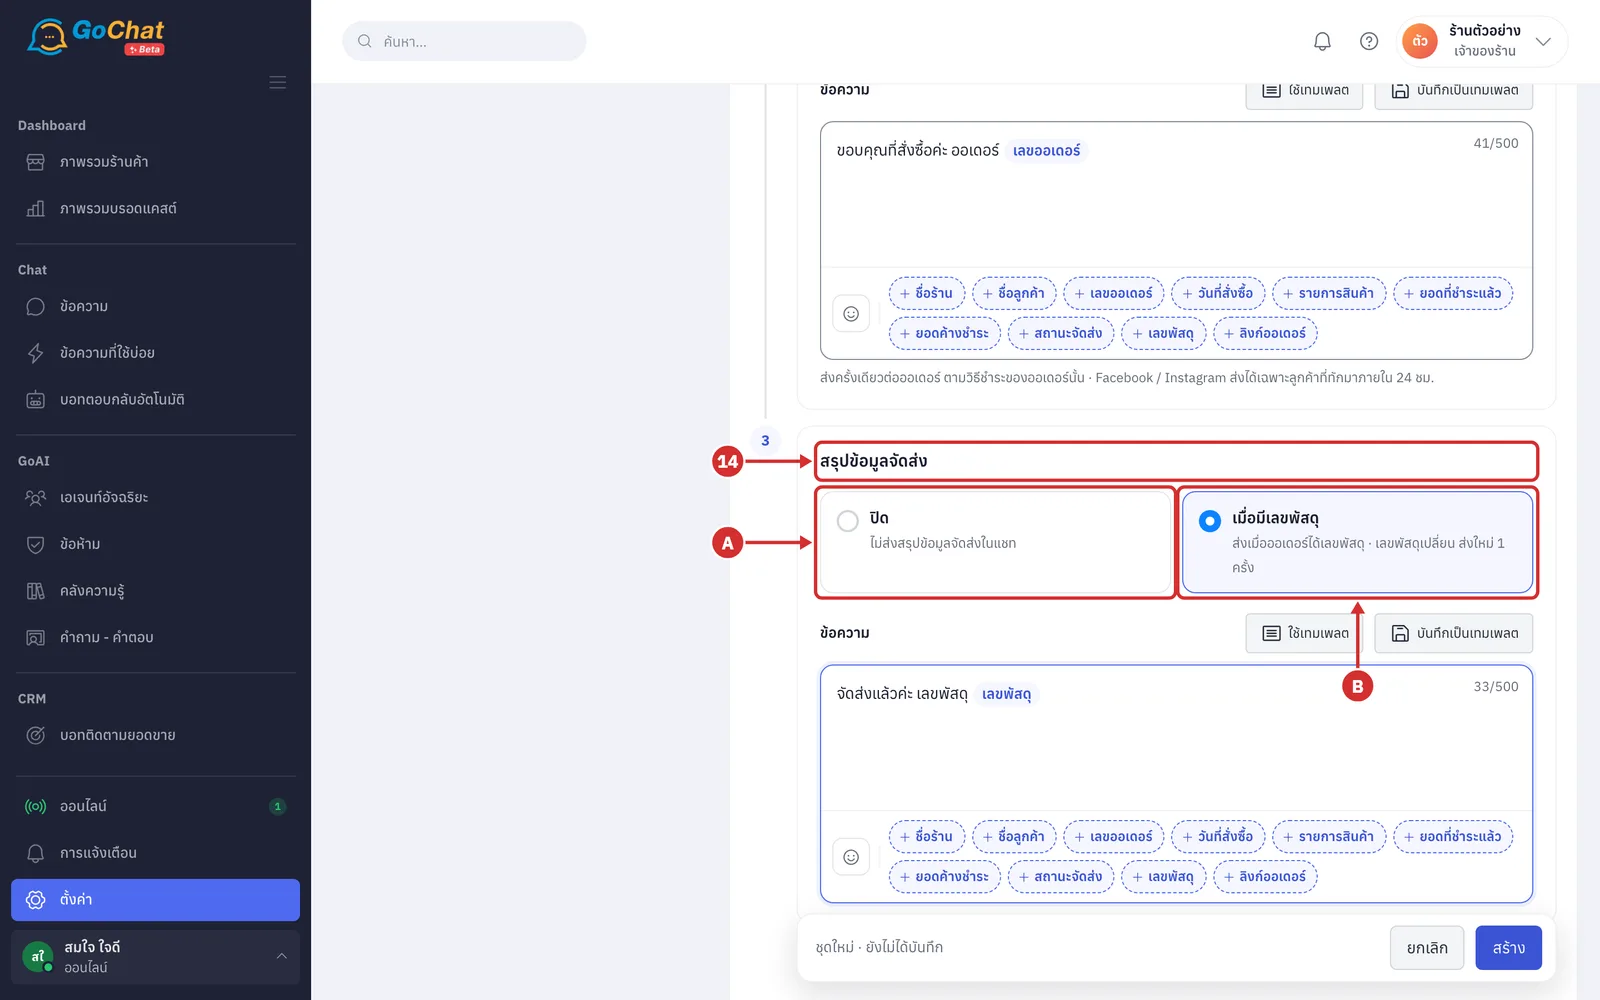
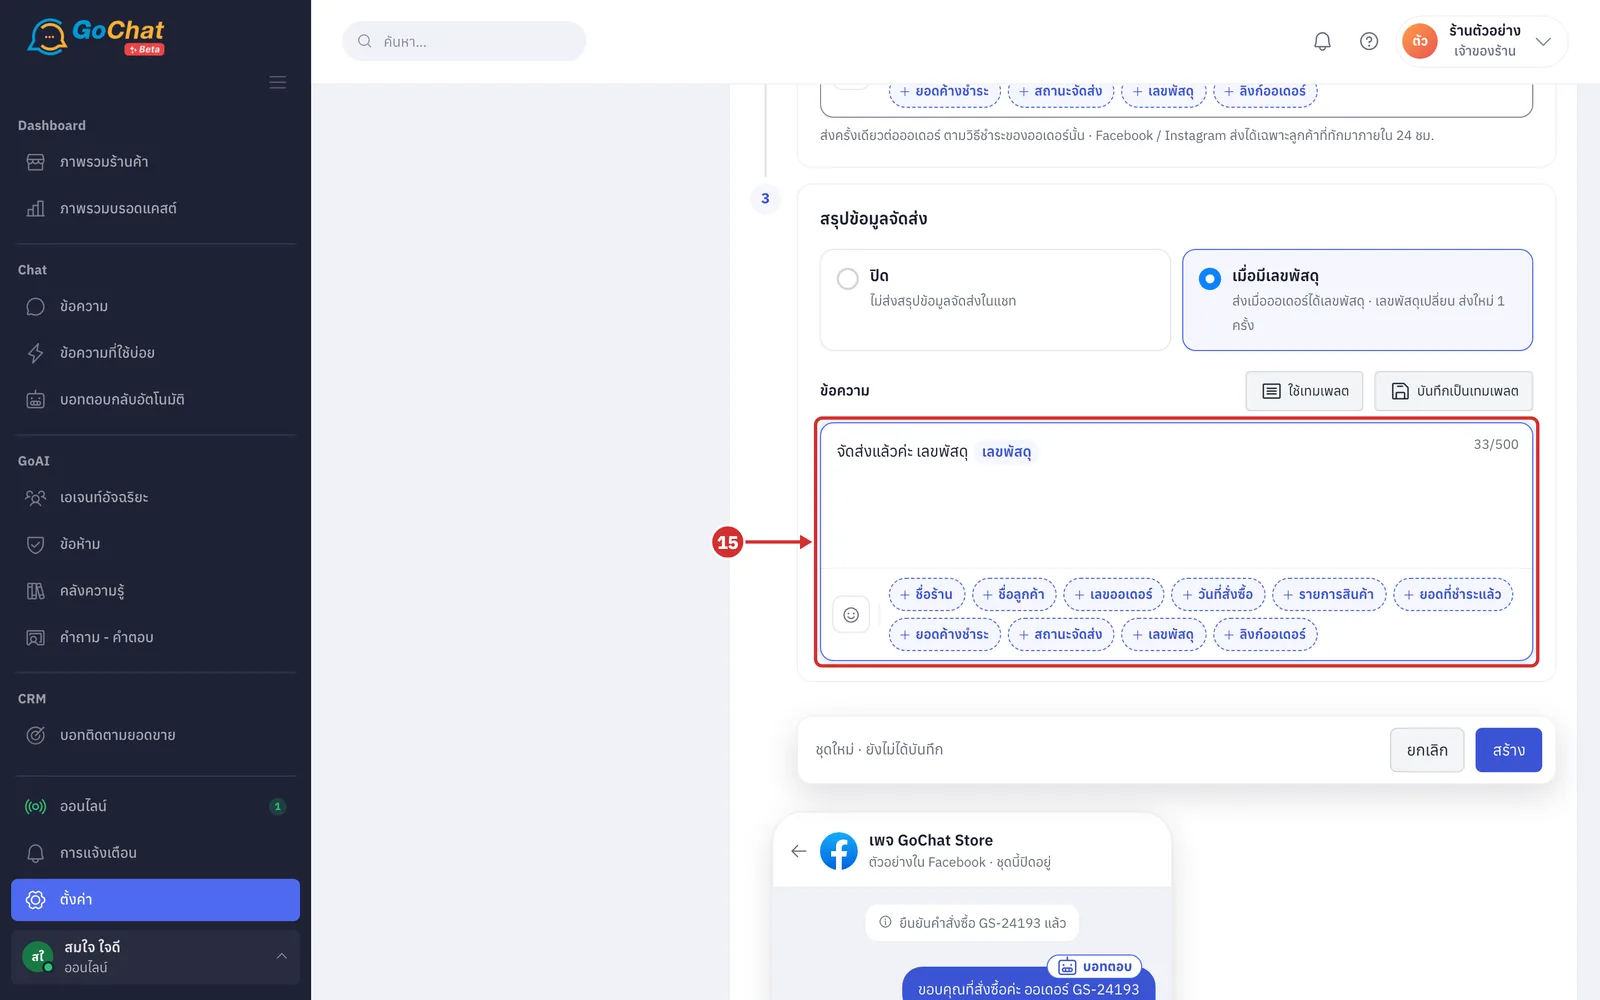
In the shipping summary ข้อความ (Message) box, type the message or click ใช้เทมเพลต (Use template), the same way as steps 10–13 (you can use the เลขพัสดุ (Tracking number) and สถานะจัดส่ง (Shipping status) variables · at least one of the order summary and the shipping summary must be on)
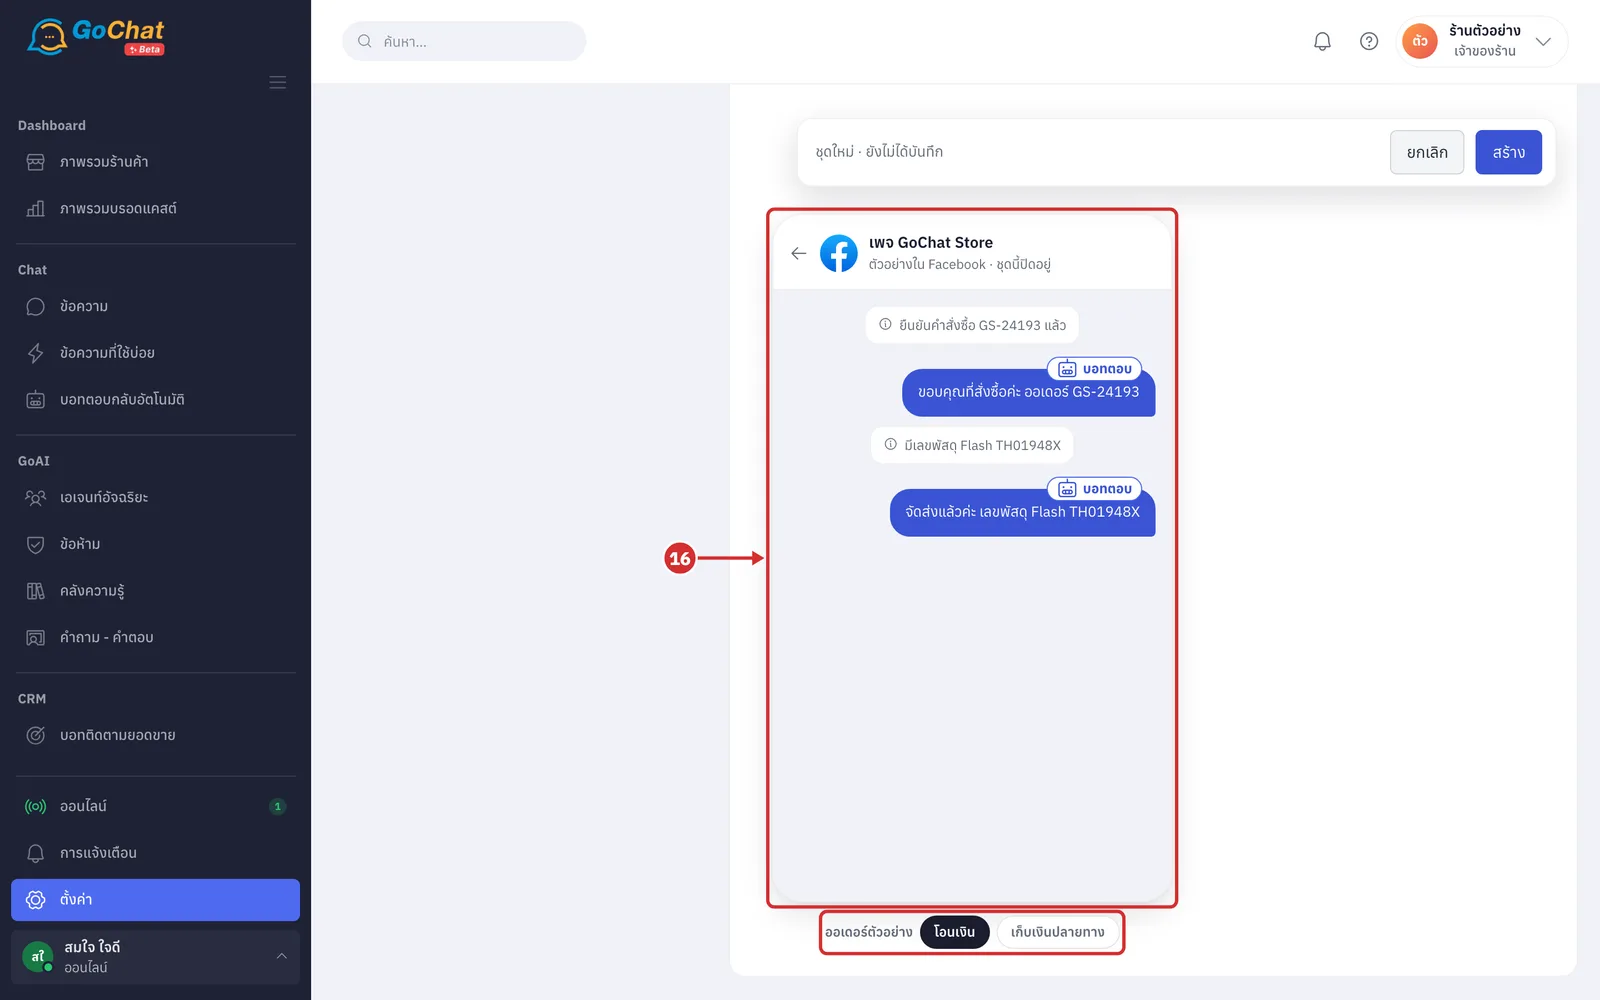
Check the preview of what the customer sees in the phone frame (it uses the first account in the set and fills variables with a sample order · the header shows ชุดนี้ปิดอยู่ (This set is off) while the set is off · click โอนเงิน (Bank transfer) or เก็บเงินปลายทาง (Cash on delivery) under ออเดอร์ตัวอย่าง (Sample order) to switch between the payment methods)
Click สร้าง (Create) in the bar at the bottom (the left of the bar shows ชุดใหม่ · ยังไม่ได้บันทึก (New set · not saved yet) · มีการแก้ไขที่ยังไม่บันทึก (Unsaved changes) or บันทึกแล้ว (Saved) · click ยกเลิก (Cancel) or the back arrow at the top of the set to return to the list without saving)
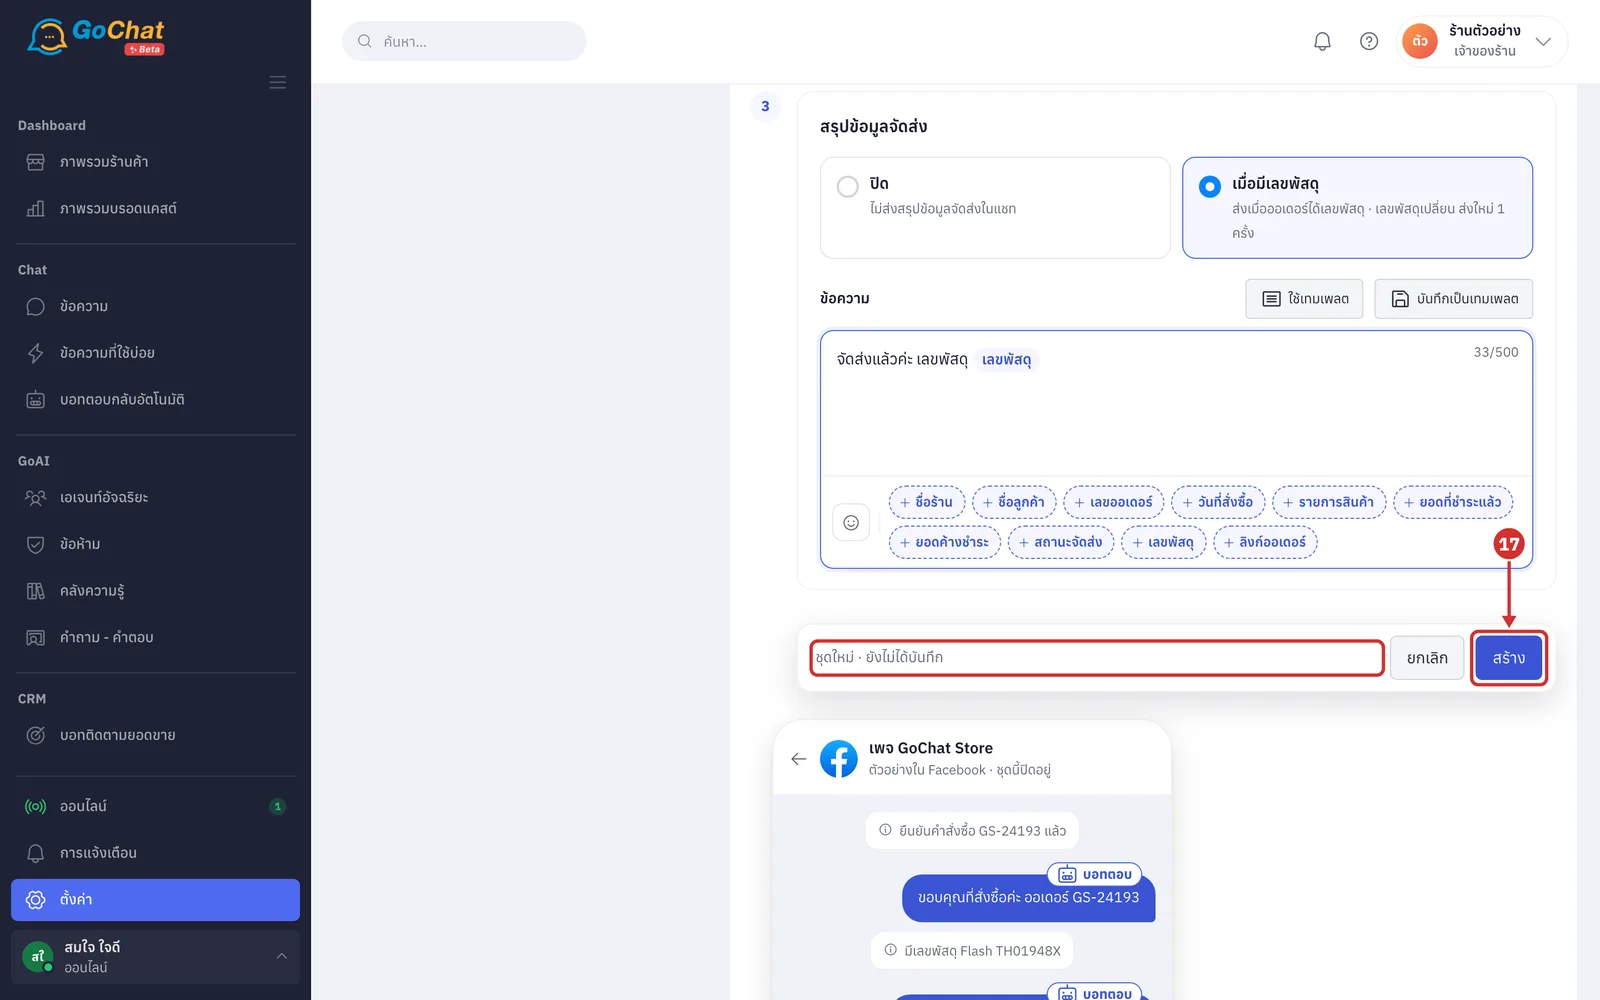
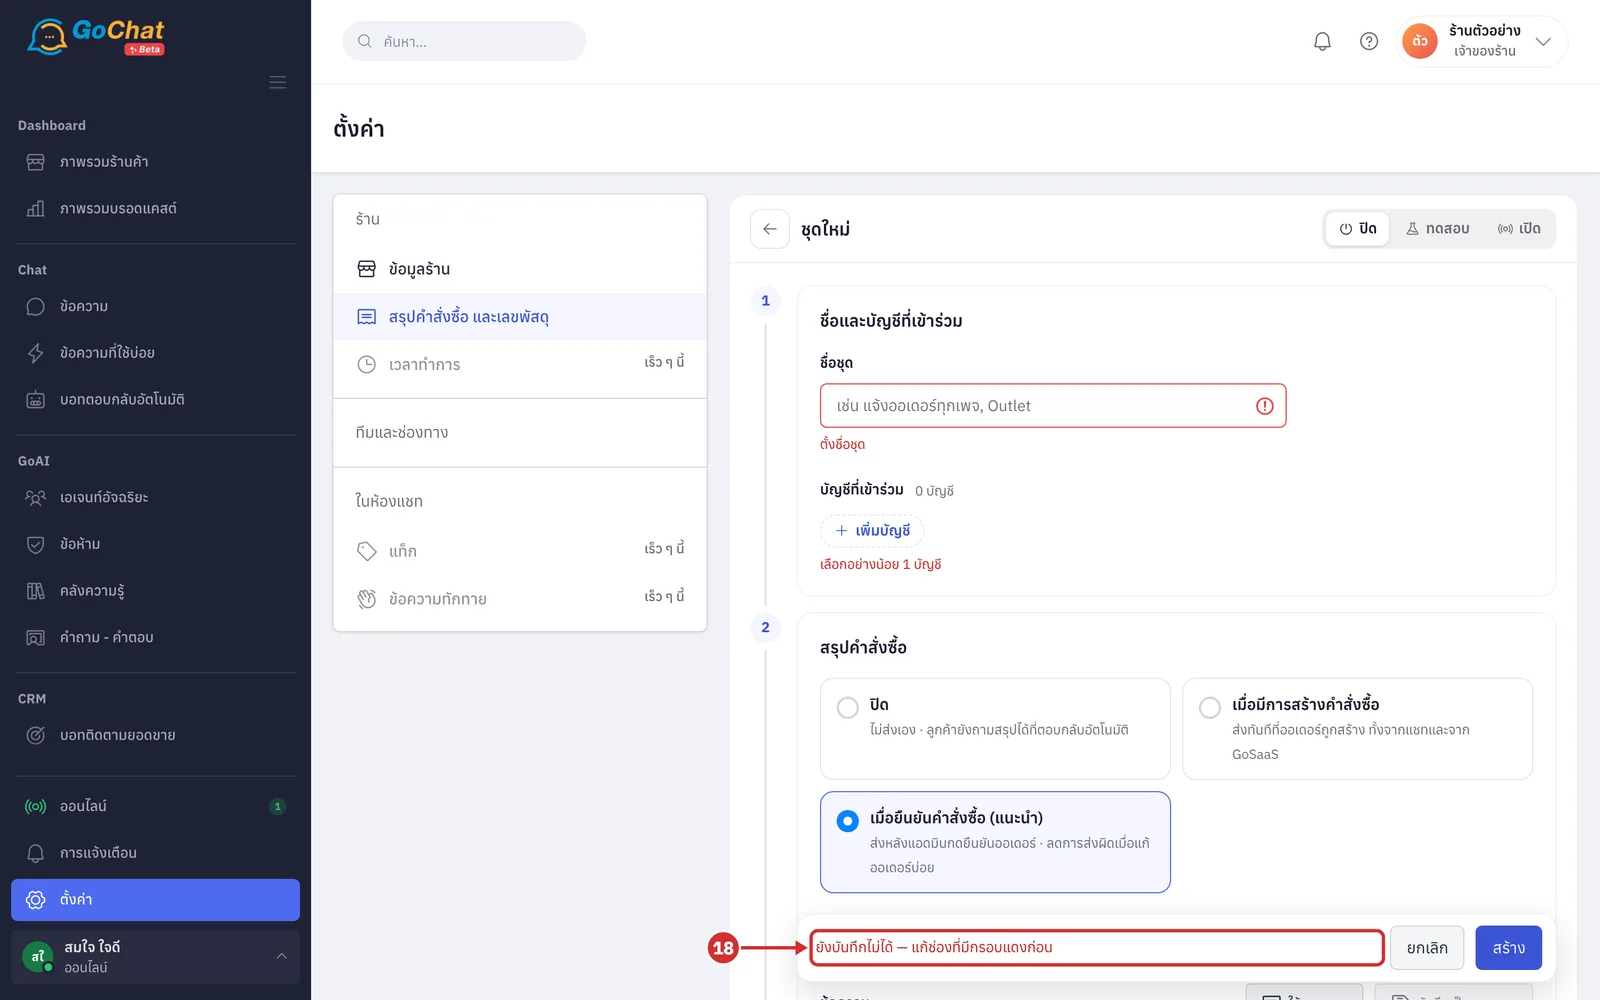
If something is missing, the system shows ยังบันทึกไม่ได้ — แก้ช่องที่มีกรอบแดงก่อน (Cannot save yet — fix the fields outlined in red first) and explains what to fix under each field, such as ตั้งชื่อชุด (Name the set) · เลือกอย่างน้อย 1 บัญชี (Choose at least 1 account)
When it is saved, the system shows บันทึก “set name” แล้ว (“Set name” saved) and stays on the set so you can keep editing (a new set starts as ปิด (Off); customers get nothing until you turn it on)
Testing and turning the set on
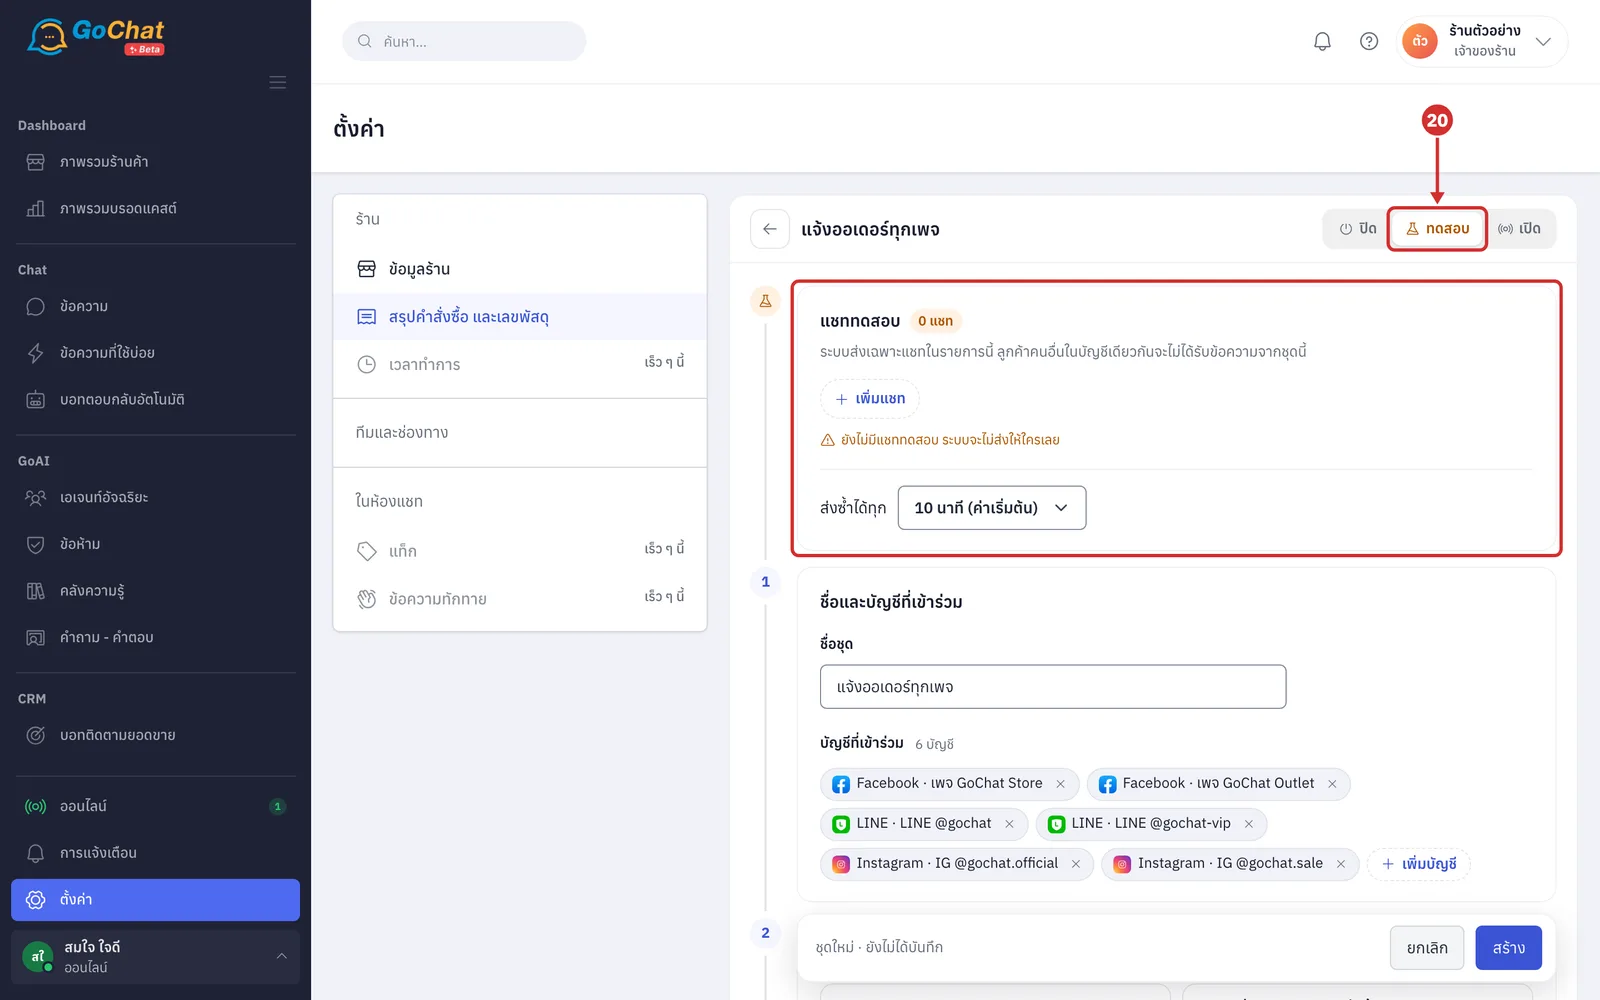
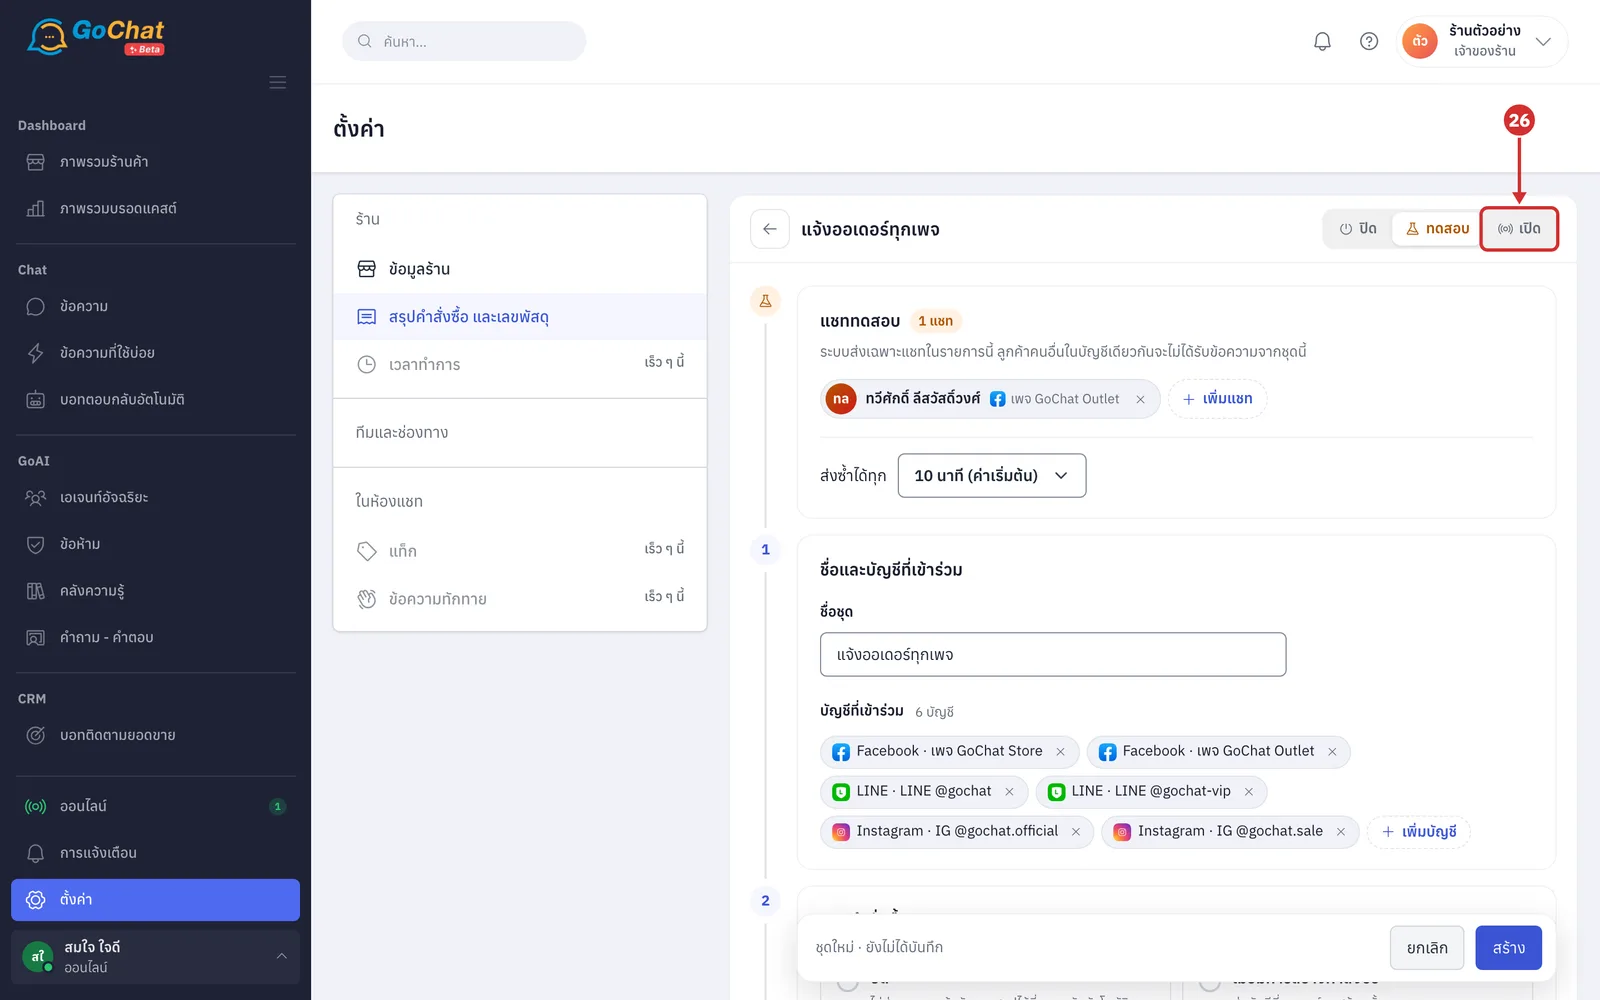
The status buttons at the top right of the set have 3 options: ปิด (Off) sends nothing · ทดสอบ (Test) sends only to the chats in the test list · เปิด (On) sends to every customer of the accounts in the set. After changing the status, click สร้าง (Create) or บันทึก (Save) in the bottom bar for it to take effect.
Click ทดสอบ (Test). The system shows the แชททดสอบ (Test chats) section at the top (the system sends only to the chats in this list; other customers of the same accounts get nothing from this set · with no chats in the list, nothing is sent · you can leave ส่งซ้ำได้ทุก (Can resend every) at its default, because this set already sends once per order)
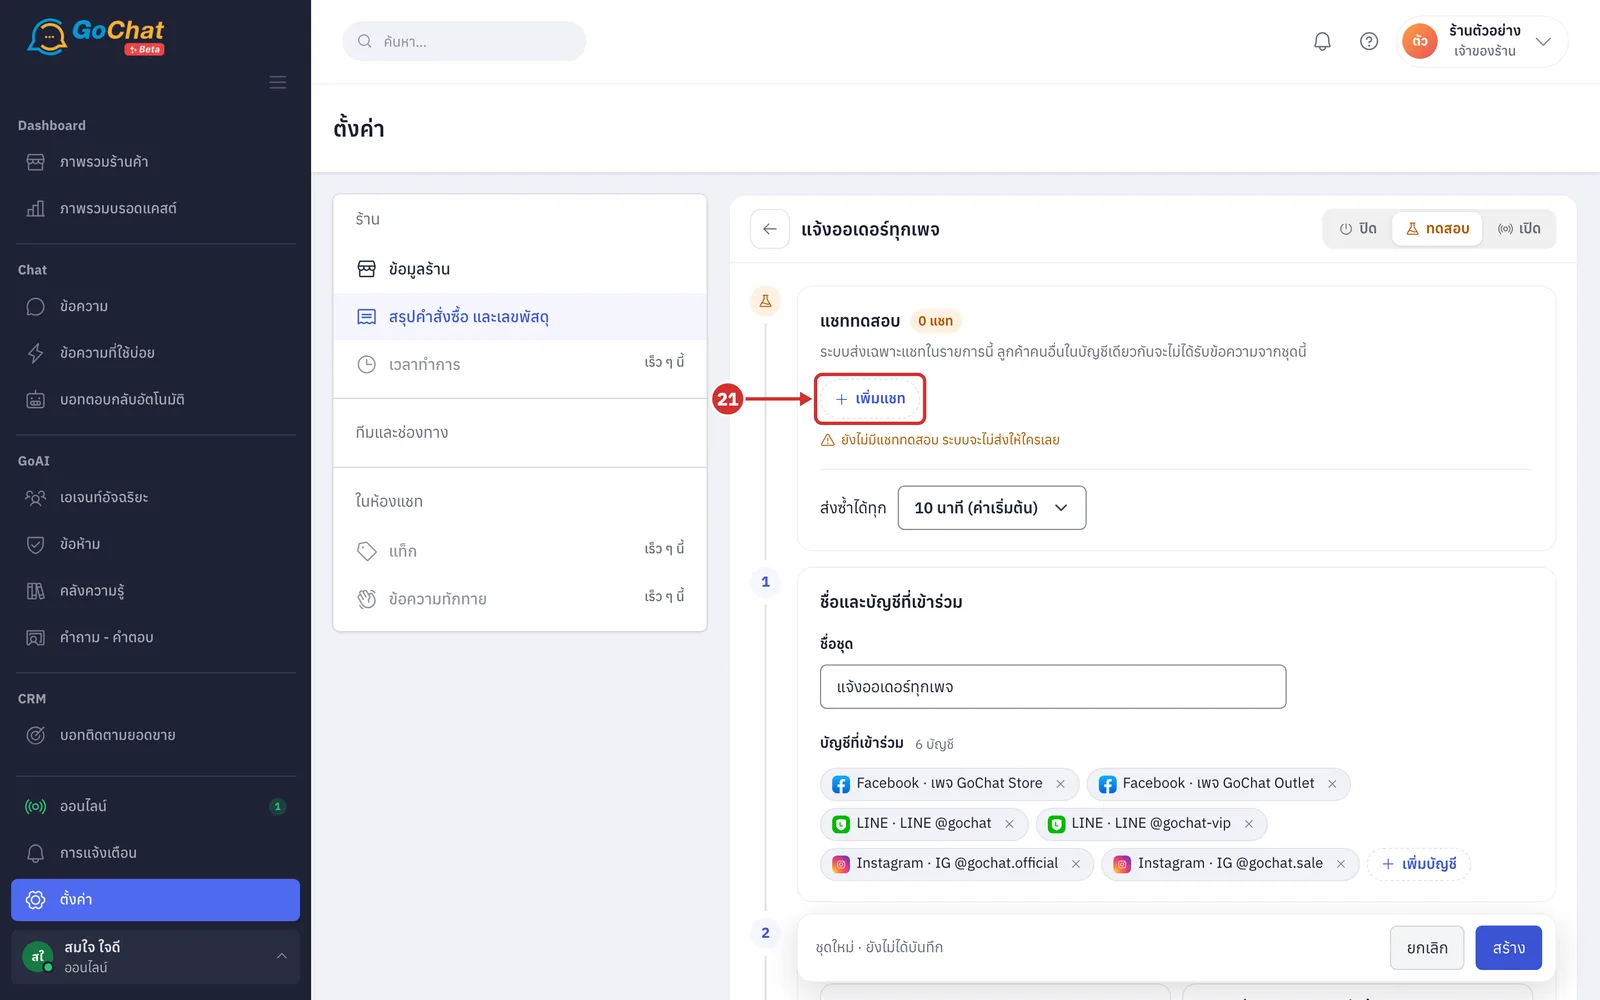
Click เพิ่มแชท (Add chat) (choose accounts in step 6 first)
In the เลือกห้องทดสอบ (Choose test chats) window, tick the chats to test with, up to 20 (search by customer name · your team's own chats are best: message the page or LINE OA from a personal account first, and the chat appears in the list)
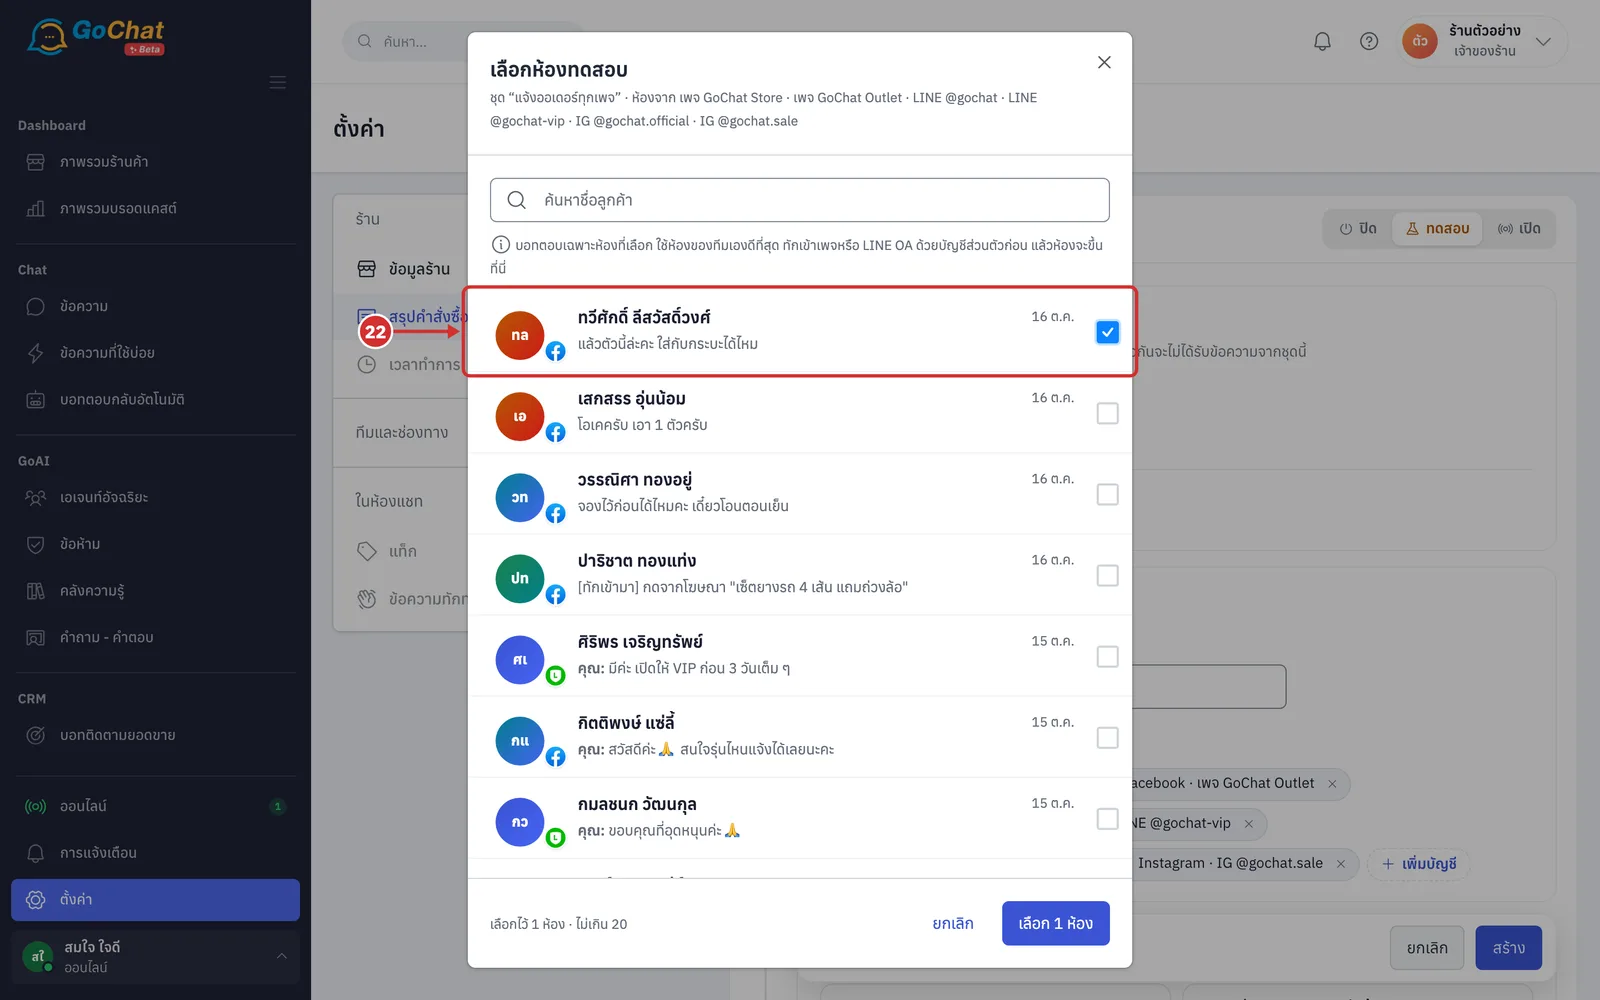
Click เลือก … ห้อง (Choose N chats) (the button shows how many chats you ticked)
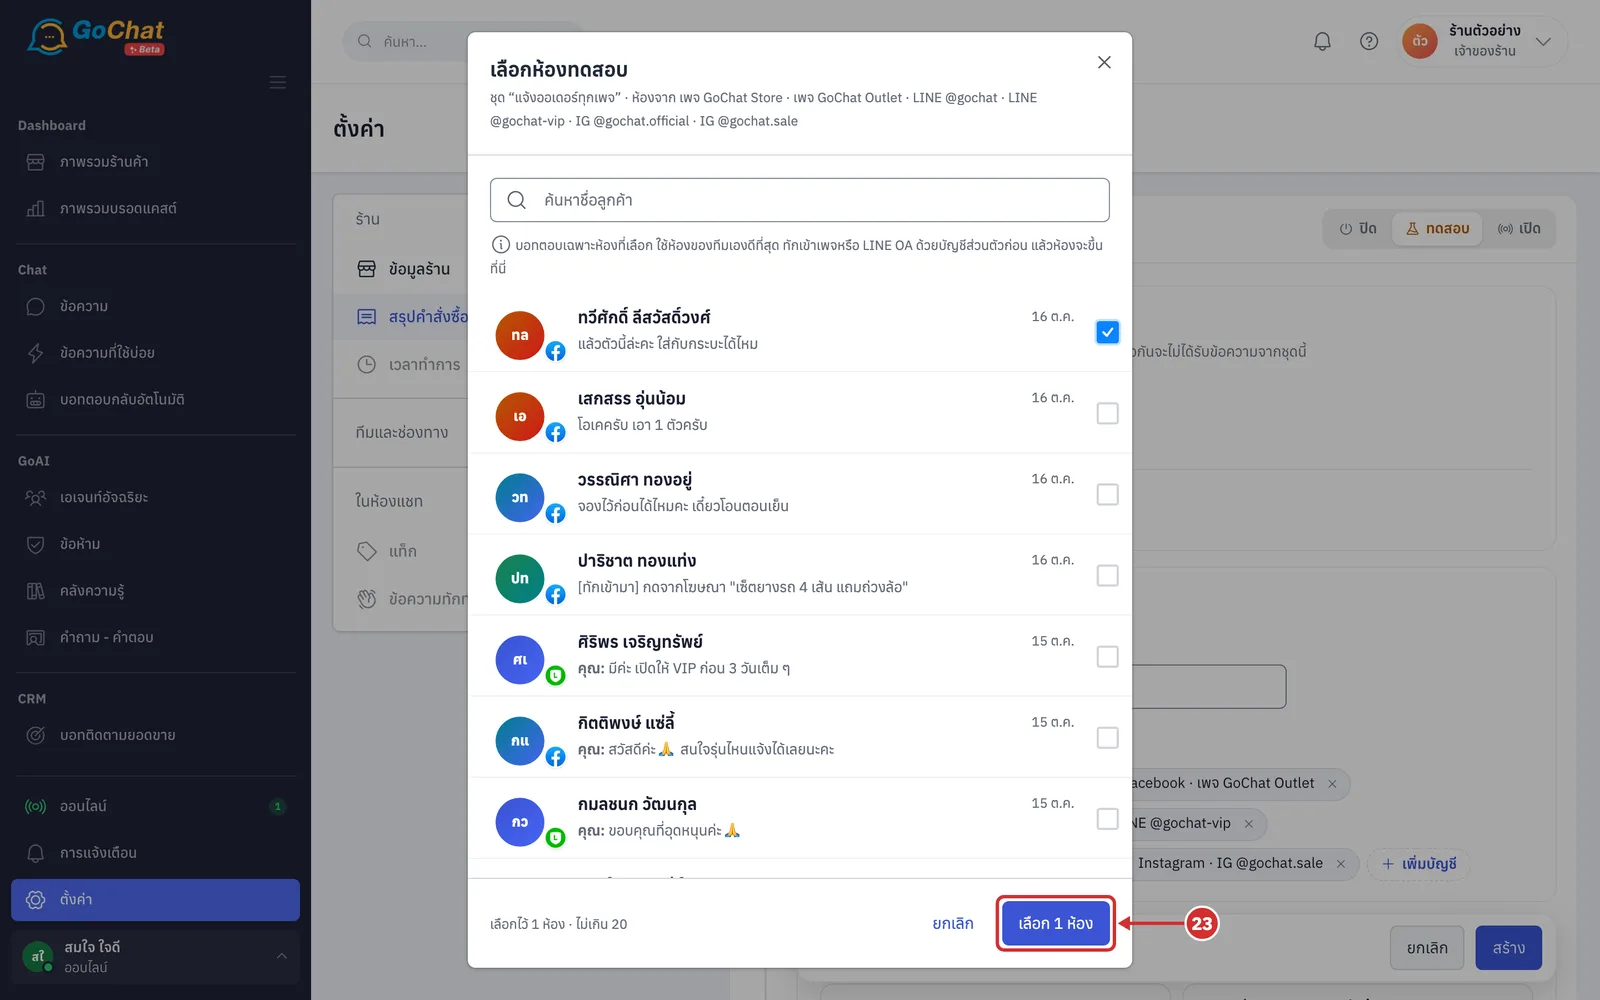
Read the warning ข้อความทดสอบจะส่งถึงคนจริงในห้องที่เลือก (Test messages go to the real people in the chosen chats), then click ยืนยัน ใช้ … ห้องนี้ (Confirm, use these N chats) (click ย้อนกลับ (Back) to choose again)
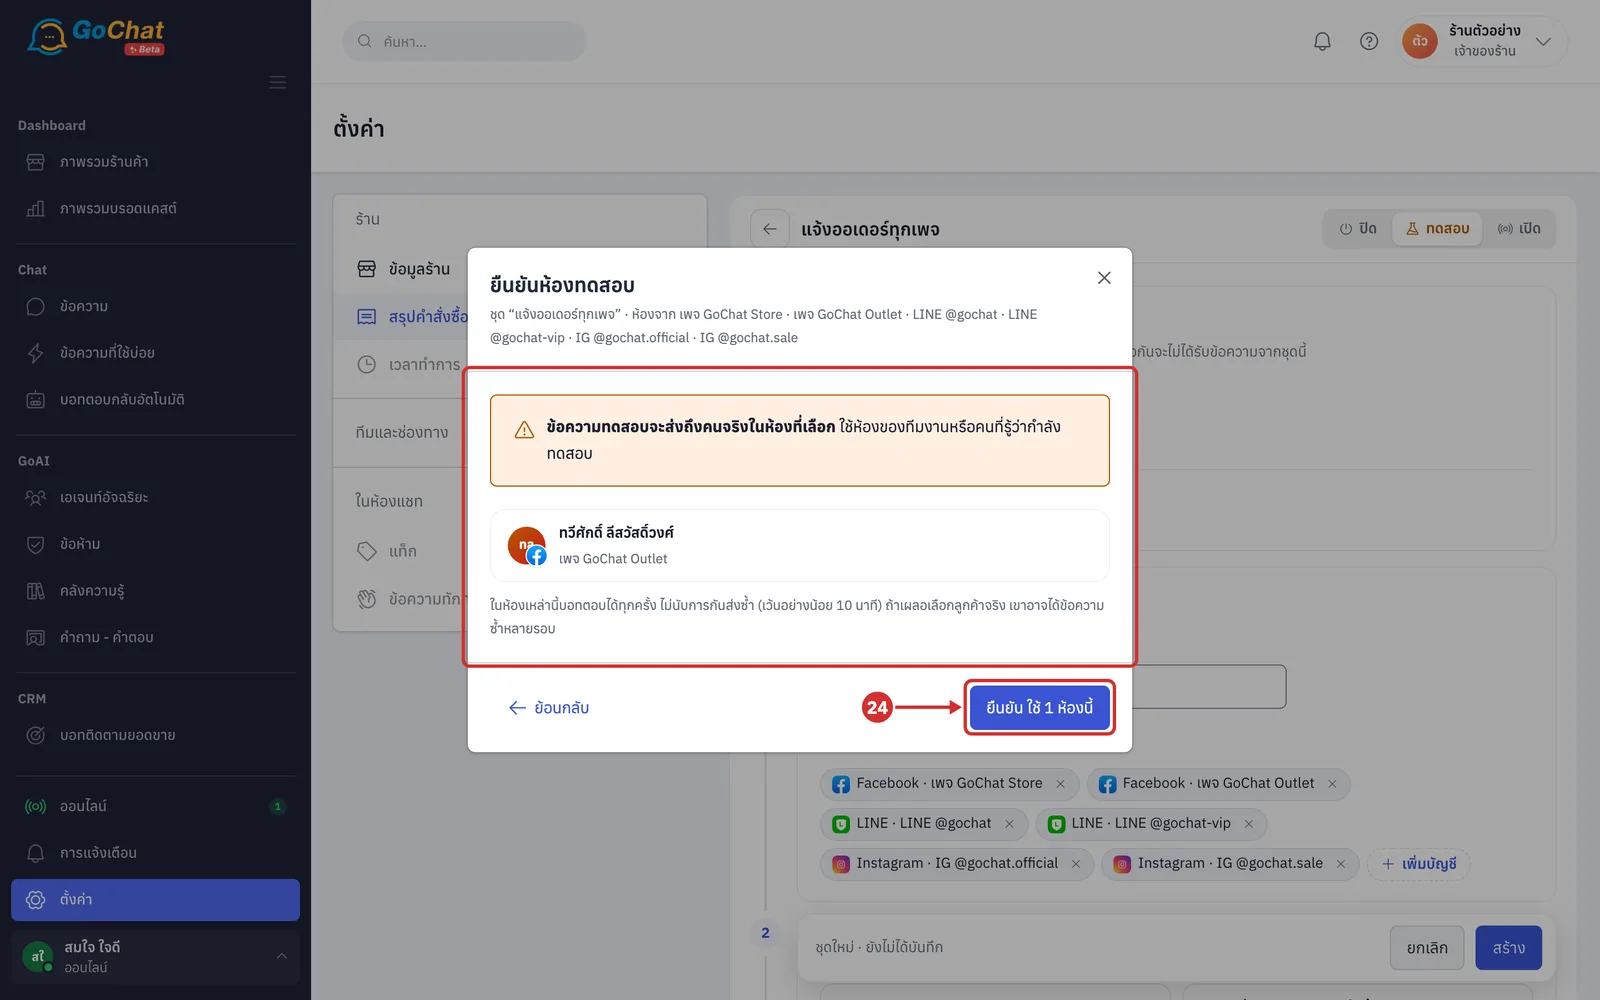
The chosen chats appear in แชททดสอบ (Test chats) (click × on a chat to remove it). Then click สร้าง (Create) or บันทึก (Save) in the bottom bar, and create or confirm an order in that chat to see the message the customer will get
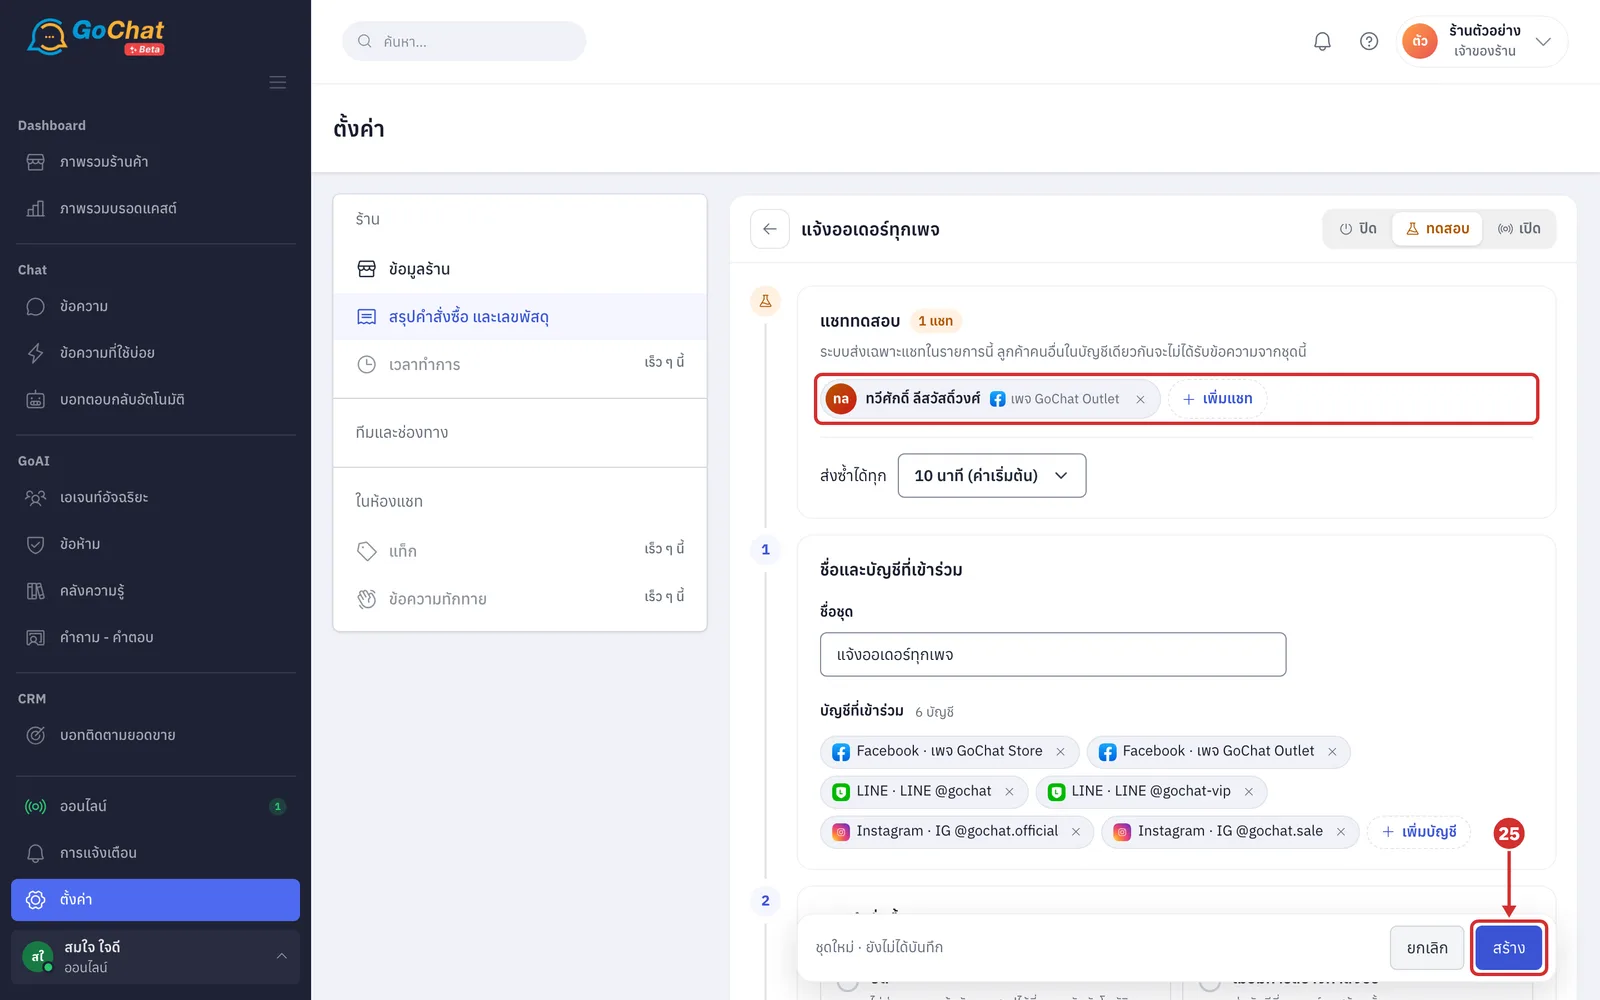
When testing is done, click เปิด (On)
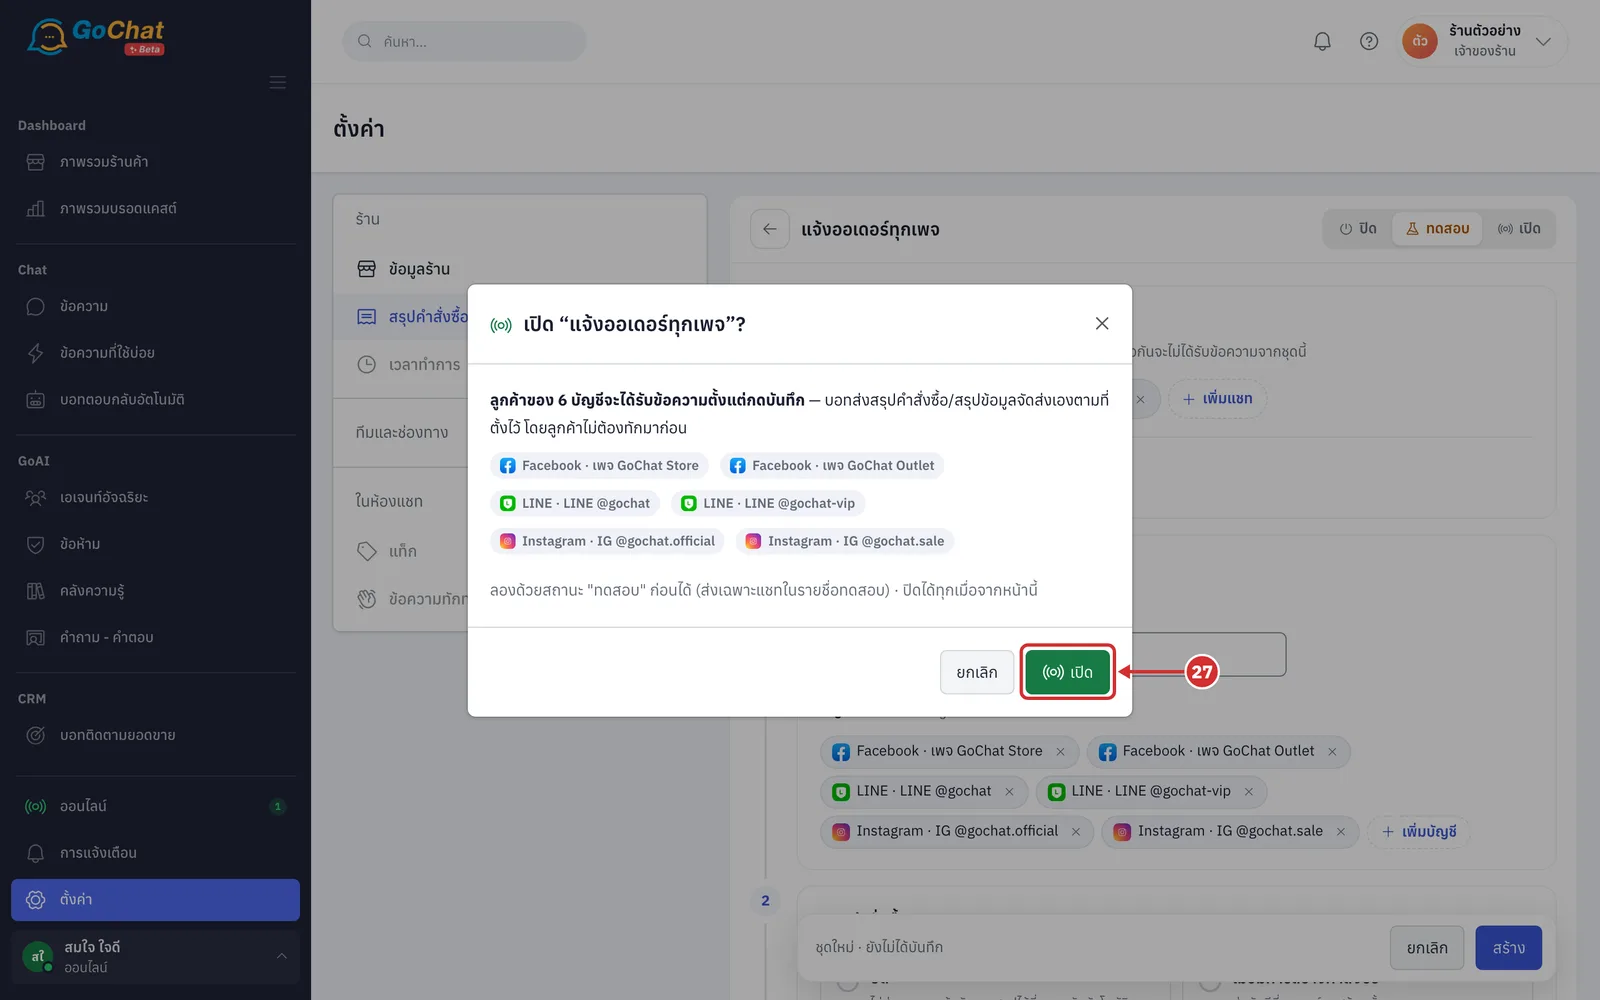
In the confirmation box, check ลูกค้าของ … บัญชีจะได้รับข้อความตั้งแต่กดบันทึก (Customers of N accounts will get messages from when you save), click เปิด (On), then click บันทึก (Save) in the bottom bar. Customers of the accounts in this set start receiving messages (click ยกเลิก (Cancel) to keep the previous status · you can turn the set off from this page at any time)
Editing, viewing history or deleting a set
On the list page, click a set's name to edit it, then click บันทึก (Save) in the bottom bar (until you save, the bar shows มีการแก้ไขที่ยังไม่บันทึก (Unsaved changes))
Click the ประวัติการแก้ไข (Edit history) button (clock icon) at the top of the set to see who created, edited, or turned this set on or off, and when (filter by person or type · click ดูก่อน/หลัง (Show before/after) to compare the old and new values · the last 90 days are shown)
If you no longer need the set, click the delete button (trash icon) at the top of the set, then click ลบชุด (Delete set) in the confirmation window. The system shows ลบ “set name” แล้ว (“Set name” deleted) (customers of the accounts in this set no longer get order or shipping summaries from it · deleted sets cannot be restored; to pause it, set the status to ปิด (Off) instead)
Note: The set sends once per order, based on that order's payment method. Facebook and Instagram can only send to customers who messaged within the last 24 hours. If the page shows a ร้านนี้ยังไม่ได้เชื่อมกับ GoSaaS (This shop is not connected to GoSaaS) box, the set can only send for orders created from the order form in the chat room.