

My profile settings
The โปรไฟล์ของฉัน (My profile) page lets you set the name and picture your teammates see in GoChat, choose a display mode, see the account you sign in with and the shops you belong to, and sign out of devices you no longer use.
Users in every role can open this page. The information here belongs to your own account, not to the shop that is open.
Opening My profile
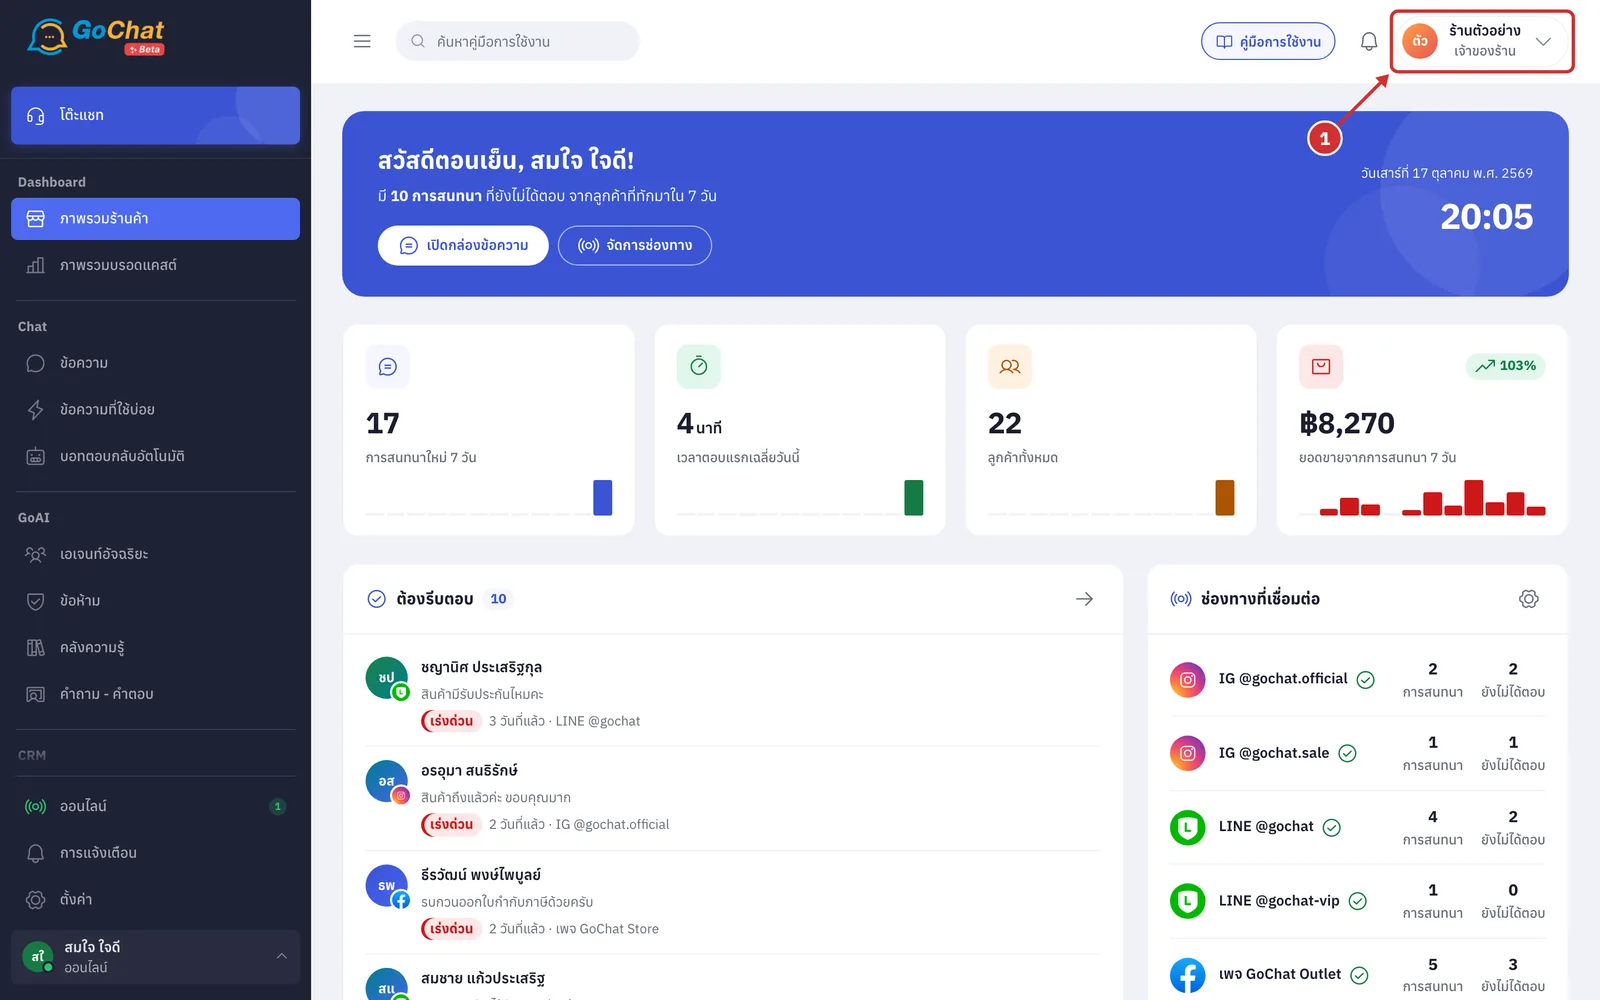
Click the shop name at the top right of the screen
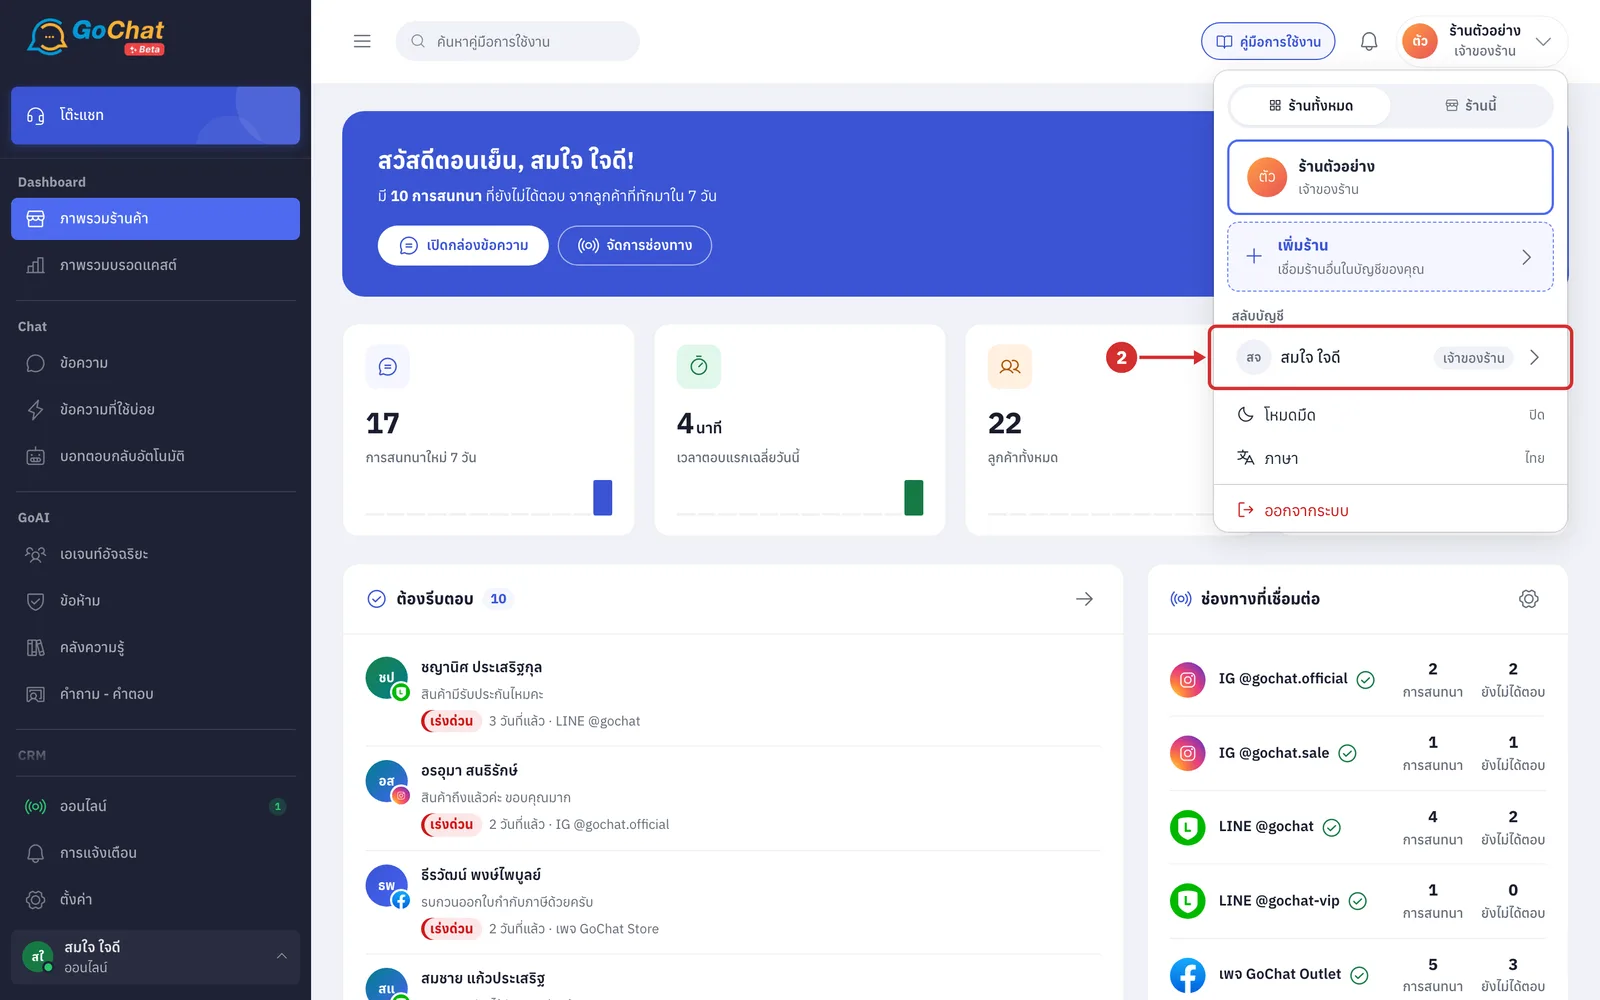
Under สลับบัญชี (Switch account), click the row with your name
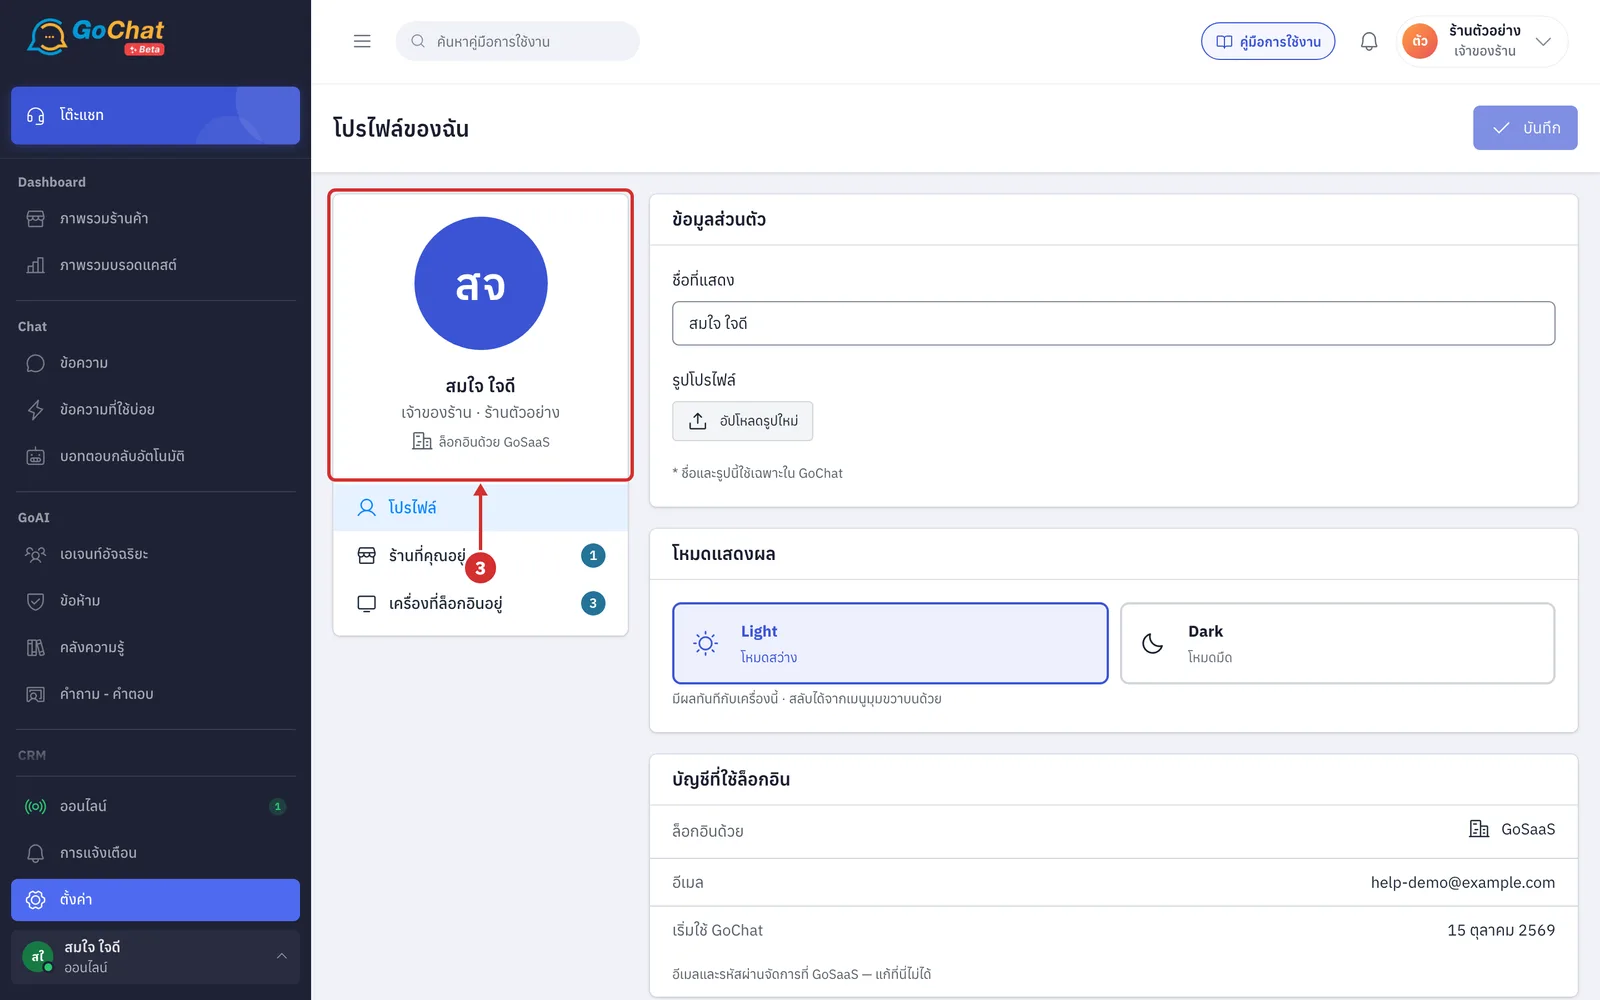
The system opens โปรไฟล์ของฉัน (My profile). The left side shows
Your picture and name
Your role and the shop that is open, such as เจ้าของร้าน · ร้านตัวอย่าง (Shop owner · Example shop)
How you sign in, such as ล็อกอินด้วย GoSaaS (Signed in with GoSaaS)
Under the picture are the โปรไฟล์ (Profile) · ร้านที่คุณอยู่ (Your shops) · เครื่องที่ล็อกอินอยู่ (Signed-in devices) tabs
The numbers on the tabs are how many shops and devices
Changing your display name
In ชื่อที่แสดง (Display name), type the name you want your teammates to see
Up to 40 characters
It cannot be empty. If you clear it, the field shows ต้องมีชื่ออย่างน้อย 1 ตัวอักษร (Enter at least 1 character)
The name under the picture on the left changes so you can check it first
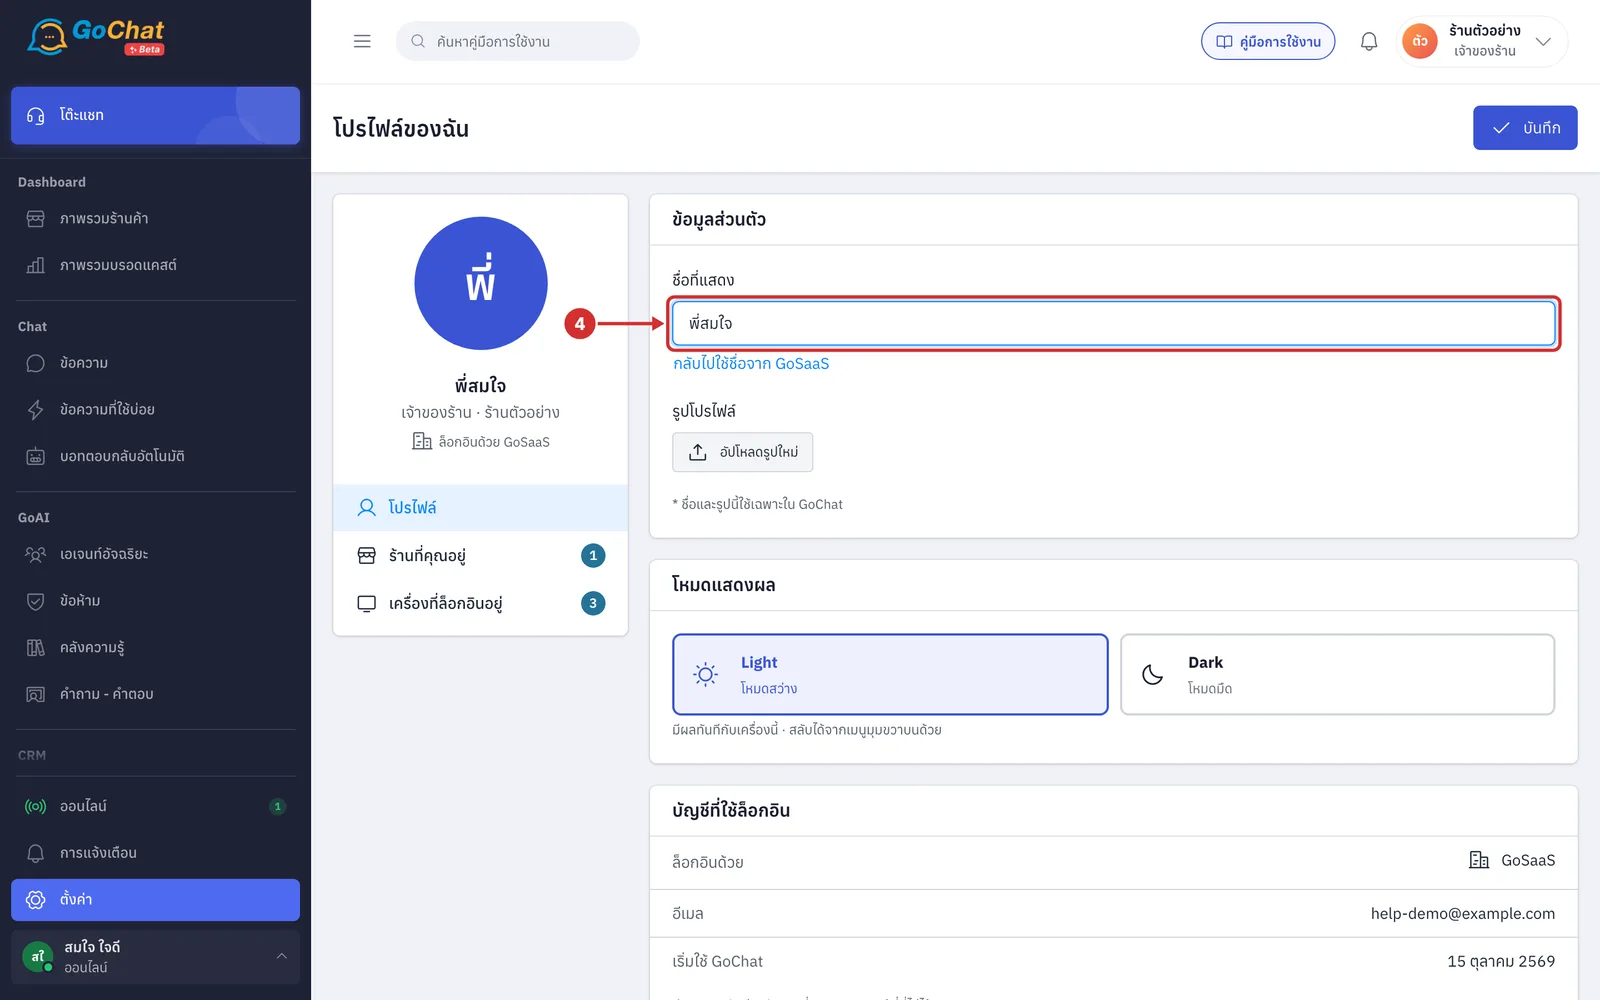
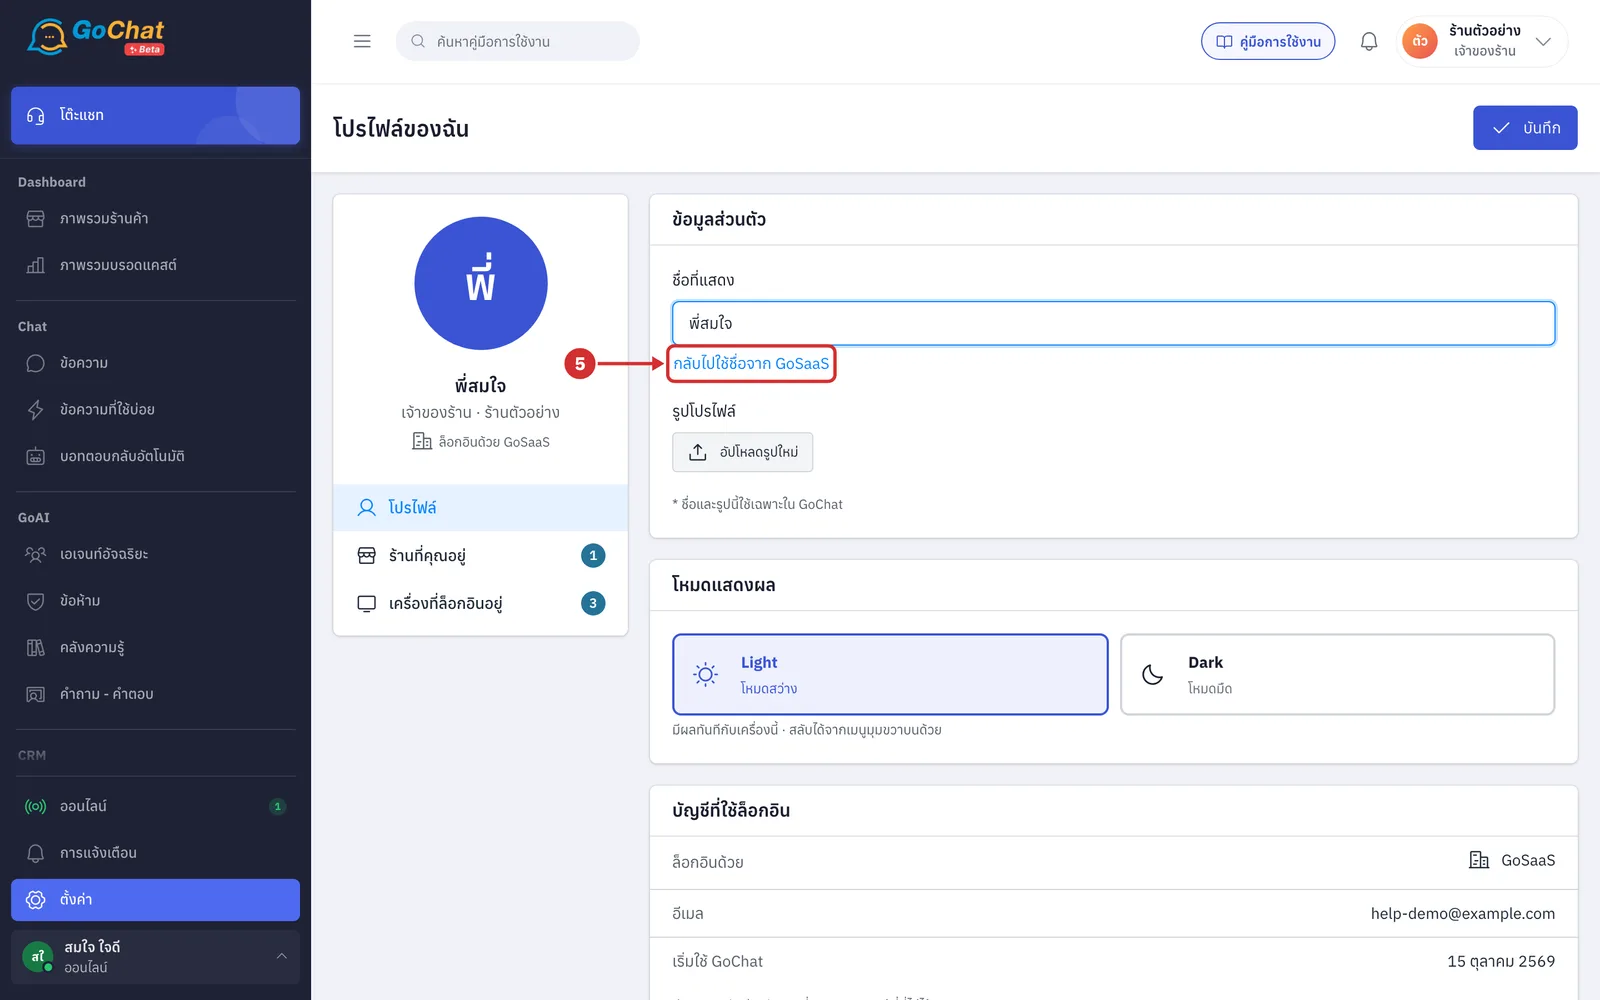
To go back to the name from the account you sign in with, click กลับไปใช้ชื่อจาก GoSaaS (Use my GoSaaS name) under the field
The button is named after how you sign in, such as กลับไปใช้ชื่อจาก Facebook (Use my Facebook name)
It appears once you have changed the name yourself
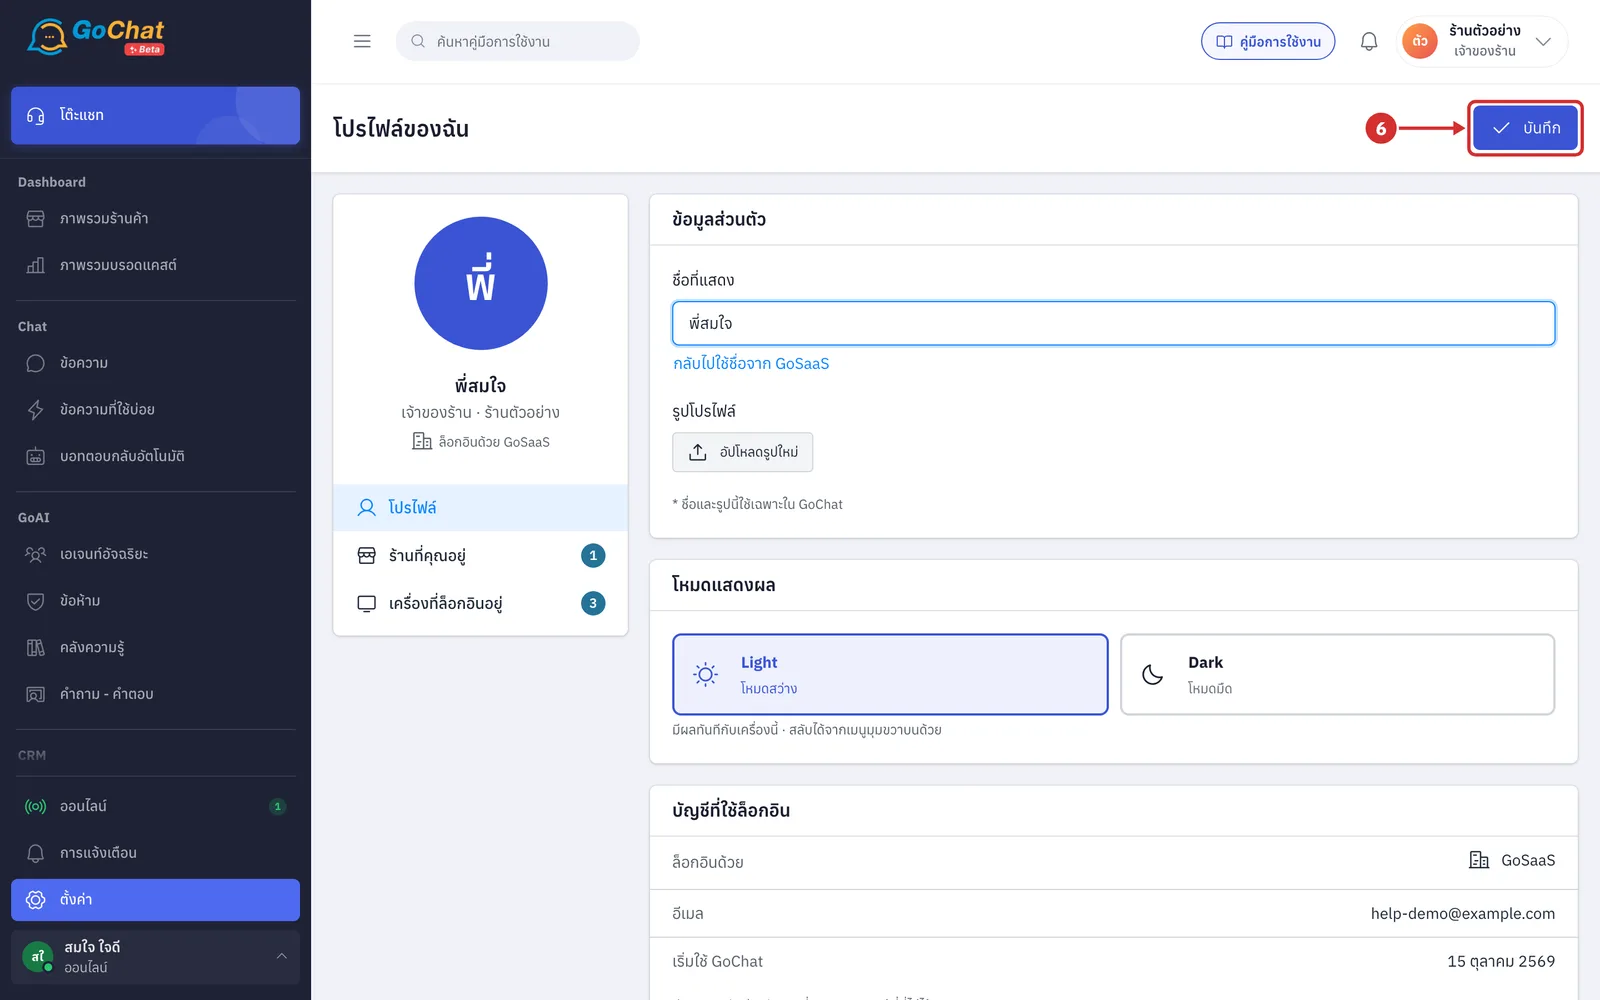
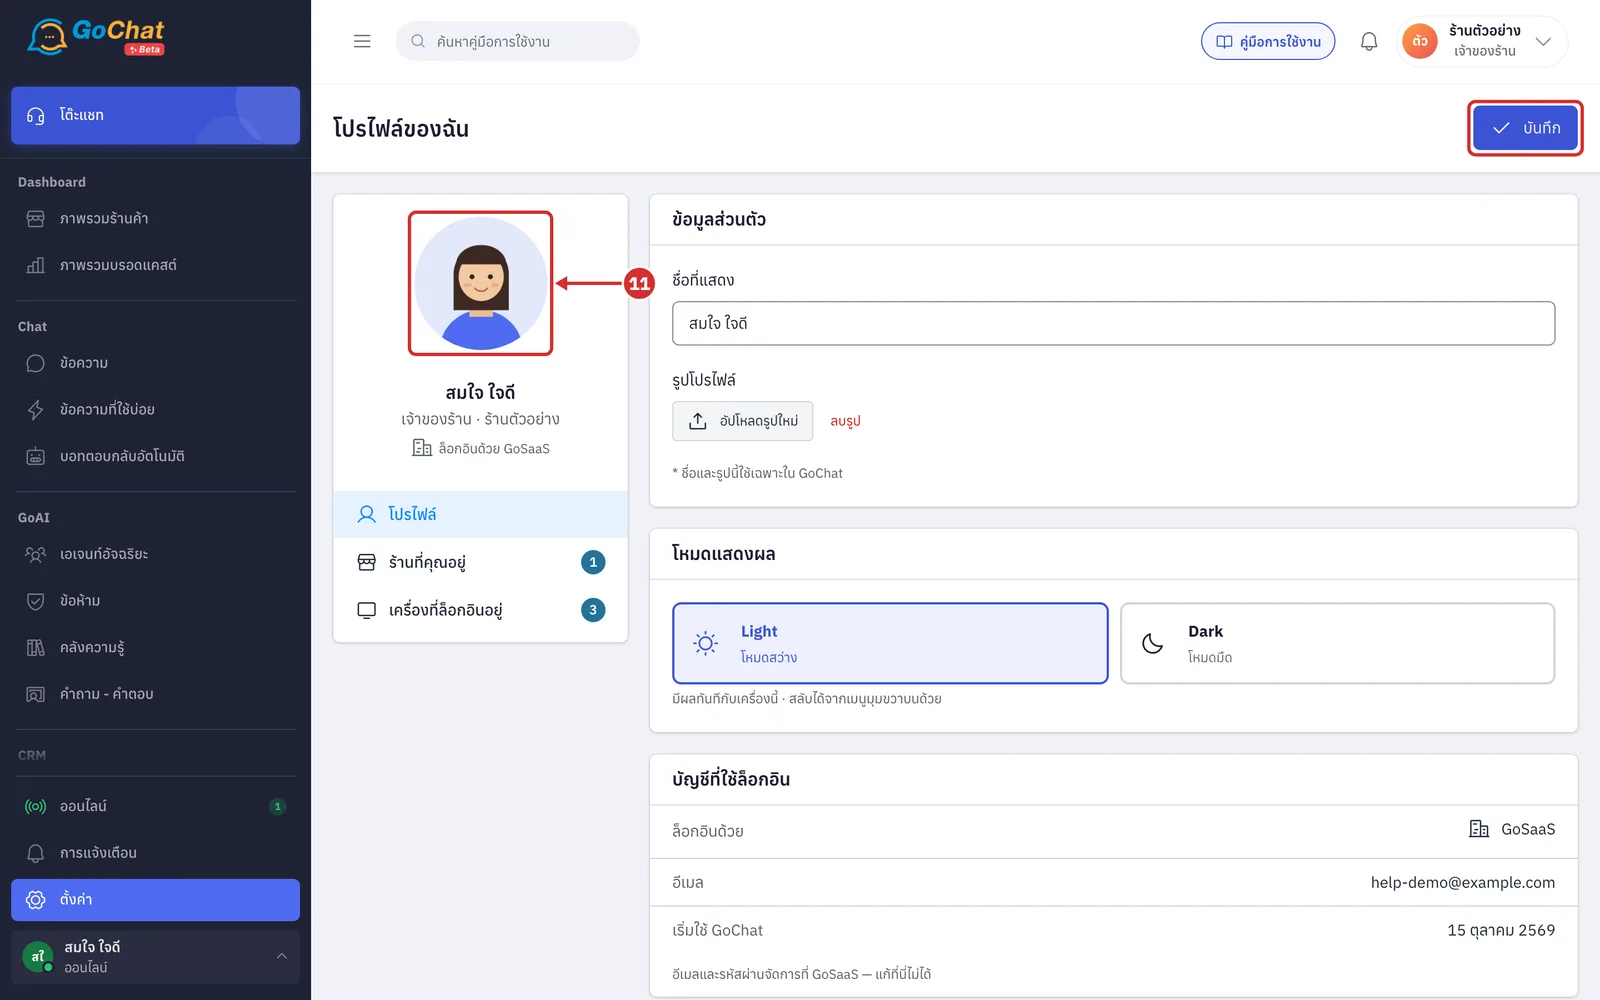
Click บันทึก (Save) at the top right (the button can be clicked once you change your name or picture)
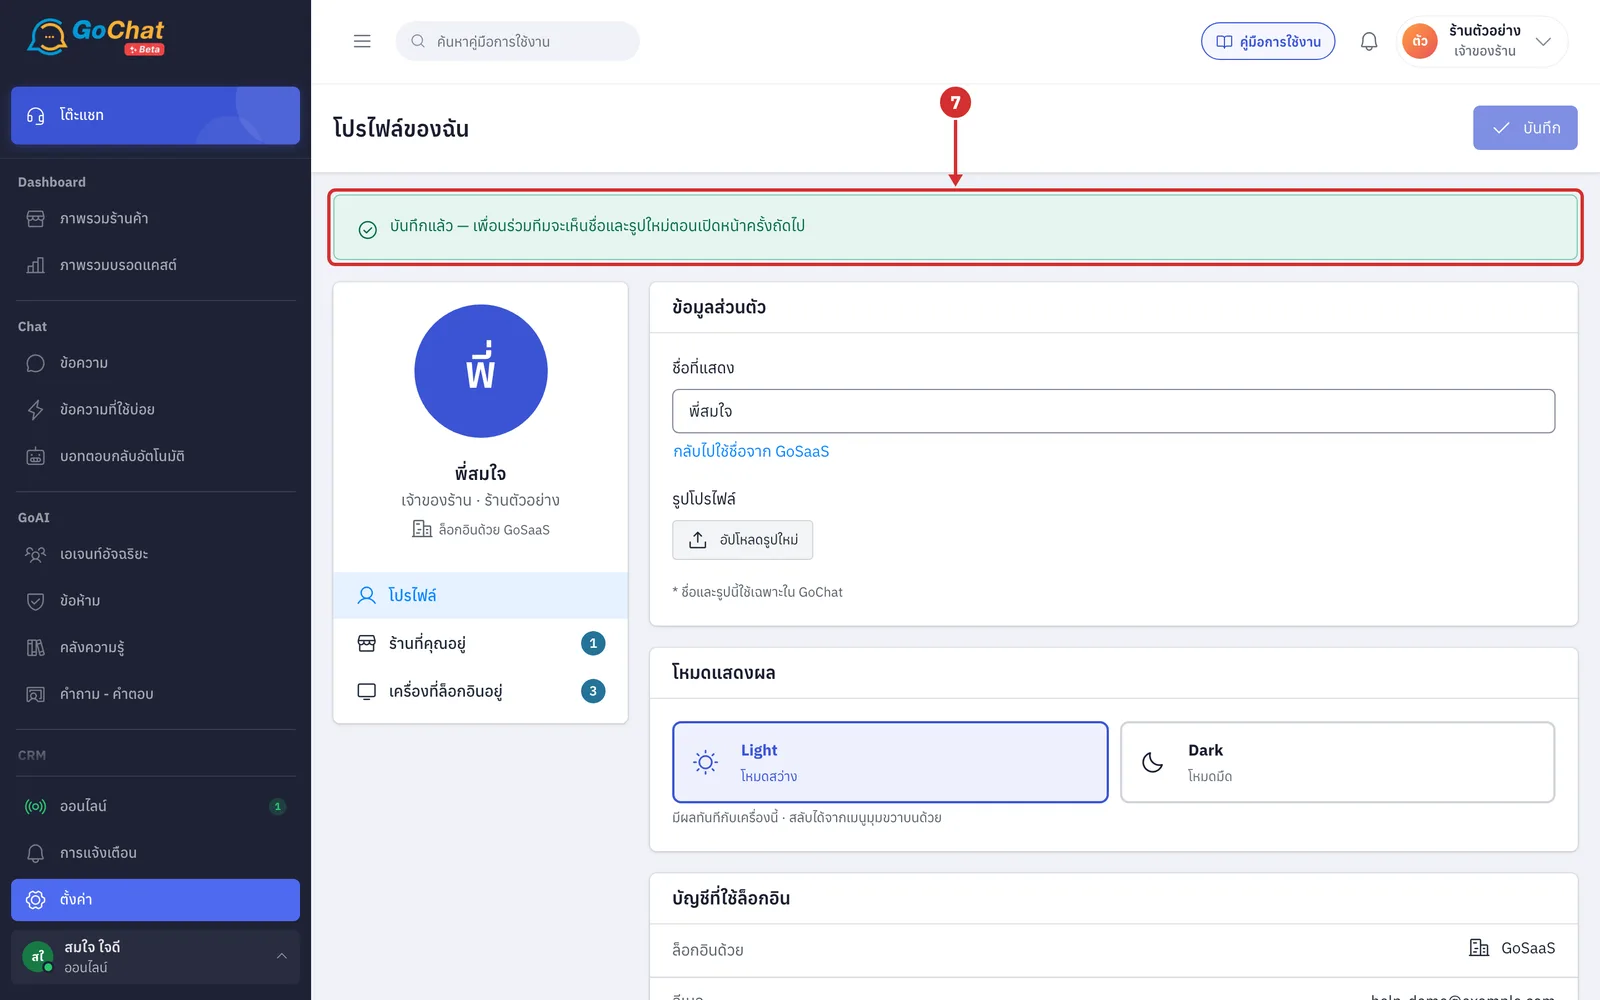
The system shows บันทึกแล้ว — เพื่อนร่วมทีมจะเห็นชื่อและรูปใหม่ตอนเปิดหน้าครั้งถัดไป (Saved — teammates will see your new name and picture the next time they open a page)
Changing your profile picture
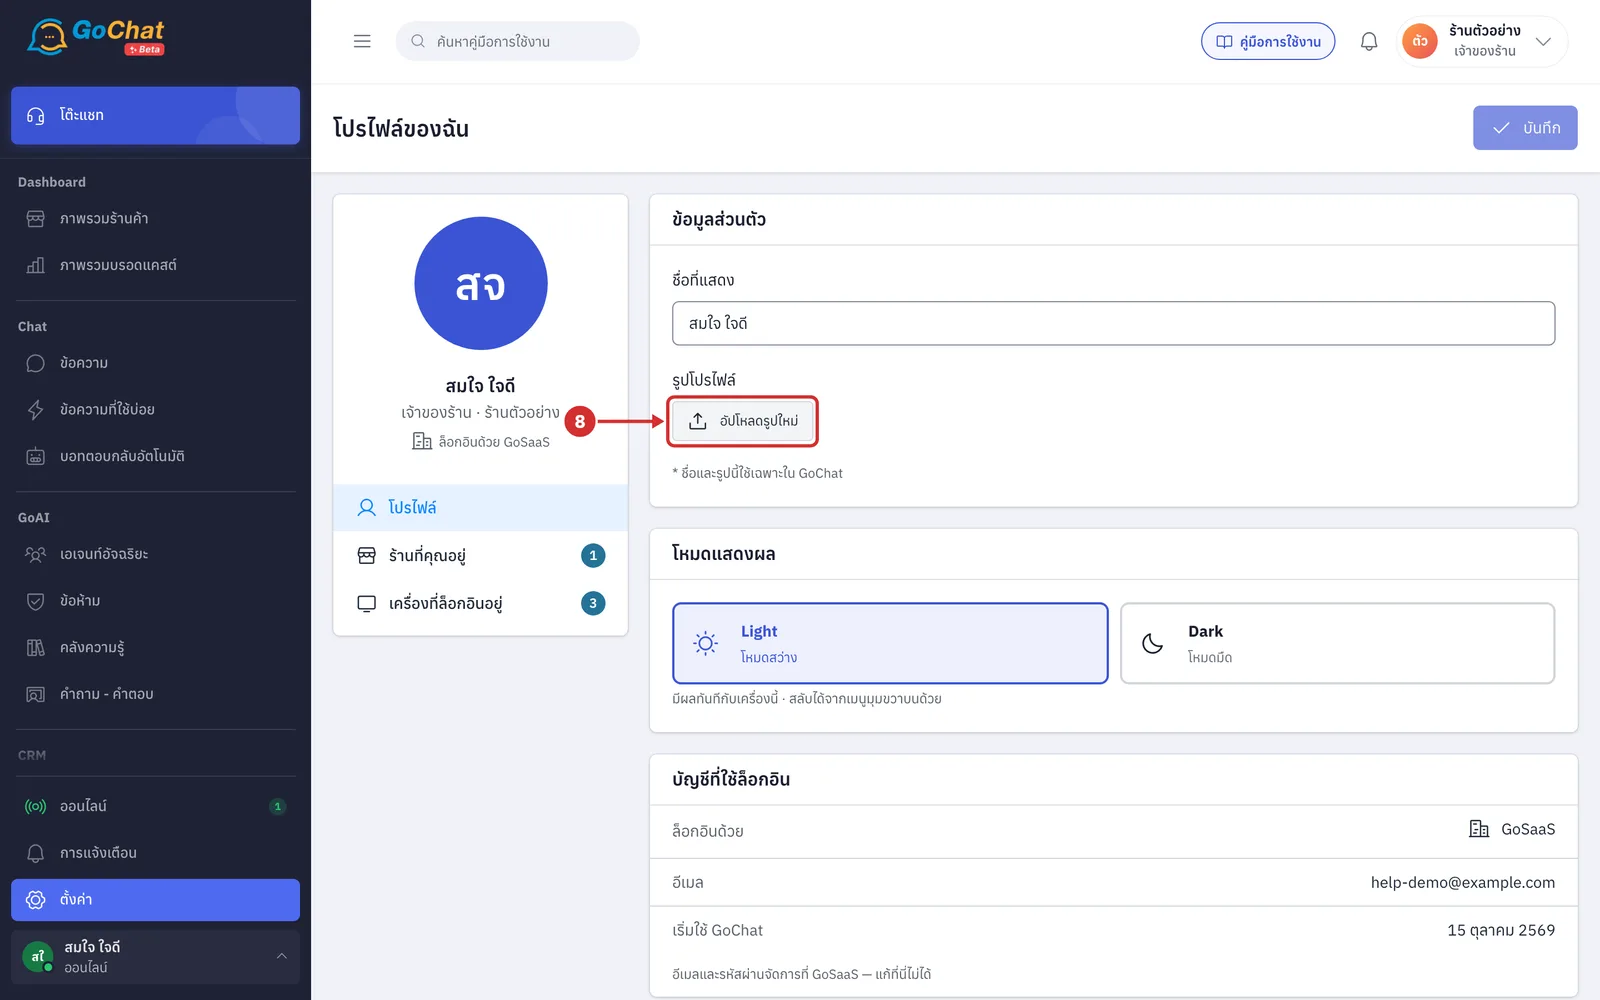
Under รูปโปรไฟล์ (Profile picture), click อัปโหลดรูปใหม่ (Upload new picture) and choose a picture from your device
JPG, PNG or WEBP up to 5MB
If the picture is too large, the system asks you to make it smaller first
You can also point at the large picture on the left and click the pencil
In the ปรับรูปโปรไฟล์ (Adjust profile picture) window, fit the picture in the circle
Drag the picture to move it
Move the slider to zoom
Click หมุน (Rotate) to turn it 90 degrees at a time
Click เริ่มใหม่ (Reset) to go back to the start
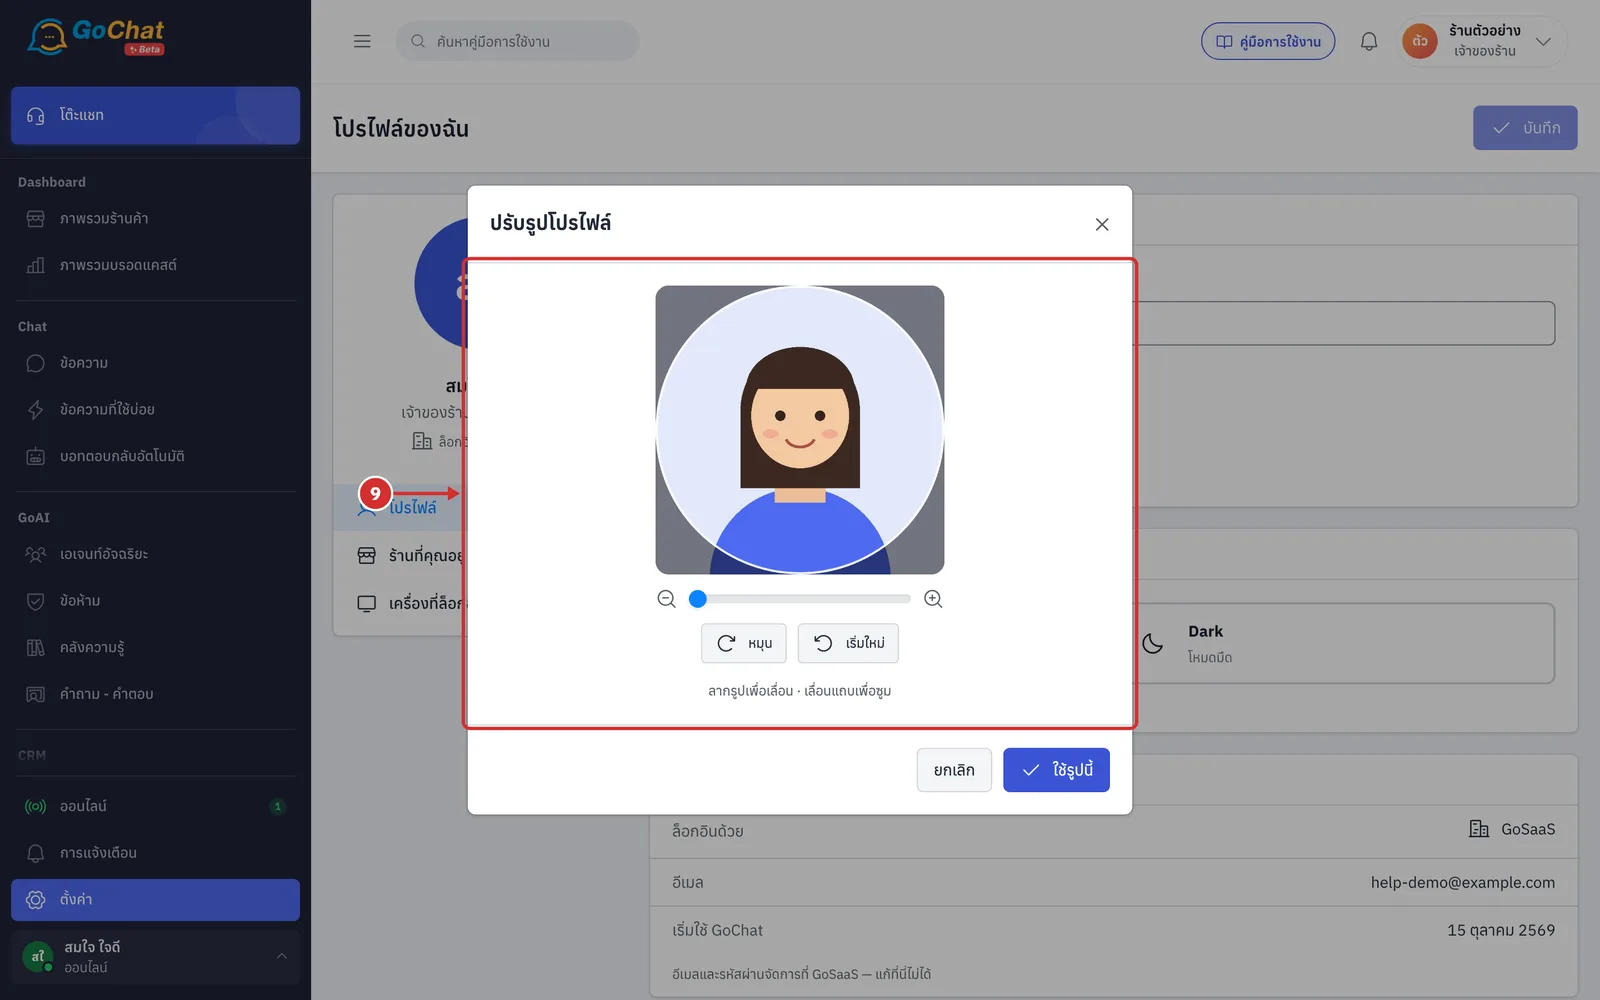
Click ใช้รูปนี้ (Use this picture) (if you do not want to use it, click ยกเลิก (Cancel))
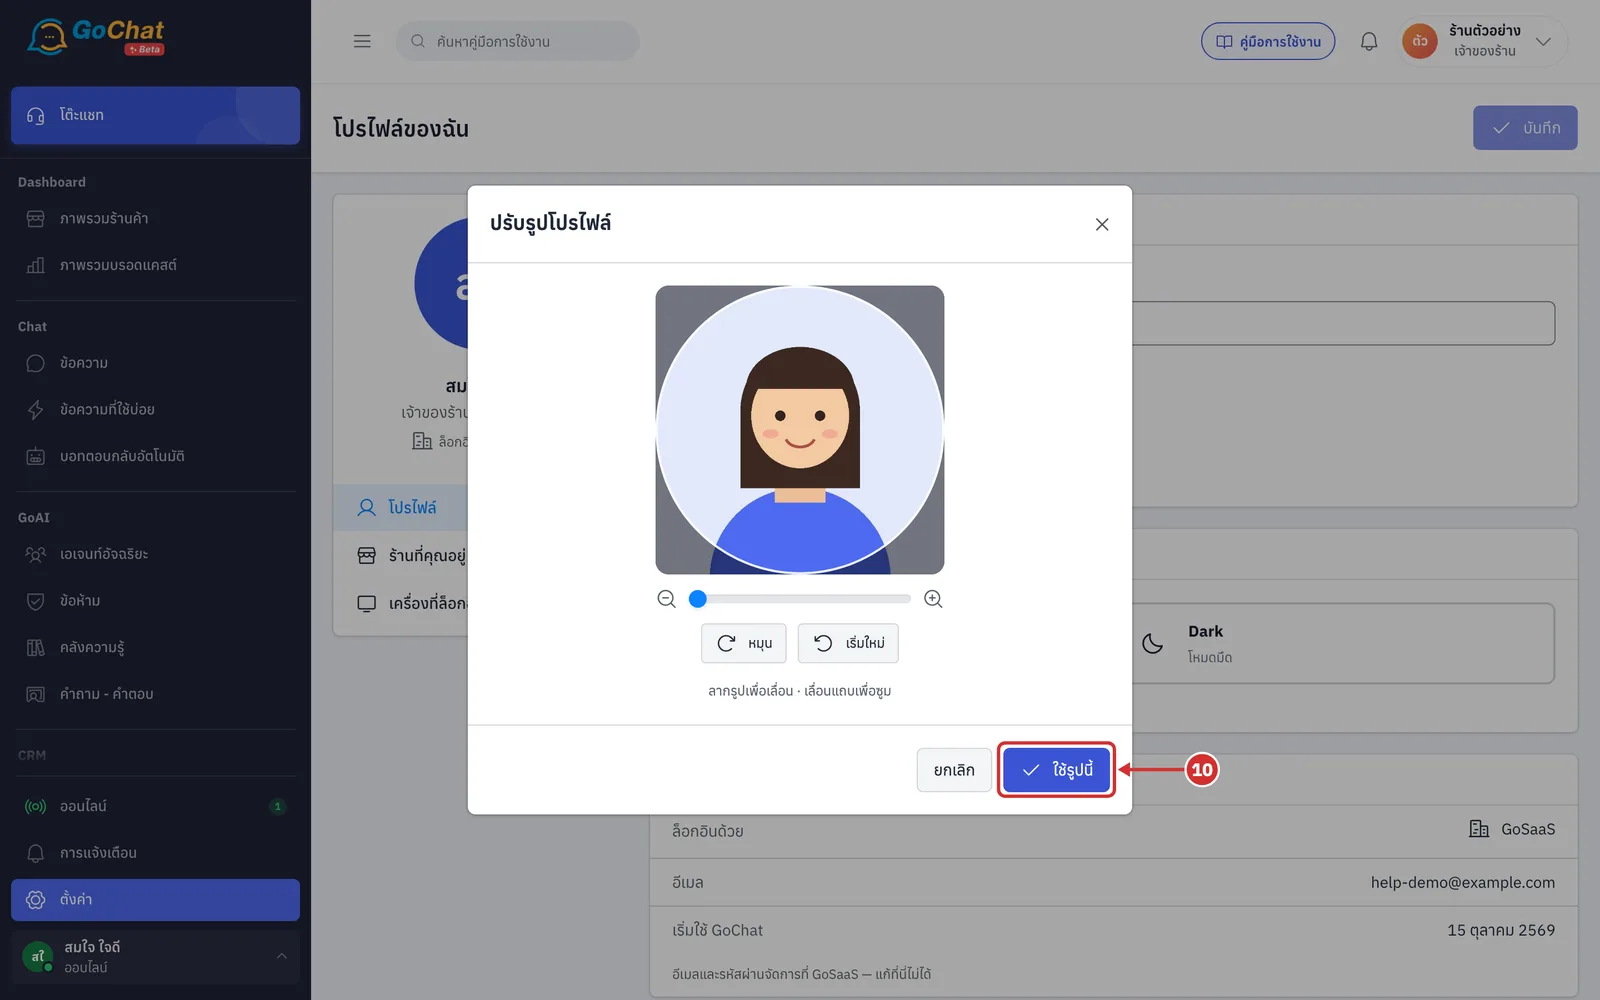
The large picture on the left changes to the new picture so you can check it (not saved yet). Click บันทึก (Save) to change your picture. The system shows the same บันทึกแล้ว (Saved) message as in step 7
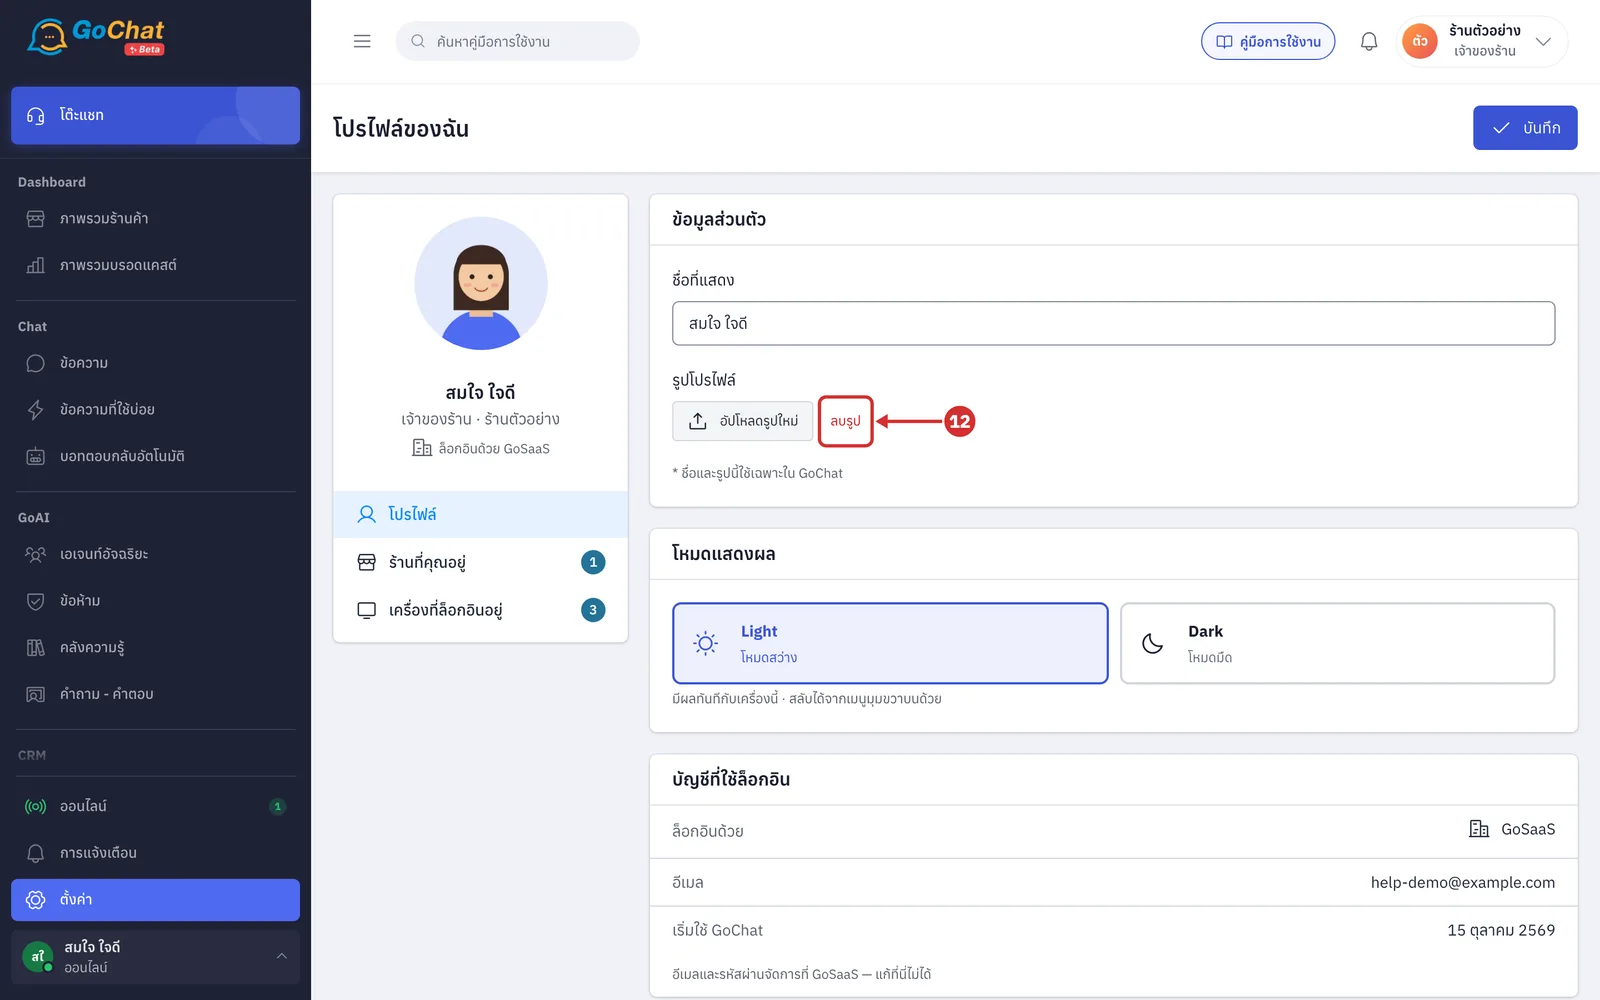
If you do not want a picture, click ลบรูป (Remove picture) and then บันทึก (Save). The system shows your initials instead
If the account you sign in with has a profile picture, such as Facebook, there is also a ใช้รูปจาก Facebook (Use my Facebook picture) button to go back to it
Choosing a display mode
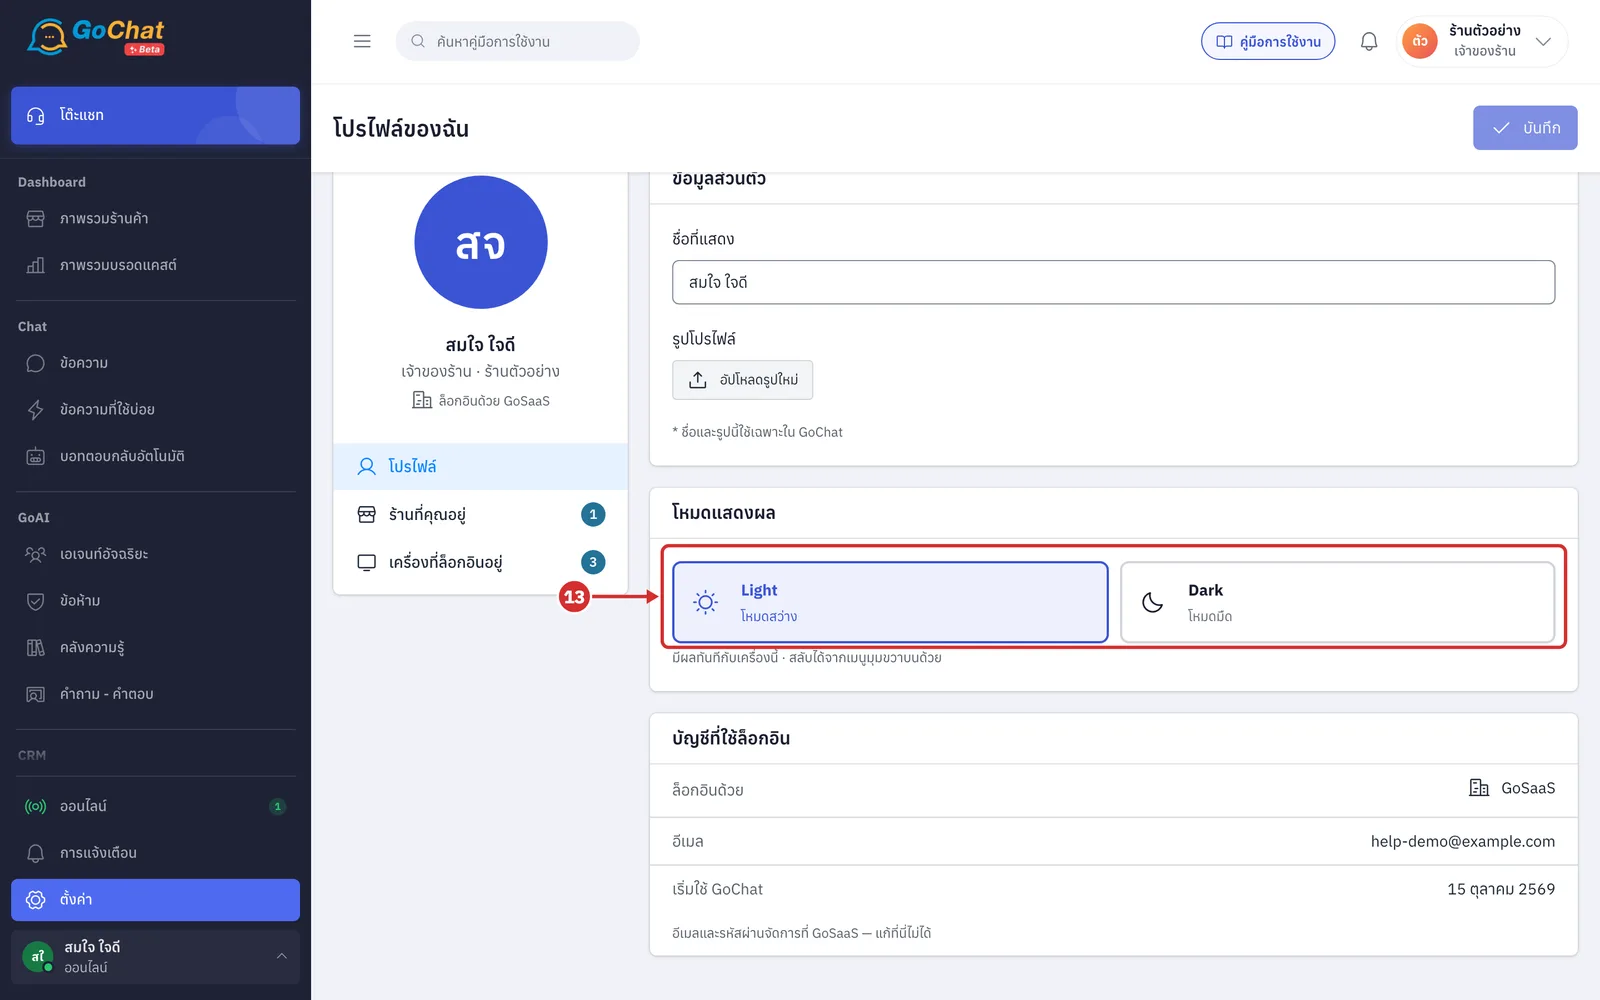
Under โหมดแสดงผล (Display mode), choose Light or Dark
It changes straight away without saving
It only applies to the device you are using
You can also switch it with โหมดมืด (Dark mode) in the shop name menu at the top right
Seeing the account you sign in with
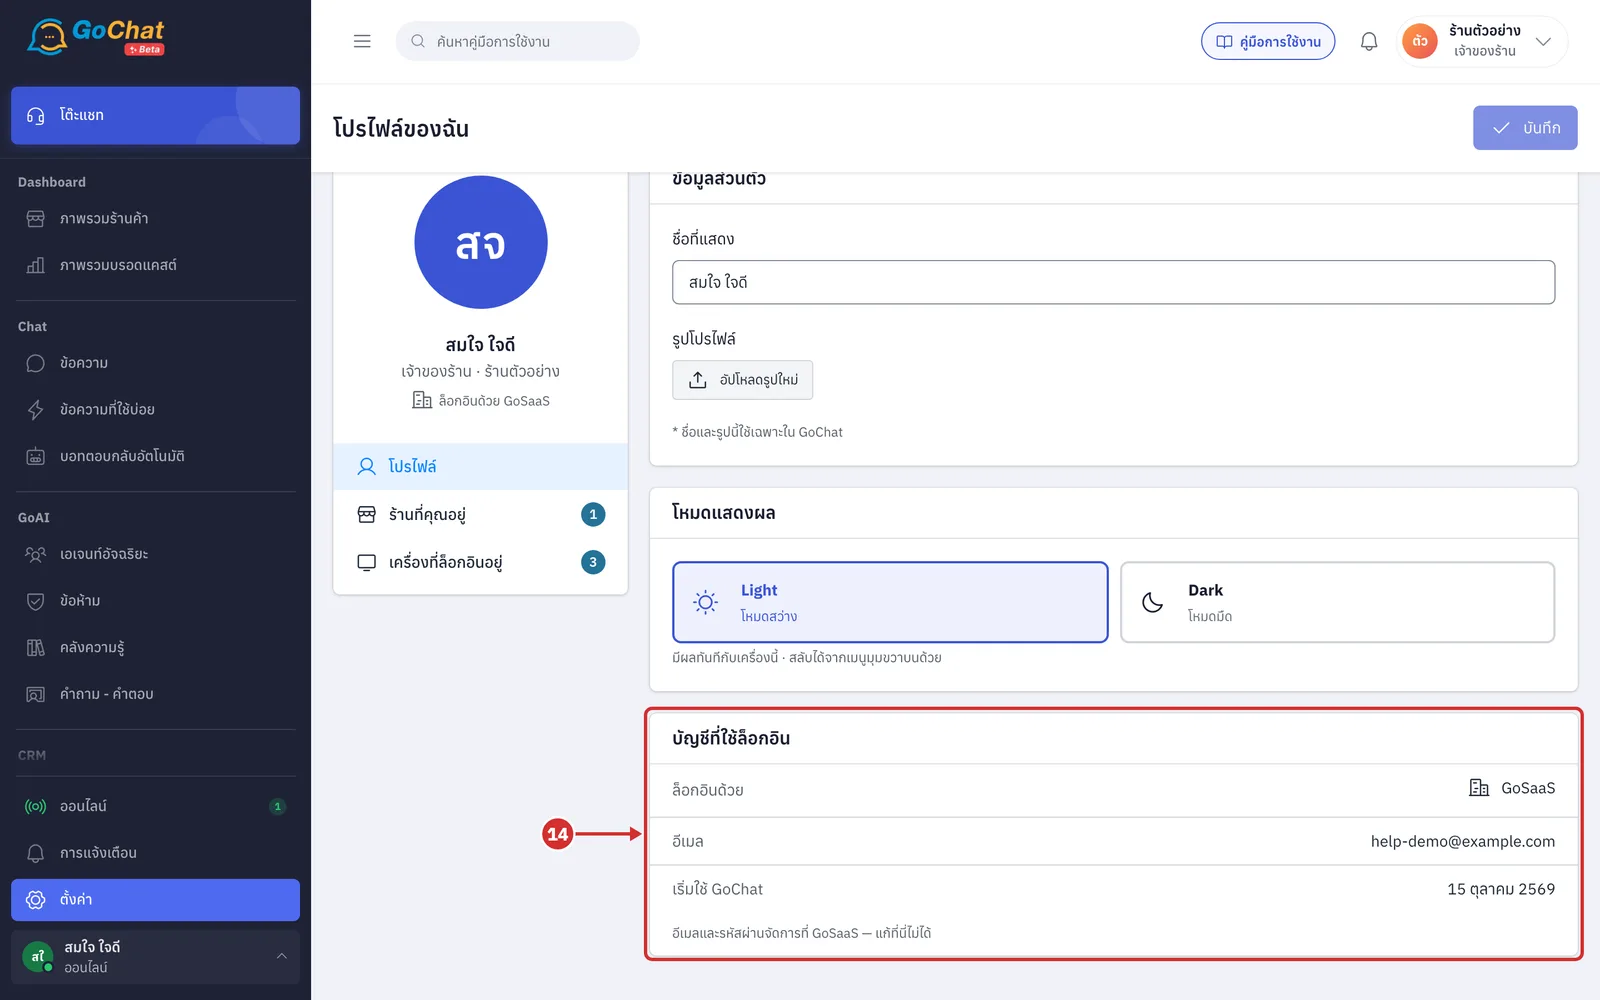
On the บัญชีที่ใช้ล็อกอิน (Sign-in account) card, see the details of the account you sign in with
ล็อกอินด้วย (Signed in with): how you sign in
อีเมล (Email): the account's email, which cannot be changed on this page
เริ่มใช้ GoChat (Started using GoChat): when you started using GoChat
Accounts that sign in with GoSaaS change their email and password at GoSaaS
Seeing your shops
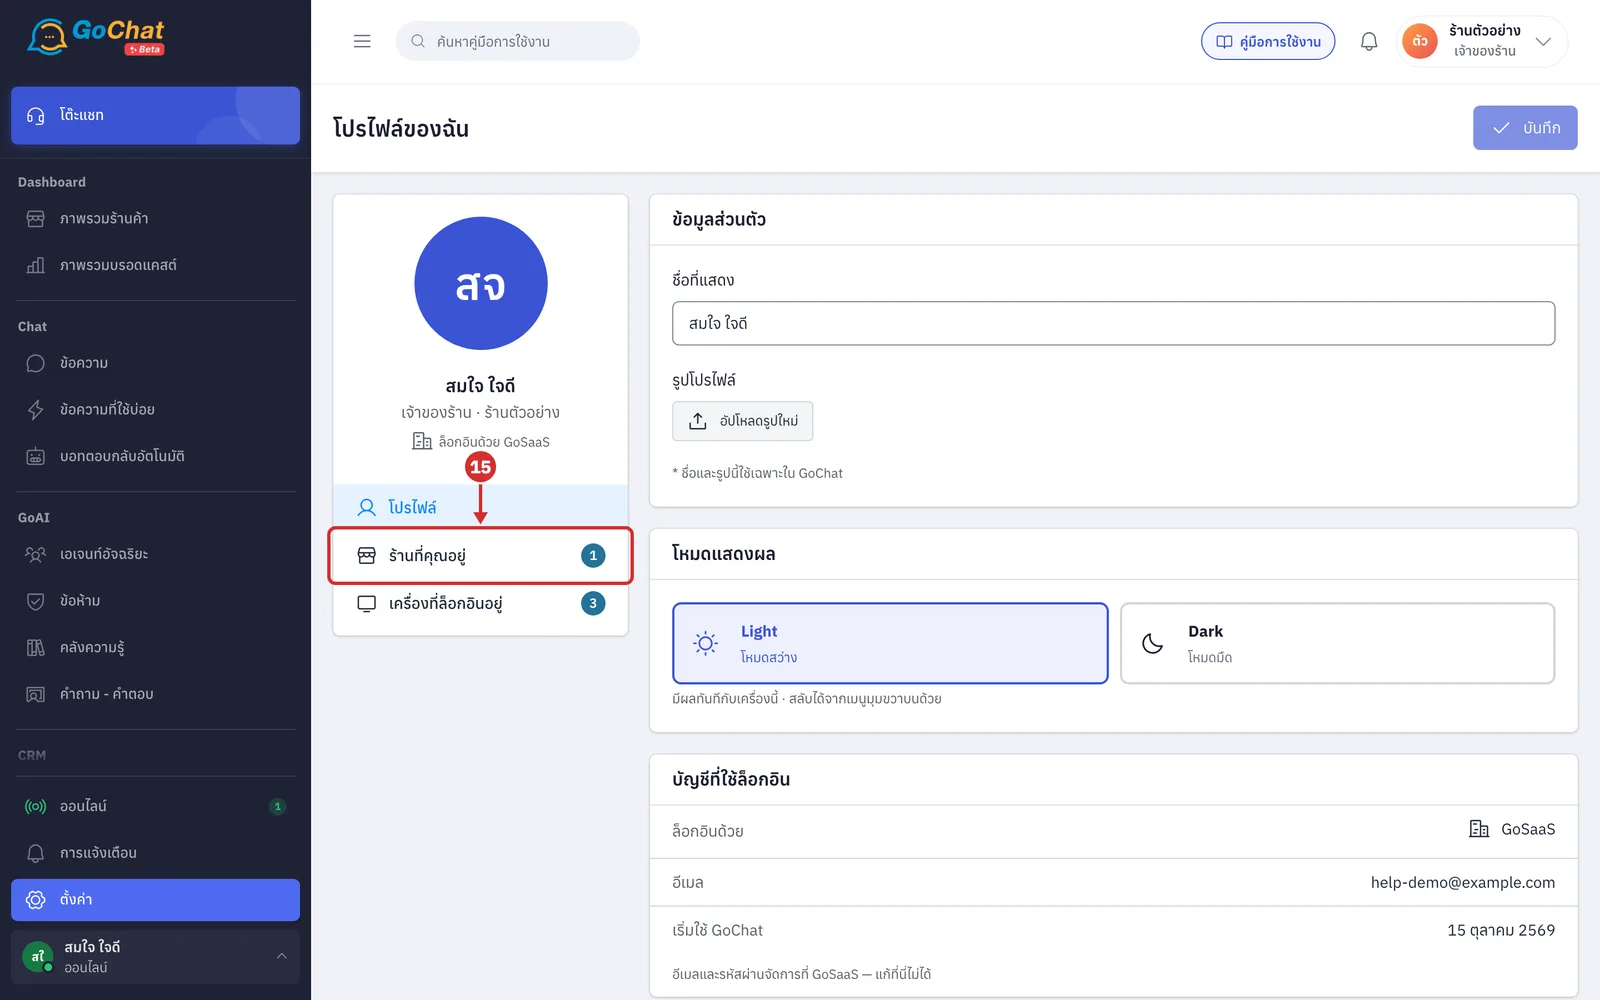
Click the ร้านที่คุณอยู่ (Your shops) tab
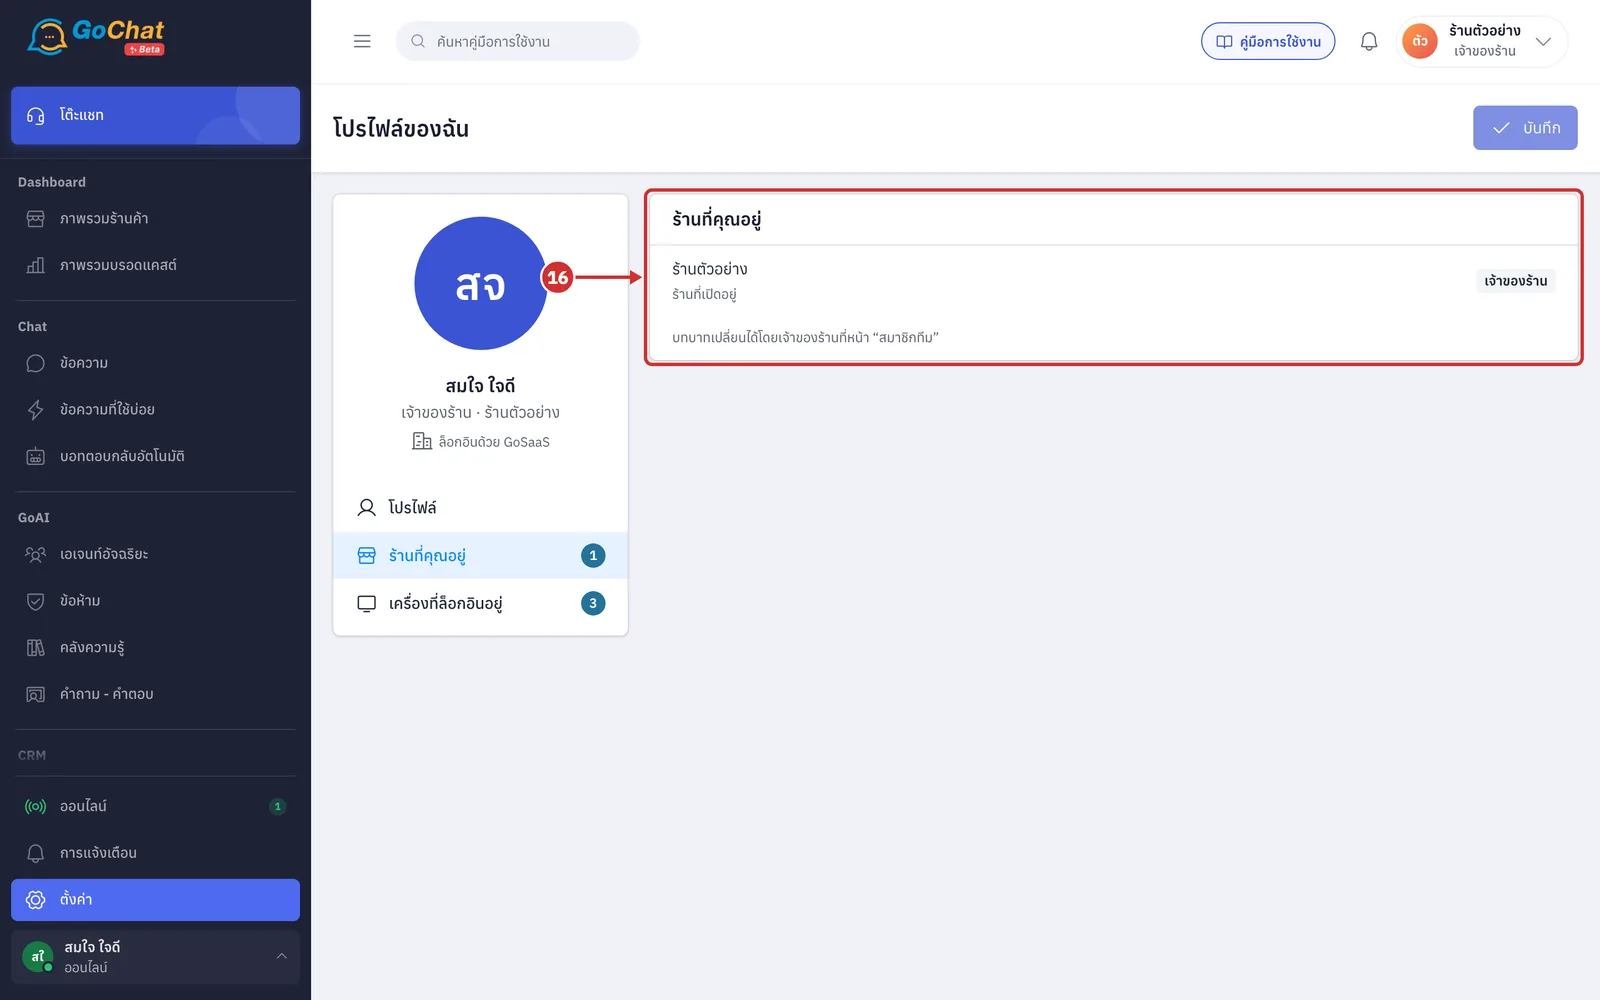
See the shops you belong to and your role in each one (เจ้าของร้าน (Shop owner) or แอดมิน (Admin))
The shop that is open says ร้านที่เปิดอยู่ (Open now) under its name
The shop owner can change roles in the ผู้ใช้งาน (Users) menu
You can switch to another shop from the shop name menu at the top right
Signing out of other devices
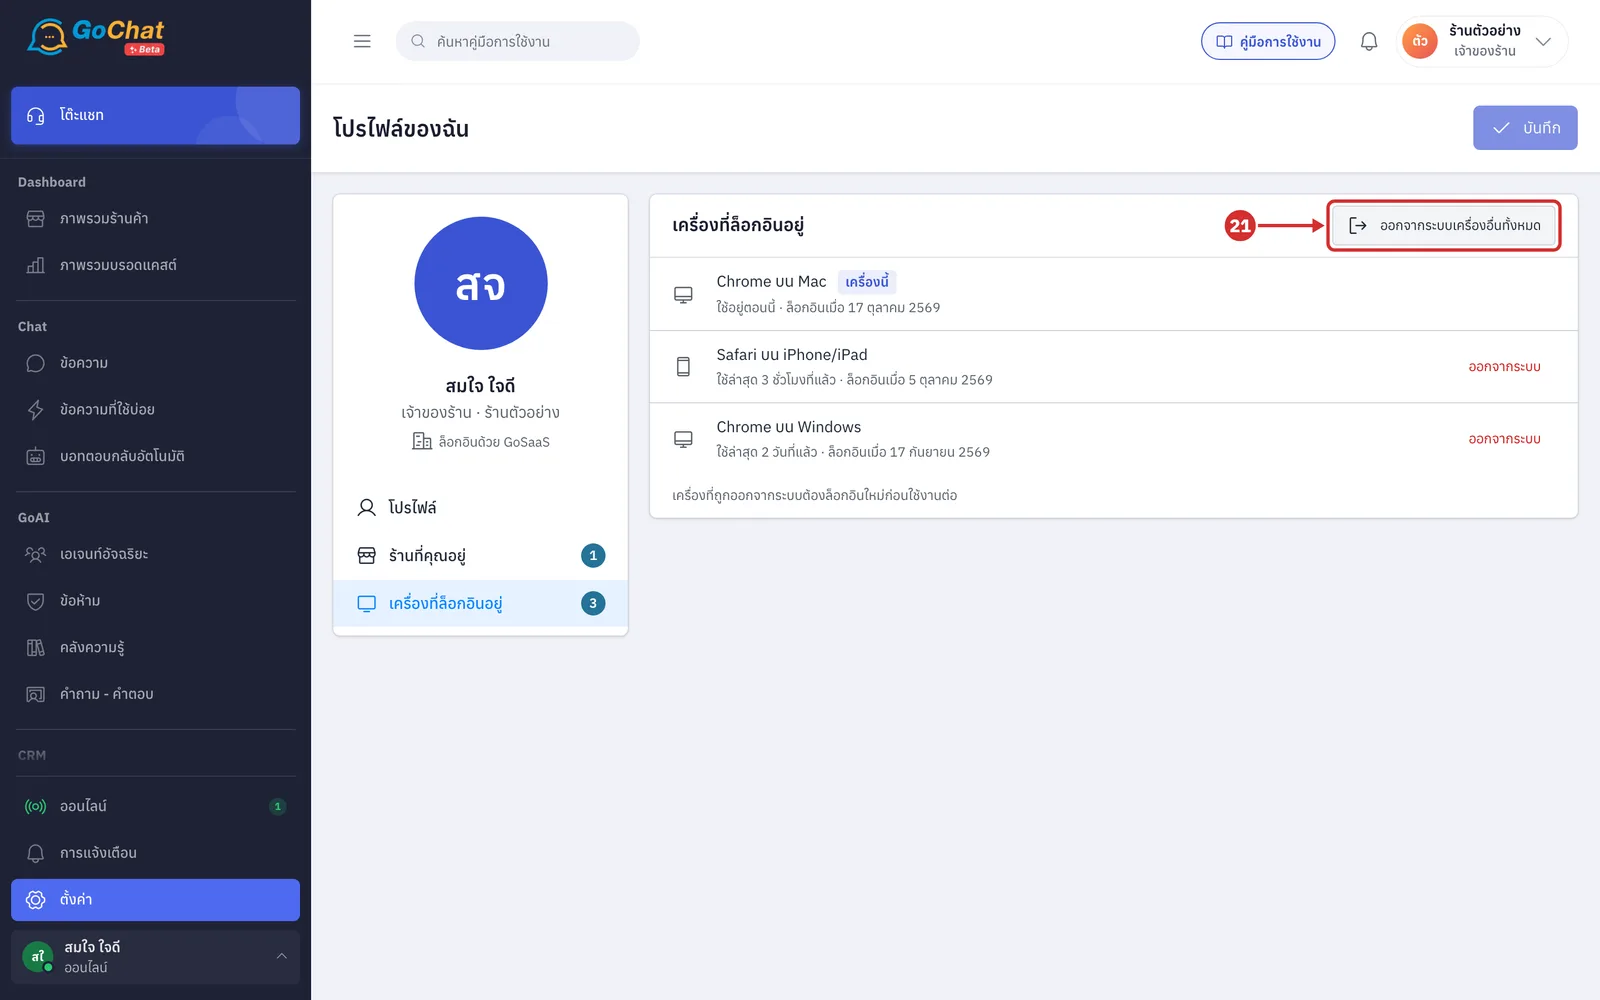
Click the เครื่องที่ล็อกอินอยู่ (Signed-in devices) tab
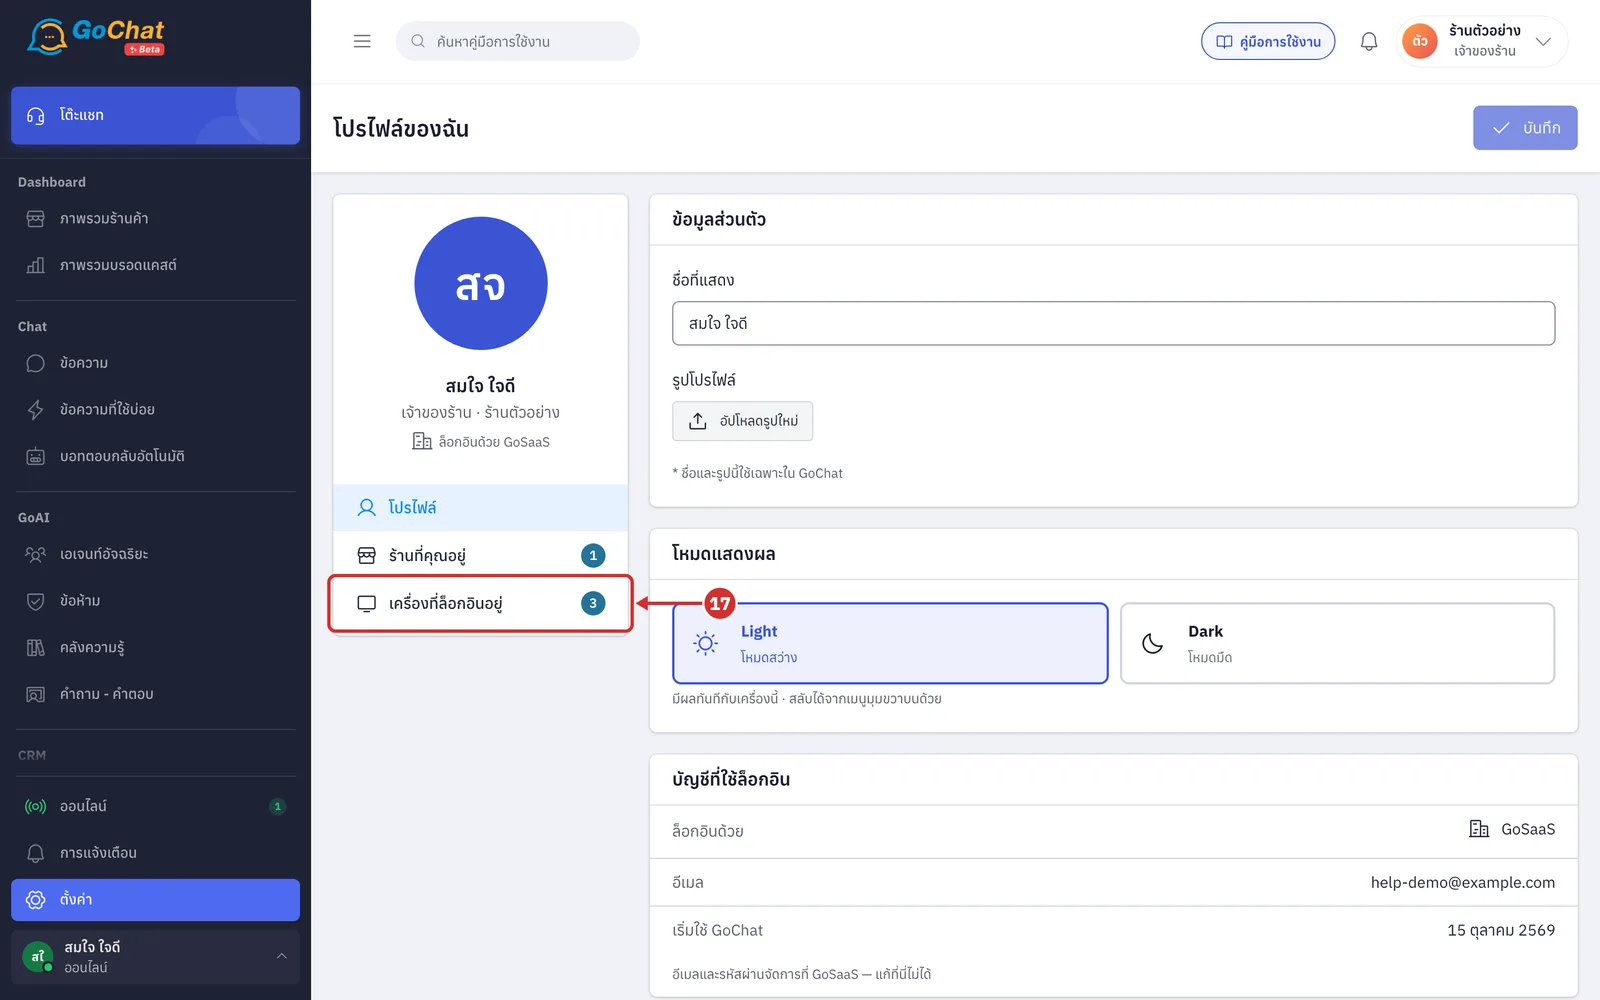
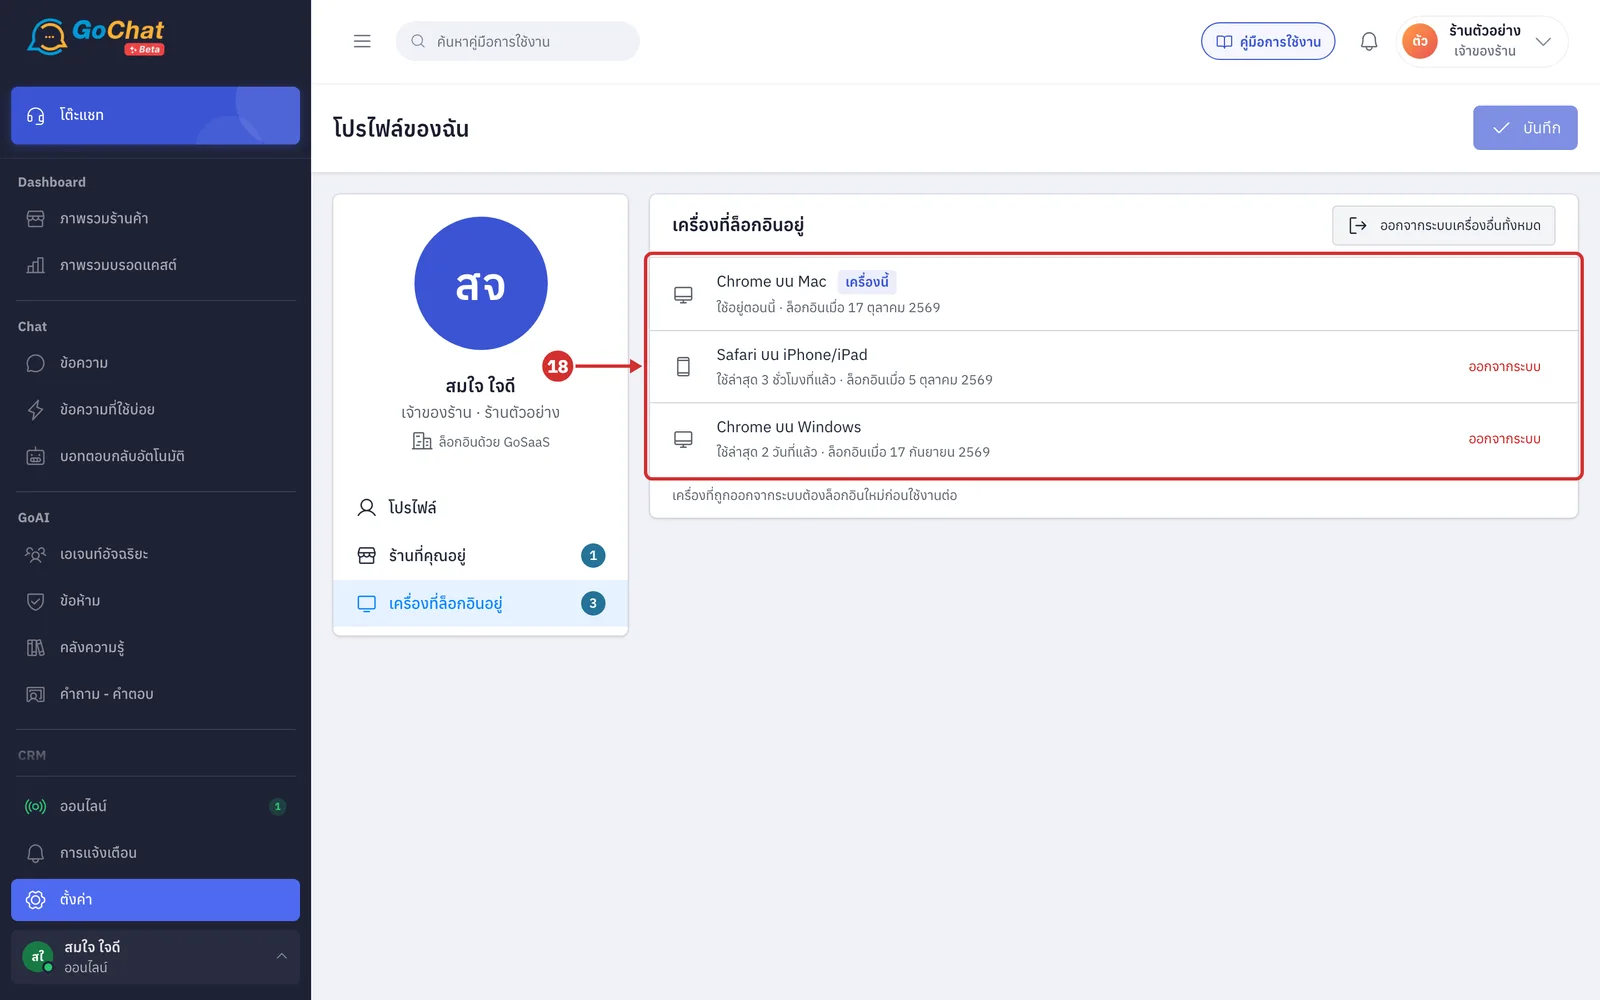
See the devices and browsers signed in to this account (such as Chrome บน Mac (Chrome on Mac) or Safari บน iPhone/iPad (Safari on iPhone/iPad))
The device you are using has a เครื่องนี้ (This device) label
Each row shows when it was last used and when it signed in
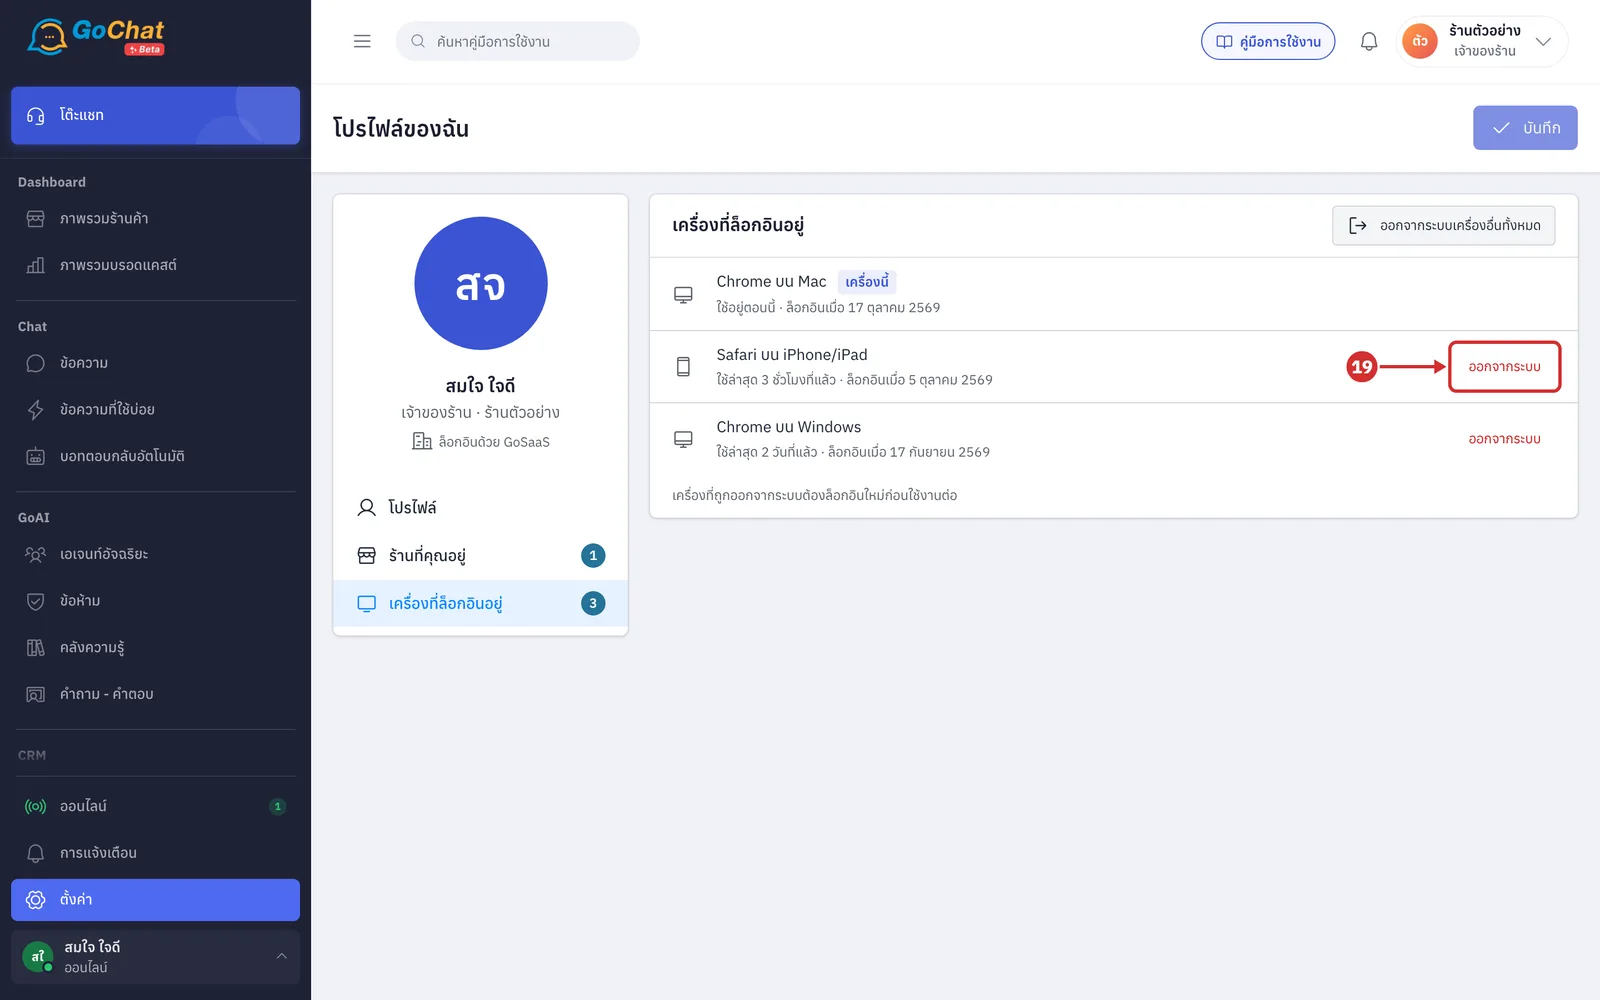
If you see a device you do not recognise or no longer use, sign it out
Click ออกจากระบบ (Sign out) at the end of the device's row
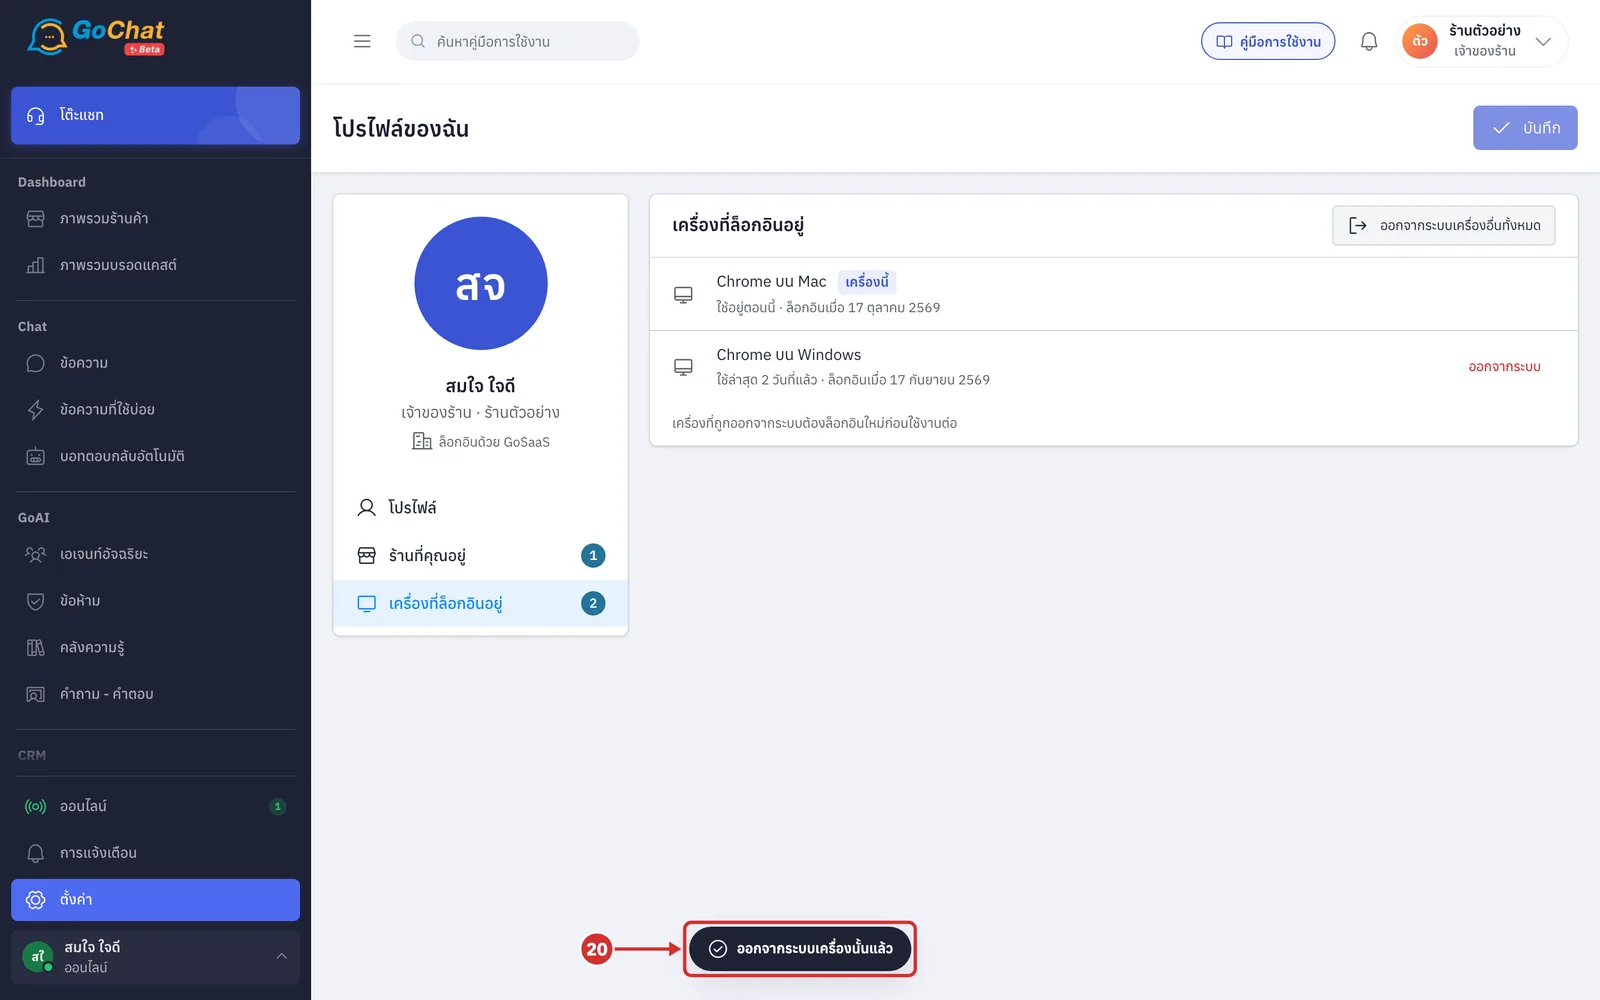
The system shows ออกจากระบบเครื่องนั้นแล้ว (Signed out of that device) and removes the device from the list
To sign out of every device except the one you are using, click ออกจากระบบเครื่องอื่นทั้งหมด (Sign out of all other devices). The system shows ออกจากระบบแล้ว N เครื่อง (Signed out of N devices)
About your profile and signing out
The name and picture on this page are only used in GoChat; they do not change your GoSaaS or Facebook account
A device that has been signed out must sign in again before it can be used
To sign out of the device you are using, use the shop name menu at the top right