

Managing messages in a chat
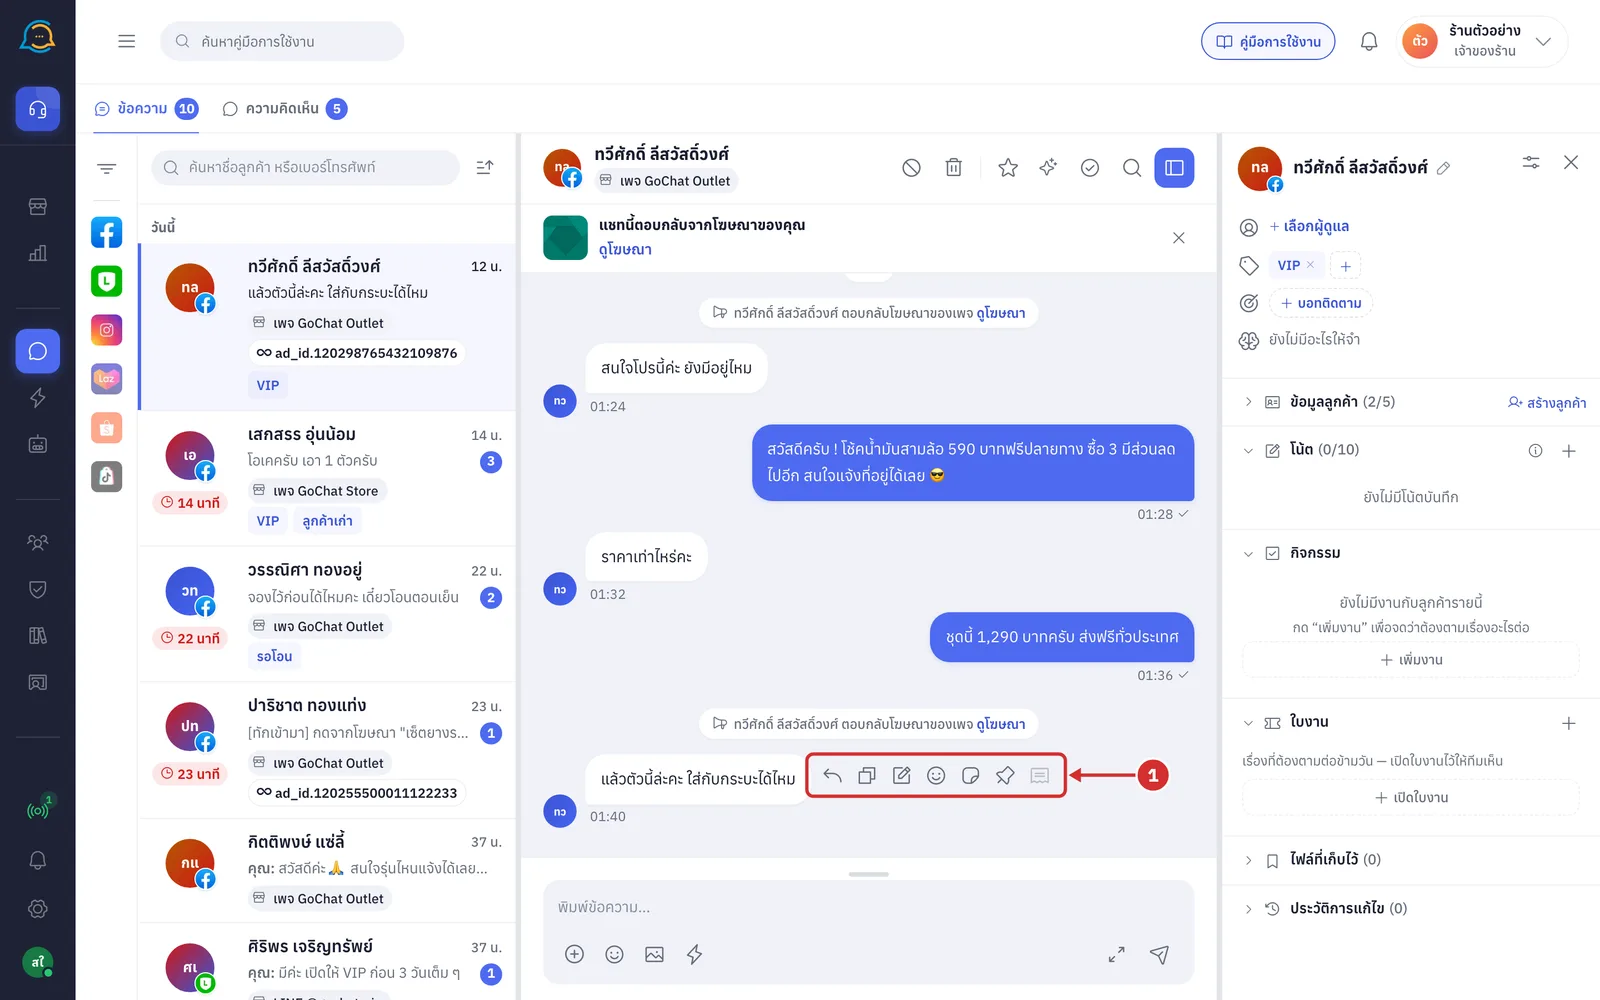
Every message bubble in a chat has buttons for that message, such as replying to that specific message, writing a note for the team, or pinning it to the chat header. Under each bubble you also see the time, the send status and who replied. Everyone in the shop can use these buttons.
Showing a message's buttons
In a chat, hover over the message bubble you want. Its buttons appear next to the bubble (customer bubbles are on the left of the chat, with buttons to their right · shop bubbles are on the right, with buttons to their left). Hover over a button to see its name
Which buttons appear depends on the channel: Messenger chats have them all · Instagram chats have no send sticker button, and the only reaction is a heart · LINE chats have no react or send sticker buttons
Which buttons appear depends on the message type: bubbles with images or files have no note or pin buttons, and only bubbles with text can be copied
Replying to a message
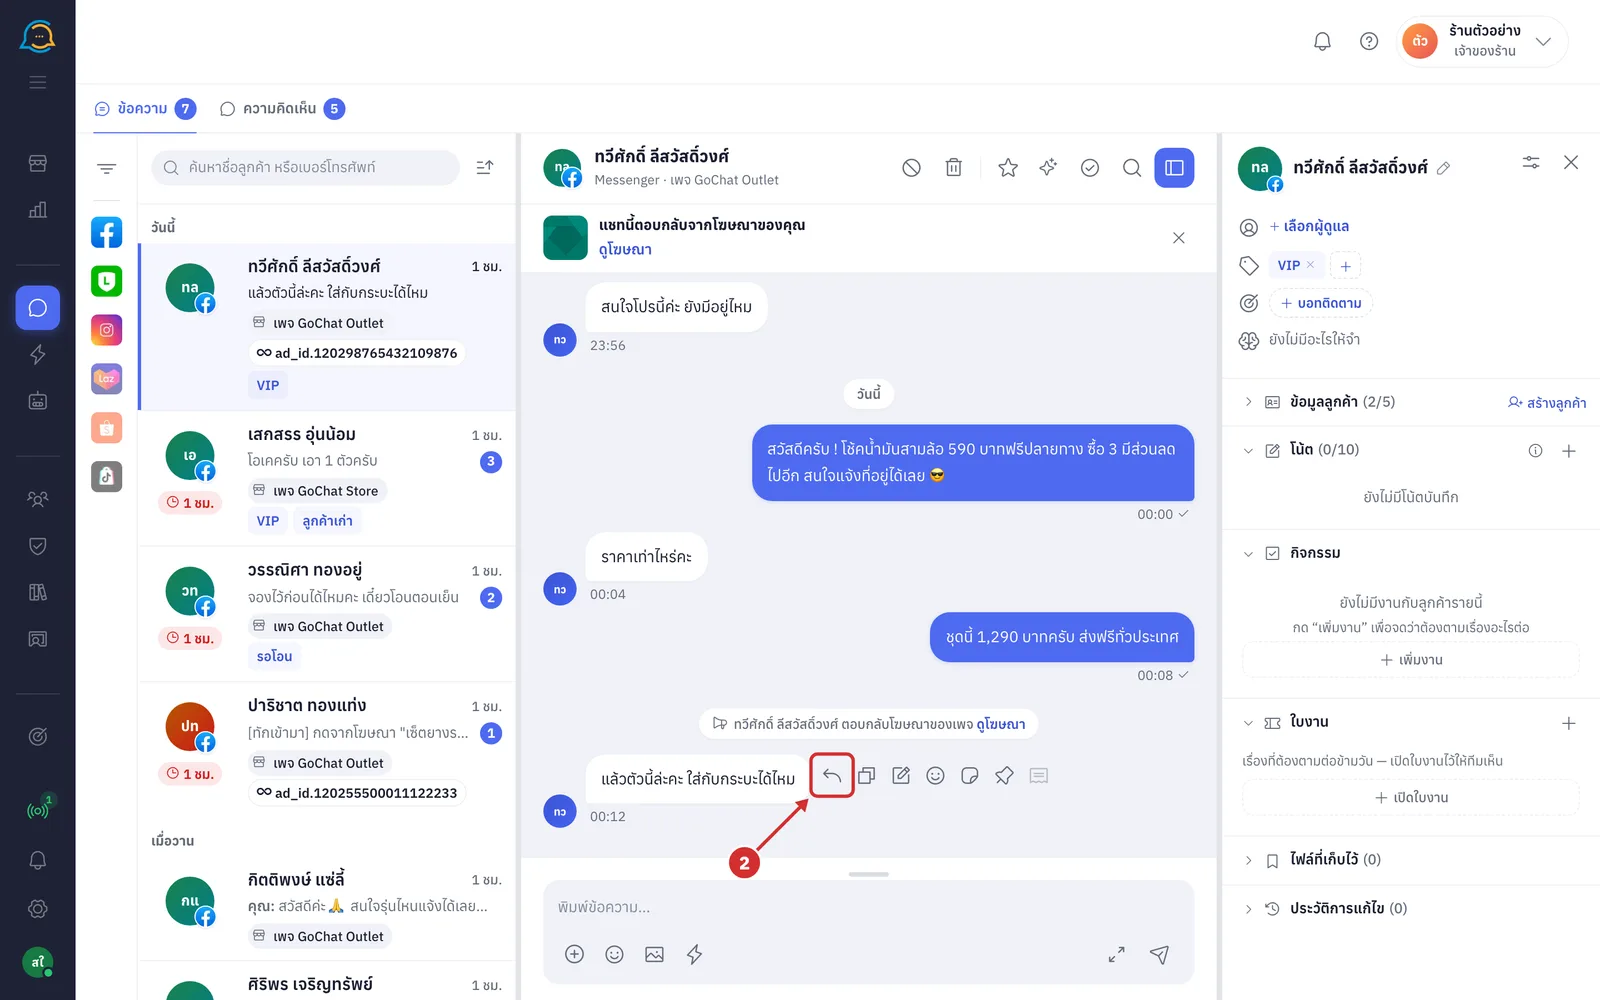
Click ตอบกลับ (Reply — the curved arrow) to reply to this specific message. Available in Messenger · Instagram · LINE chats
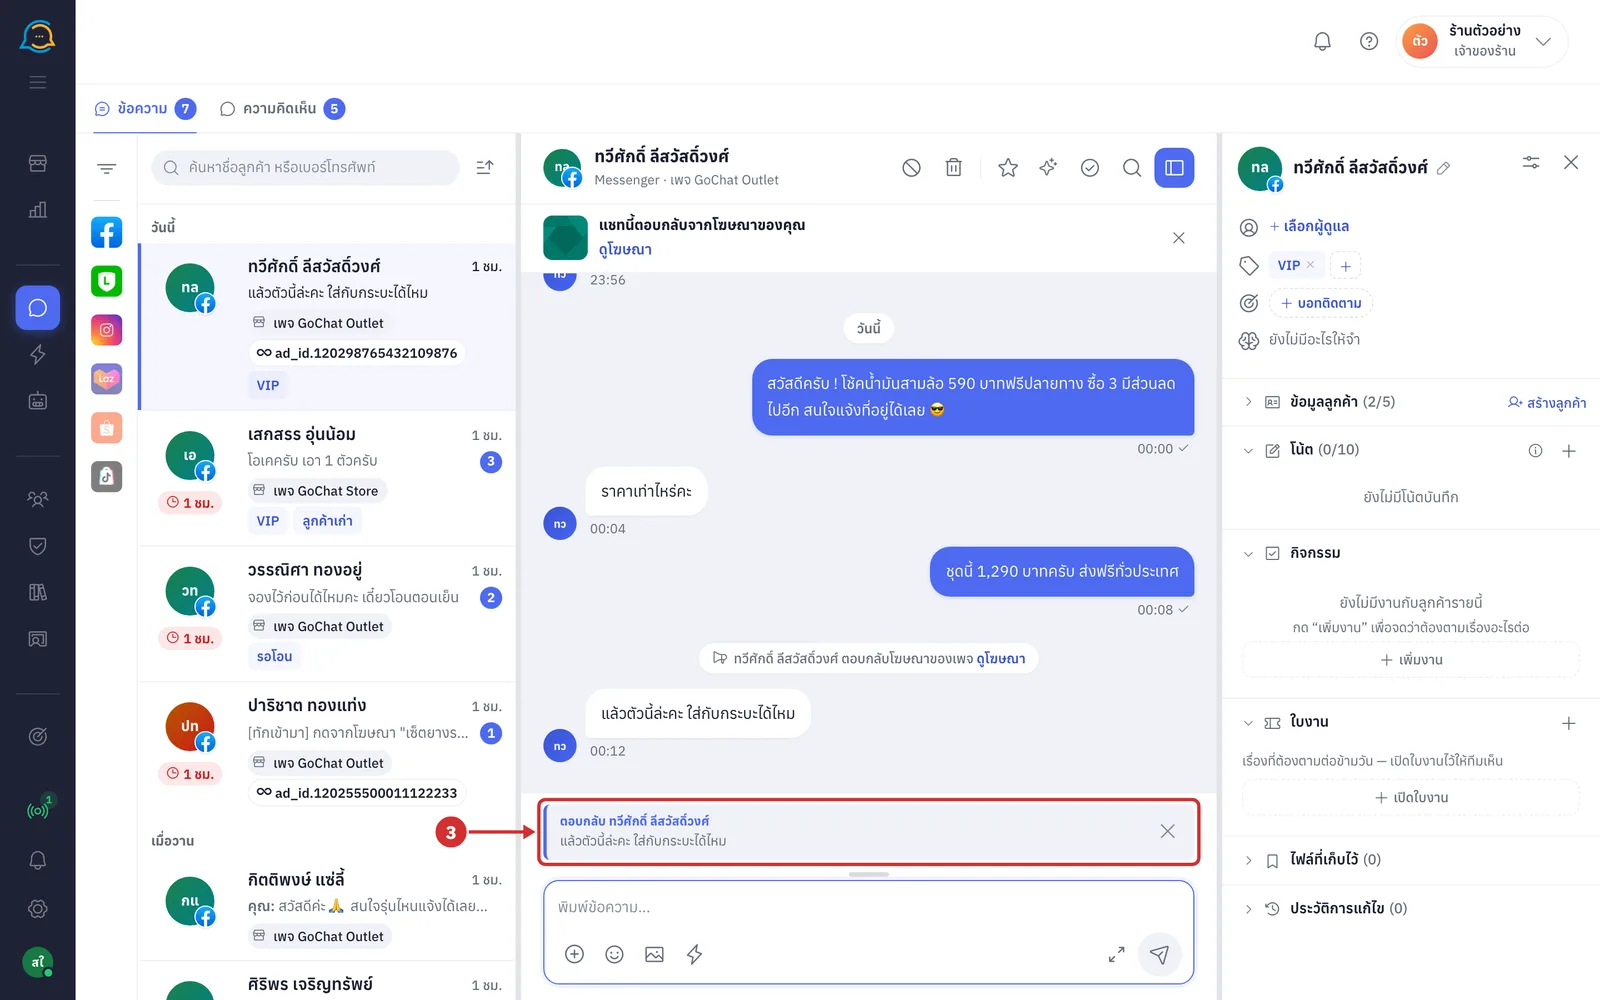
A ตอบกลับ <ชื่อ> (Reply to <name>) bar with the original message appears above the message box. Type your reply and send as usual. The sent message shows the original quoted above the bubble with คุณตอบกลับ <ชื่อ> (You replied to <name>), and the customer sees which message you answered. Click the quoted message to jump to the original (changed your mind? click × at the end of the bar to cancel the reply)
Copying a message
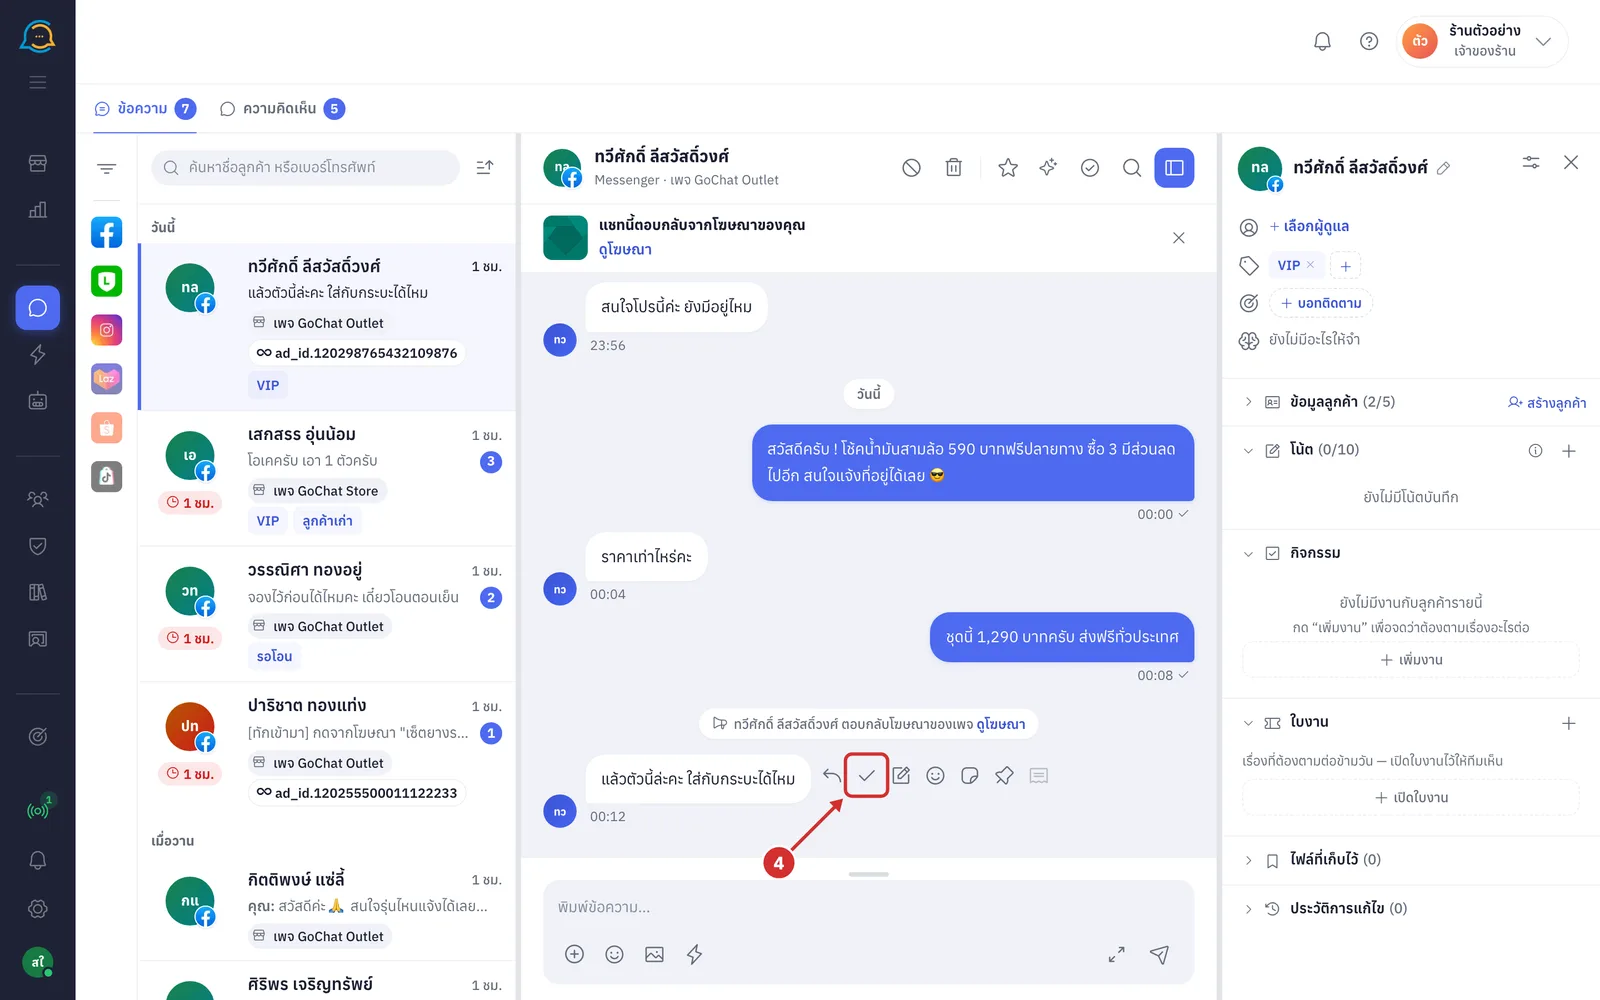
Click คัดลอกข้อความ (Copy message) to copy the text in the bubble and paste it elsewhere. The icon briefly turns into a check mark (คัดลอกแล้ว (Copied)) to show it has been copied
Writing a note from a message
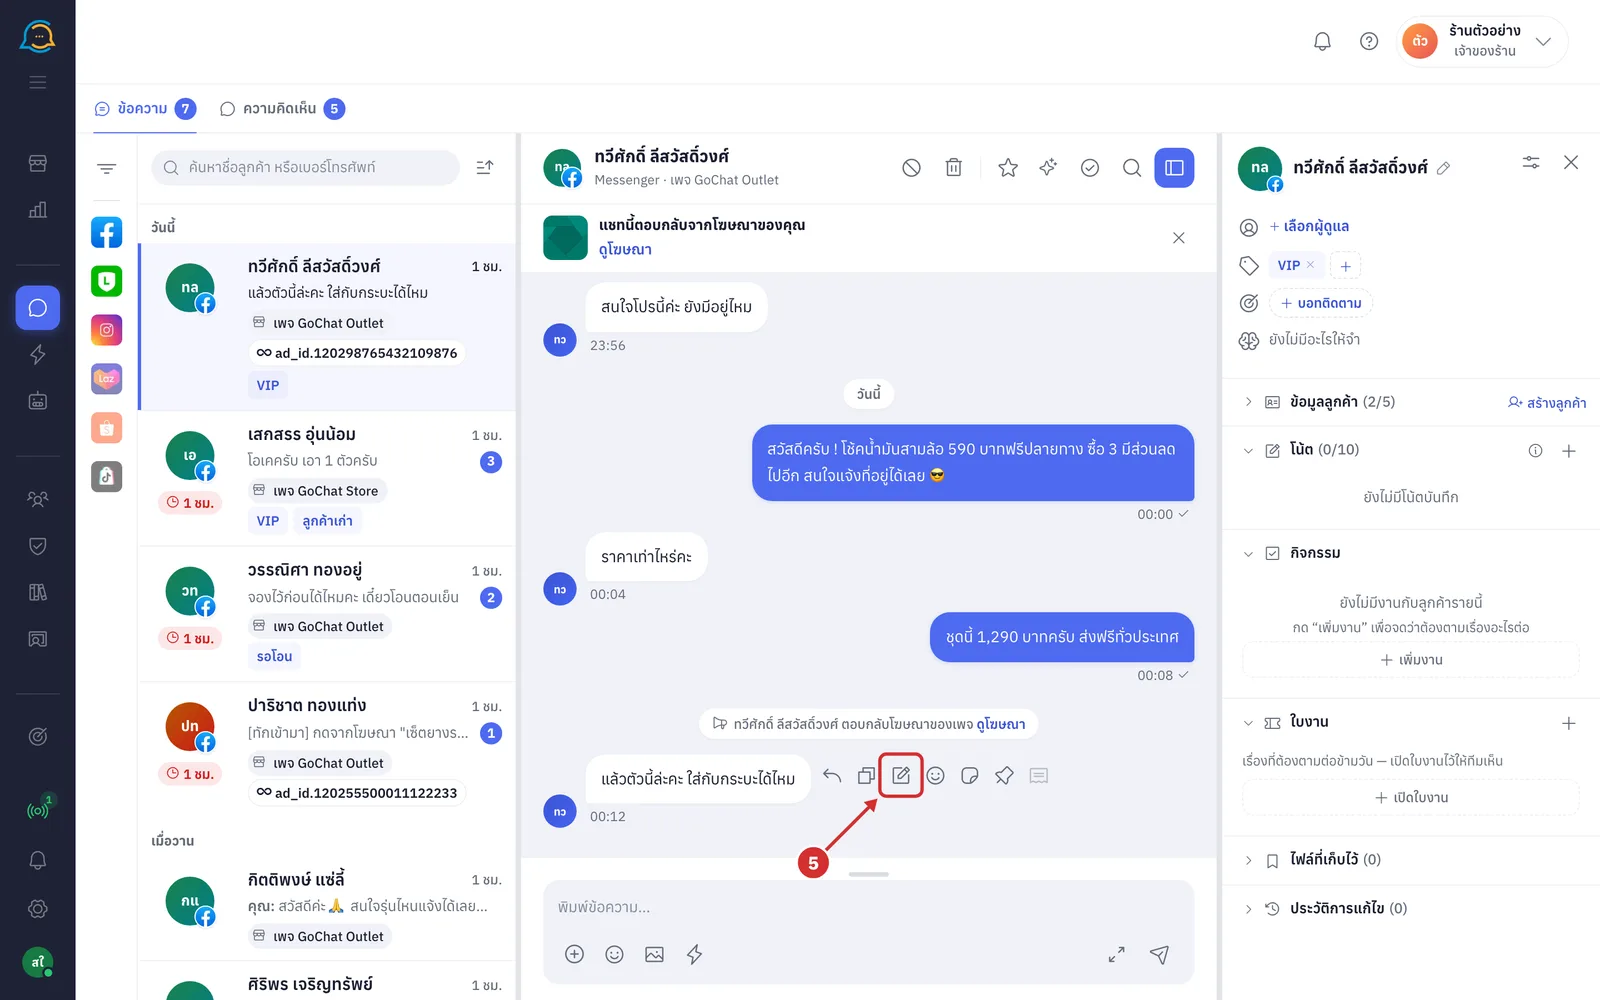
Click จดโน้ต (Write note — the pencil on paper) to write a note for the team from this message
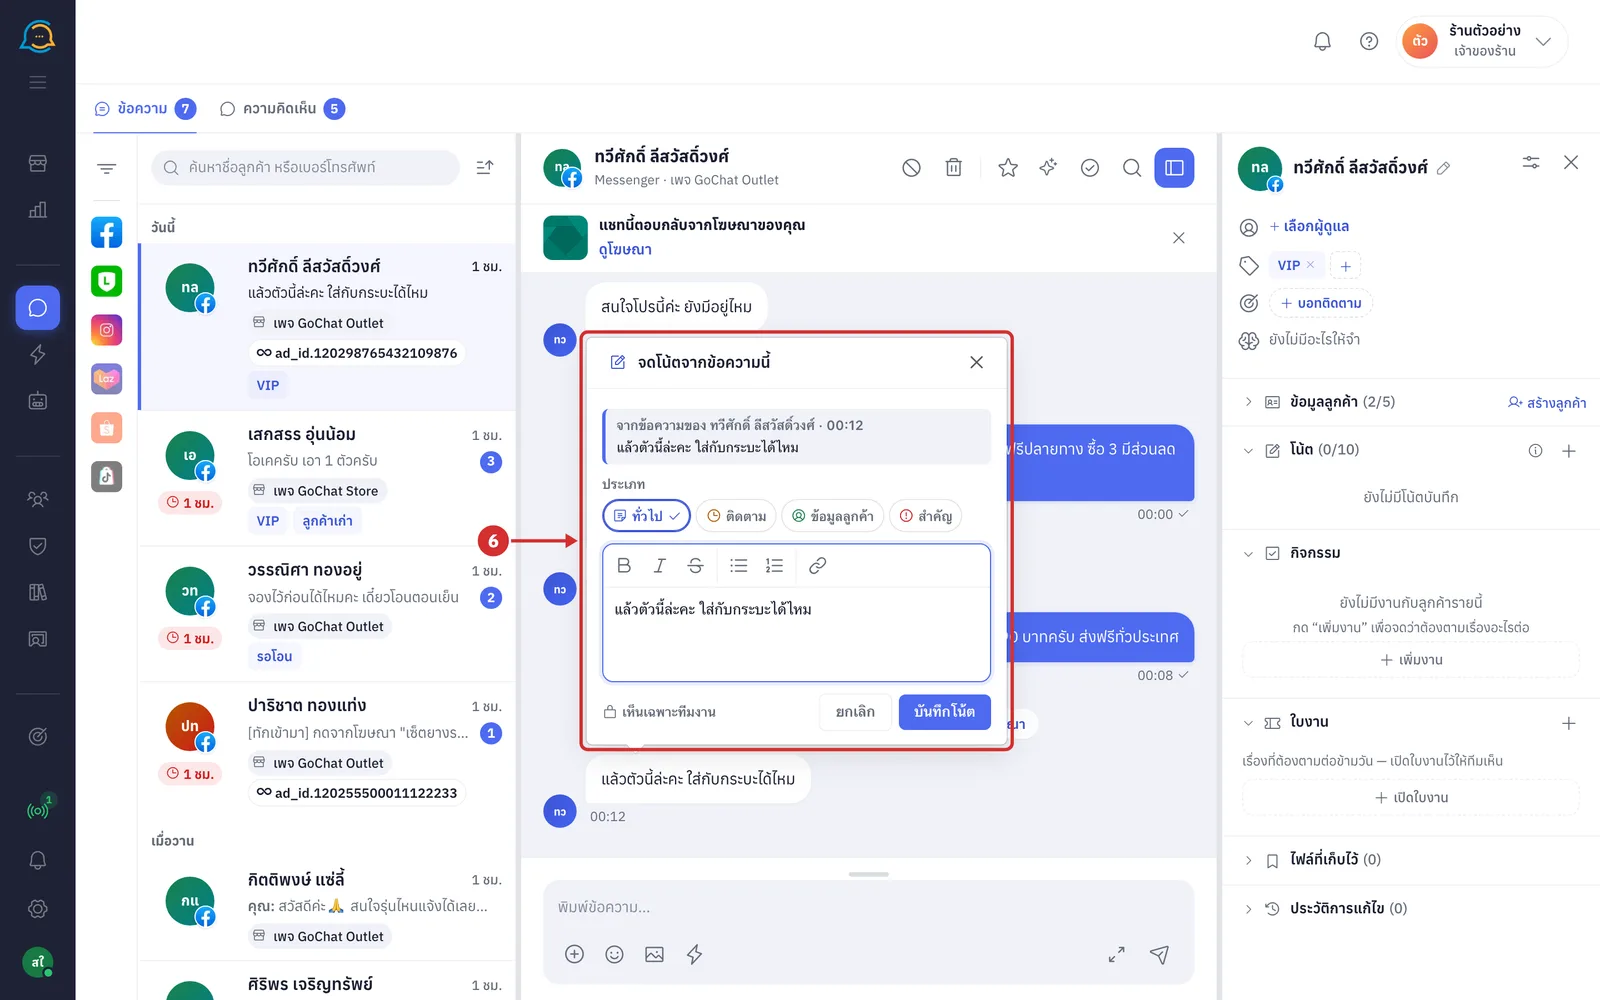
The จดโน้ตจากข้อความนี้ (Note from this message) box shows whose message it came from and when, and fills the message into the box for you; edit it as you like. Choose a ประเภท (Type), then click บันทึกโน้ต (Save note). The system shows บันทึกโน้ตแล้ว (Note saved) (notes are visible only to your team, not to the customer)
A โน้ต (Note) label appears under that message (with a count if there are several); click it to open this message's notes in the customer panel
The note also appears under โน้ต (Notes) in the customer panel; see how to edit and delete notes in Using the customer panel
Reacting to a message
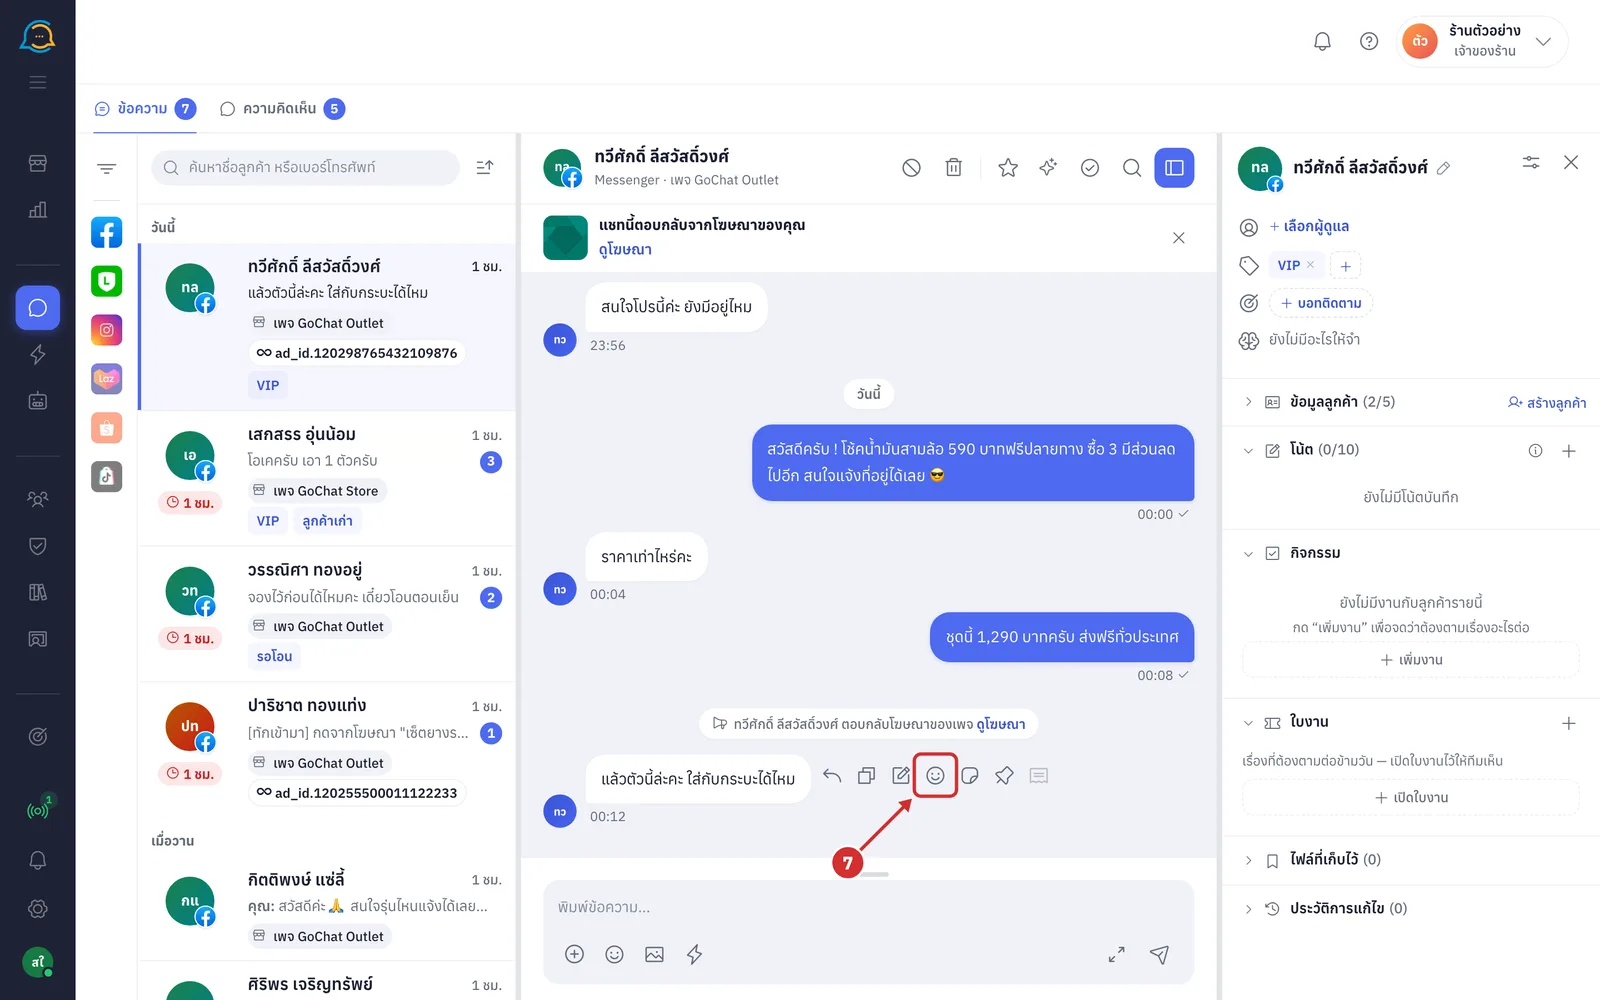
Click กดอารมณ์ (React — the smiley). Available in Messenger and Instagram chats
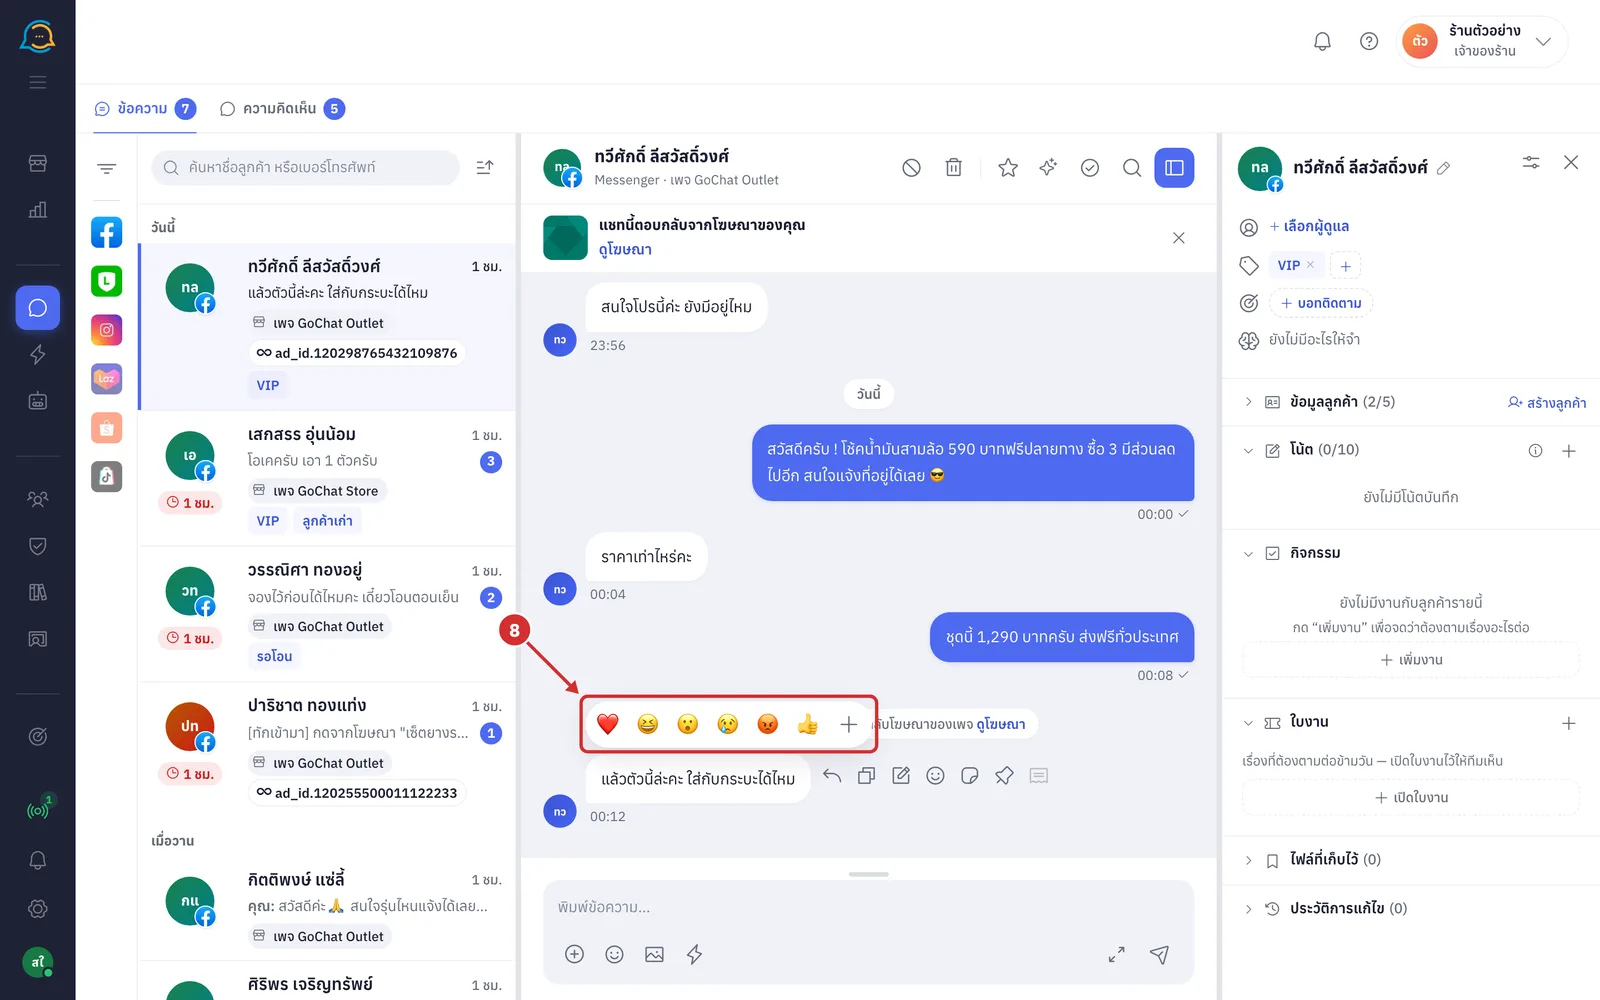
Choose a reaction from the bar above the bubble (รัก (Love) · ฮา (Haha) · ว้าว (Wow) · เศร้า (Sad) · โกรธ (Angry) · ถูกใจ (Like)) or click + (เลือกอิโมจิอื่น (Choose another emoji)). The reaction appears under the bubble and is sent to the customer
Click the same reaction again = remove it · click a different one = change it. Each admin has their own reaction and does not overwrite others' or the customer's
Instagram chats only have the heart
Click the reactions under a bubble to see who reacted (the ความรู้สึก (Reactions) window); your own row can be clicked to remove it
More than 24 hours after the customer last typed, the button is faded and cannot be clicked (Facebook no longer allows reactions, but you can still type replies for up to 7 days)
Replying with a sticker
Click ส่งสติกเกอร์ (Send sticker) to answer this message with a sticker (Messenger chats only, within 24 hours of the customer's last message)
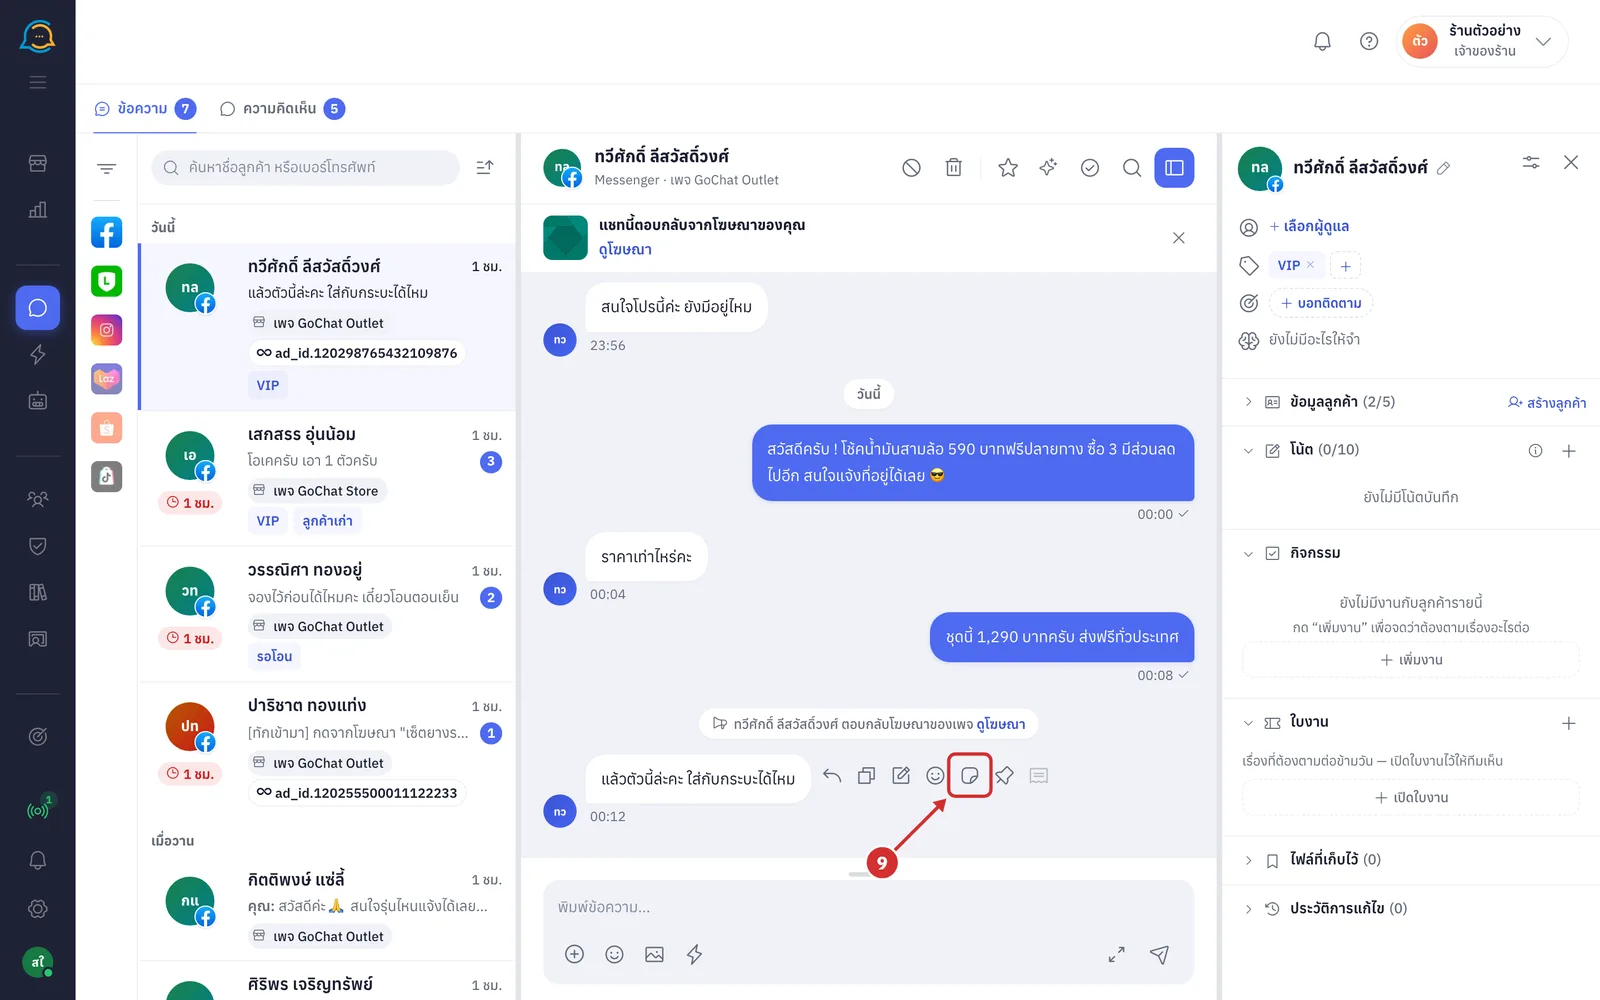
The อิโมจิและสติกเกอร์ (Emoji and stickers) panel opens on the สติกเกอร์ (Stickers) tab. Search in ค้นสติกเกอร์ เช่น ขอบคุณ · แมว (Search stickers, such as thanks · cat) or click a category (such as มีความสุข (Happy) · รัก (Love)), then click the sticker you want; the system sends it as a reply to that message right away (recently used stickers appear above the categories · the GIPHY tab sends animated images)
Pinning a message
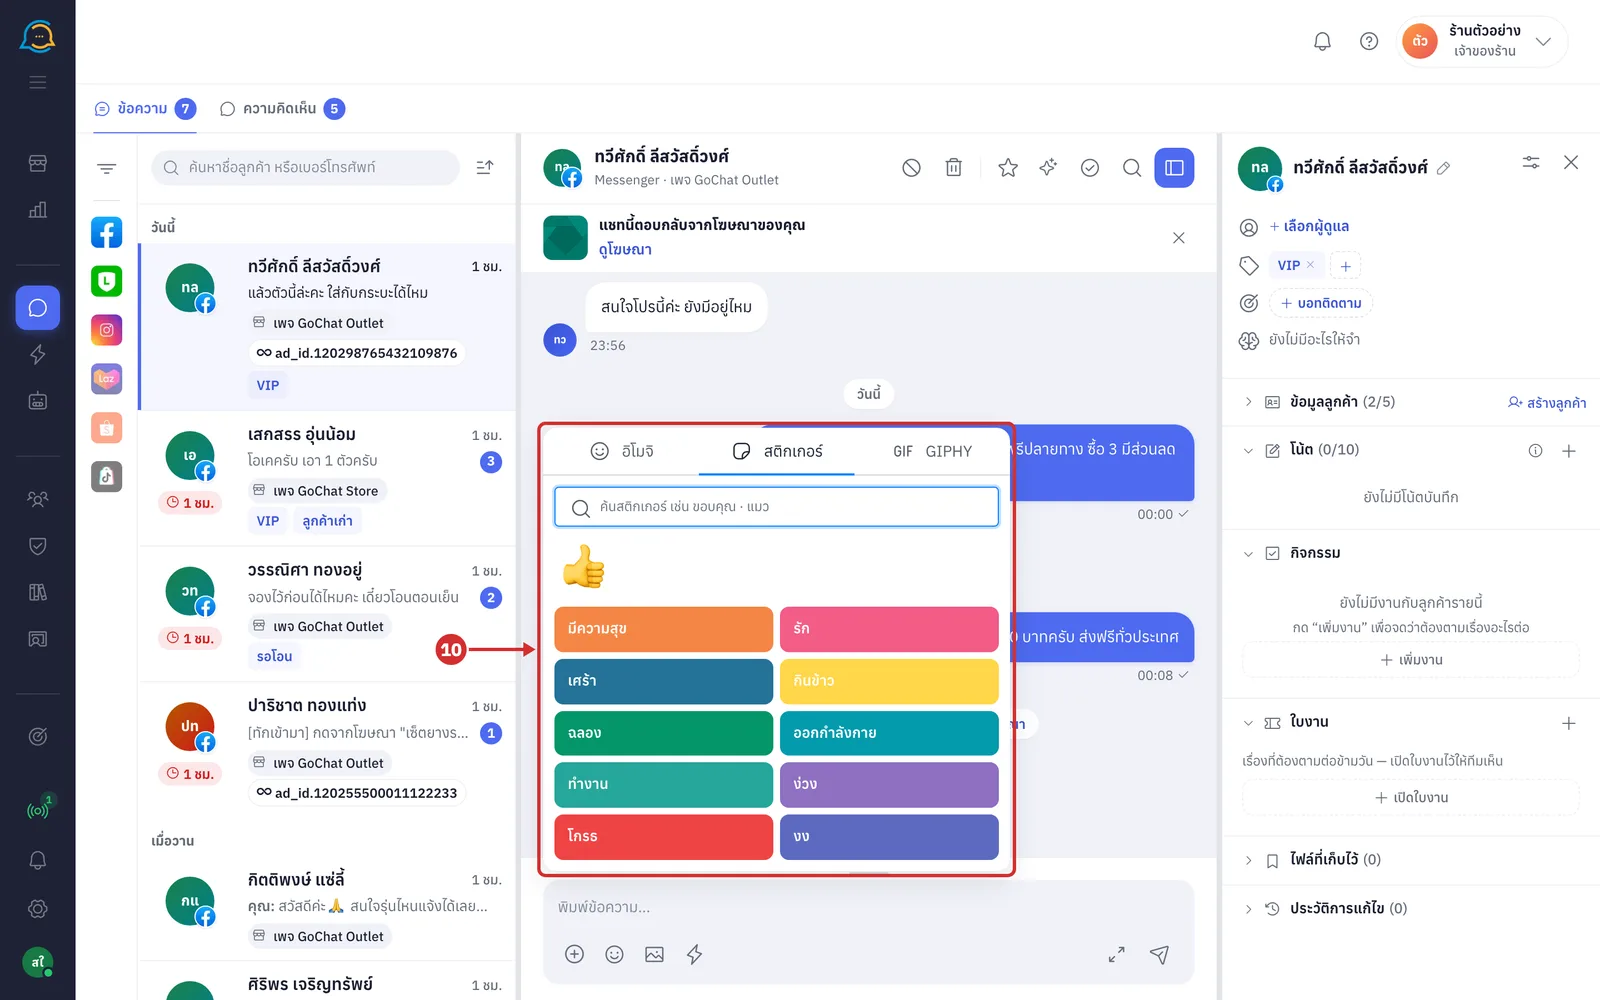
Click ปักหมุดข้อความ (Pin message — the pin) to pin this message to the chat header. Everyone in the shop sees it; the customer does not. Only text messages can be pinned, up to 5 per chat
Pinned messages appear as a bar under the chat header showing the latest pin. Click the message to jump to it, click ดูหมุดทั้งหมด (N) (See all pins (N)) to expand the list, and ย่อรายการหมุด (Collapse pins) to fold it
Click the unpin button on the bar, or the pin button on the same bubble again (เลิกปักหมุด (Unpin)), to remove a pin
When 5 messages are already pinned, the ปักครบ 5 ข้อความแล้ว (5 messages already pinned) window lets you choose which to remove (you can choose several), then click เอาออก N อัน แล้วปักอันใหม่ (Remove N and pin the new one). The system never removes old pins by itself
Pins keep their own copy of the text, so they stay even if the original message is hidden or disappears
Saving images so they do not expire
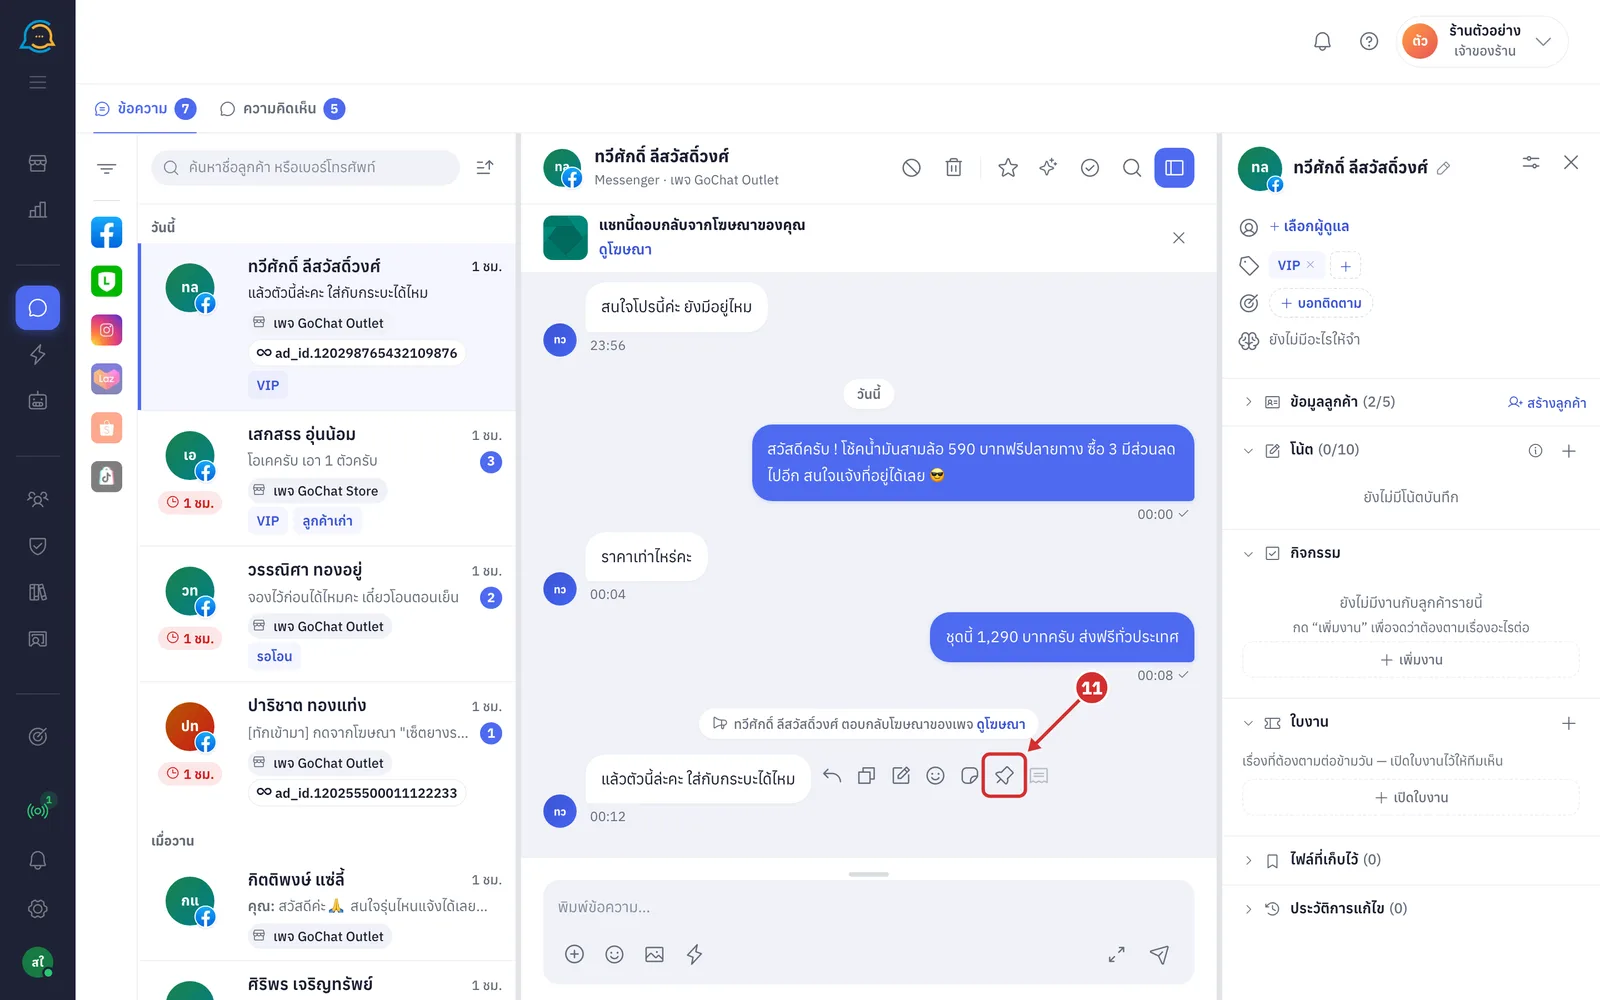
Bubbles with images have a เก็บรูปนี้ไว้ (Save this image — bookmark icon) button. After you click it, the system shows เก็บไว้แล้ว (Saved); the image will not expire with the chat's files and appears under ไฟล์ที่เก็บไว้ (Saved files) in the customer panel. The button stays highlighted, and clicking it again is เลิกเก็บรูปนี้ (Unsave this image) (removes it from the saved list; the file stays in your shop's storage · if the image is used in a saved reply, the system asks first). For a bubble with several images, this button saves all of them; to save one at a time, click an image to view it full screen and use that image's save button (the button only appears for images the system can keep a copy of).
Reading the status and details under bubbles
Under the shop's message bubbles are the time sent and a status mark
Clock = sending · one check mark = sent
Two check marks = read; hover to see when it was read (Facebook and Instagram show it when the customer opens the message · LINE shows it when the customer types a reply after the shop's message, and the time shown is when the customer replied; group chats are not counted)
A red exclamation mark = not sent; hover to see why. Click the circular arrow (ส่งอีกครั้ง (Send again)) to retry, or the trash can to remove the bubble from the chat; the system asks you to confirm (…นี้ยังไม่ถึงลูกค้า ลบแล้วจะหายจากห้องนี้และกู้คืนไม่ได้ (… has not reached the customer; once deleted it disappears from this chat and cannot be restored) · if the system did not hear back from the channel in time, it warns ลูกค้าอาจได้รับข้อความนี้แล้ว (The customer may have received this message) and asks you to check in the channel's app before deleting)
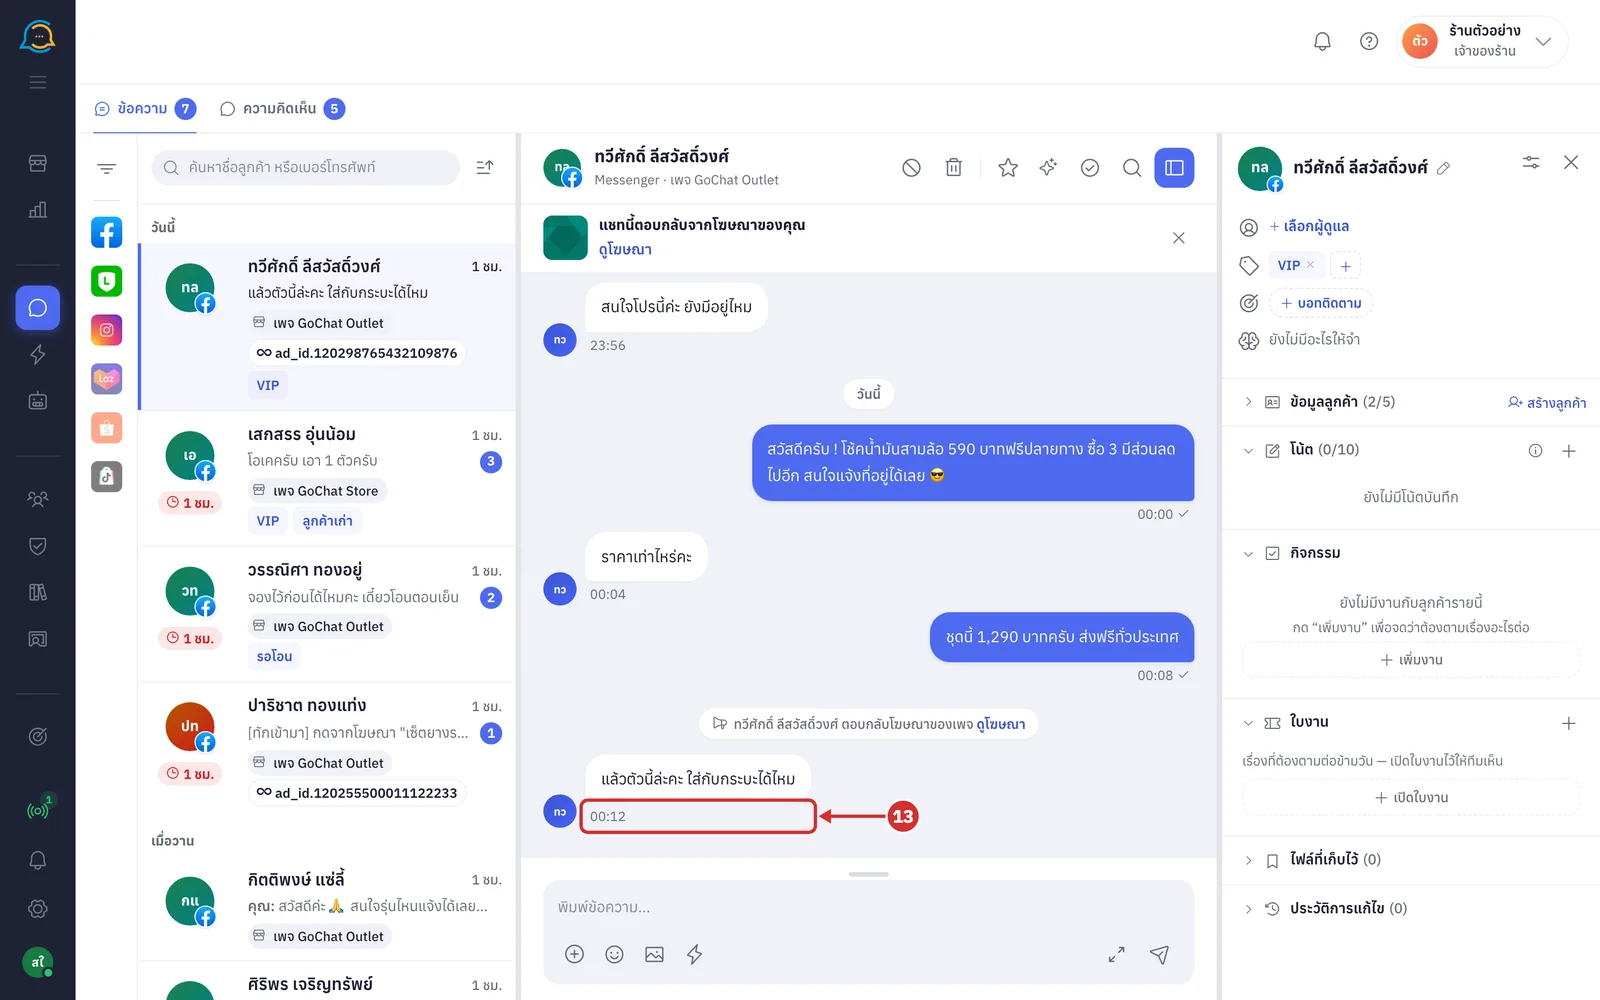
The round picture at the end of the line is the admin who sent this message; hover to see the name (… เป็นคนตอบข้อความนี้ (… sent this message)). Messages written by the AI assistant have ผู้ช่วย AI (AI assistant) before the time
Messages sent by an auto-reply bot have a บอทตอบ (Bot replied) label on the edge of the bubble; click it to see ทำไมบอทตอบ (Why the bot replied) (the rule or set used, the condition, the mode and the time)
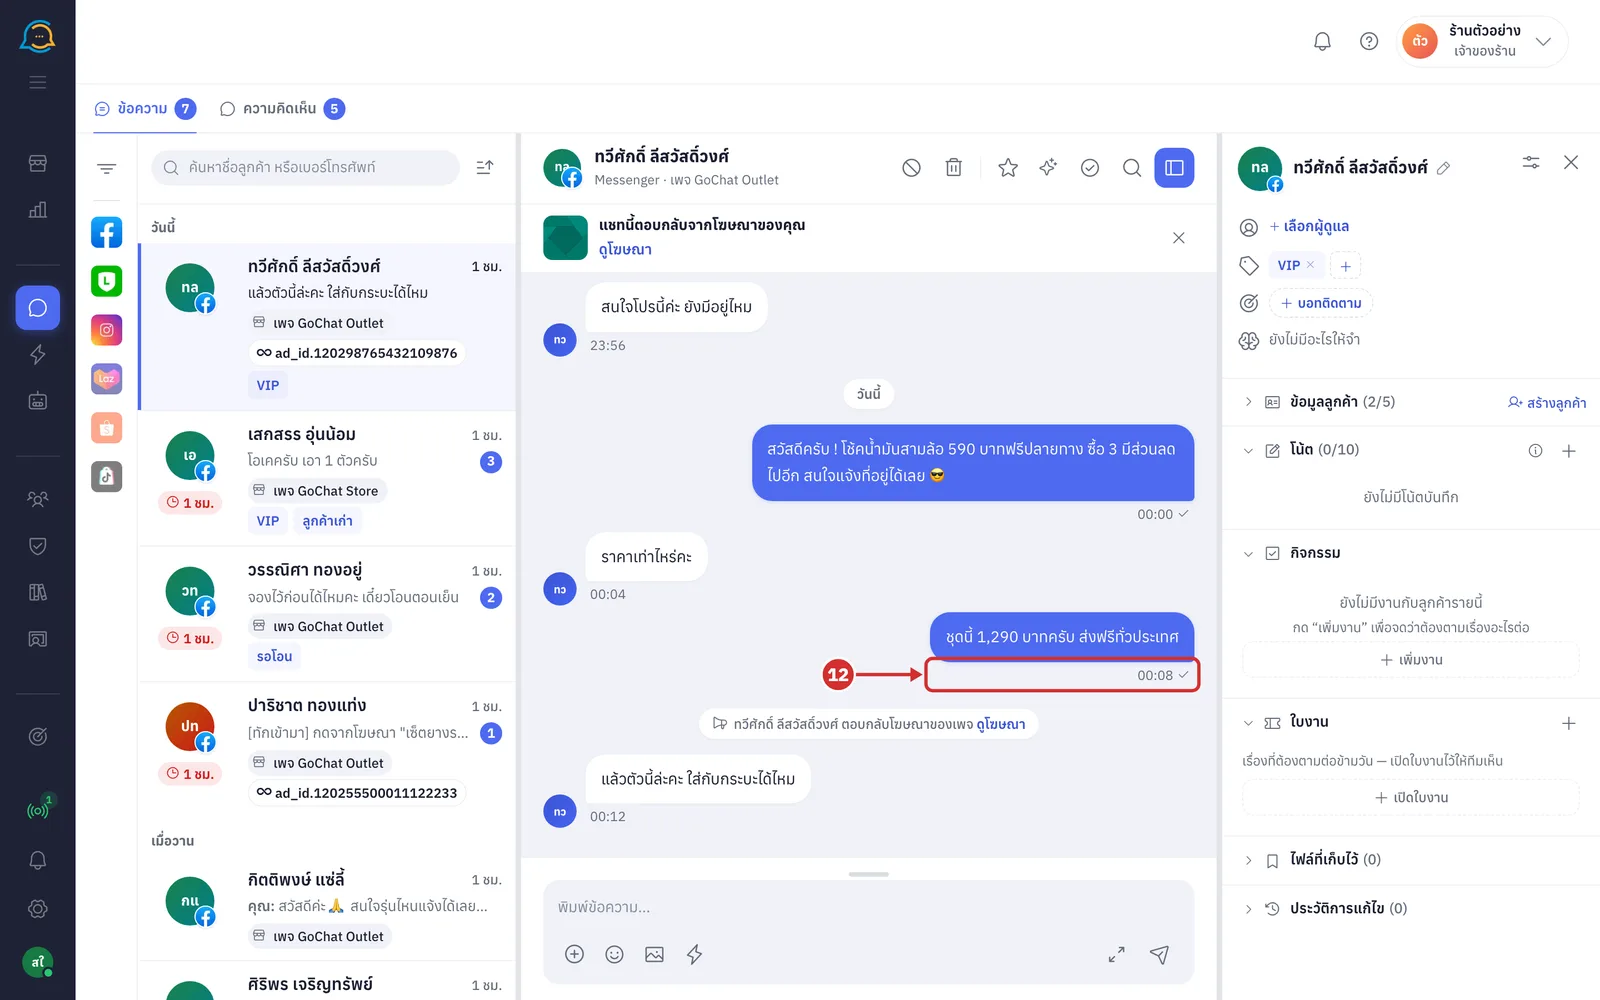
Under the customer's message bubbles is the time the customer sent it, and sometimes more details
แก้ไขแล้ว (Edited) (or แก้ไขแล้ว N ครั้ง (Edited N times)) = the customer edited this message after sending; you see the latest version
จากปุ่มลัด (From a quick button) = the customer tapped one of the option buttons the shop sent rather than typing
Teammates' pictures under the customer's latest message = people in your shop who have seen it; hover to see their names (เห็นแล้ว (Seen))
Reading system lines in a chat
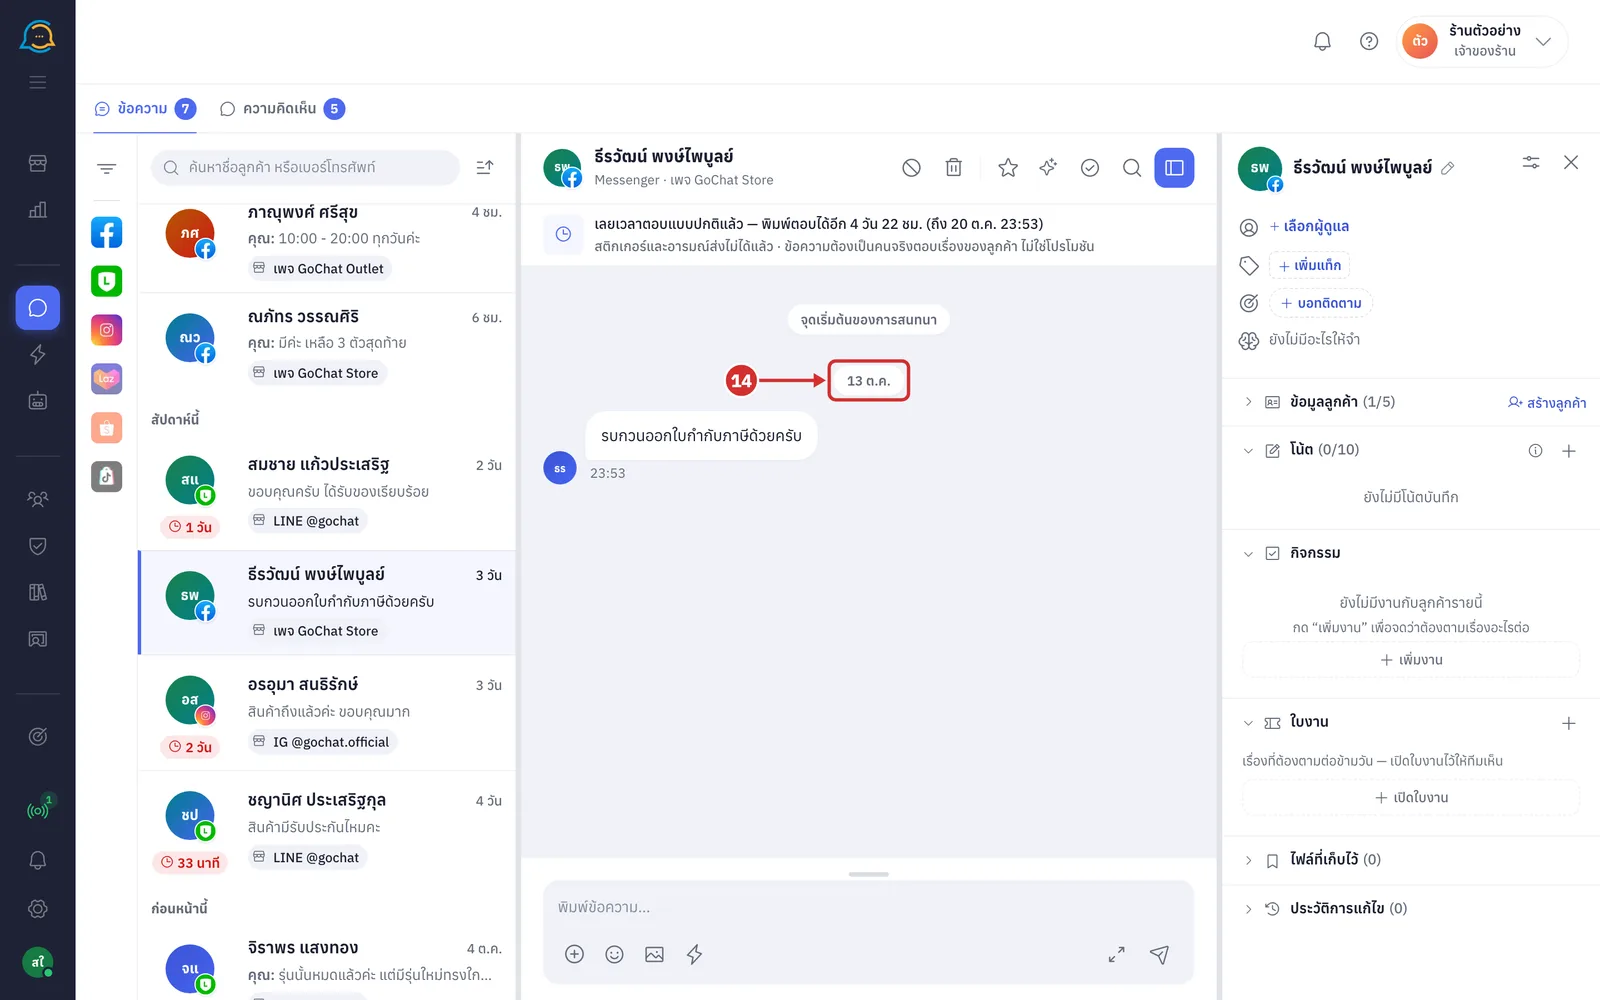
Labels in the middle of the chat separate messages by day (วันนี้ (Today) · เมื่อวาน (Yesterday) or a date such as 13 ต.ค. (13 Oct))
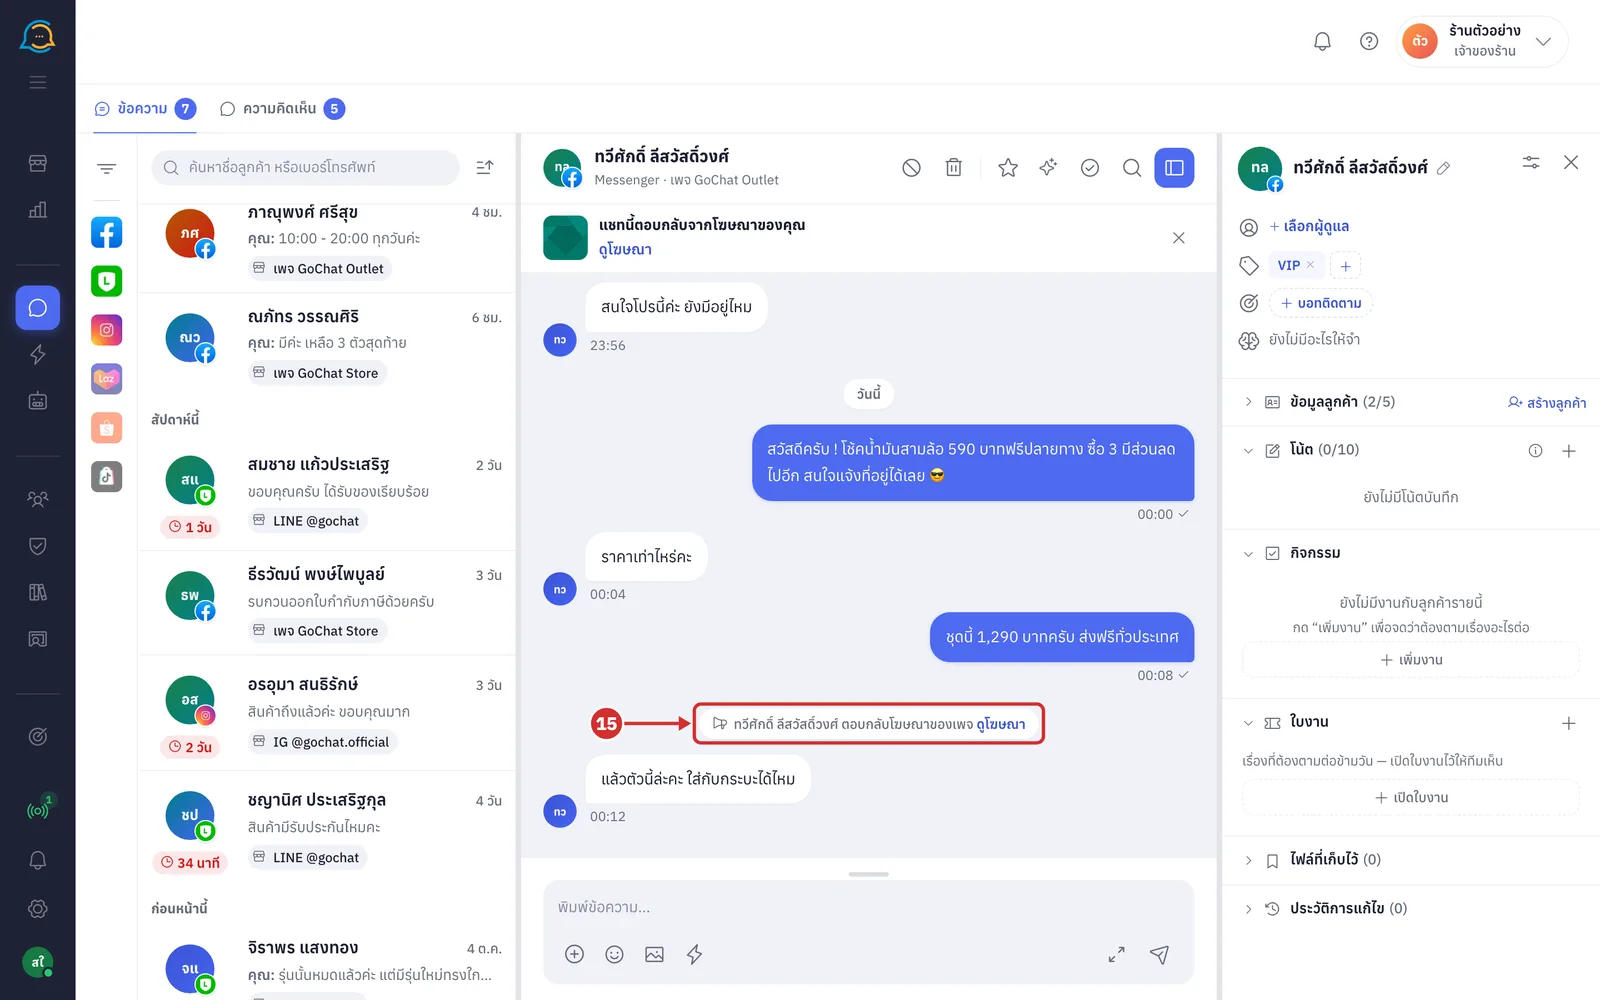
The line <ชื่อลูกค้า> ตอบกลับโฆษณาของเพจ (<customer name> replied to the page's ad) means the customer clicked a Facebook ad and messaged you. It appears once per ad (a different ad, or clicking the ad again, adds a new line). Click ดูโฆษณา (View ad) to open that ad
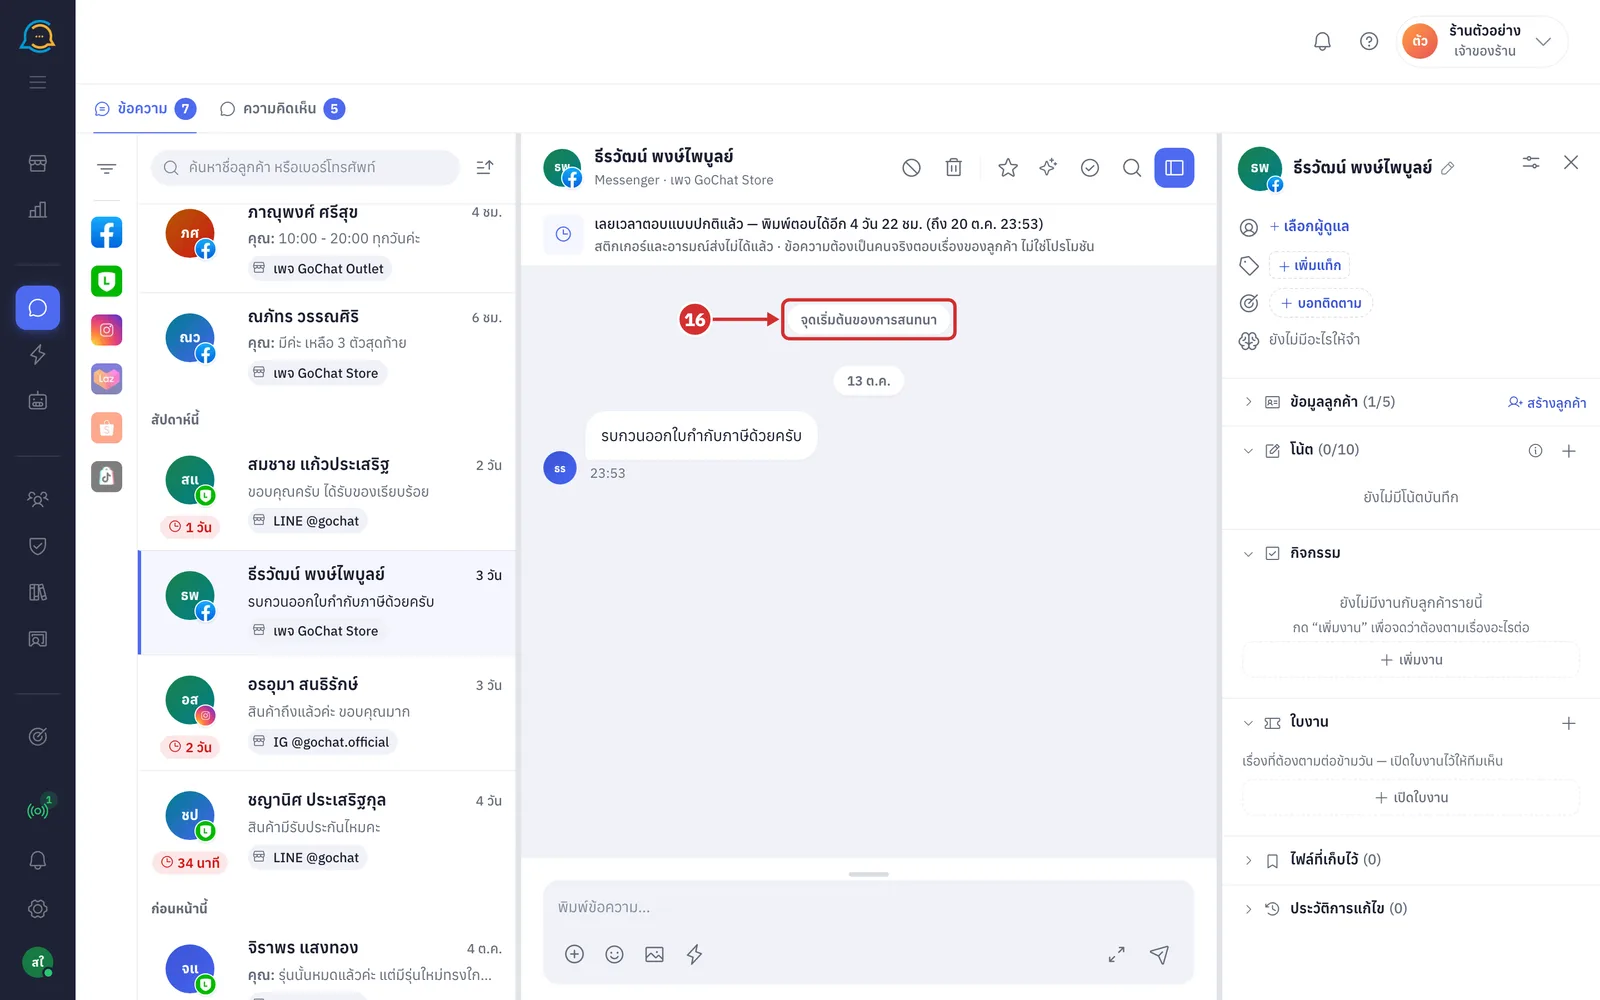
Scroll up to the top of the chat and older messages load by themselves (while loading it shows กำลังโหลดข้อมูลเพิ่มเติม… (Loading more…)) until you reach the จุดเริ่มต้นของการสนทนา (Start of the conversation) label, which means there are no older messages. While reading back, a down arrow button (ลงไปข้อความล่าสุด (Go to the latest message)) appears at the bottom right, and if new messages arrive it becomes ข้อความใหม่ N ข้อความ (N new messages)
Note: Chats that use bots or tickets also show grey lines in the middle of the chat for events, such as when this chat's ticket changes. These lines are not messages, and the customer does not see them.