

Managing the shop file drive
The ไดรฟ์ (Drive) page — the คลังไฟล์ (File library) menu — keeps your shop's images, videos and PDF documents in one place, ready to send in chat or attach to quick replies. It has 3 sections: ไดรฟ์ของร้าน (Shop drive — files your shop uploaded or kept), ไฟล์ในแชท (Chat files — images and videos sent in chats) and ถังขยะ (Trash). Everyone in the shop can upload, organise folders, delete and restore files.
Opening the Drive page
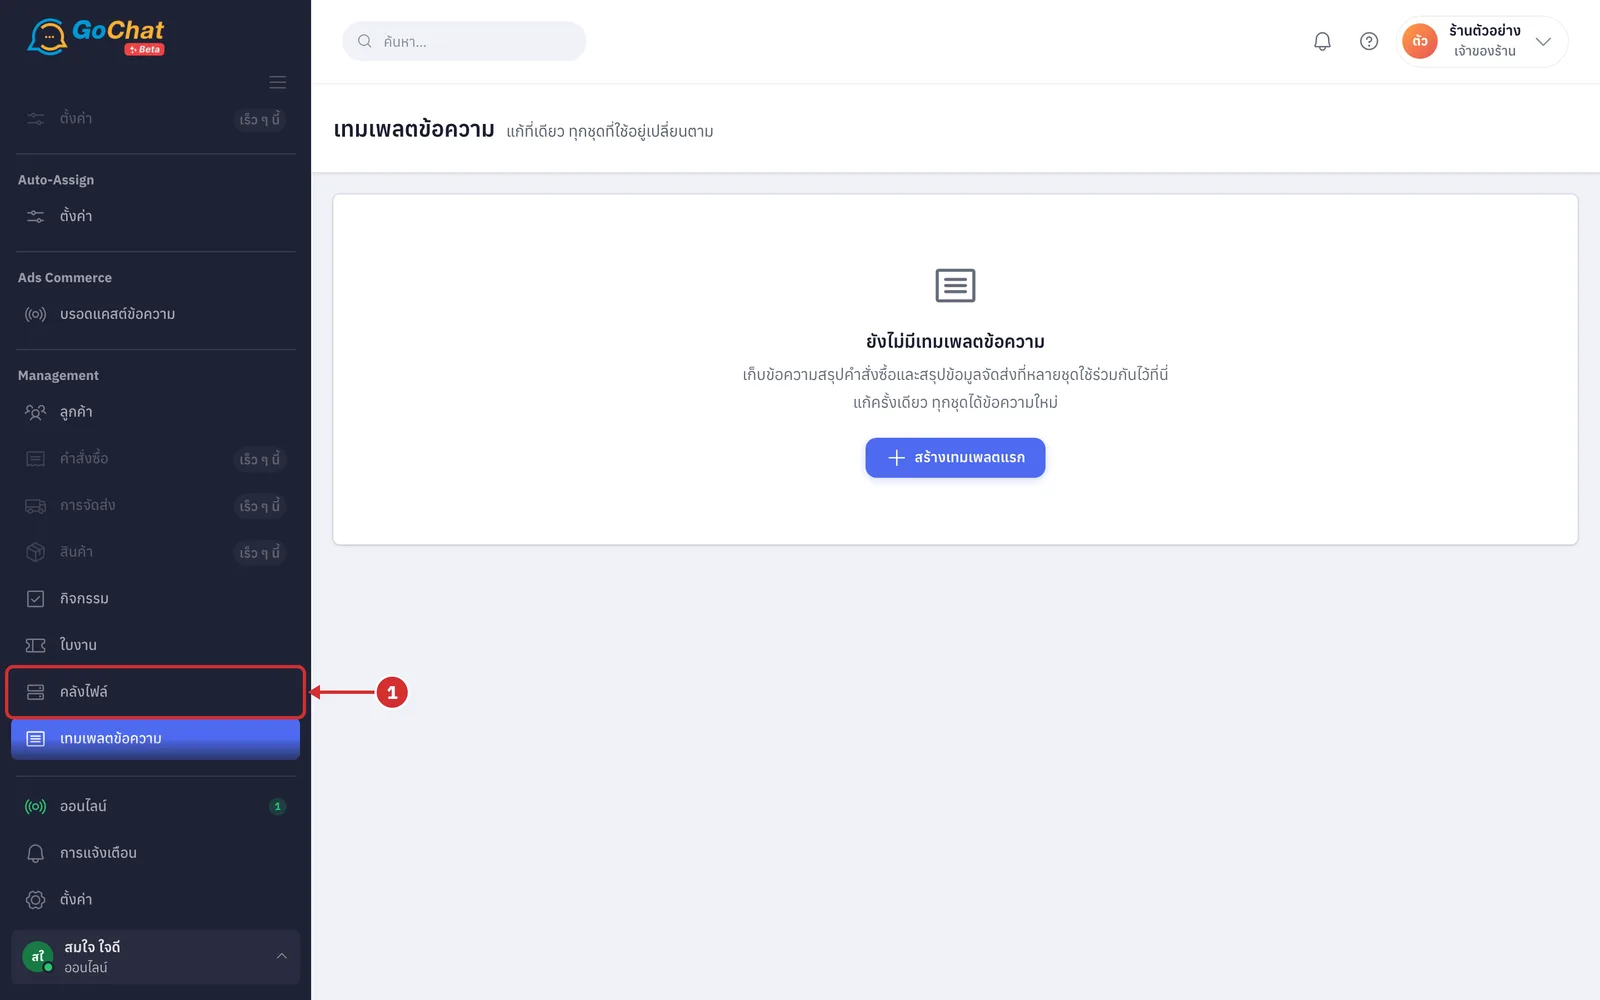
Go to the คลังไฟล์ (File library) menu under Management in the left menu bar. The system opens the ไดรฟ์ (Drive) page
Reading the drive cards
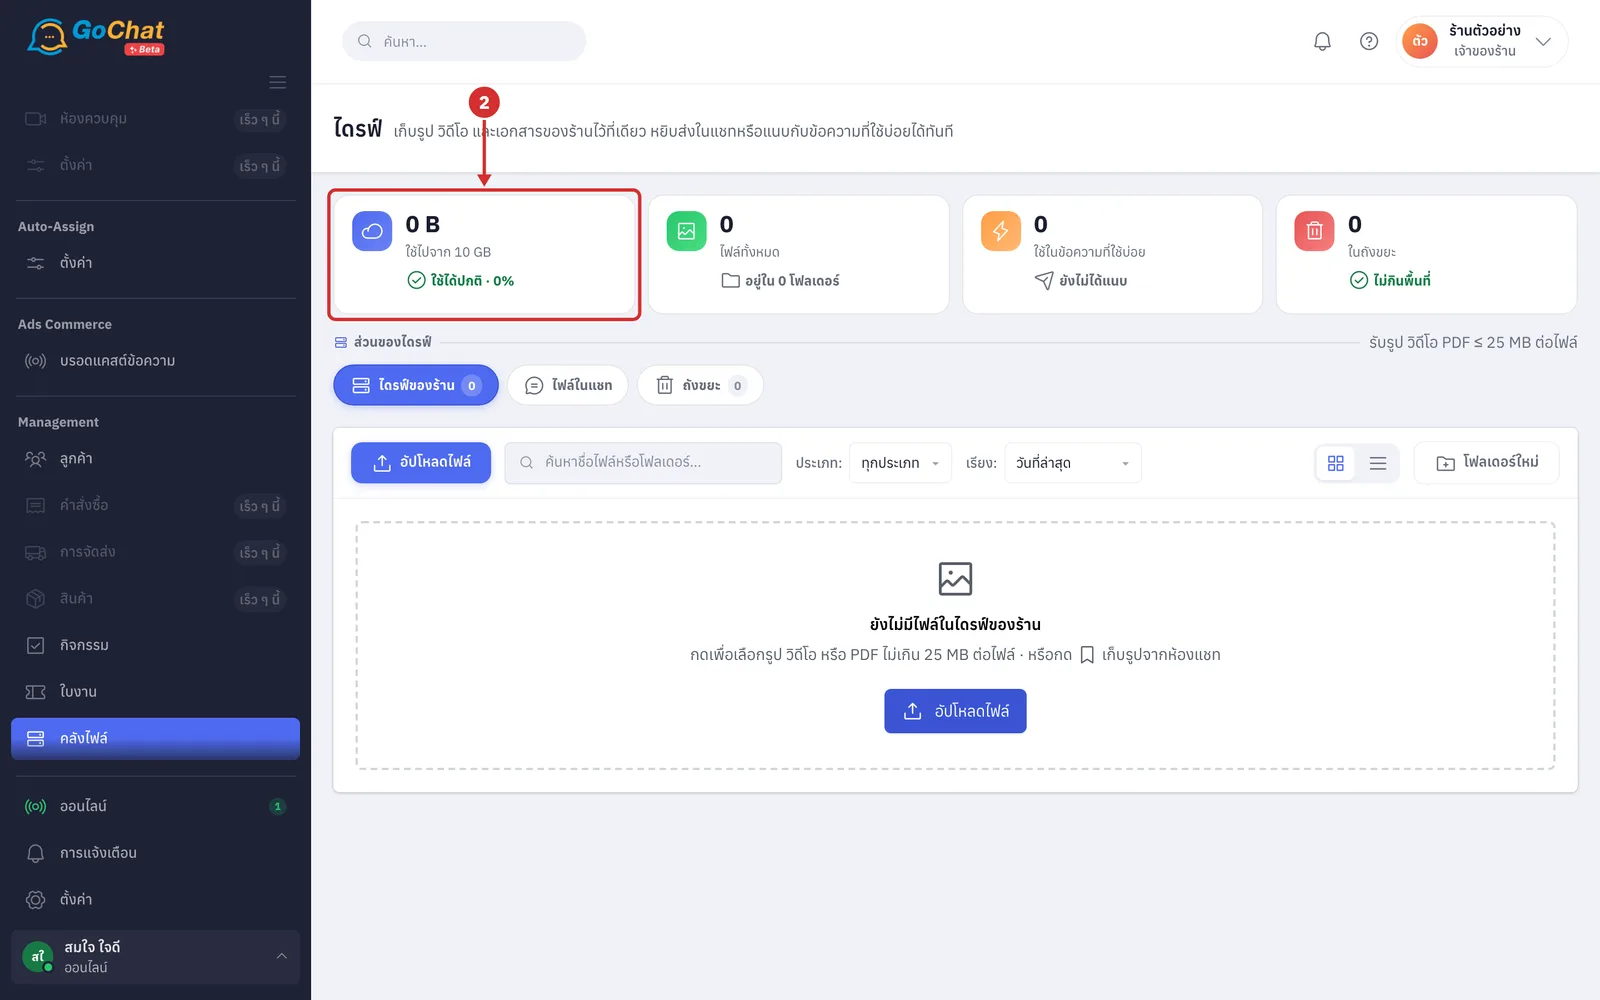
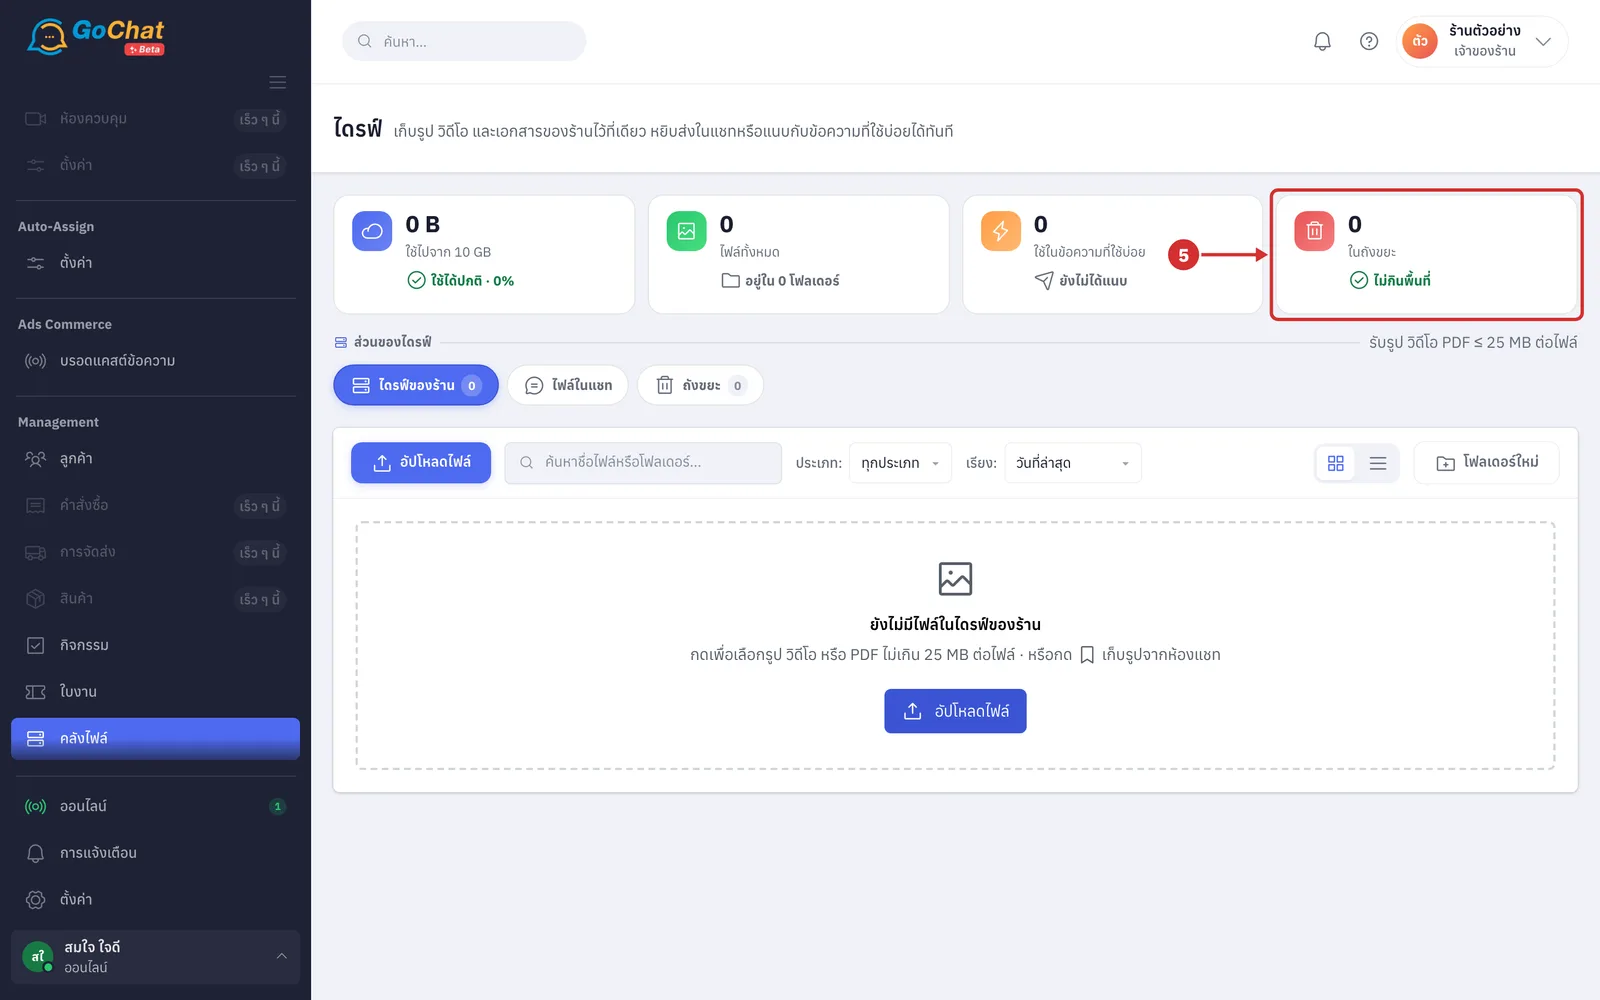
The 4 cards at the top always count the whole shop, whichever section or folder is open.
On the first card, see how much space your shop has used against your package's storage limit (ใช้ไปจาก … (used of …)). The bottom line shows the status: ใช้ได้ปกติ (Normal) with the percentage used · ใกล้เต็ม (Almost full — 80% or more) · ใกล้เต็มมาก (Nearly full — 95% or more) · เต็มแล้ว (Full) or เกินแพ็กเกจ … (Over the package by …) (space includes files in the trash; the same file kept several times counts once; chat images and videos not kept in the drive do not count)
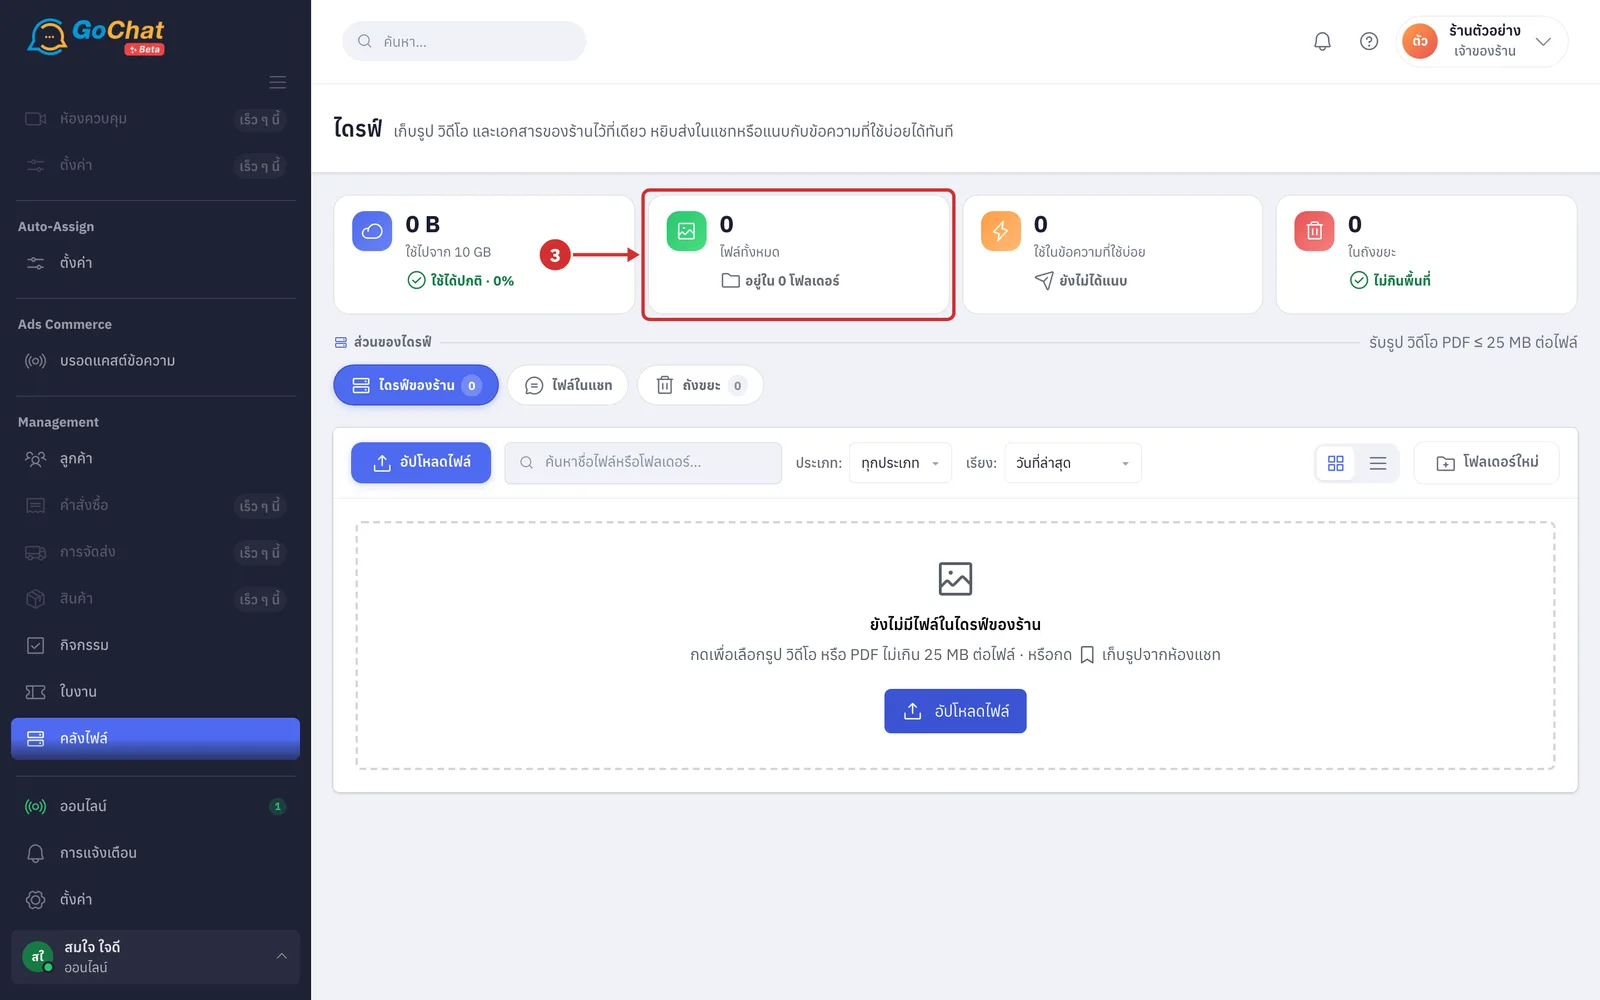
On the ไฟล์ทั้งหมด (All files) card, see how many files are in the shop drive outside the trash. The bottom line shows the number of folders in the shop (อยู่ใน … โฟลเดอร์ (in … folders))
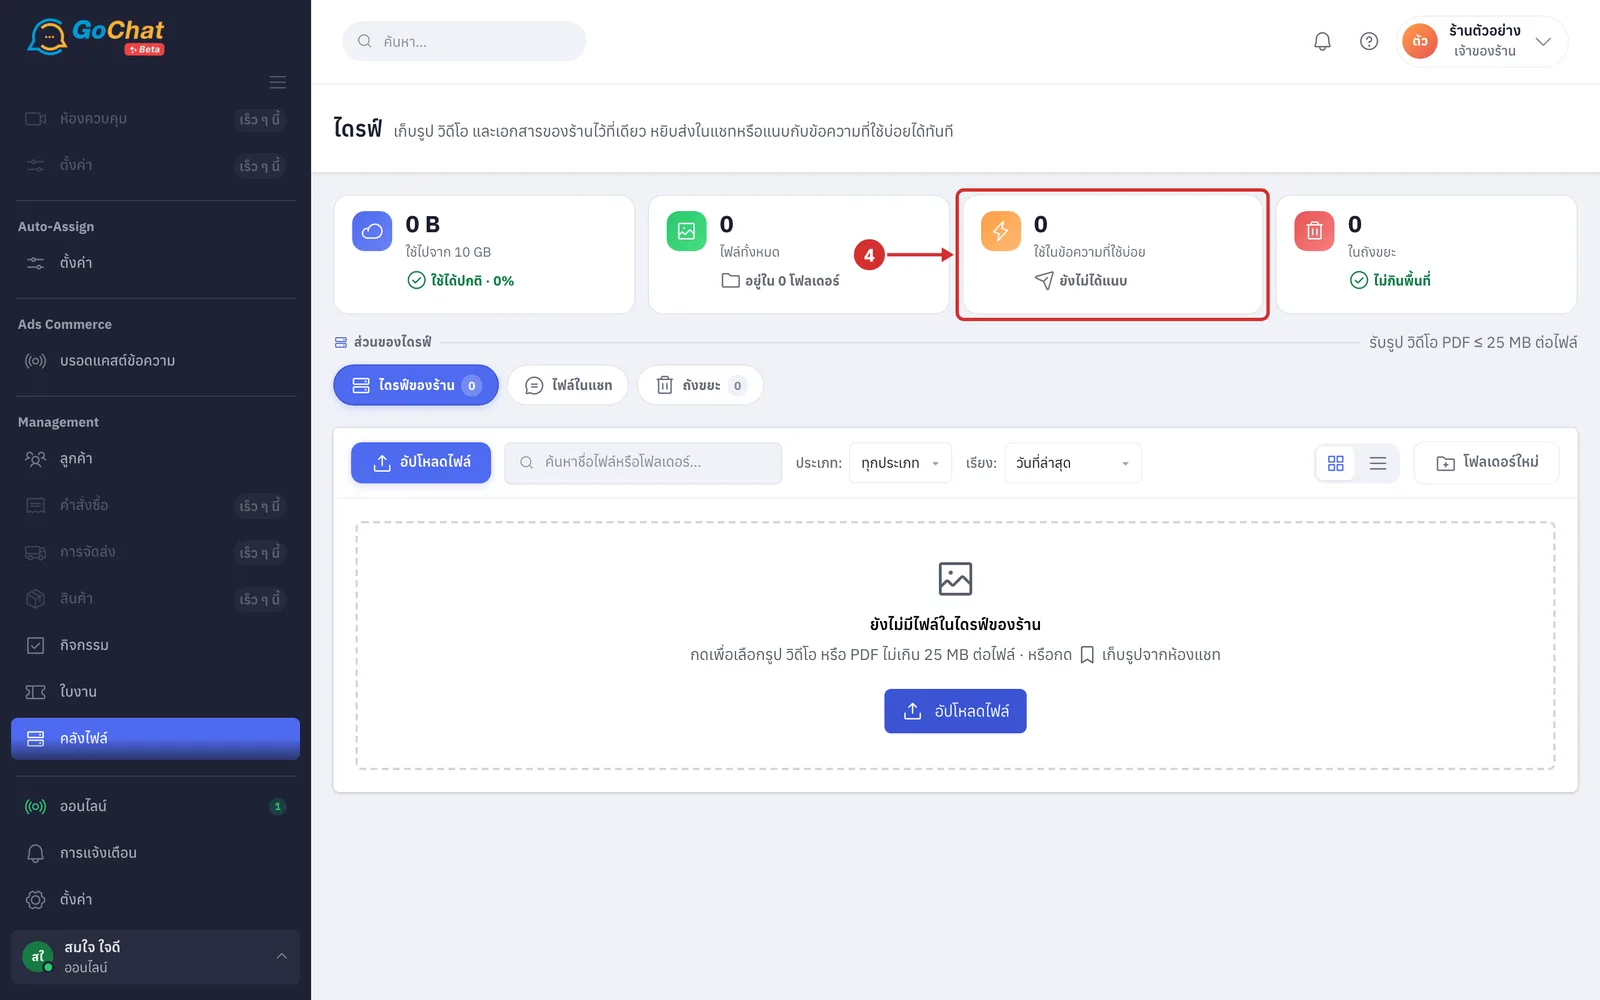
On the ใช้ในข้อความที่ใช้บ่อย (Used in quick replies) card, see how many drive files are attached to quick replies. The bottom line shows how many quick replies attach drive files (แนบอยู่ … ข้อความ (attached to … messages) or ยังไม่ได้แนบ (Not attached yet))
On the ในถังขยะ (In trash) card, see how many items are in the trash. The bottom line shows how much space the trash still takes (ยังนับพื้นที่ … (still counts …) or ไม่กินพื้นที่ (Takes no space) · delete permanently to free space, see Restoring and emptying the trash)
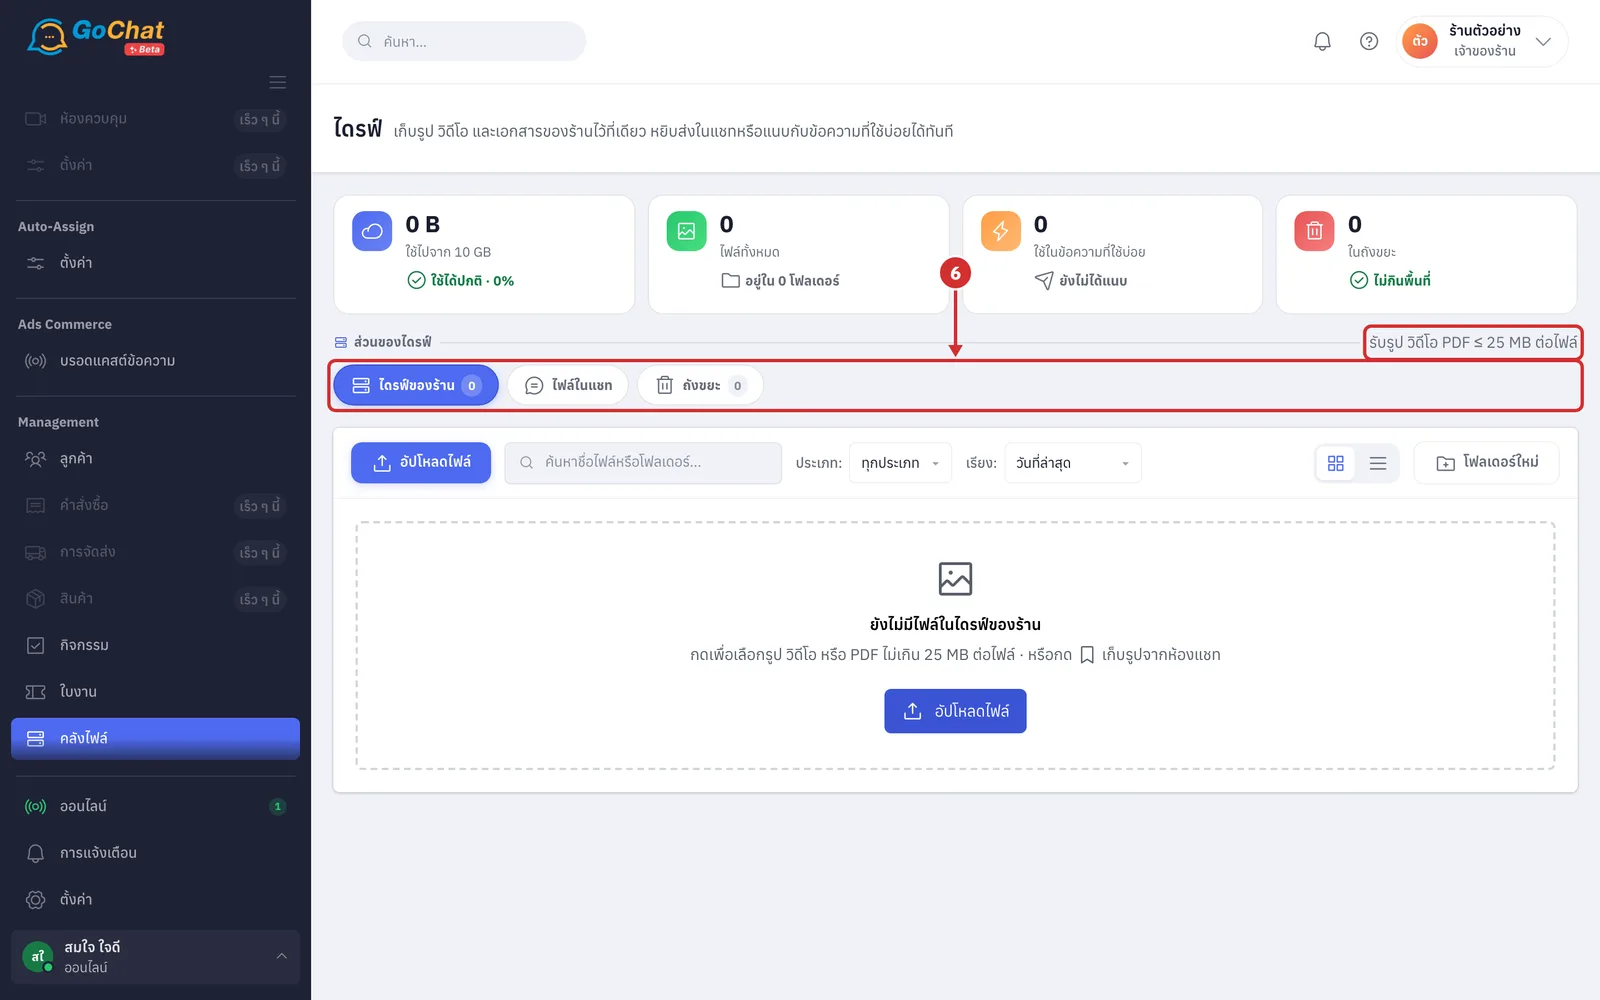
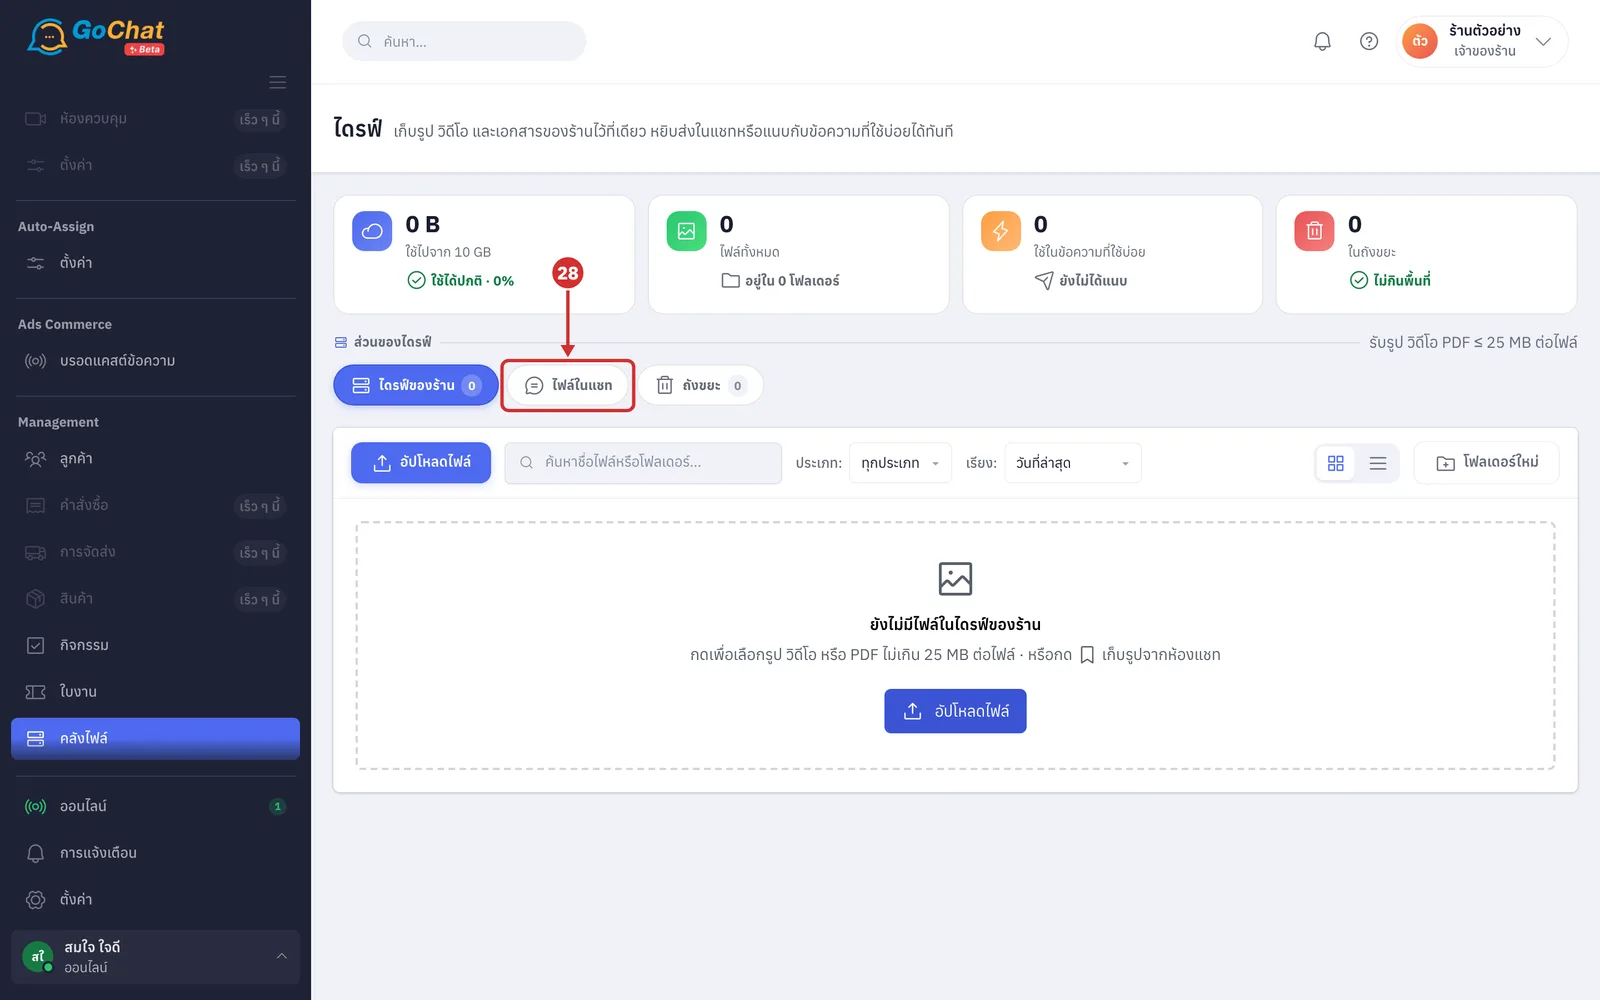
Below the cards, under ส่วนของไดรฟ์ (Drive sections), click the ไดรฟ์ของร้าน (Shop drive) · ไฟล์ในแชท (Chat files) or ถังขยะ (Trash) chip to switch sections (the numbers on the chips are the files in the shop drive and the items in the trash · the right side shows what is accepted, รับรูป วิดีโอ PDF ≤ 25 MB ต่อไฟล์ (Images, videos, PDFs ≤ 25 MB per file); when space is full it changes to พื้นที่เต็มแล้ว — ลบไฟล์เพื่อคืนพื้นที่ (Space is full — delete files to free space))
Uploading files
In ไดรฟ์ของร้าน (Shop drive), open the folder you want the files in (if no folder is open, files go to the top level of the drive), then click อัปโหลดไฟล์ (Upload files)
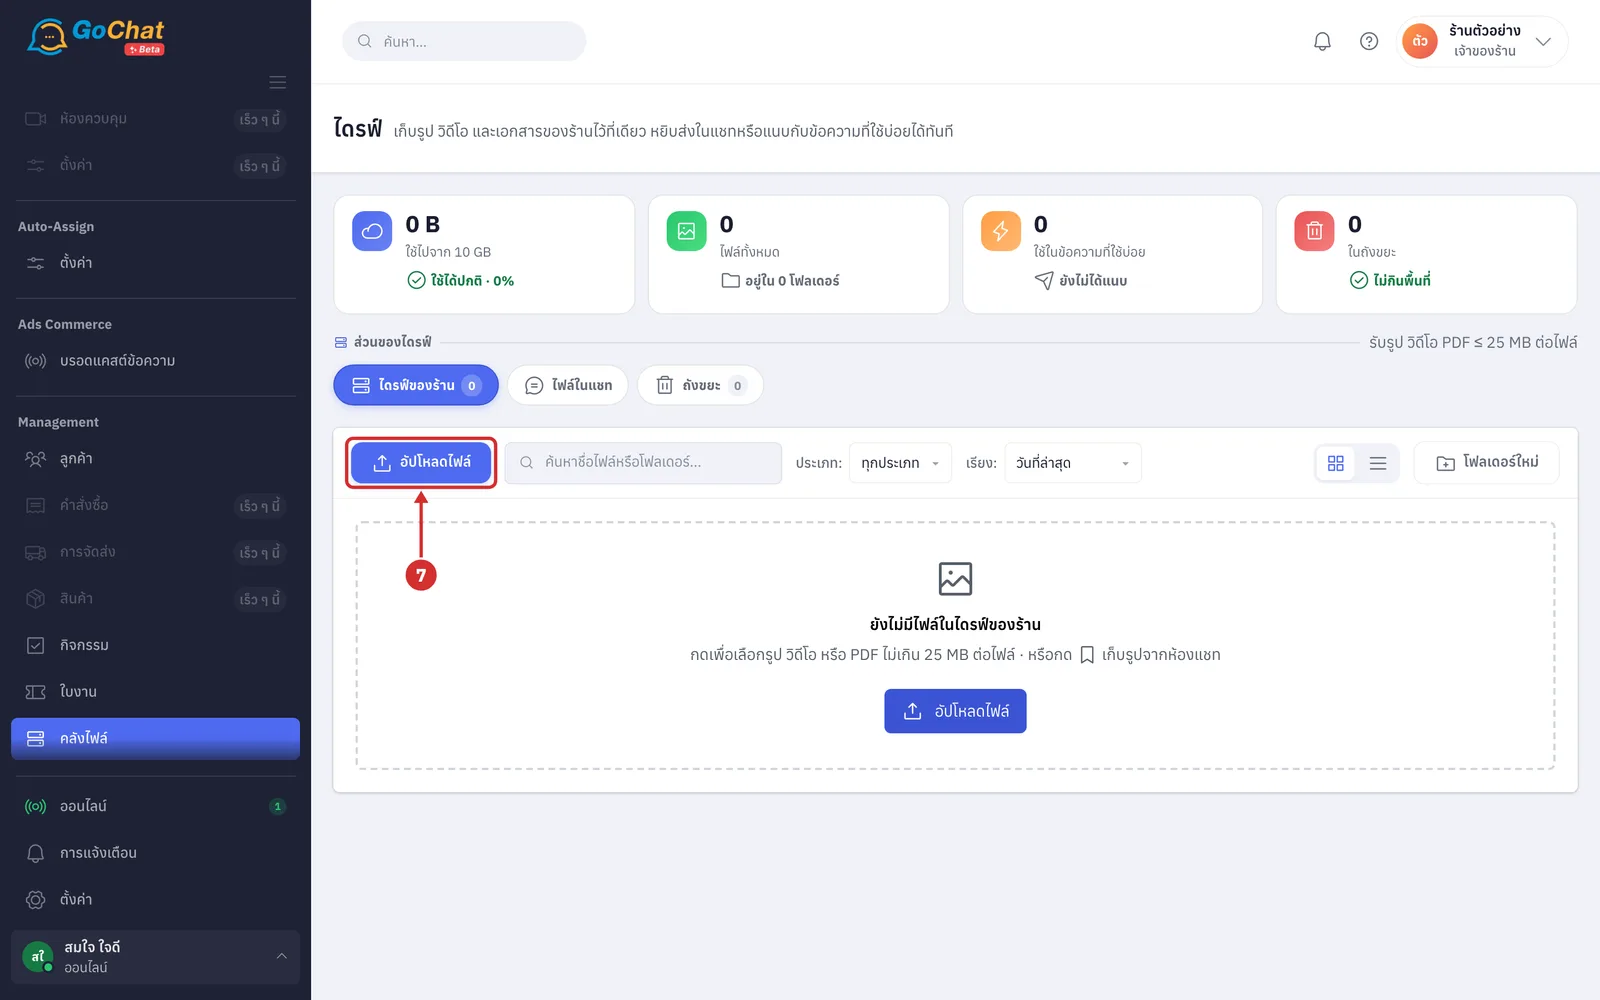
Choose files from your computer. You can choose several at once. Images (JPG · PNG · GIF · WebP), videos (MP4 · MOV) and PDFs up to 25 MB per file are accepted
The system uploads one file at a time and shows a card for each file in the วันนี้ (Today) group with รอคิว (Queued) or กำลังอัปโหลด …% (Uploading …%). When done, the card turns into the real file (a file that fails shows อัปโหลดไม่สำเร็จ (Upload failed) with the reason, such as ใหญ่เกินไป (Too large) or เป็นไฟล์ว่าง (Empty file); if the connection was the cause there is a ลองใหม่ (Try again) button · click × on the card to close it · a file type that is not accepted shows a red bar at the top saying ชนิดไฟล์นี้เก็บไม่ได้ รับเฉพาะรูป วิดีโอ PDF (This file type cannot be stored — only images, videos and PDFs))
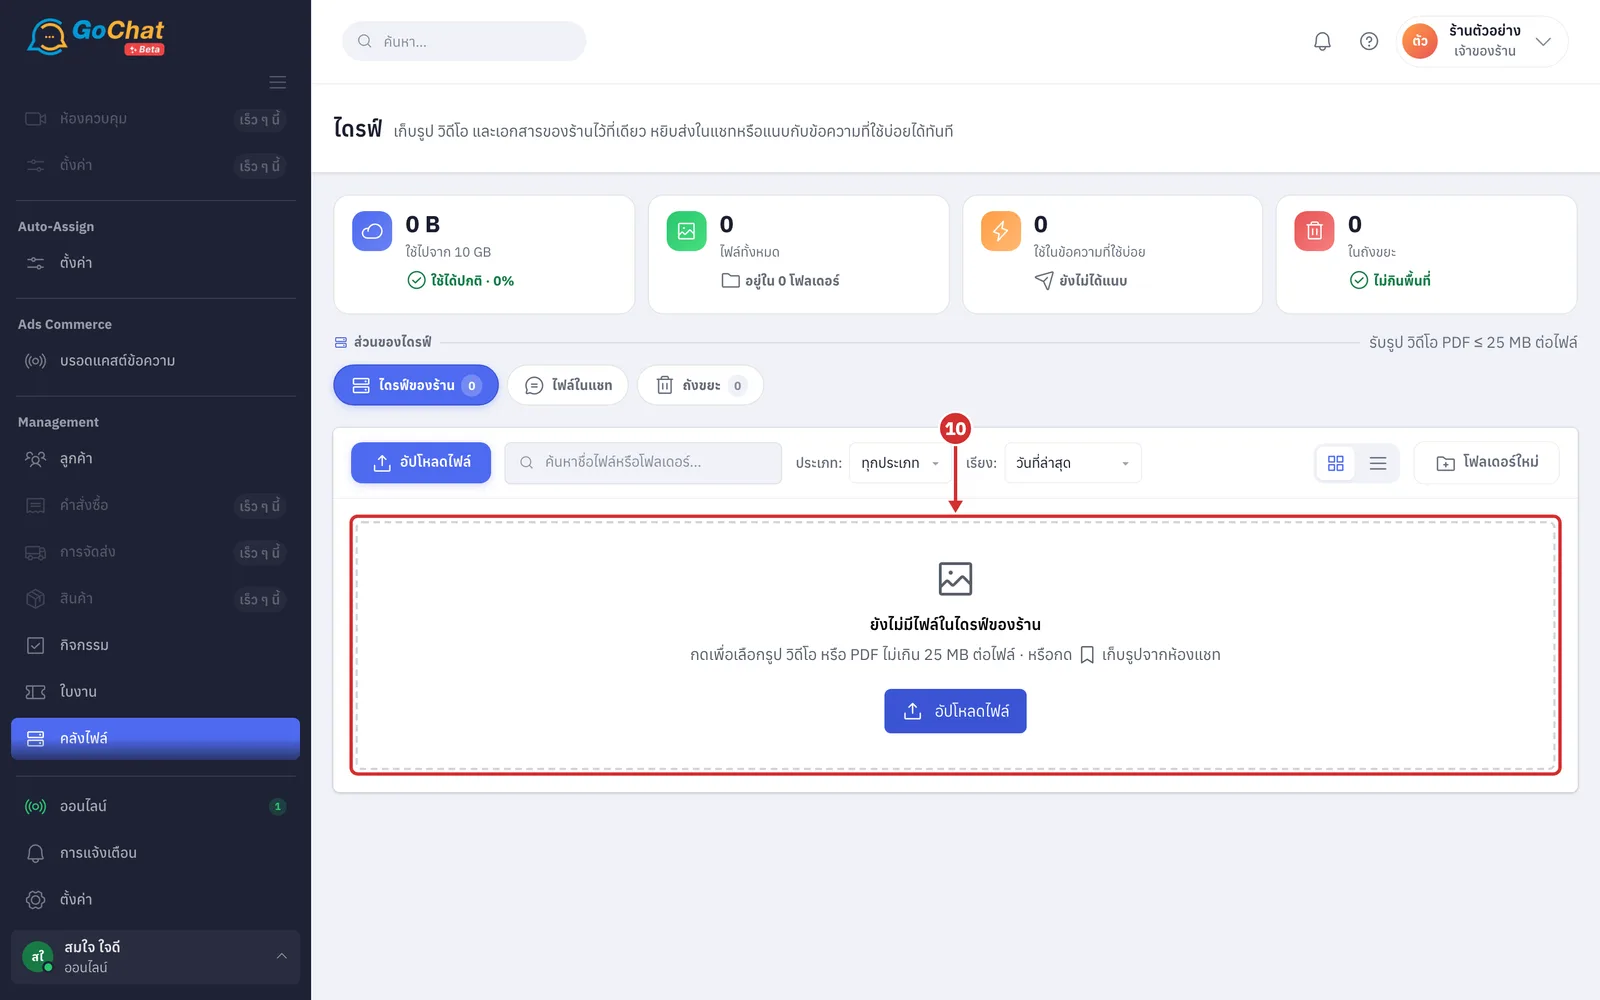
If the drive has no files yet, the page shows the ยังไม่มีไฟล์ในไดรฟ์ของร้าน (No files in the shop drive yet) box (an empty folder shows โฟลเดอร์นี้ยังว่าง (This folder is empty)). Click the box to choose files to upload as well (the box also says you can click the bookmark icon in a chat to keep chat images in the drive — see การจัดการข้อความในห้องแชท)
When space is full, the อัปโหลดไฟล์ (Upload files) button cannot be clicked (point at it to see the reason อัปโหลดไม่ได้ — พื้นที่เต็ม (Cannot upload — space is full)). If usage is over the package, the top of the page shows อัปโหลดเพิ่มไม่ได้ — ลบไฟล์ออก … หรือซื้อพื้นที่เพิ่ม (Cannot upload more — delete … of files or buy more space); files customers send in chat still come in as usual, and the เจ้าของร้าน (Shop owner) can click ซื้อพื้นที่เพิ่ม (Buy more space) to go to the แพ็กเกจ (Package) page (see การเลือกและสั่งซื้อแพ็กเกจ)
Creating a folder
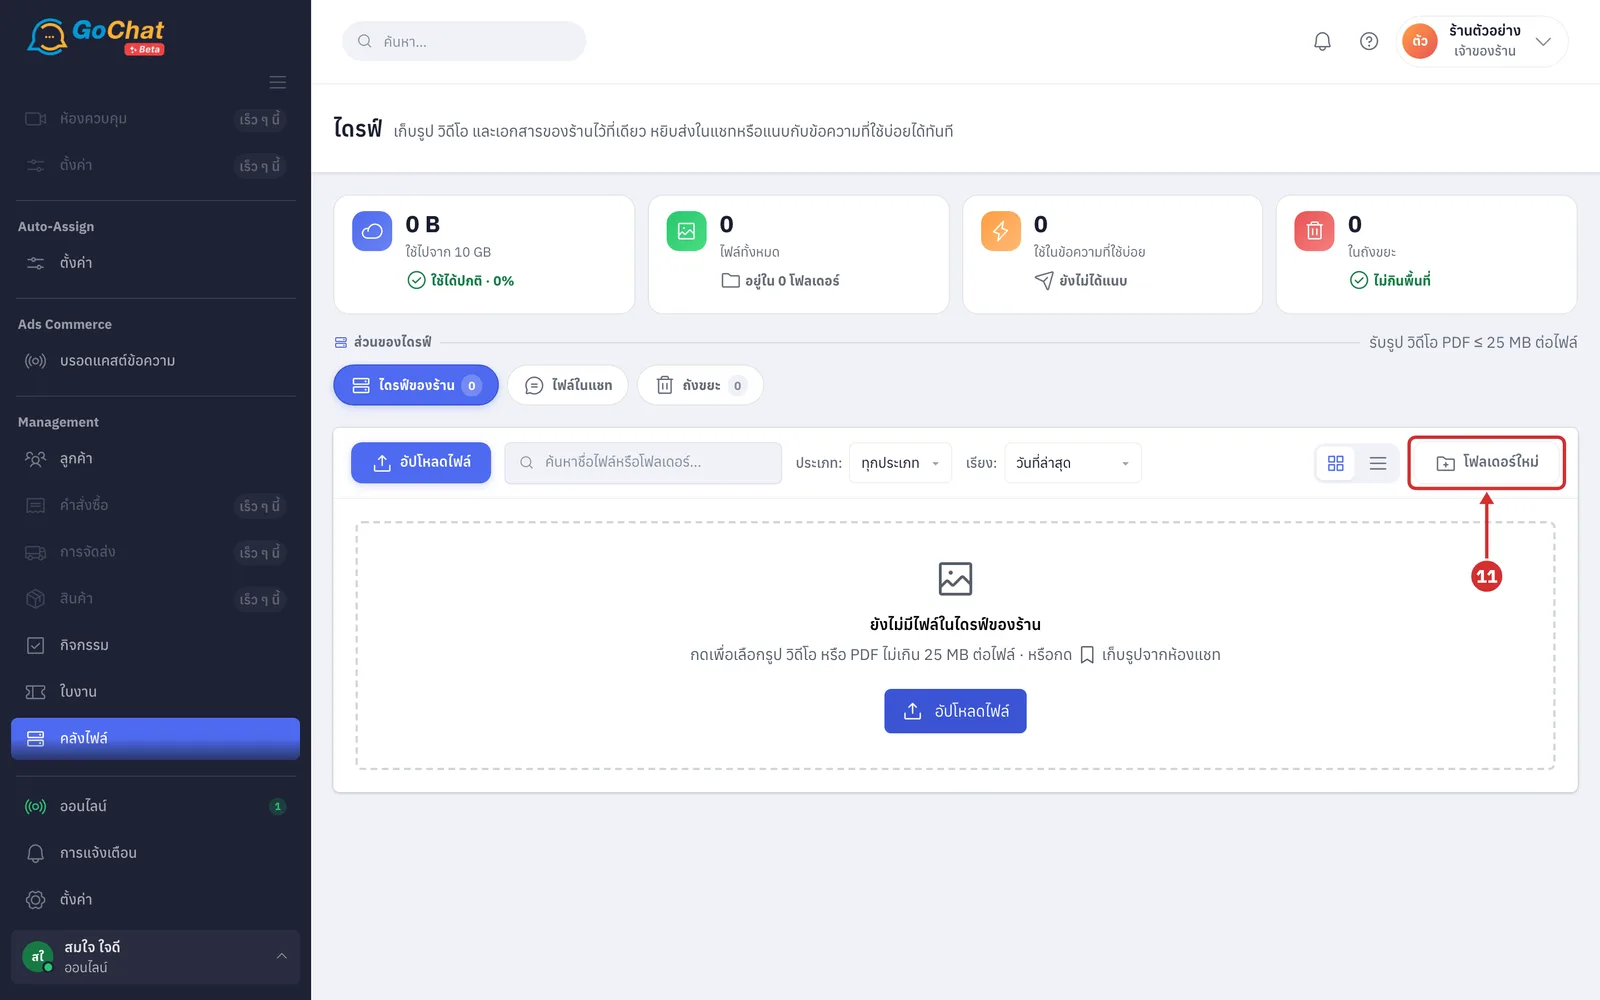
Click โฟลเดอร์ใหม่ (New folder) at the right of the toolbar (the new folder goes inside the folder that is open; if none is open, it goes to the top level)
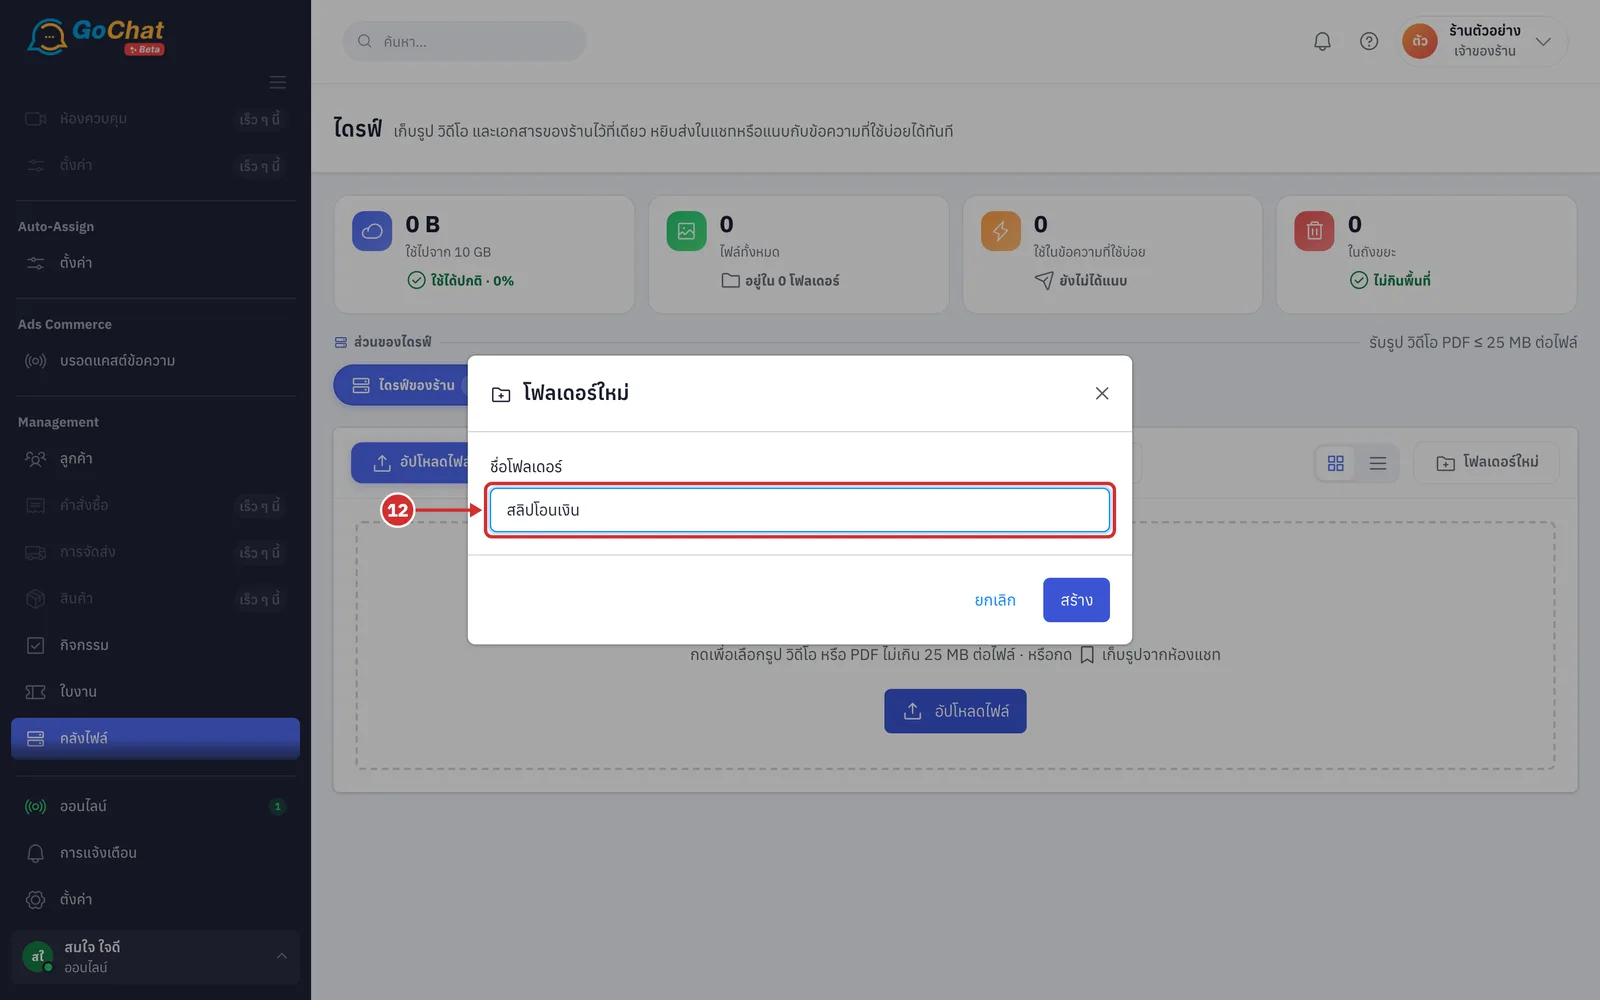
In the โฟลเดอร์ใหม่ (New folder) window, enter a name in ชื่อโฟลเดอร์ (Folder name), such as "สลิปโอนเงิน", up to 120 characters (required; the create button works once there is a name)
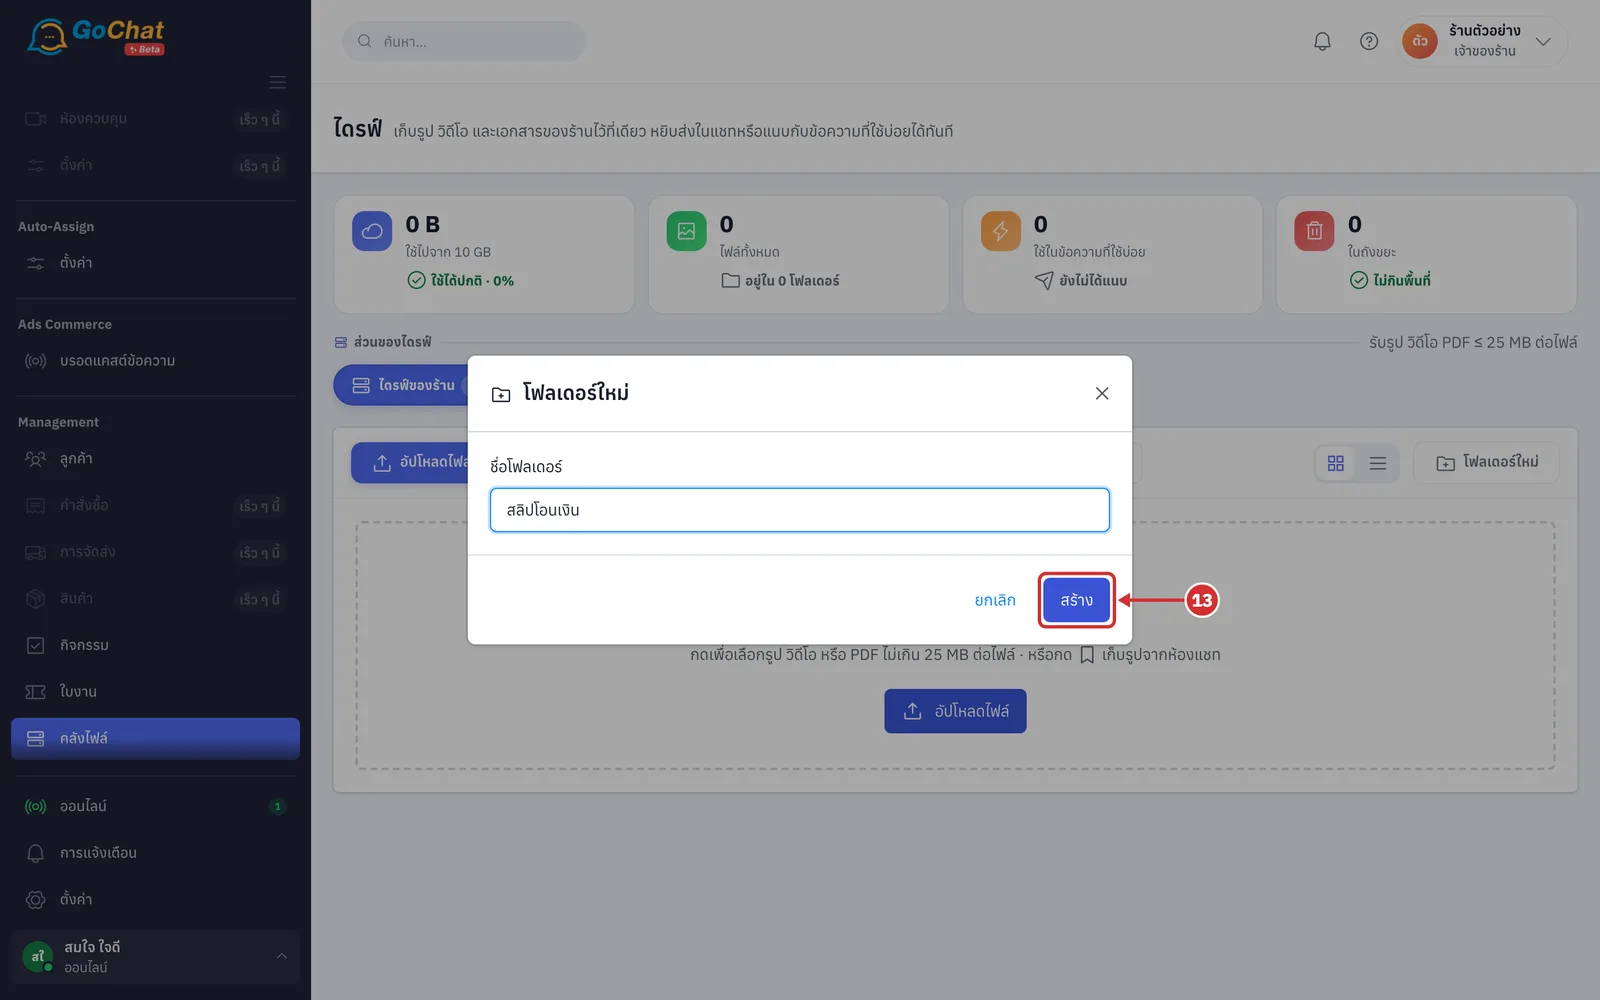
Click สร้าง (Create). The system shows สร้างโฟลเดอร์แล้ว (Folder created) and the folder appears under โฟลเดอร์ (Folders) (click ยกเลิก (Cancel) to close the window without creating)
Click a folder to open it. A folder card shows the number of subfolders, files and the total size (an empty folder shows ว่าง (Empty)). Inside a folder, the location appears below the toolbar, such as ไดรฟ์ของร้าน (Shop drive) / สลิปโอนเงิน; click a name in it to go back up
Searching, filtering and changing the view
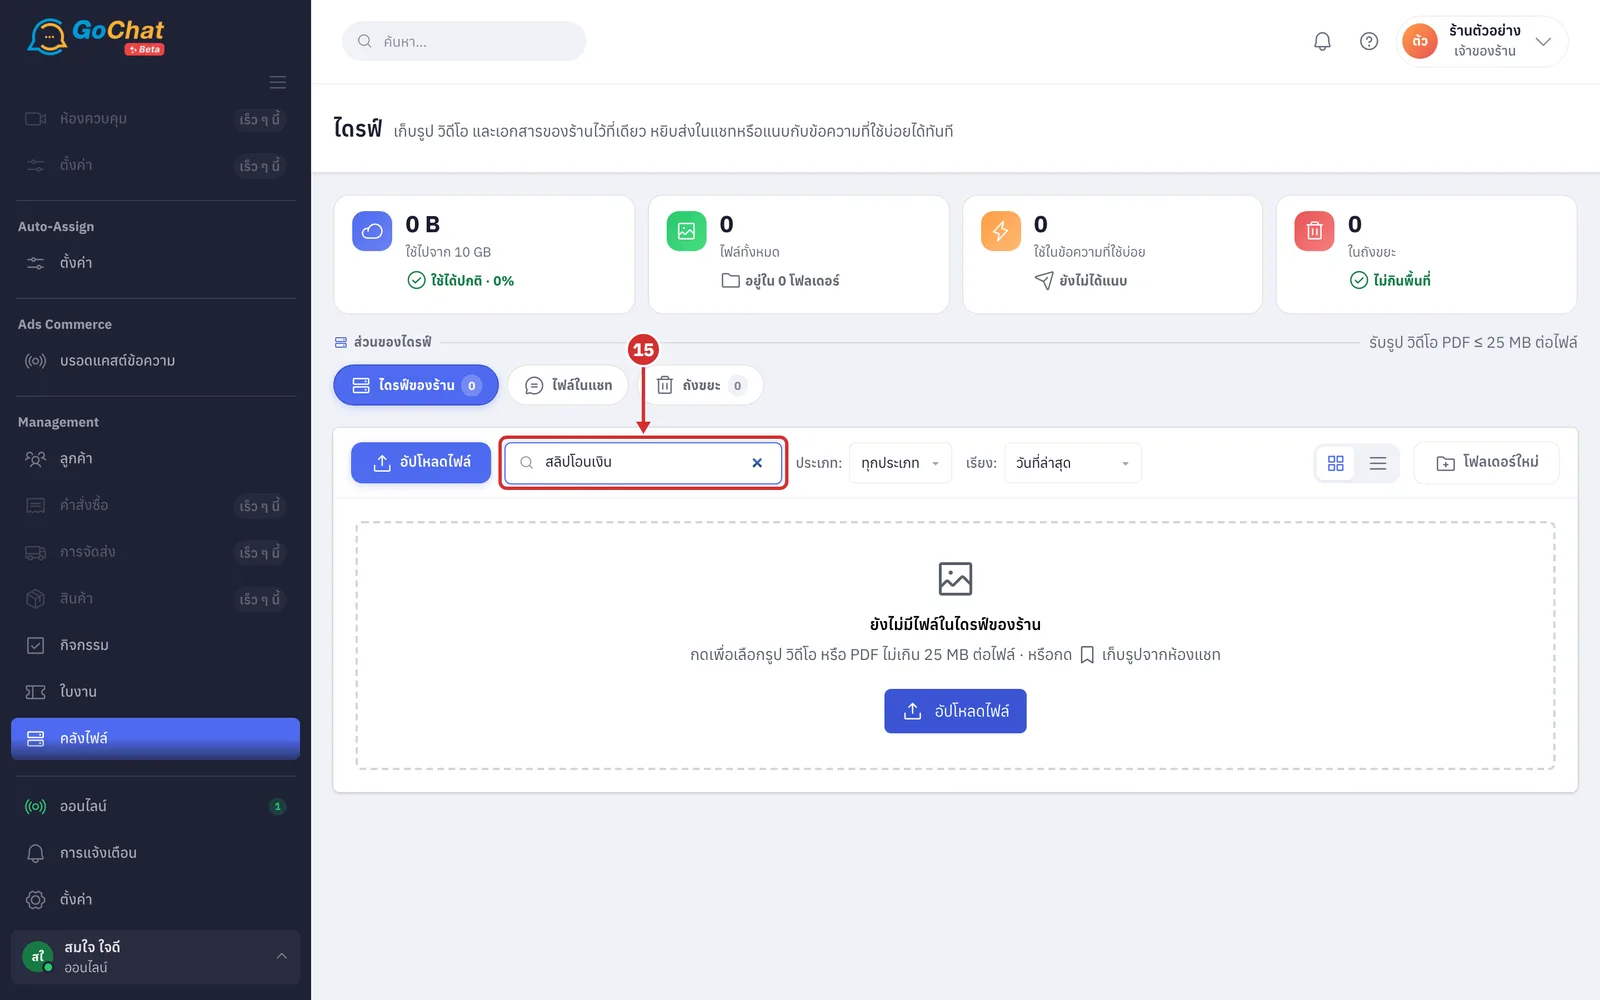
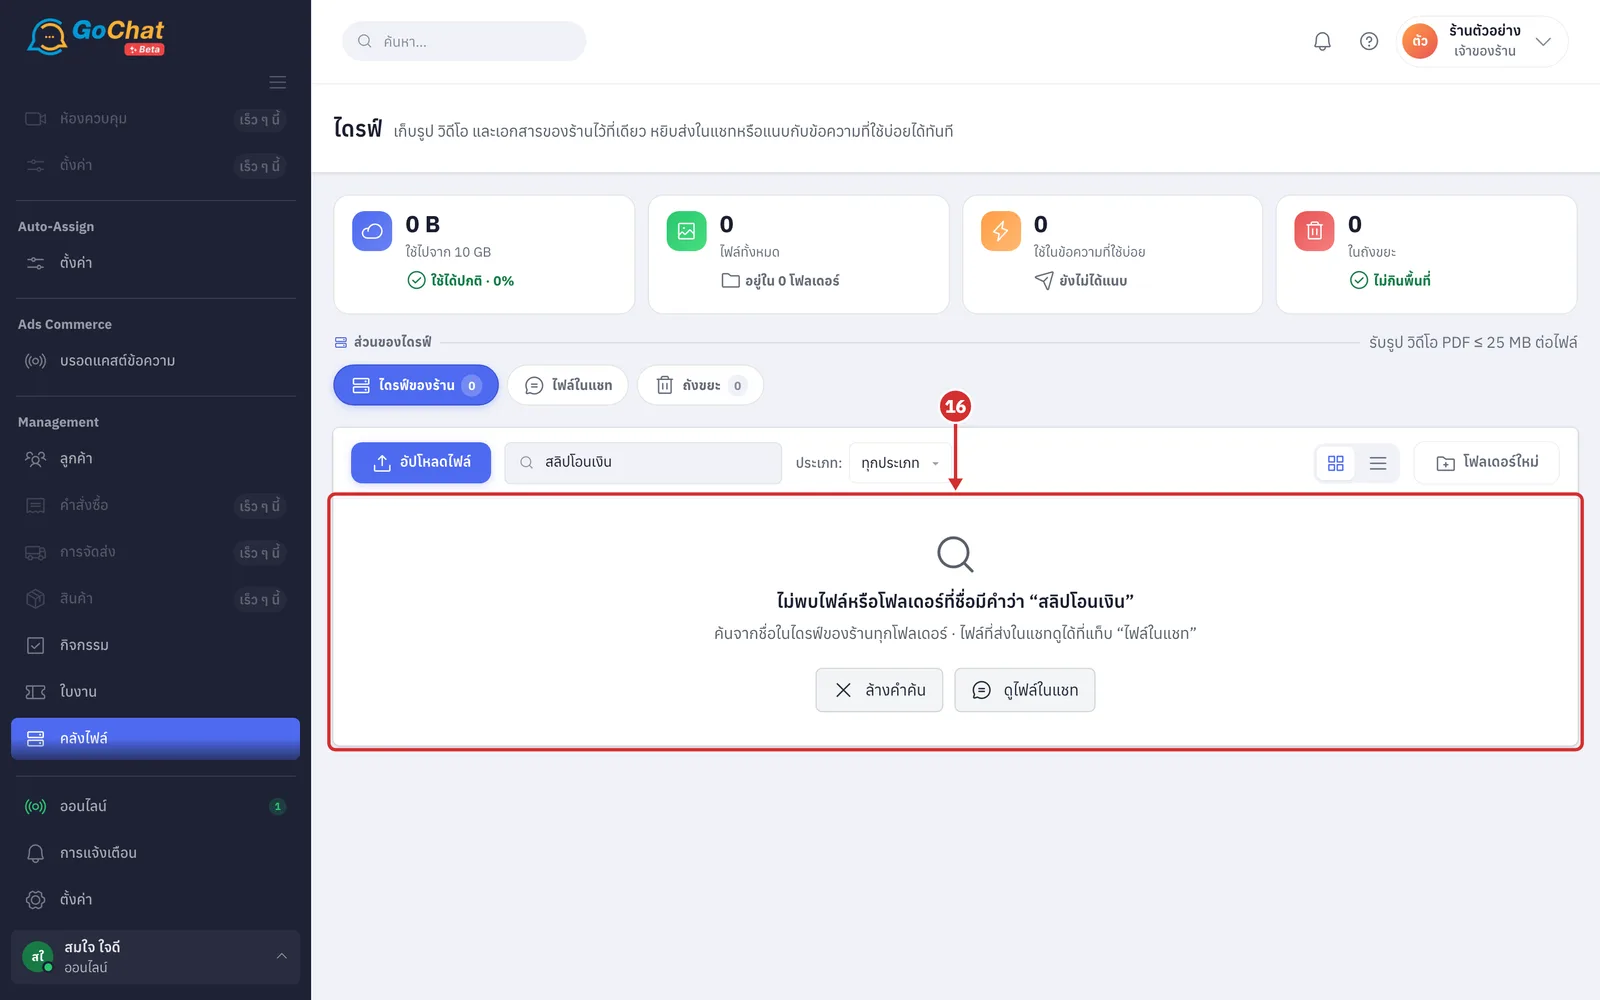
In ค้นหาชื่อไฟล์หรือโฟลเดอร์... (Search file or folder name...), type a name and press Enter. The system searches names in every folder of the shop drive, not the trash, whichever folder is open (results are headed พบ … รายการสำหรับ “…” (Found … items for “…”) and each one shows which folder it is in · up to the 200 latest matching files are shown; if you cannot find it, type something more specific)
If nothing is found, the system shows ไม่พบไฟล์หรือโฟลเดอร์ที่ชื่อมีคำว่า “…” (No file or folder name contains “…”). Click ล้างคำค้น (Clear search) to see all files again, or ดูไฟล์ในแชท (View chat files) to go to Chat files (chat images and videos cannot be searched from this box)
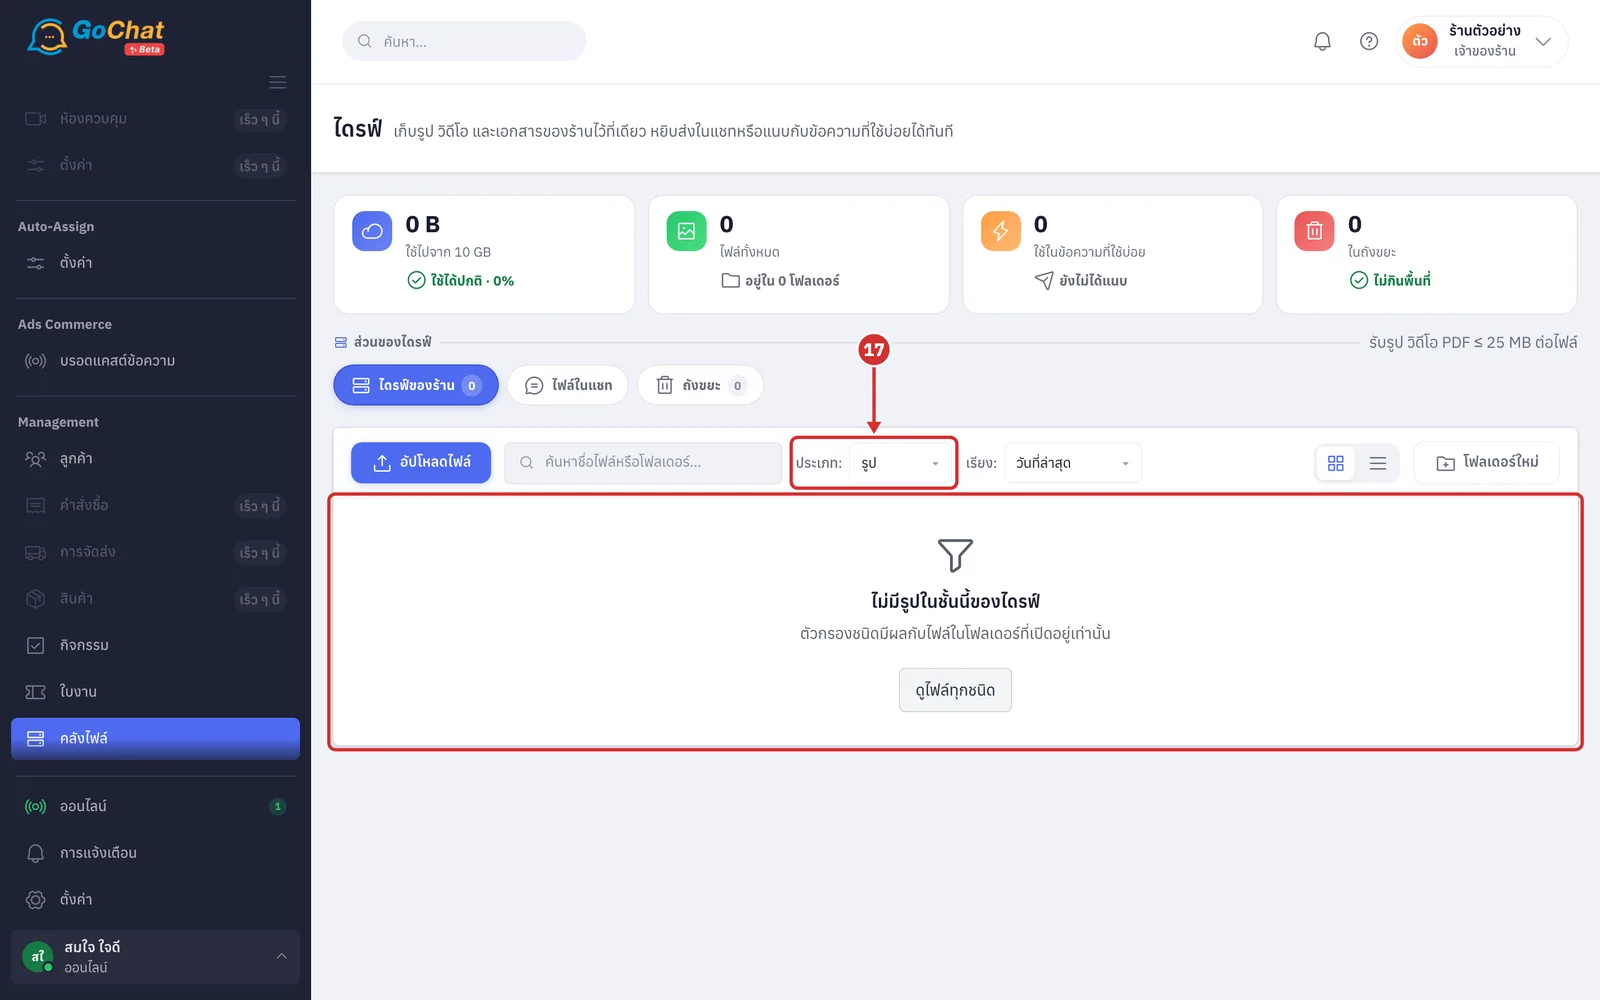
In ประเภท: (Type:), choose ทุกประเภท (All types) · รูป (Images) · วิดีโอ (Videos) or เอกสาร (Documents) to show only that kind of file (the filter applies to files in the open folder only; folders are still shown · with no files of that kind, the system shows, for example, ไม่มีรูปในชั้นนี้ของไดรฟ์ (No images at this level of the drive) with a ดูไฟล์ทุกชนิด (View all file types) button)
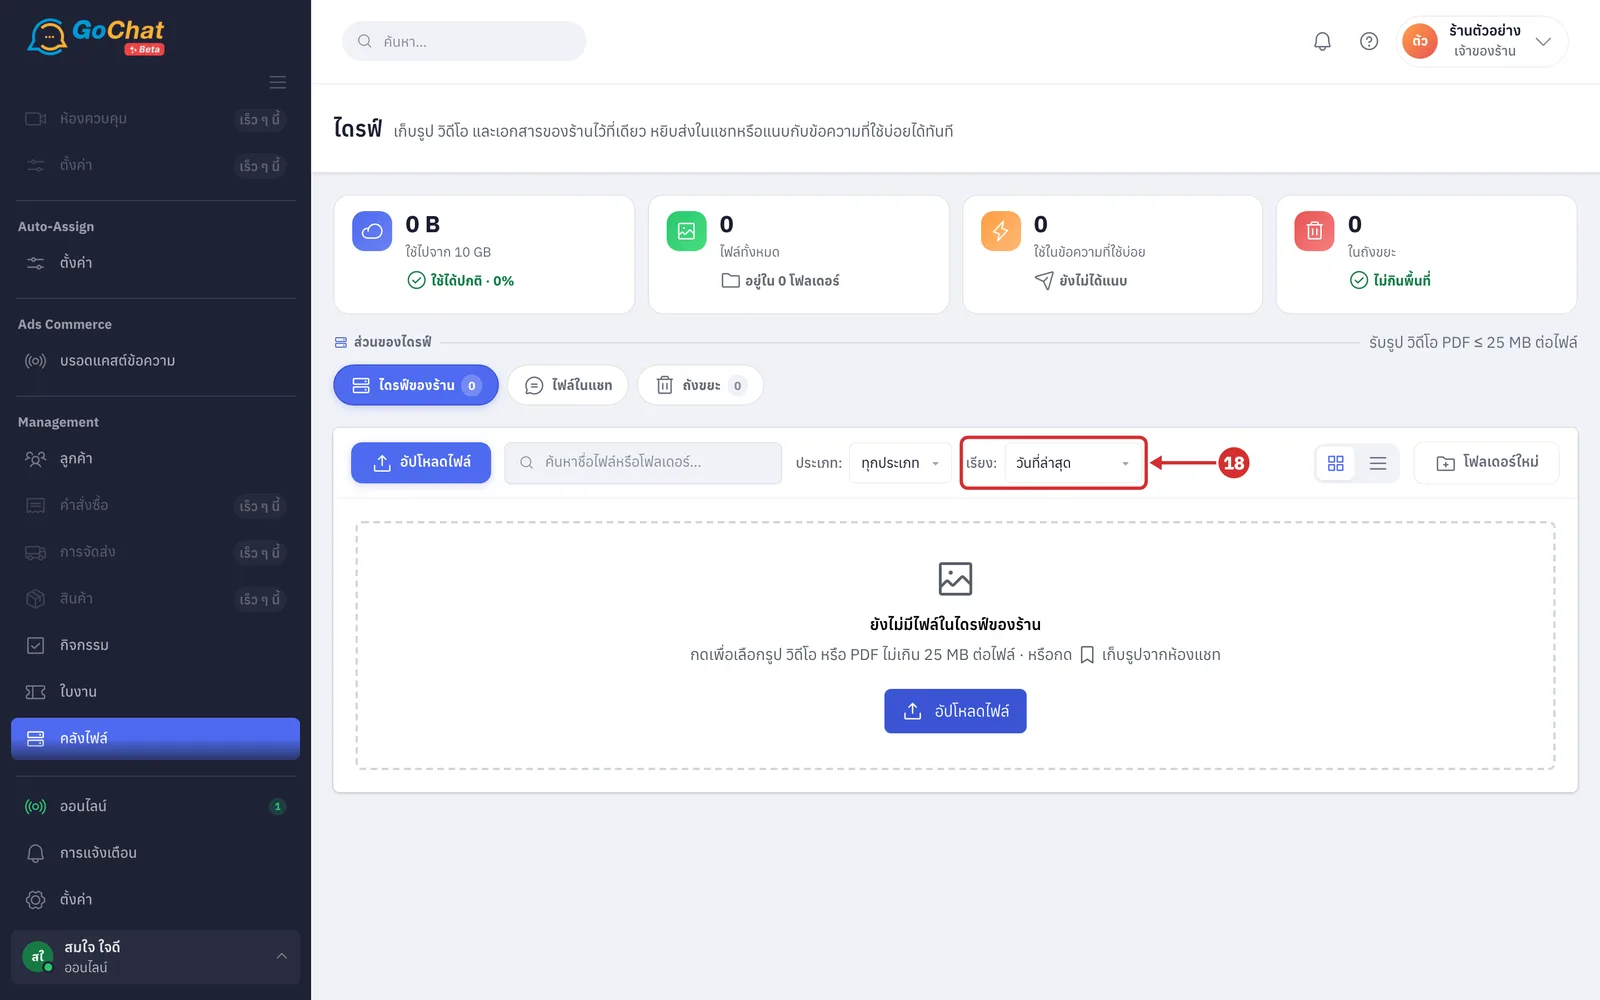
In เรียง: (Sort:), choose ชื่อ ก–ฮ (Name A–Z) · ขนาด ใหญ่ไปเล็ก (Size, largest first) or วันที่ล่าสุด (Latest date) (the default · sorting by date groups files into วันนี้ (Today) · สัปดาห์นี้ (This week) and by month, each group showing the number of files and total size · this field is hidden while searching · each level shows up to 500 files; with more, the system suggests splitting them into subfolders)
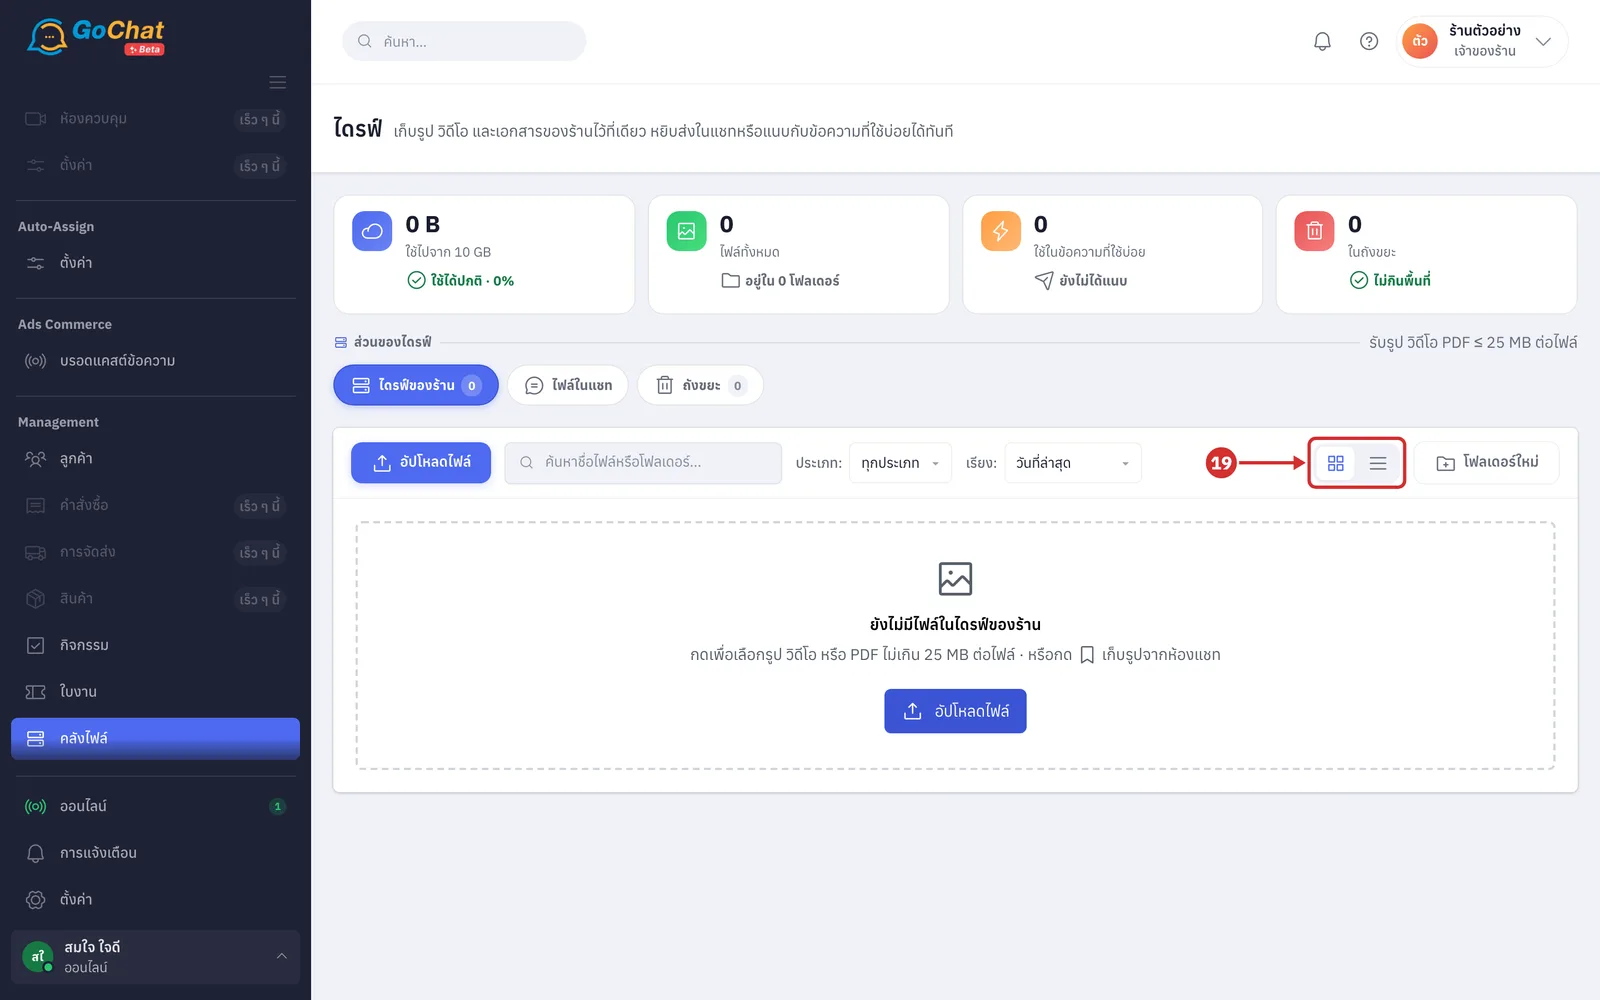
Click the buttons at the right of the toolbar to switch between มุมมองการ์ด (Card view — the default) and มุมมองตาราง (Table view). The system remembers your choice in this browser (table view shows the columns ไฟล์ (File) · ที่มา (Source) · ขนาด (Size) · ใช้ในข้อความที่ใช้บ่อย (Used in quick replies) with ย้าย (Move) ลบ (Delete) and อื่น ๆ (More) buttons at the end of each row)
Viewing and managing files
Each file card shows a file type icon and the file name, a thumbnail, and a bottom line with the size and source: files kept from chat show the customer's name, uploaded files show who uploaded them, and images that came from quick replies show ข้อความที่ใช้บ่อย (Quick replies) (images attached to quick replies have a ใช้ใน … ข้อความ (Used in … messages) badge at the bottom corner of the image)
Click the file name, or point at the image and click the expand icon, to view the image or play the video full screen on the same page (use the left and right arrows for the previous or next file · PDFs open in a new tab · files kept from chat have a ดูในแชท (View in chat) button that takes you to that message in the chat)
Click the ⋯ button at the top right of the card to choose ดูเต็มจอ (View full screen — เล่น (Play) for videos) · ดูในแชท (View in chat — chat files only) · ดาวน์โหลด (Download) · ย้ายไปโฟลเดอร์ (Move to folder) · เปลี่ยนชื่อ (Rename) · เลือก (Select) or ย้ายไปถังขยะ (Move to trash) (a folder's ⋯ button has เปลี่ยนชื่อ (Rename) · ย้ายไปโฟลเดอร์ (Move to folder) · เลือก (Select) · ลบโฟลเดอร์ (Delete folder))
Choose เปลี่ยนชื่อ (Rename) and edit ชื่อใหม่ (New name) (file names up to 200 characters, folder names up to 120 · the system selects just the name for you, not the file extension), then click บันทึก (Save). The system shows เปลี่ยนชื่อแล้ว (Renamed)
Choose ย้ายไปโฟลเดอร์ (Move to folder), then in the ย้าย “…” (Move “…”) window choose the destination folder (the top one is ไดรฟ์ของร้าน (ชั้นนอกสุด) (Shop drive, top level) · the current location shows อยู่ที่นี่ (Here) and cannot be chosen · a folder cannot be moved into itself), then click ย้ายมาที่นี่ (Move here). The system shows ย้ายแล้ว (Moved)
To handle several items at once, tick the box at the corner of a card (it appears when you point at the card) or choose เลือก (Select) from the ⋯ button. The system shows a เลือกไว้ … รายการ (… items selected) bar with ยกเลิกการเลือก (Clear selection) · ย้ายไปโฟลเดอร์ (Move to folder) · ลบที่เลือก (Delete selected) (meanwhile, click other cards to tick them too · table view has a tick box on every row)
Choose ย้ายไปถังขยะ (Move to trash) (or ลบโฟลเดอร์ (Delete folder) / ลบที่เลือก (Delete selected)). The system moves it to the trash right away and shows ย้าย “…” ไปถังขยะแล้ว — กู้คืนได้ใน 30 วัน (Moved “…” to trash — restore within 30 days) (deleting a folder moves everything inside it too · images kept from chat are also un-kept in the chat)
If the image is attached to quick replies, the system asks first with the ย้ายรูปนี้ไปถังขยะ? (Move this image to trash?) window, which names the quick replies using it. Click ย้ายไปถังขยะ (Move to trash) to confirm, or ยกเลิก (Cancel) (after moving, those messages are sent without the image right away; messages already sent to customers are not affected · you can restore it from the trash, but the image does not go back into the messages by itself — you have to attach it again)
Viewing chat files
Click the ไฟล์ในแชท (Chat files) chip
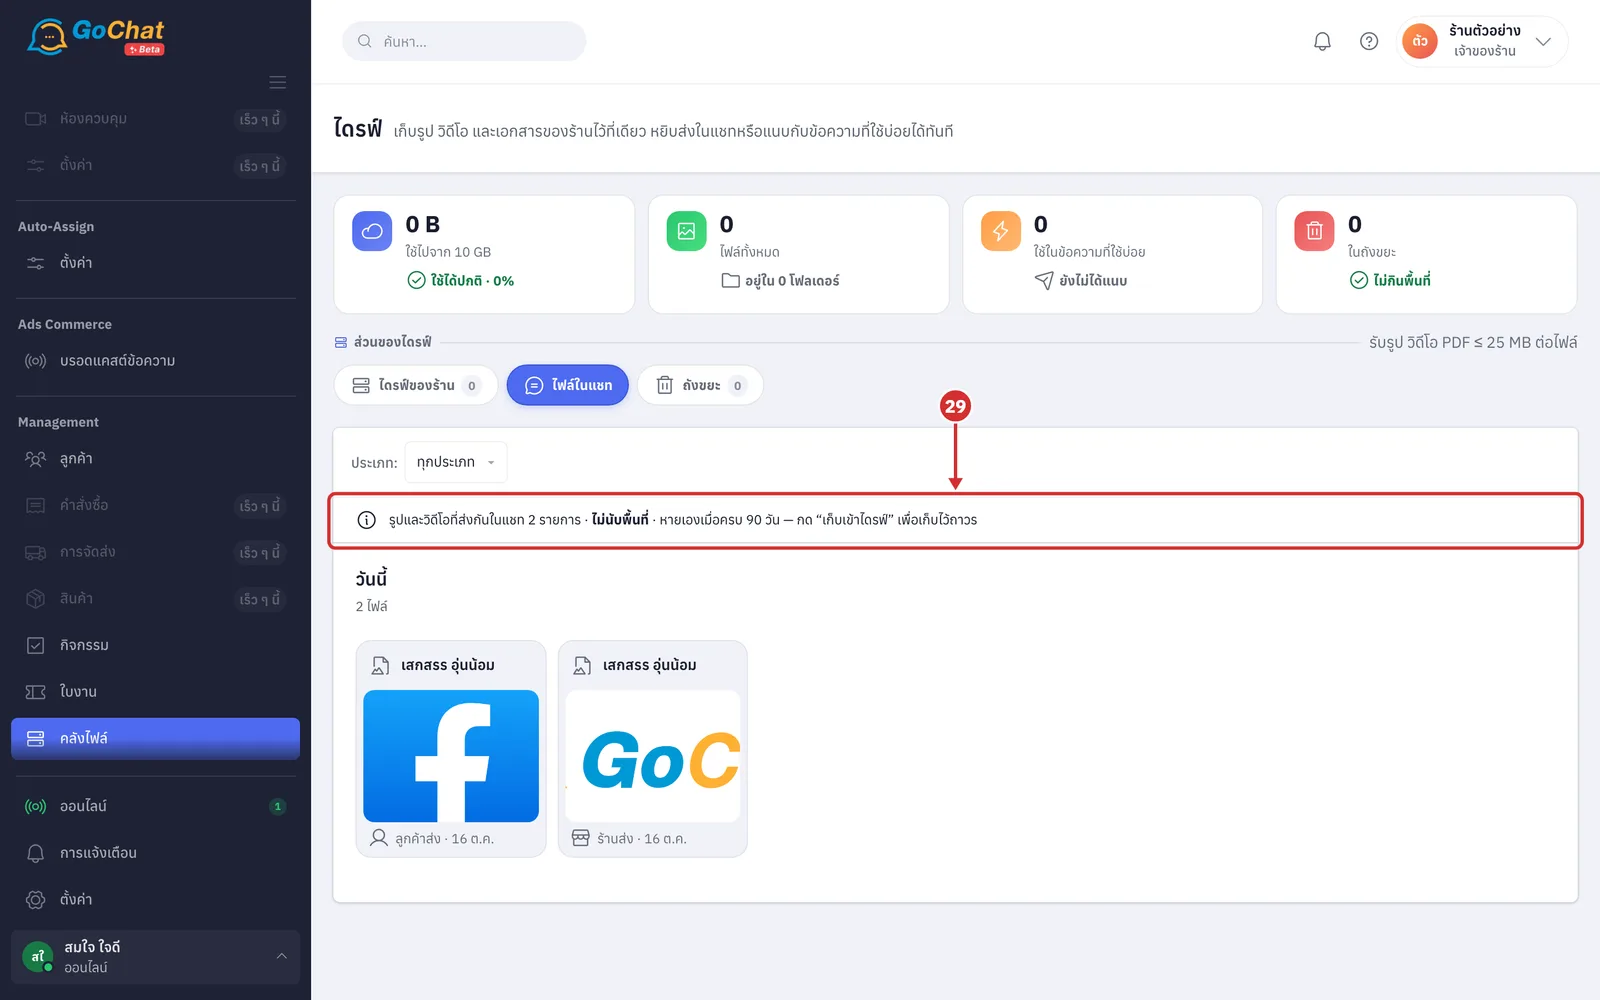
Read the bar at the top, which shows how many images and videos were sent in chats (chat images and videos do not count toward drive space, but disappear by themselves after 90 days; to keep one permanently, click เก็บเข้าไดรฟ์ (Keep in drive) as in step 33)
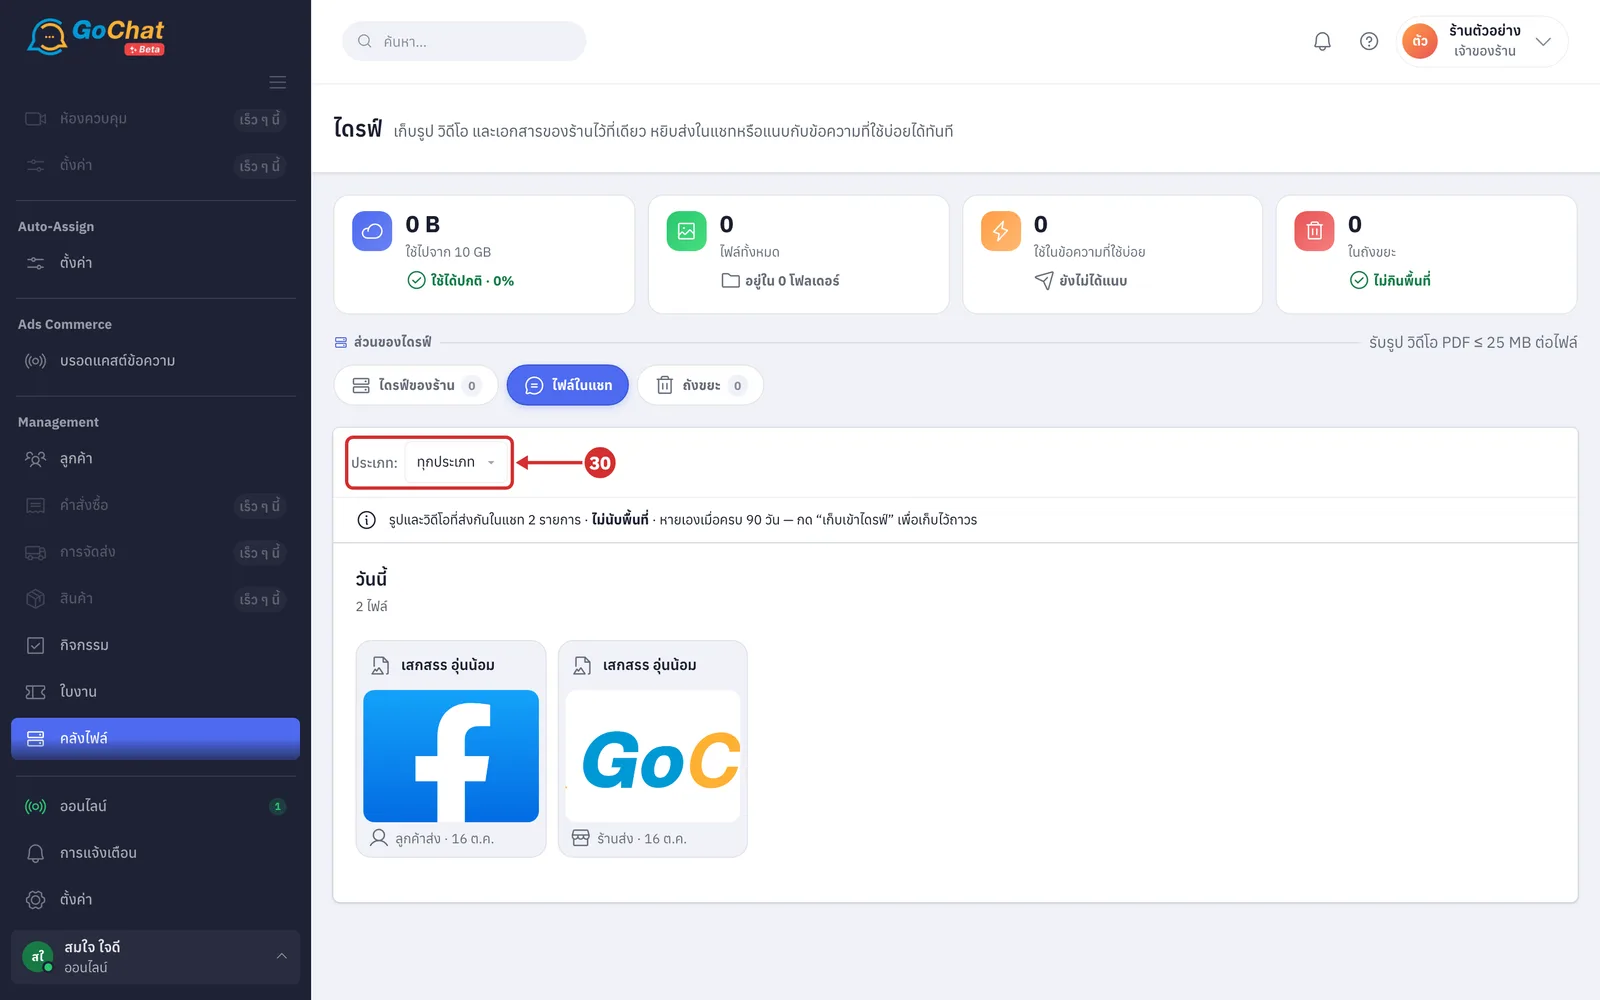
In ประเภท: (Type:), choose ทุกประเภท (All types) · รูปภาพ (Images) or วิดีโอ (Videos)
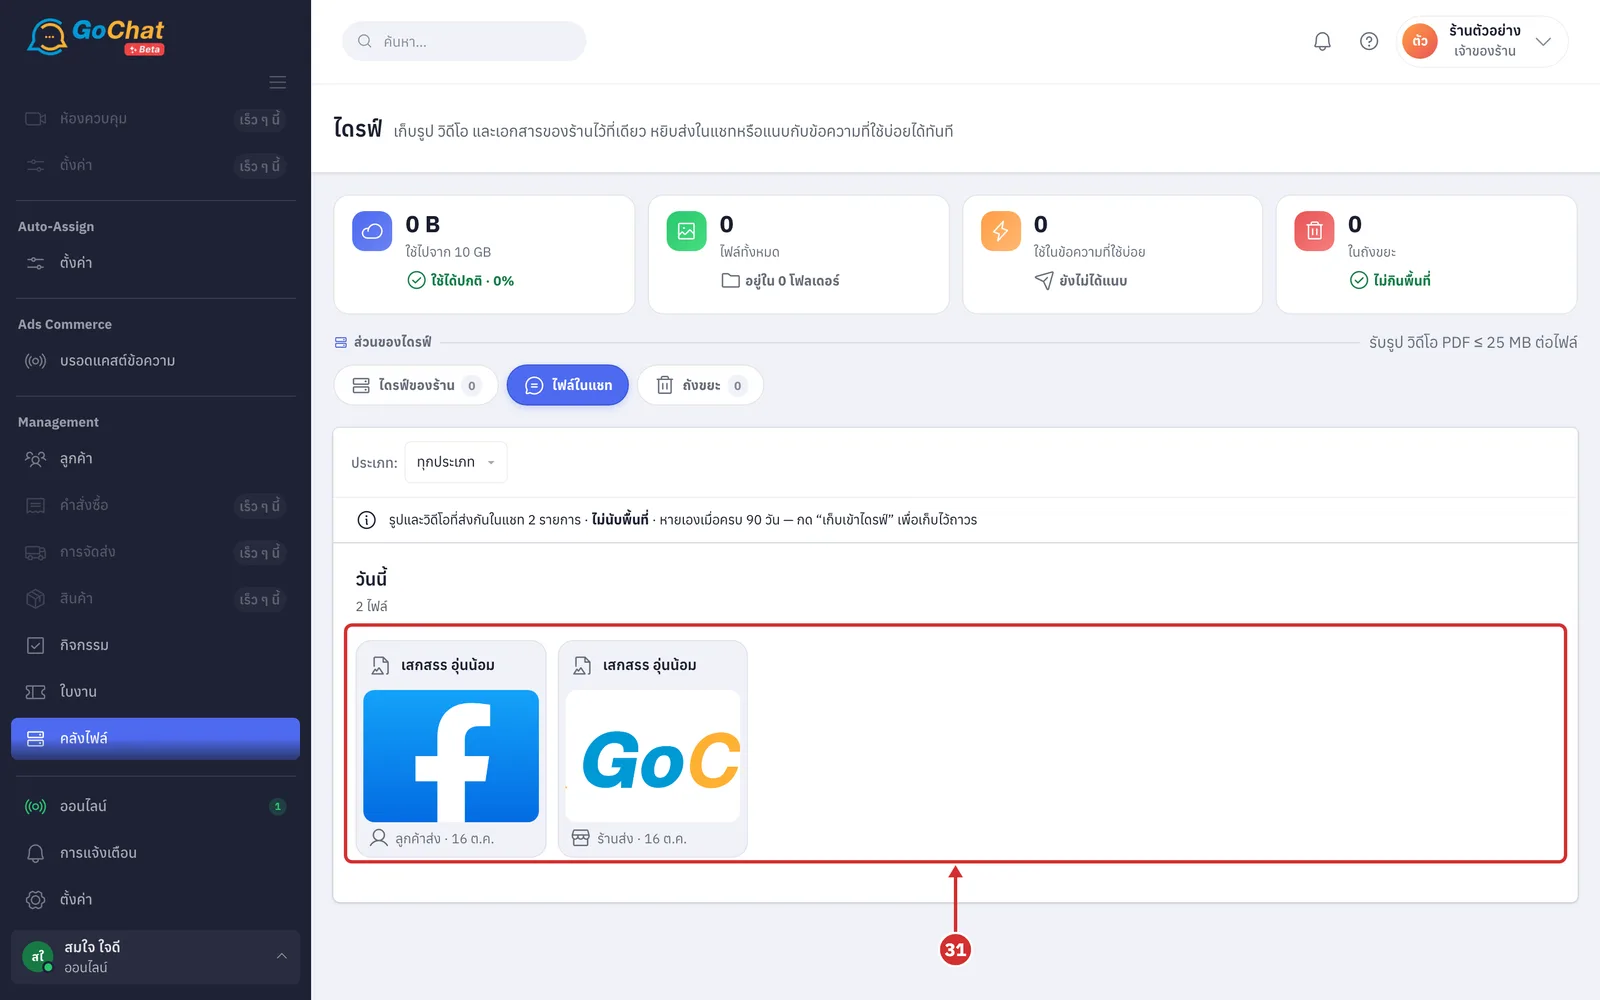
Look at the card of each file, grouped by date. The card header is the customer's name for that chat, and the bottom line shows ลูกค้าส่ง (Sent by customer) or ร้านส่ง (Sent by shop) and the date (the latest 200 items are shown; older files have to be found in the chat · only chats you are allowed to see are shown, going back as far as your package's history · files that can no longer be opened show a placeholder image)
Point at the image and click the expand icon to view the image or play the video full screen (below it you see who sent it and the date · click ดูในแชท (View in chat) to go to that message in the chat · pointing at the card and clicking the chat icon also takes you to the chat)
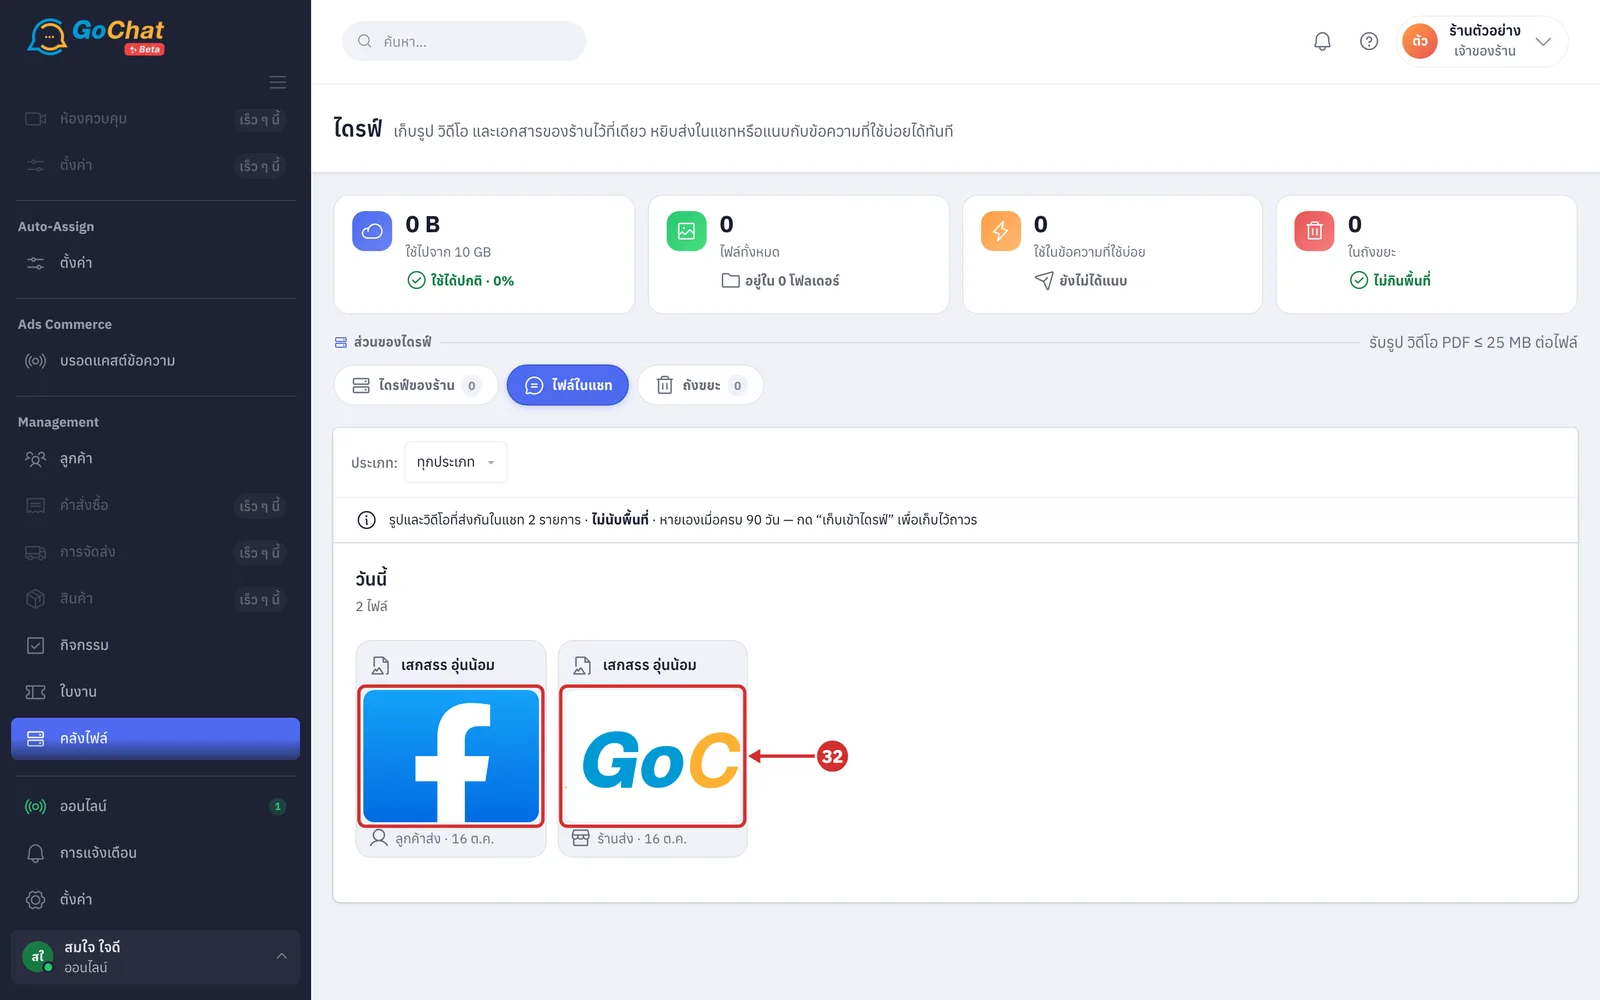
Image cards the system keeps a copy of show หายใน … วัน (Gone in … days) (the icon becomes an hourglass when 7 days or fewer are left). Click เก็บเข้าไดรฟ์ (Keep in drive) to keep that image in the shop drive permanently. The system shows เก็บเข้าไดรฟ์แล้ว (Kept in drive) and the card changes to อยู่ในไดรฟ์แล้ว (In drive) (images only · kept images count toward drive space · when space is full the button shows เก็บไม่ได้ — พื้นที่เต็ม (Cannot keep — space is full))
Restoring and emptying the trash
Click the ถังขยะ (Trash) chip
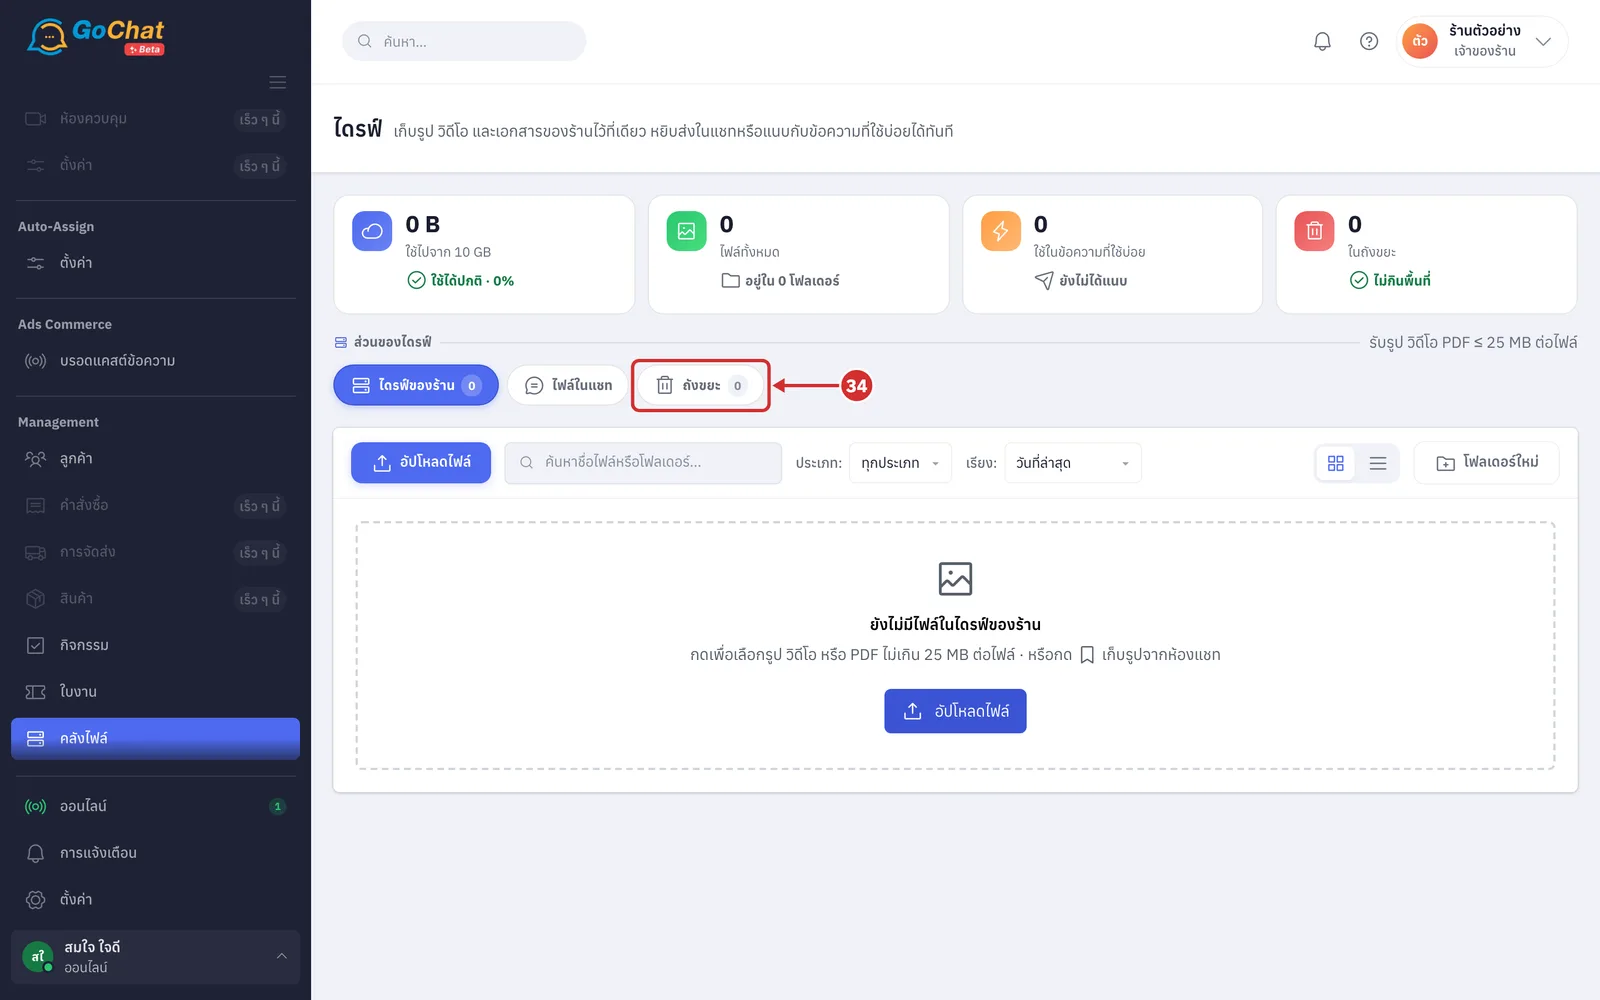
Look at the deleted items, which stay in the trash for 30 days before they are gone for good. The bar at the top shows ลบถาวรเองเมื่อครบ 30 วัน · ยังนับพื้นที่ … (Deleted permanently after 30 days · still counts …) and each card shows ลบถาวรใน … วัน (Deleted permanently in … days) (red when 7 days or fewer are left · a deleted folder shows as one card with the number of files inside · with no items, it shows ถังขยะว่าง (Trash is empty))
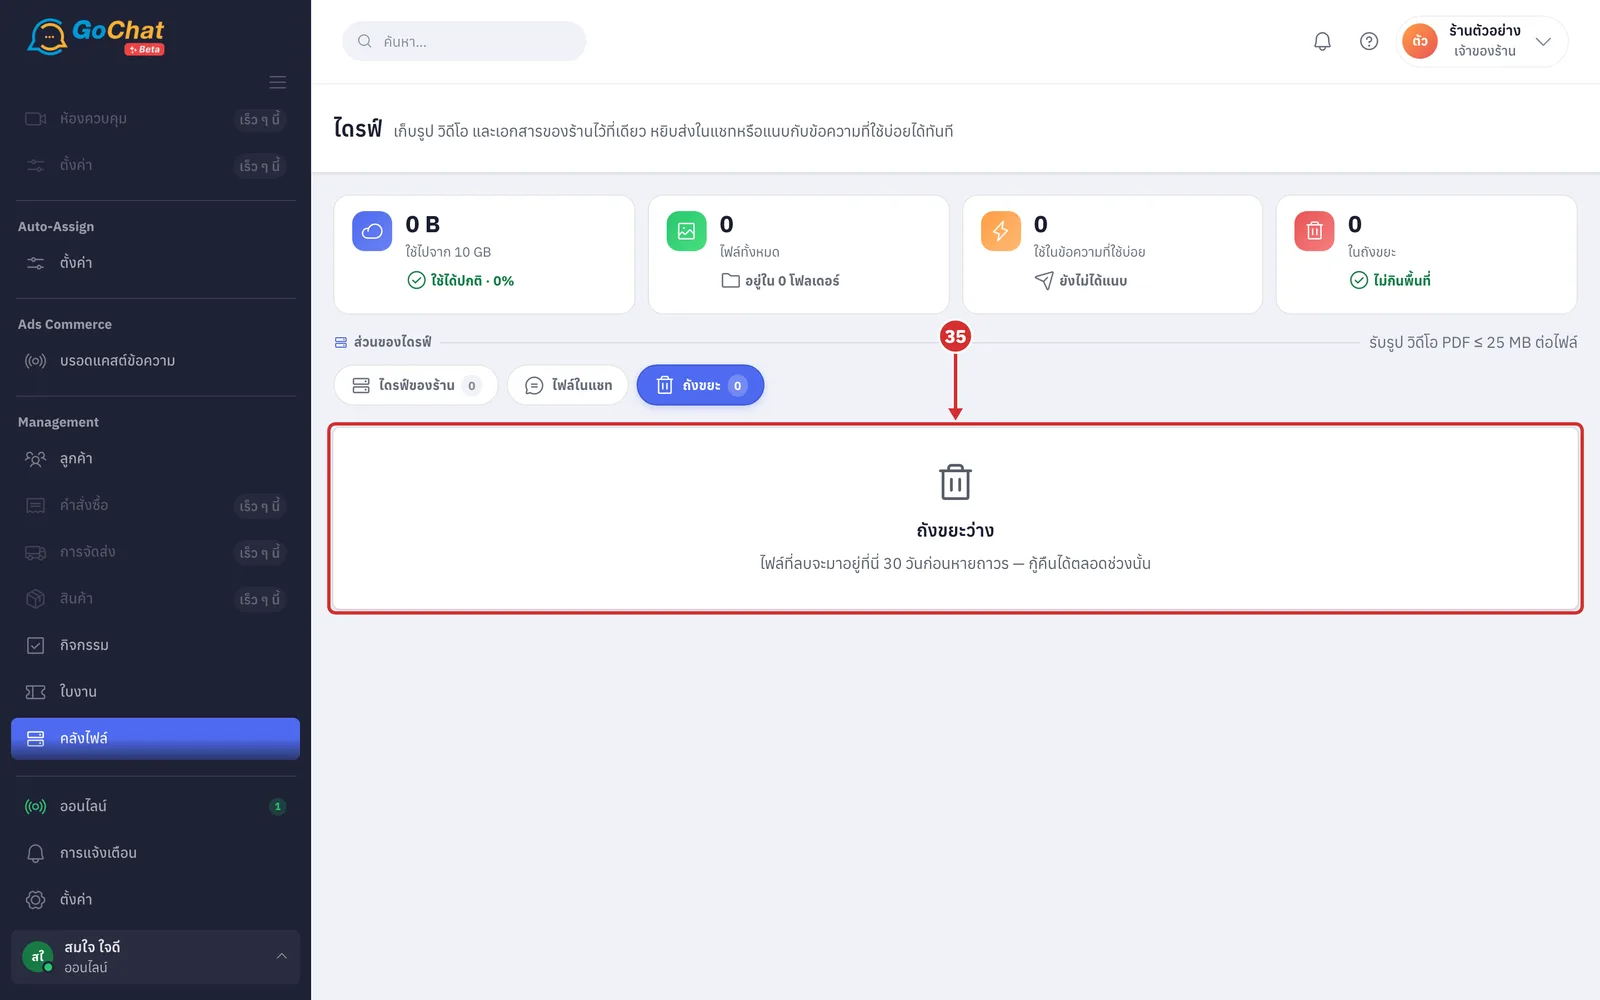
Click cards to select them (several at once). The system shows a เลือกไว้ … รายการ (… items selected) bar with ยกเลิกการเลือก (Clear selection) · กู้คืน (Restore) · ลบถาวร (Delete permanently)
Click กู้คืน (Restore). The system shows กู้คืน “…” แล้ว (Restored “…”) and the items go back where they were (a folder comes back with everything deleted together with it · if the original folder is still in the trash, items go back to the top level · images that were attached to quick replies do not go back into the messages by themselves)
Or click ลบถาวร (Delete permanently), then ลบถาวร (Delete permanently) in the confirmation window. The system shows ลบถาวรแล้ว (Deleted permanently) (this cannot be undone · deleting a folder permanently deletes all files inside too)
To delete everything, click ล้างถังขยะ (Empty trash) in the bar at the top, then ล้างถังขยะ (Empty trash) in the confirmation window (the window shows about how much space you will get back). The system shows ล้างถังขยะแล้ว (Trash emptied)
Note: Everyone in the shop can delete files and empty the trash; the 30-day trash protects against mistakes. Files in the trash still count toward space until they are deleted permanently. For more space, the เจ้าของร้าน (Shop owner) can buy the storage add-on on the แพ็กเกจ (Package) page.