

Replying to customer chats
Video tutorial
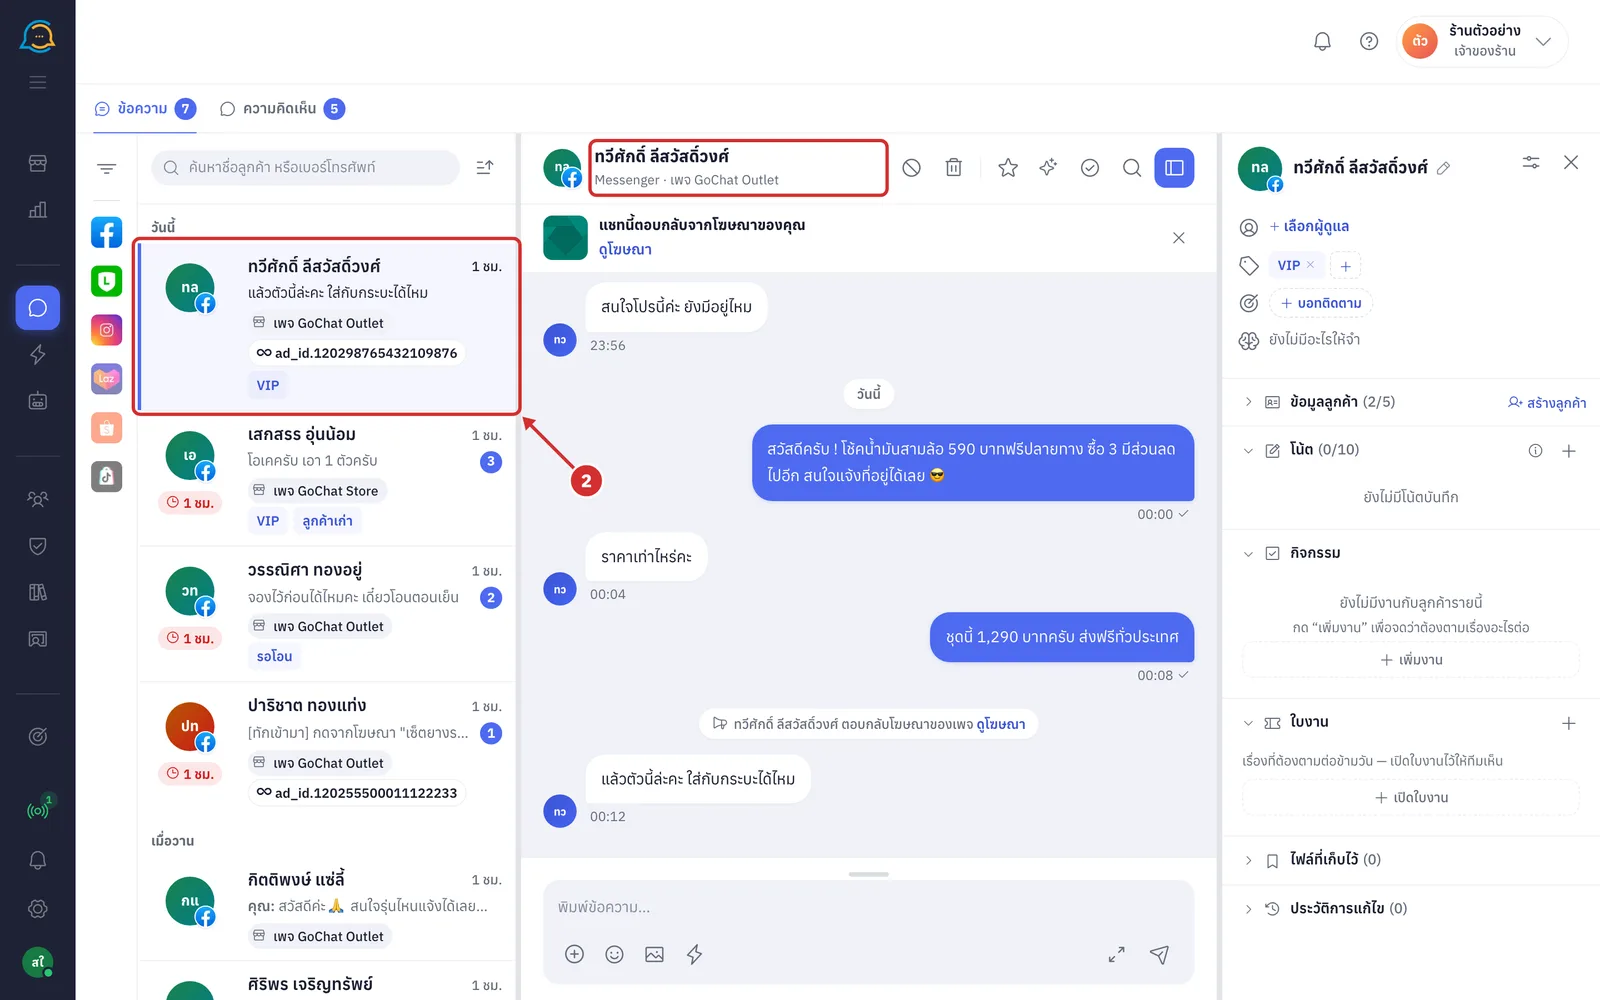
The ข้อความ (Messages) page brings chats from every channel your shop connected (Facebook · Instagram · LINE · Shopee · Lazada · TikTok Shop) into one place. The chat list is on the left, the open chat with its message box is in the middle, and the customer panel is on the right. Every role in the shop can reply from this page (in shops that restrict channels or use chat assignment, each person sees and replies only to the chats they are allowed to).
Opening a chat
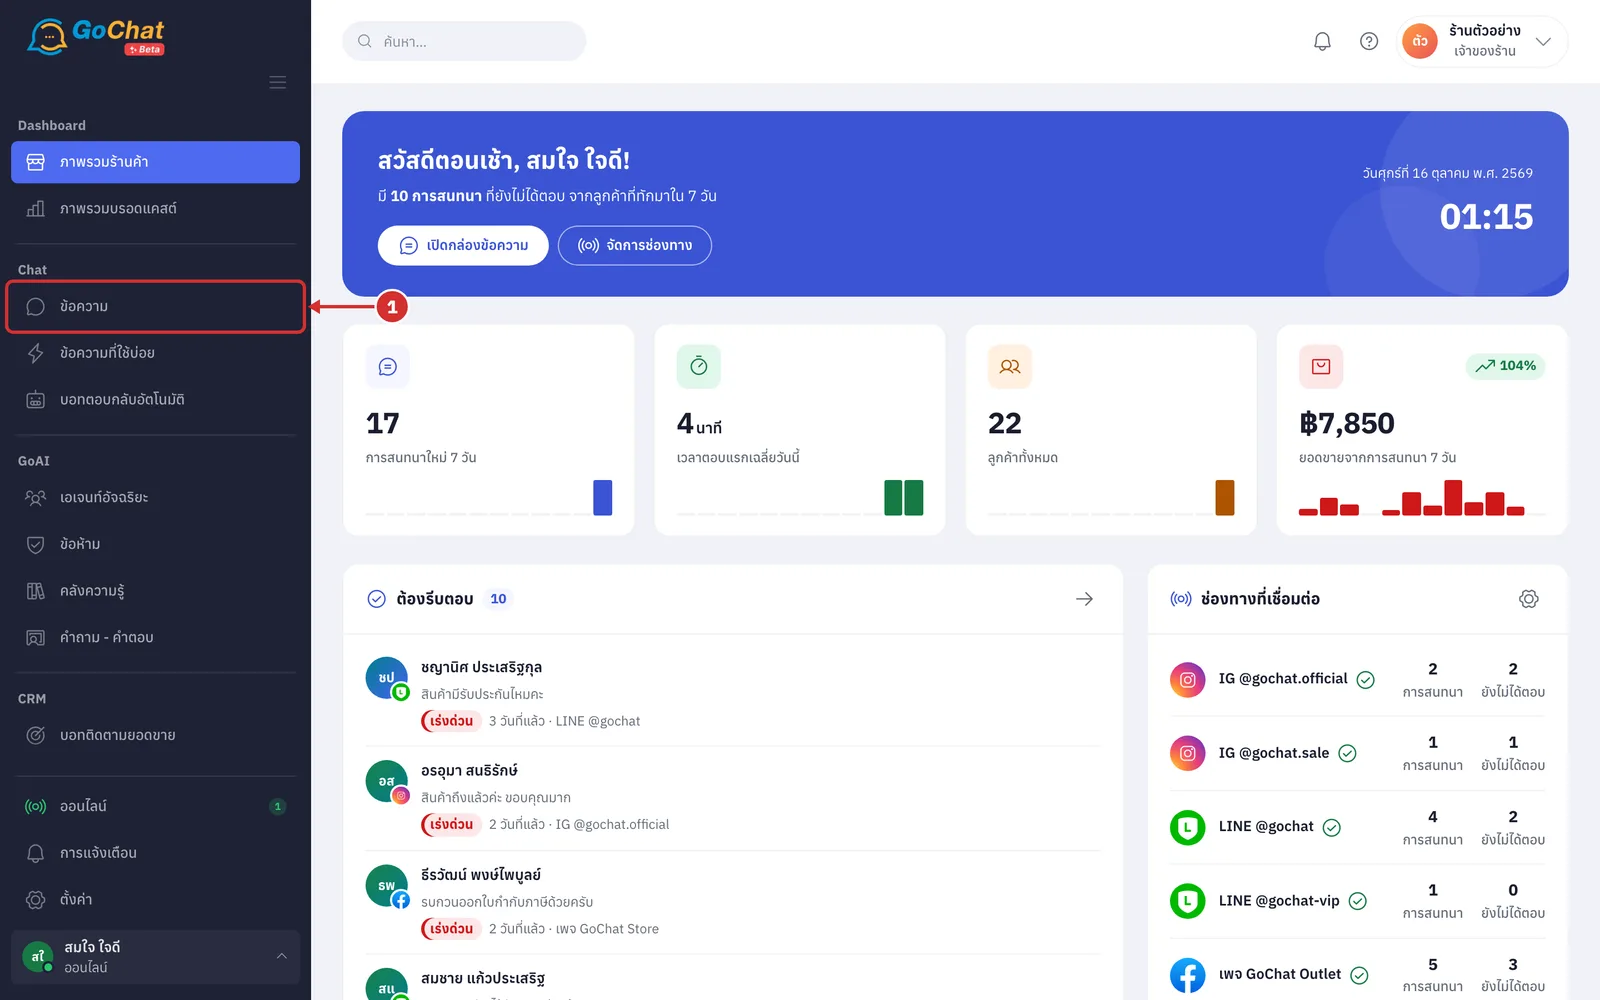
Go to the ข้อความ (Messages) menu in the left menu bar
Click the chat you want in the list on the left. It opens in the middle; the header shows the customer name, the channel, and the page or account the customer messaged, and the customer details appear on the right (opening a chat with unread messages marks it as read: the unread number disappears for everyone in the shop, and customers on Facebook · Instagram · Shopee · Lazada see that the shop has read it · to find chats with search and filters, see Searching and filtering chats)
Reading the chat
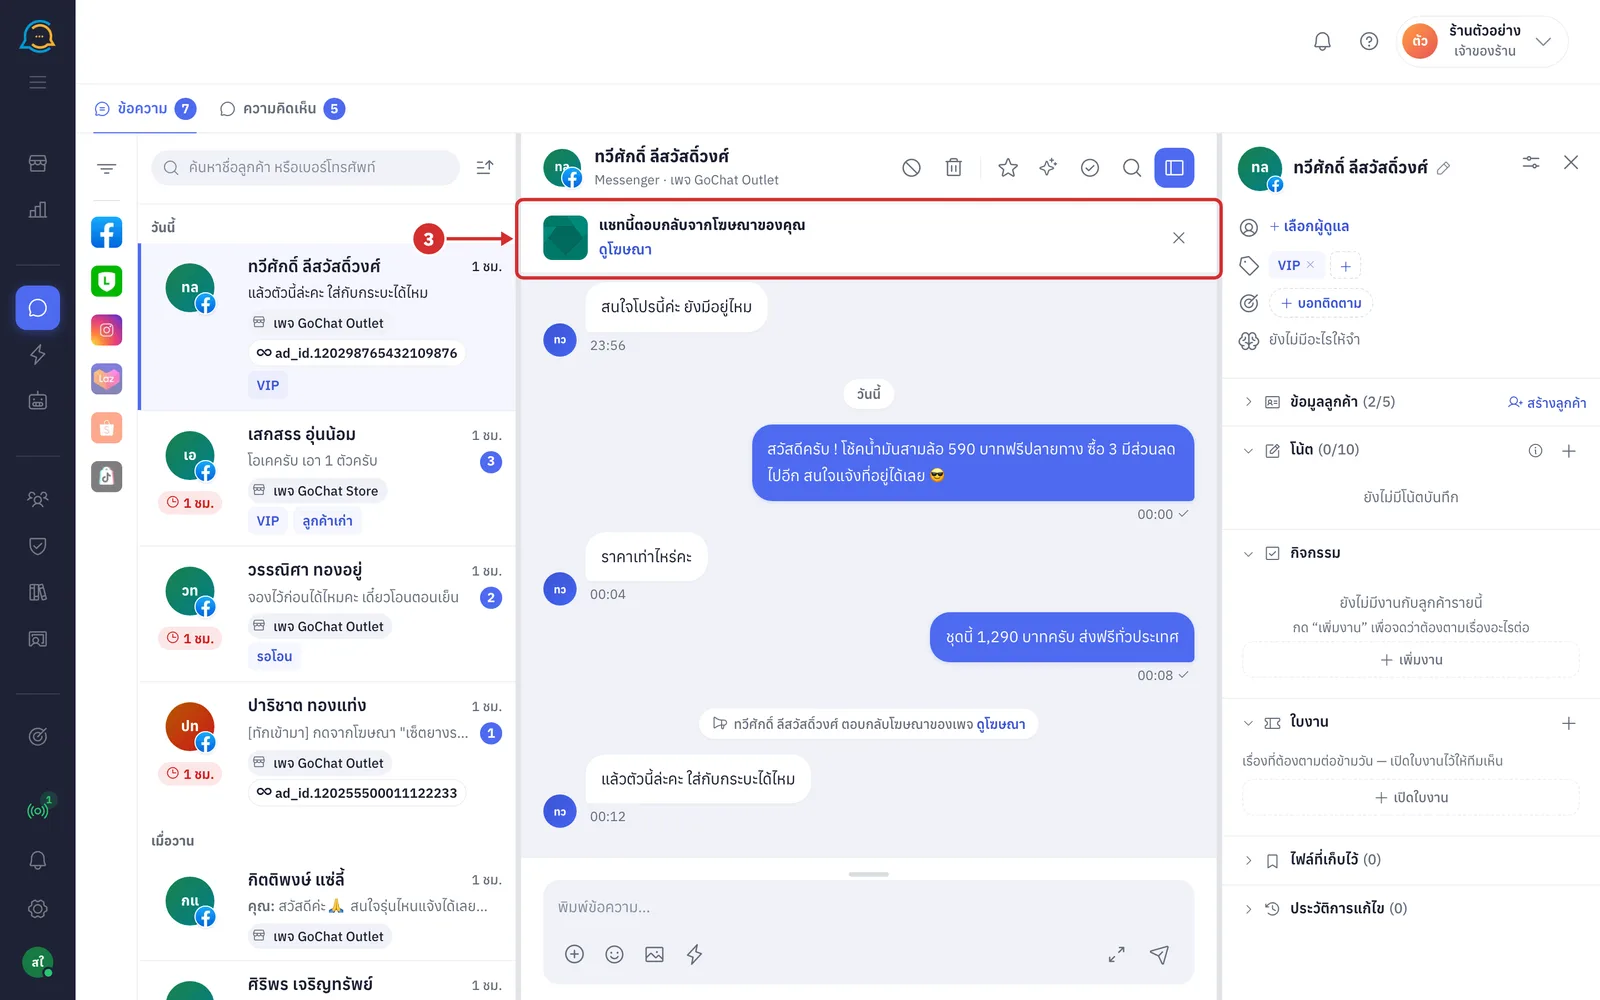
If the customer came from an ad, a bar แชทนี้ตอบกลับจากโฆษณาของคุณ (This chat is a reply to your ad) shows under the header with the ad's picture and text. Click ดูโฆษณา (View ad), when shown, to open the ad's post on Facebook or the ad in Ads Manager in a new tab (for video ads from a page post, click the picture to play it · click X to close the bar for this chat; it comes back after a refresh)
Customer messages are on the left; messages the shop sent are on the right on a blue background, with the time below (messages from the AI assistant or another app on the page have a label saying who sent them · scroll up to load older messages; at the first message you see จุดเริ่มต้นของการสนทนา (Start of the conversation) · while you are scrolled up, new messages show a ข้อความใหม่ N ข้อความ (N new messages) button that takes you down to the latest one · point at a message to show its buttons; see the last section of this article)
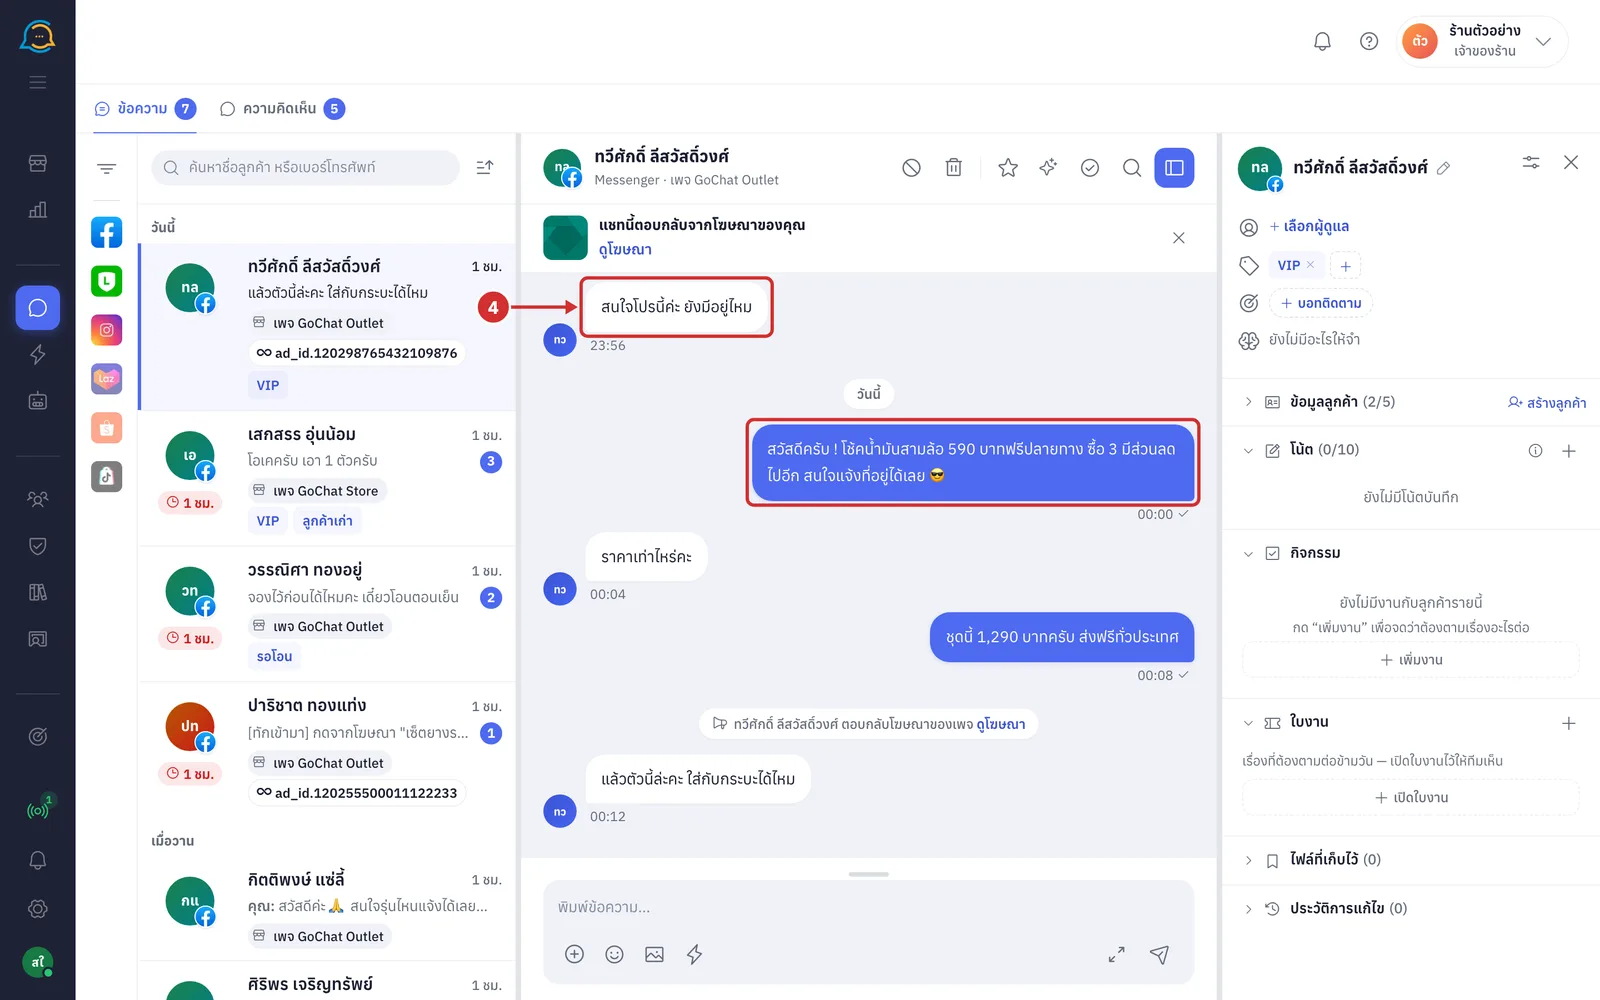
Labels in the middle show the day of the messages, such as วันนี้ (Today) · เมื่อวาน (Yesterday) or a date, and grey lines show events in the chat, such as … ตอบกลับโฆษณาของเพจ (… replied to the page's ad) when the customer came in from an ad (click ดูโฆษณา (View ad) at the end of the line to open the ad they clicked)
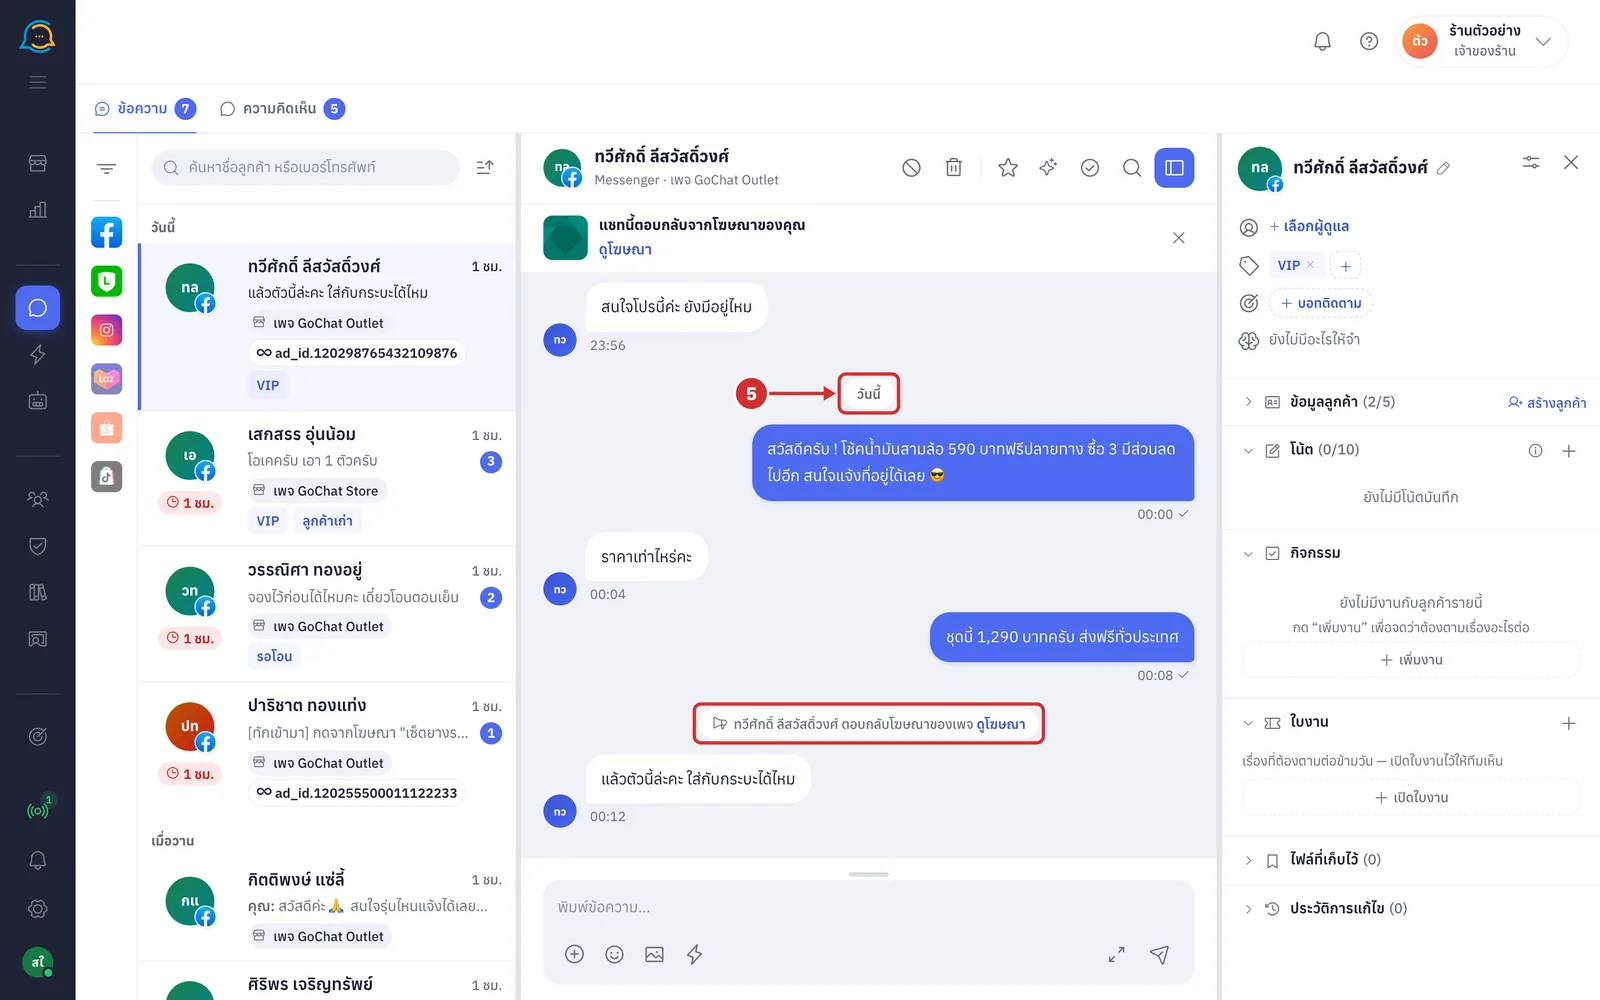
Typing and sending a message
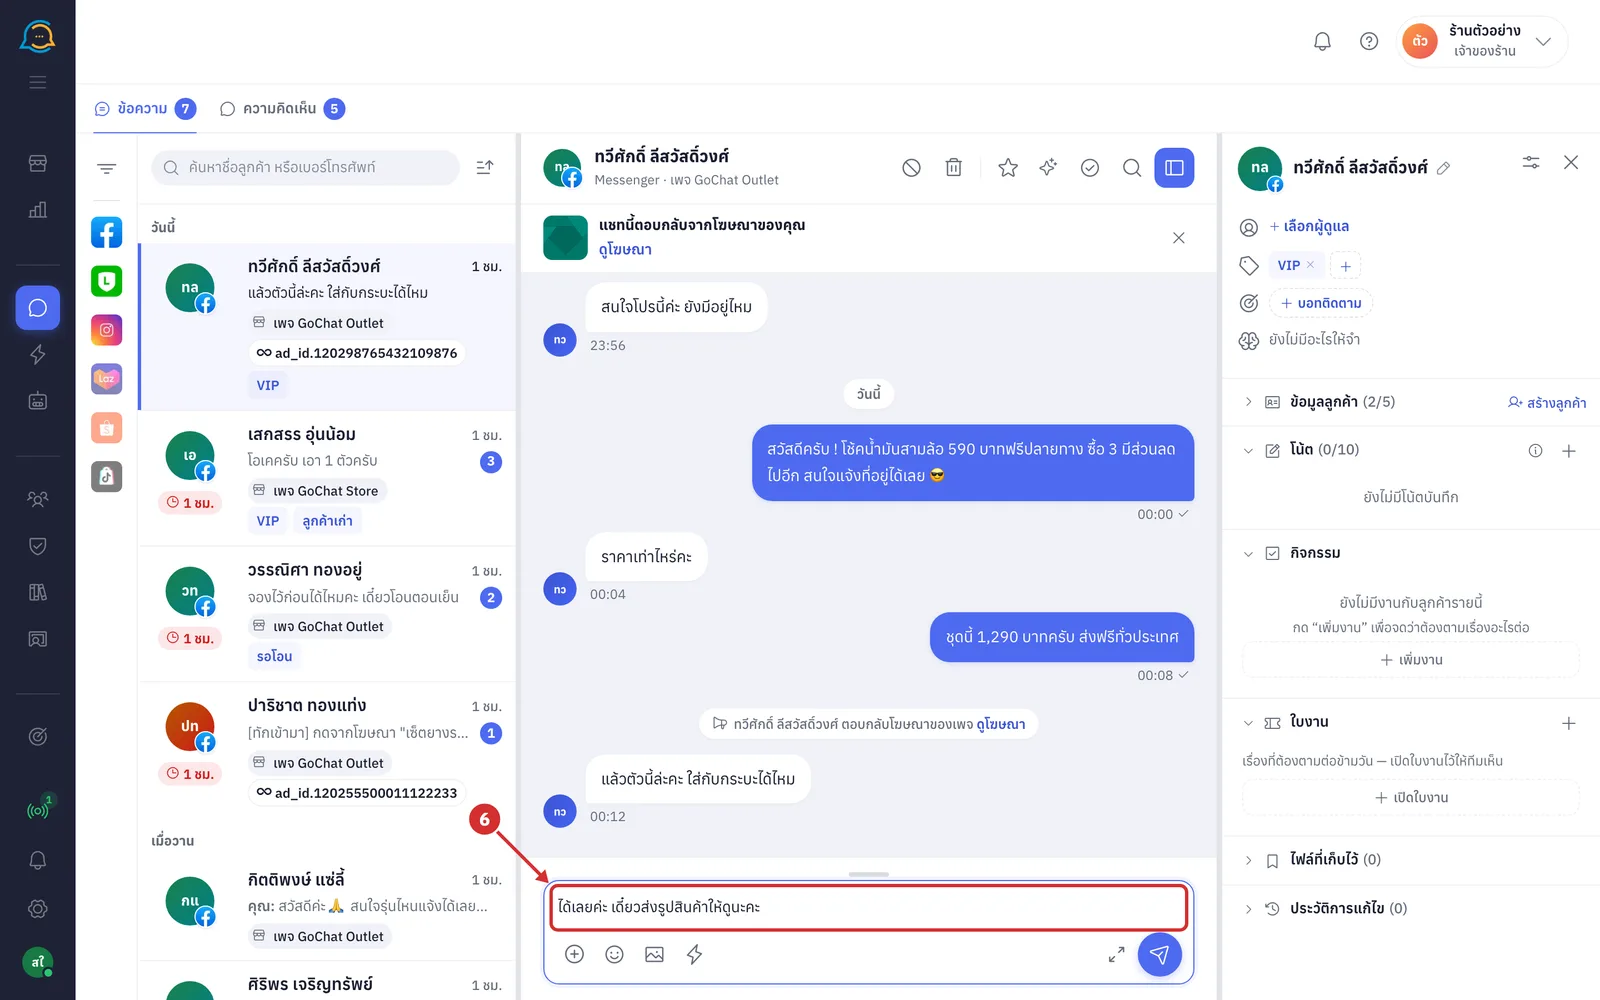
In พิมพ์ข้อความ... (Type a message...), type your reply (press Enter to send · Shift + Enter for a new line · text you leave unsent stays when you switch to another chat and come back; it is kept in this browser and your teammates do not see it · paste a copied image with Ctrl + V · in LINE group chats the box reads พิมพ์ข้อความถึงทุกคนในกลุ่ม... (Message everyone in the group...), and typing @ lets you pick a member to mention)
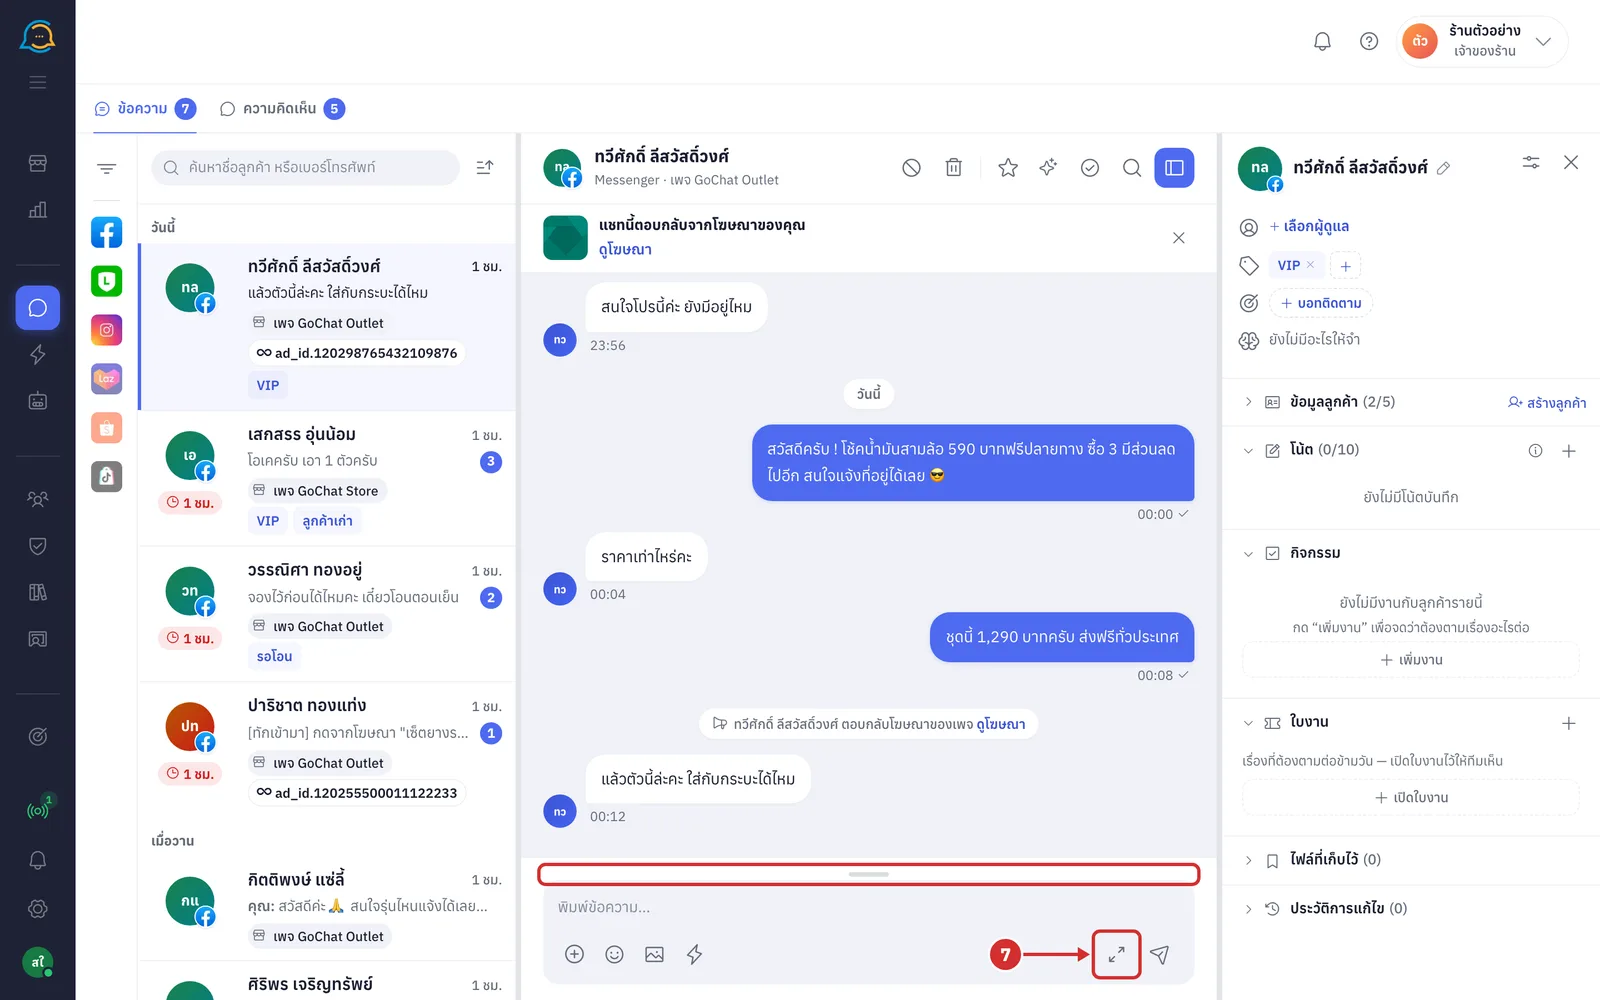
Click the two-headed arrow button on the right of the message box to make it taller for long messages; click again to shrink it (or drag the short bar above the message box to set the height yourself)
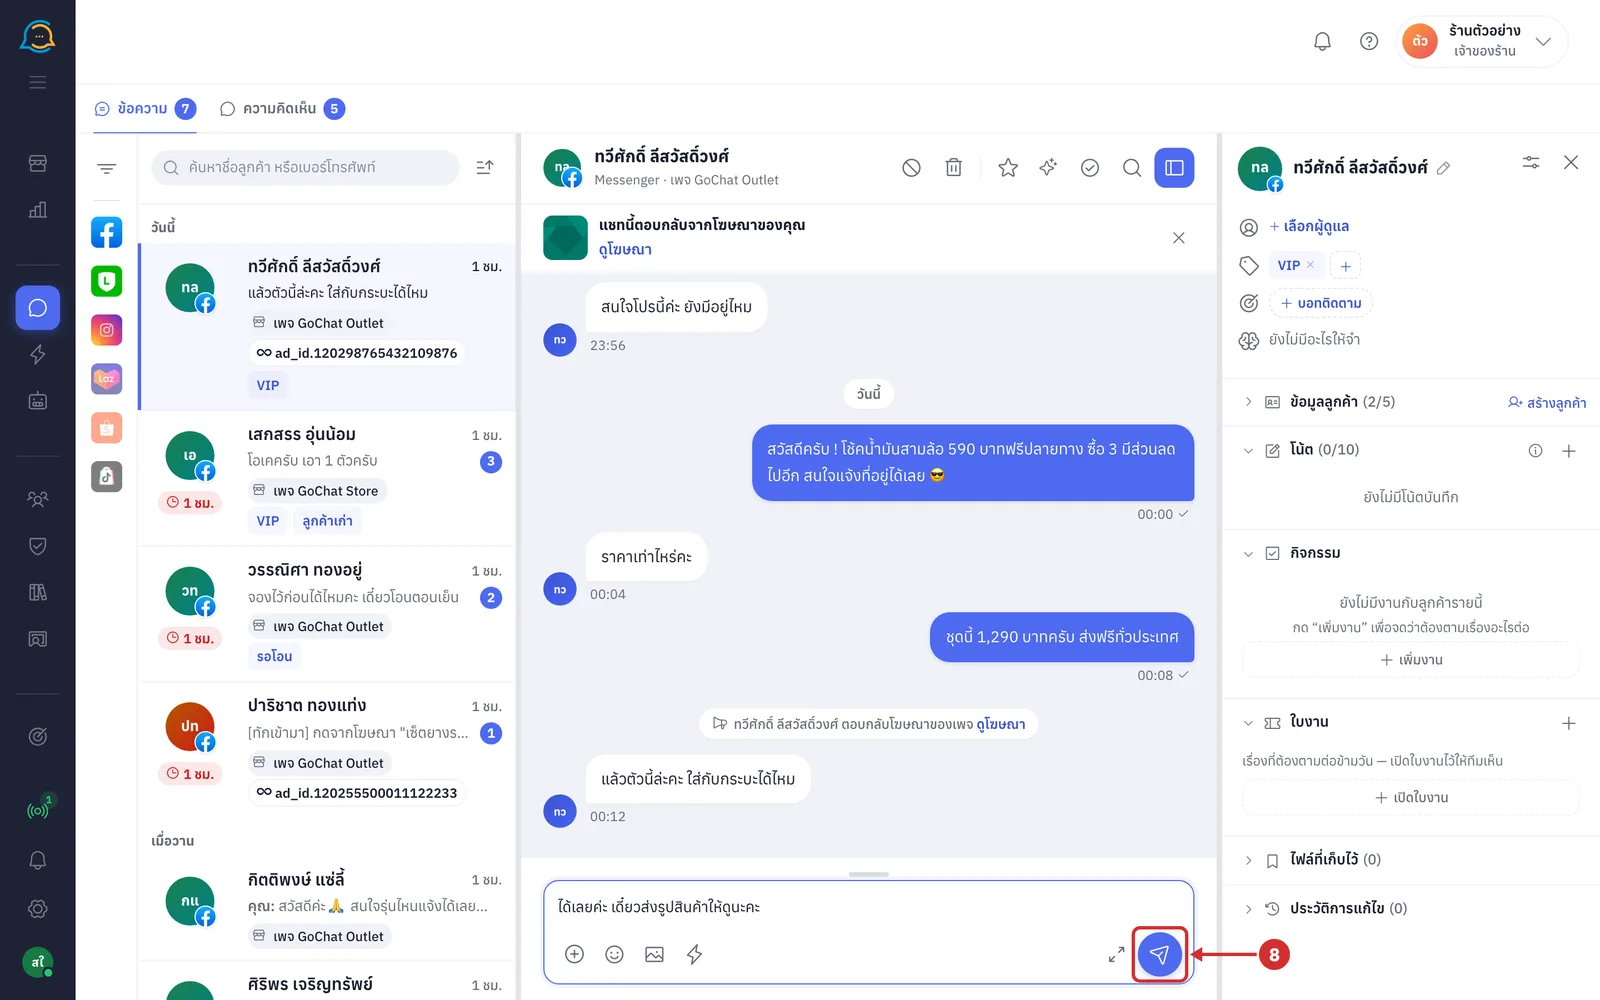
Click the send button (the paper plane at the bottom right of the message box) or press Enter (the button is faded and cannot be clicked while there is nothing to send)
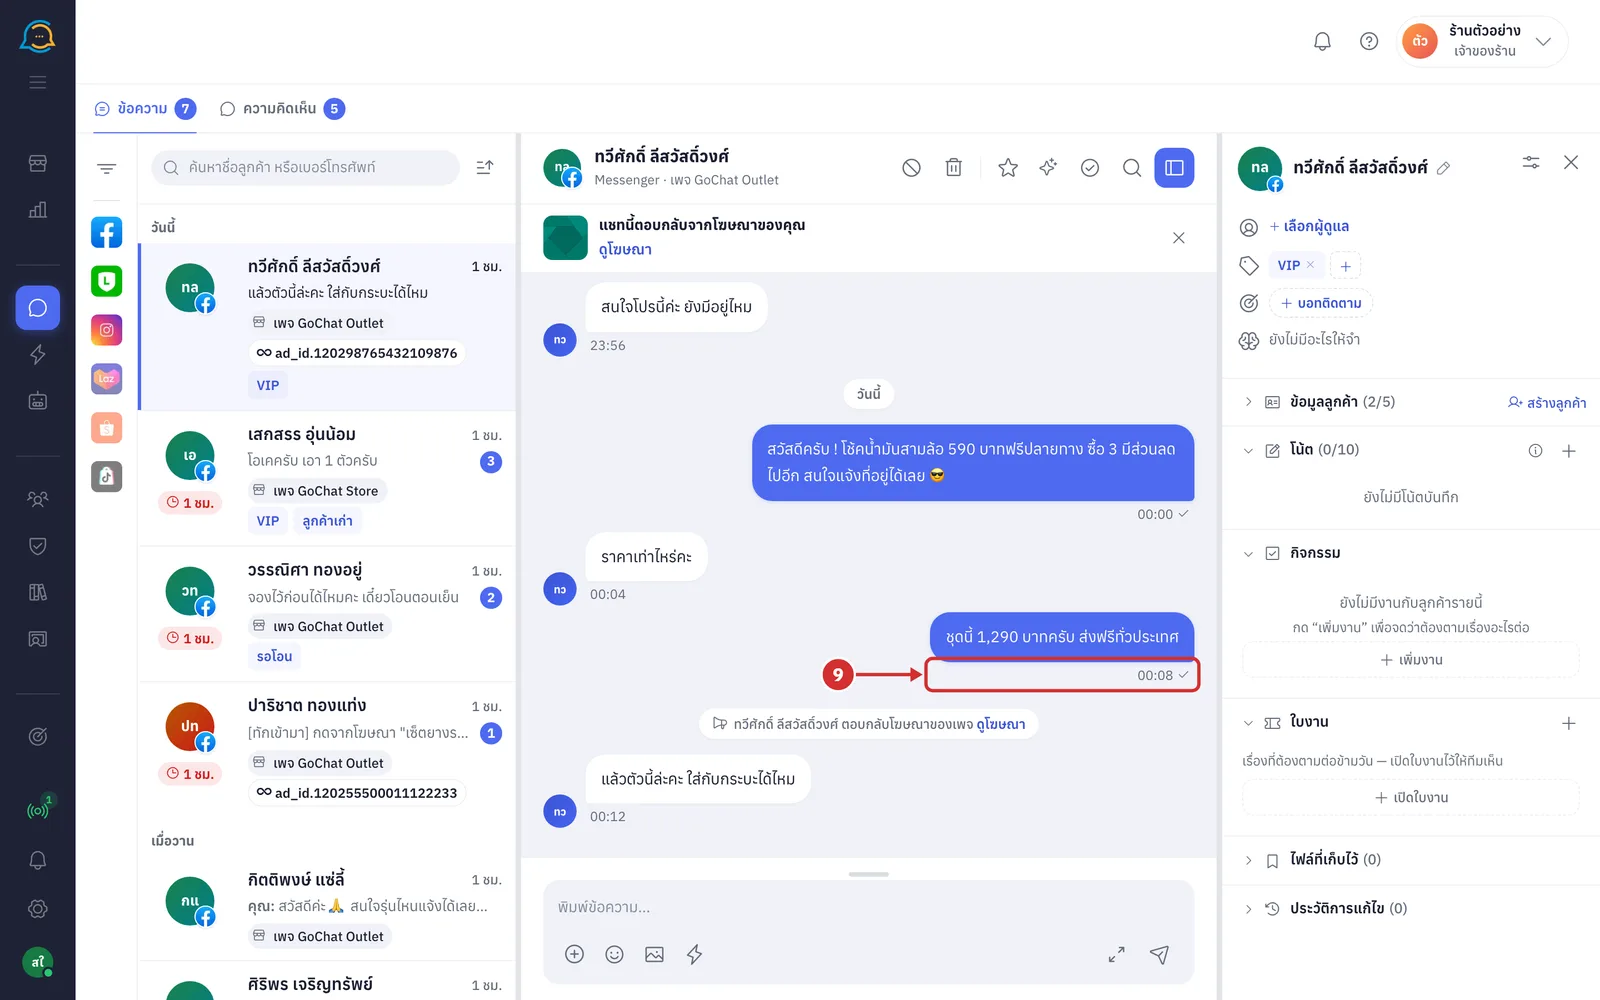
The message appears on the right of the chat straight away. The icon after the time below it shows the sending status
Clock icon = sending
One tick = delivered to the channel
Two ticks = the customer has read it (point at the ticks to see when · only on channels that report reads)
Red warning icon = not sent. Point at the icon to see why, click the circular arrow button to send again (if that message can be resent), or click the trash button to remove the failed message from the chat; the system asks before deleting
Sending images, videos and files
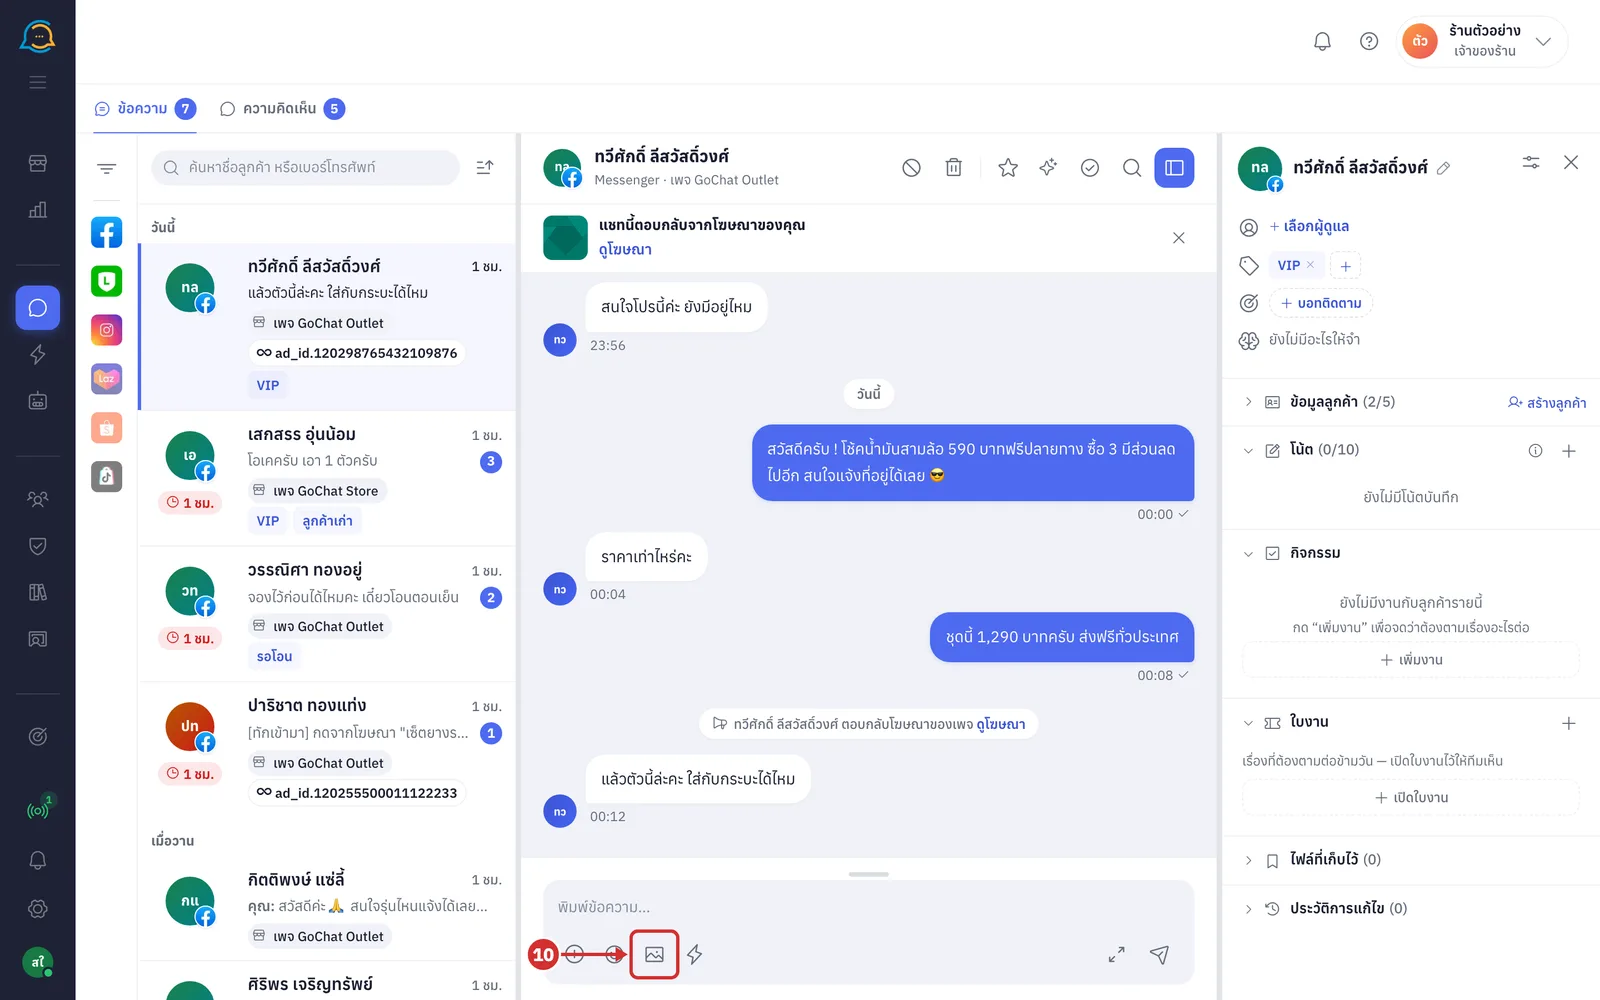
Click แนบรูปภาพ (Attach image — the picture icon) and choose images from your device (JPG · PNG · GIF · WEBP, several at once). They appear as thumbnails in the message box first and are not sent until you click send (click X on a thumbnail to remove it · up to 25 MB per file · you can type a message to go with the images or send them without one · you can also drag files from your device onto the message box, which shows วางที่นี่เพื่อแนบ (Drop here to attach))
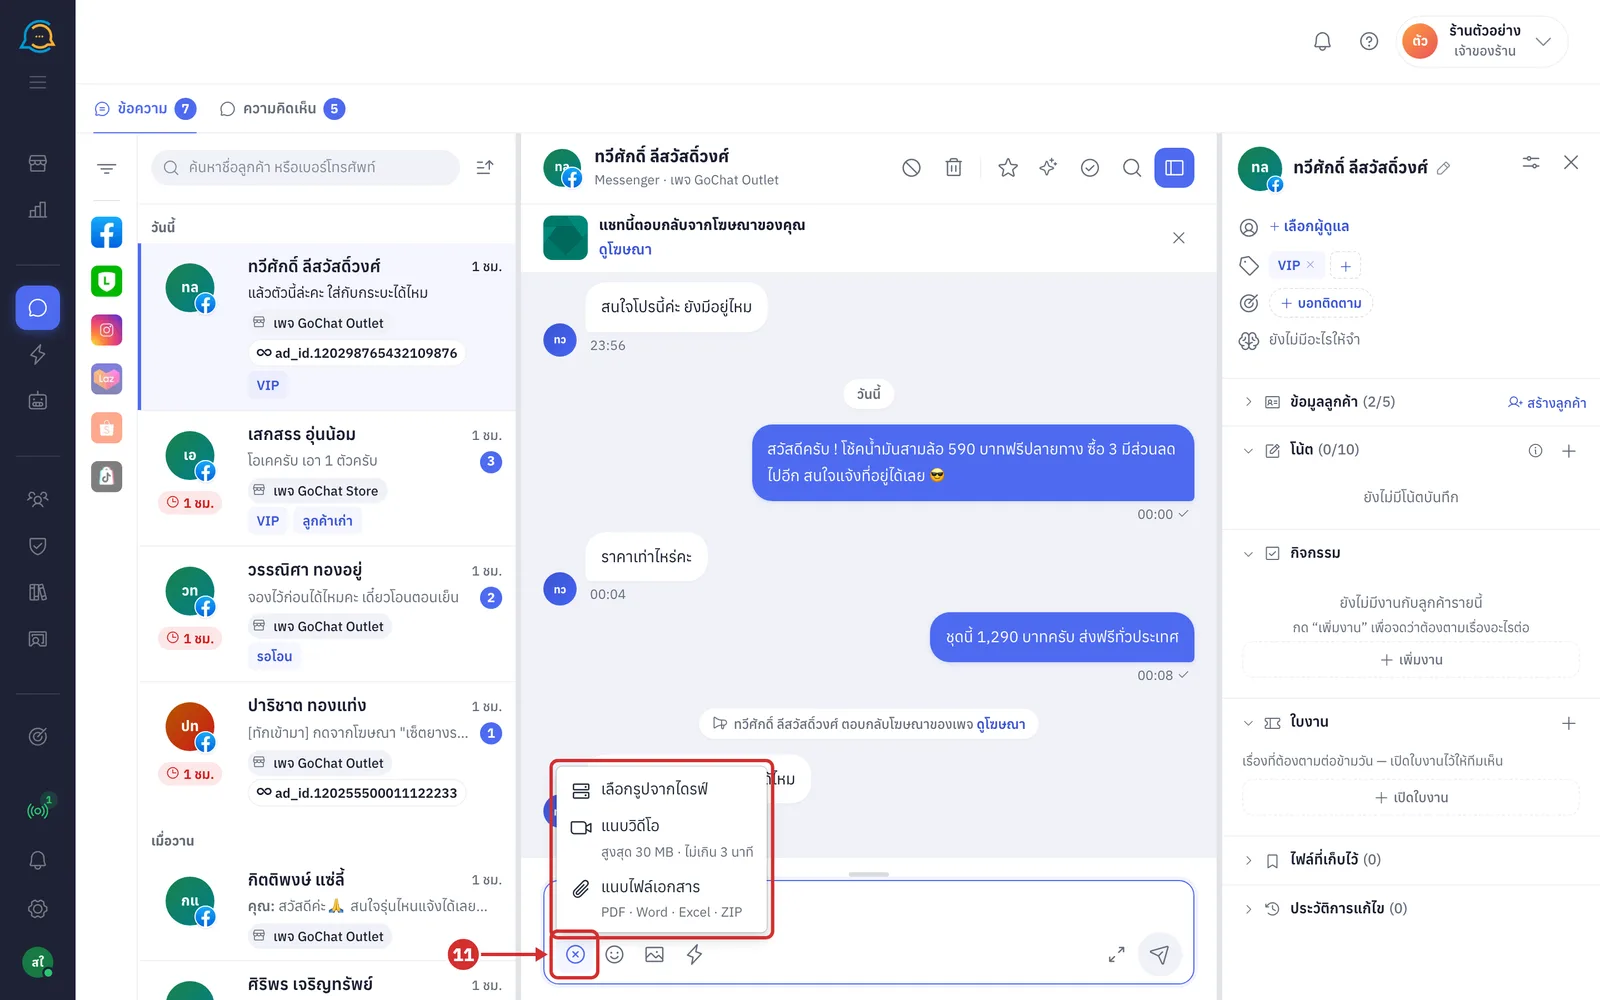
Click the + button at the far left of the message box and choose what to attach from the menu (the menu only lists what the chat's channel can send; for example LINE chats only have เลือกรูปจากไดรฟ์ (Choose image from drive) · click the button again to close the menu)
เลือกรูปจากไดรฟ์ (Choose image from drive) to pick an image your shop keeps in its drive
แนบวิดีโอ (Attach video) to send one video from your device, up to 30 MB and 3 minutes (MP4 · MOV · works on Facebook · Instagram · Shopee · TikTok)
แนบไฟล์เอกสาร (Attach document) to send a PDF · Word · Excel · ZIP file (works on Facebook and Instagram)
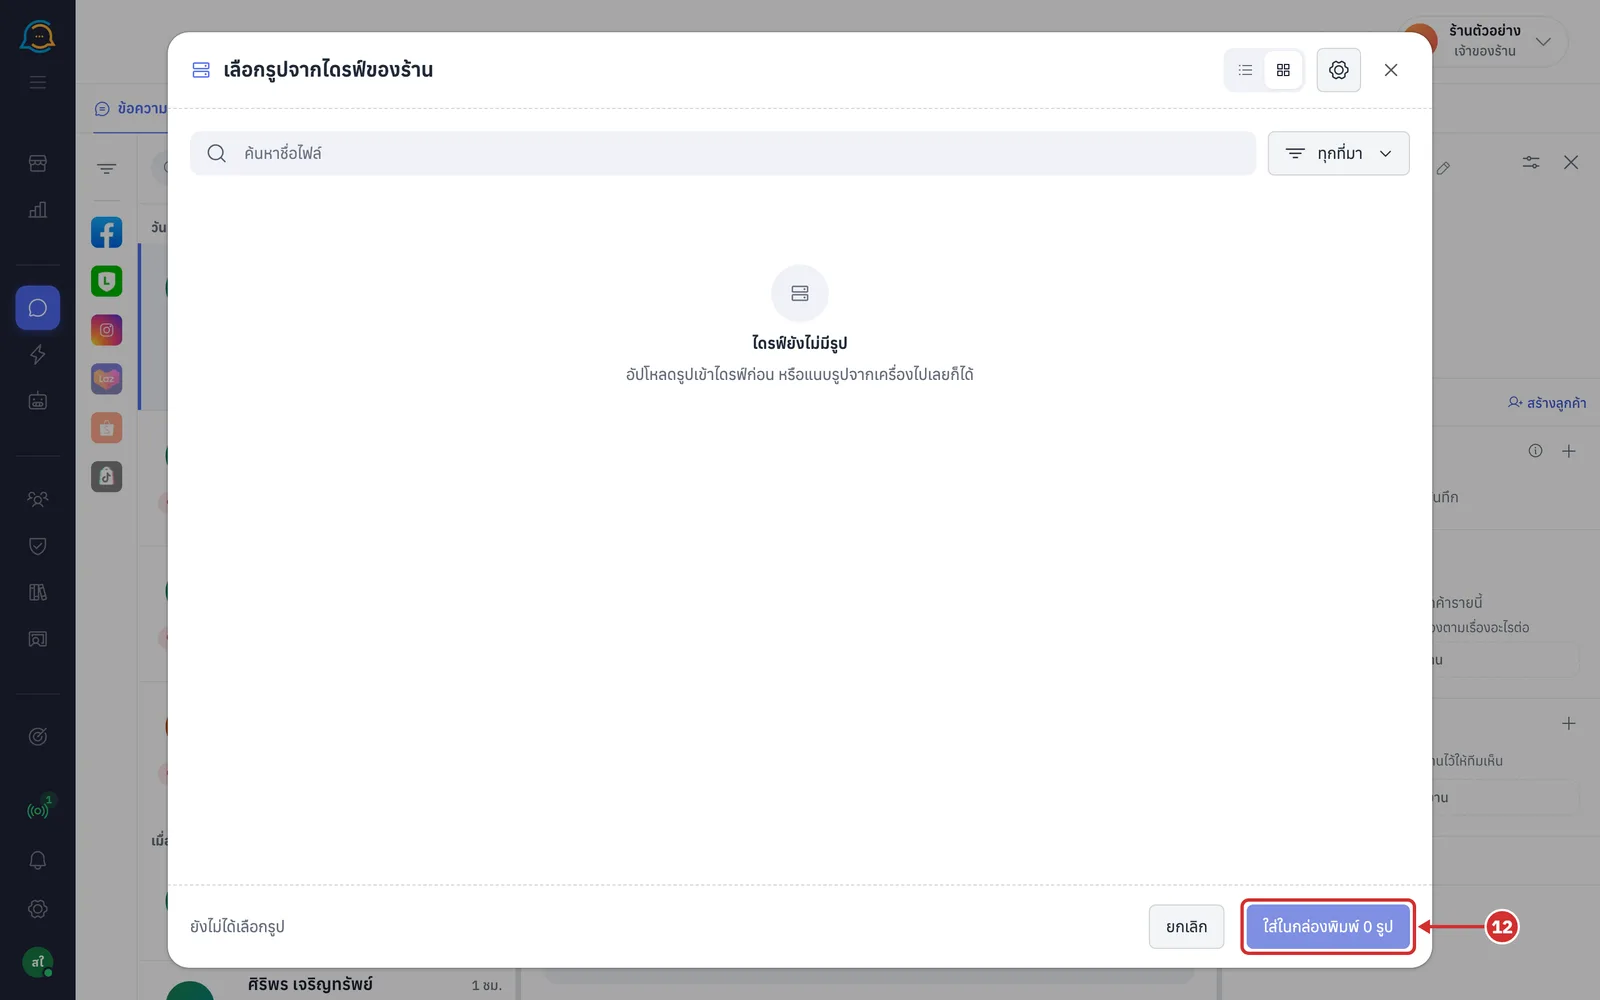
In เลือกรูปจากไดรฟ์ของร้าน (Choose images from the shop drive), search by file name or filter by source, tick the images you want (several at once), then click ใส่ในกล่องพิมพ์ N รูป (Put N images in the message box). They wait in the message box just like images from your device (an empty drive shows ไดรฟ์ยังไม่มีรูป (No images in the drive yet) · the gear button at the top uploads, renames or moves images to the trash · click ยกเลิก (Cancel) to close without choosing)
Sending emoji and stickers
Click อิโมจิและสติกเกอร์ (Emoji and stickers — the smiley icon). The panel opens above the message box; click the icon again or click elsewhere to close it
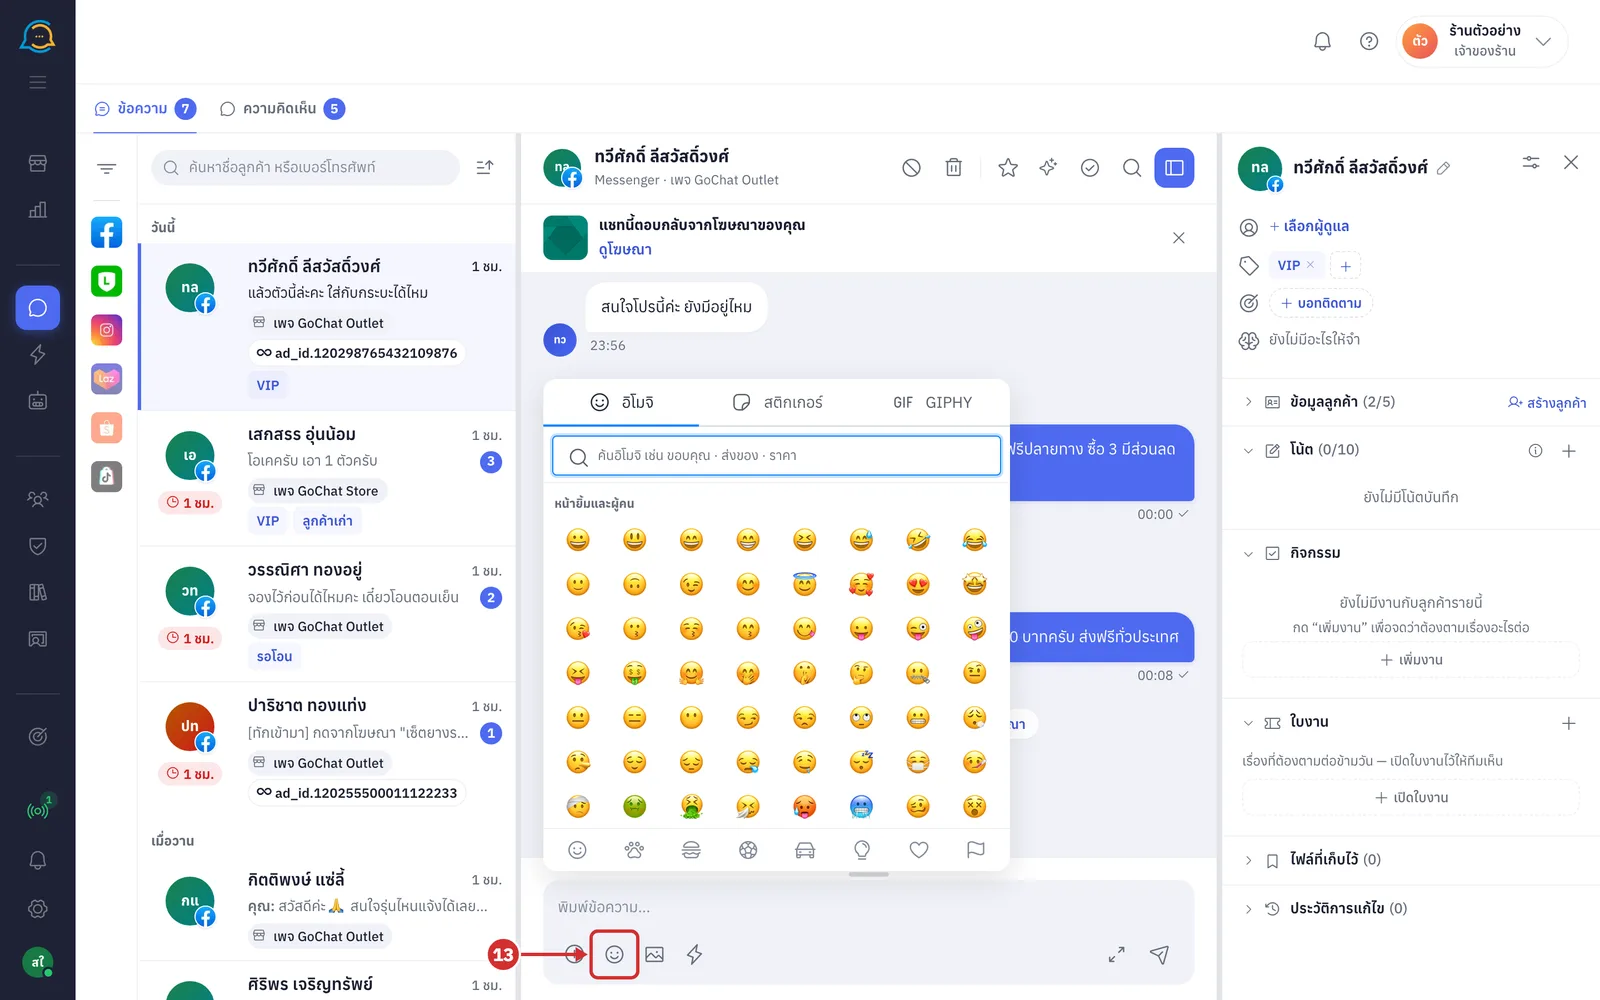
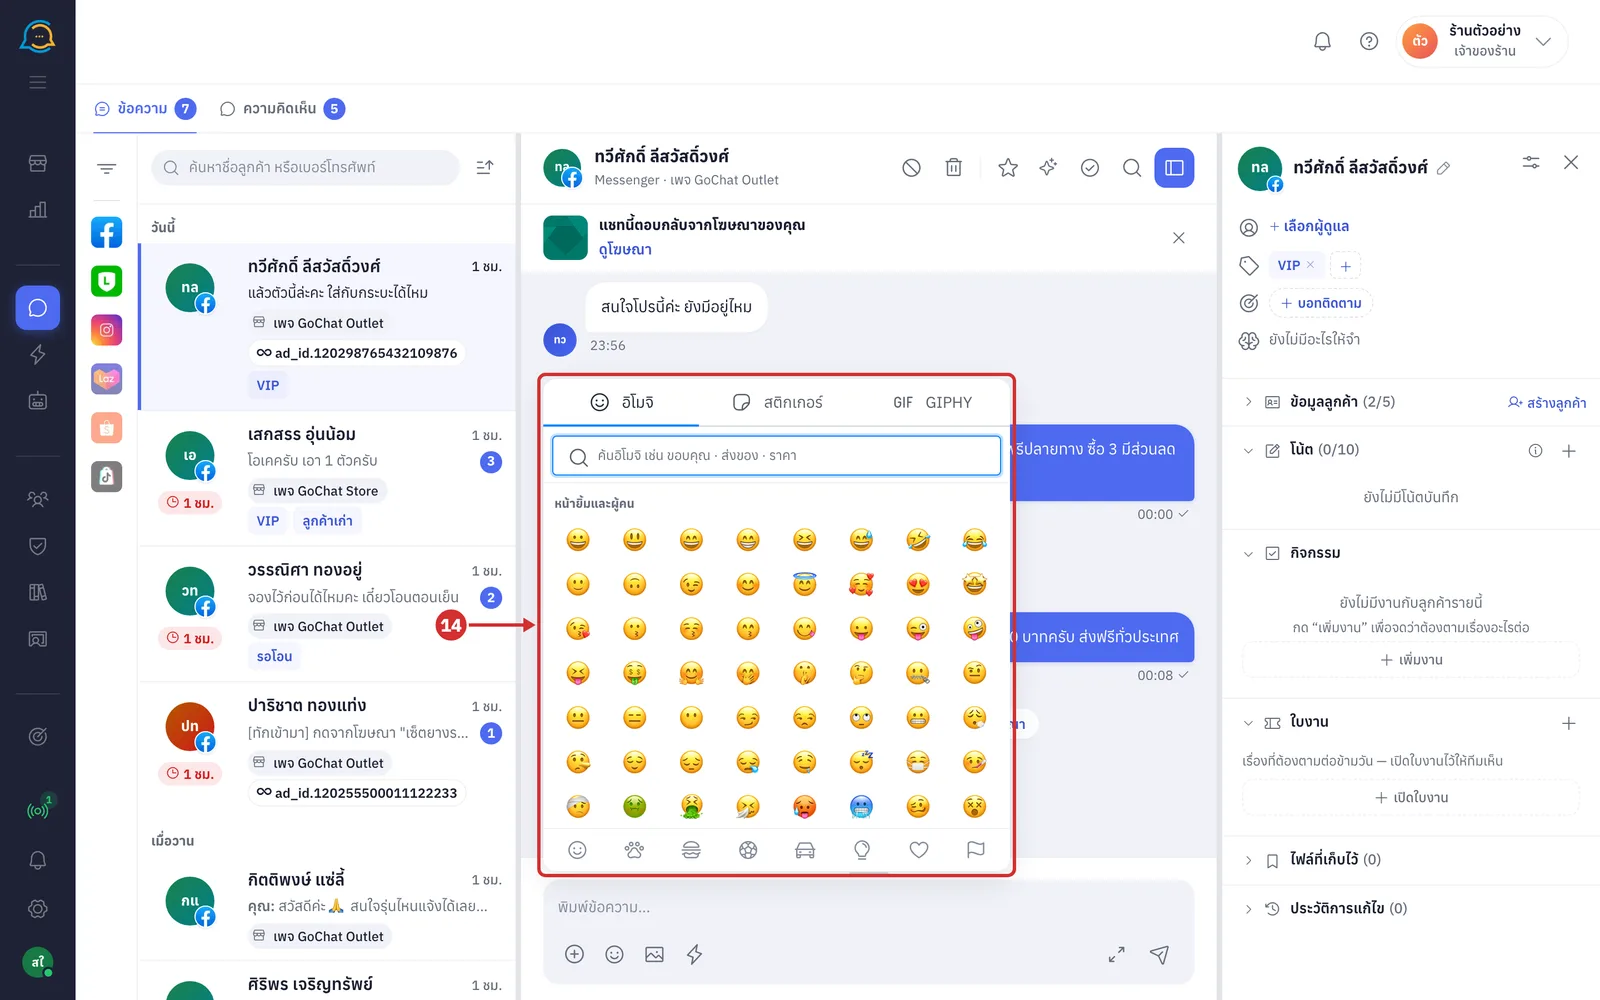
On the อิโมจิ (Emoji) tab, search in the emoji search box or pick a category at the bottom, then click an emoji to insert it where you are typing (the panel stays open so you can add several · recently used emoji come first · emoji are characters in your message, so they work on every channel at any time)
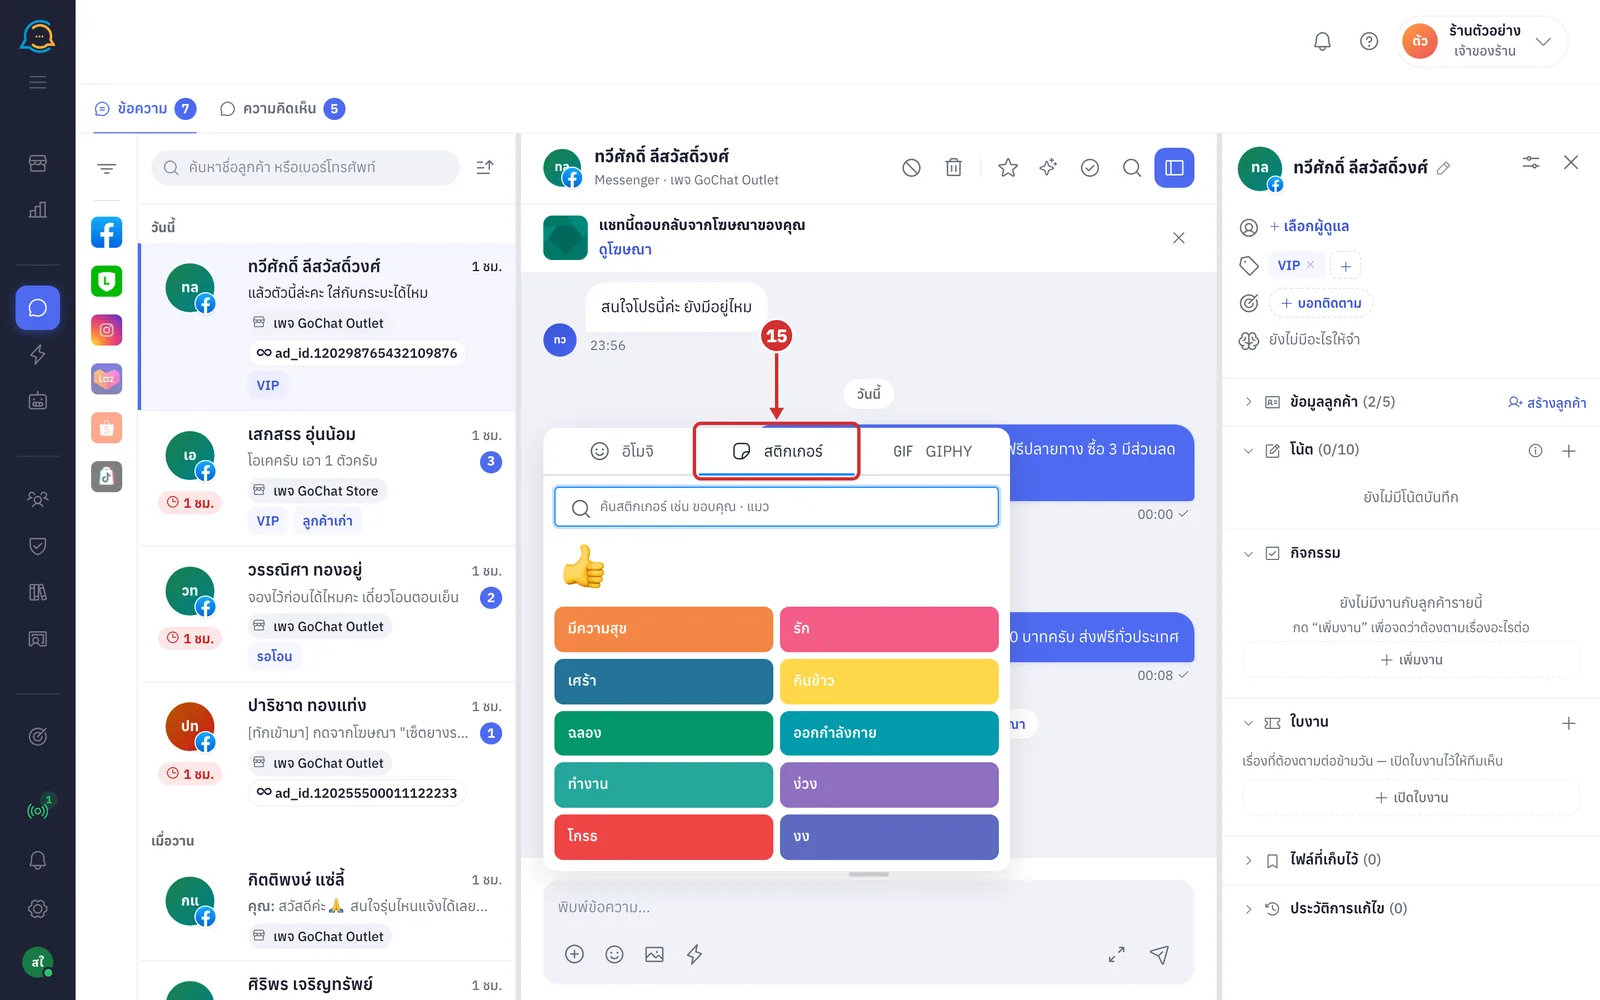
Click the สติกเกอร์ (Stickers) tab, then click a sticker. The sticker is sent to the customer immediately; there is no send button
Facebook chats — search in ค้นสติกเกอร์ เช่น ขอบคุณ · แมว (Search stickers, e.g. thanks · cat) or click a category such as มีความสุข (Happy) · รัก (Love) · เศร้า (Sad) (the thumbs-up icon is the like sticker) · there is also a GIPHY tab for GIPHY stickers and GIFs
LINE chats — choose a pack at the bottom; hold the mouse on a sticker to preview its animation before sending (the panel stays open after sending so you can send more)
Instagram chats — the สติกเกอร์ (Stickers) tab uses GIPHY stickers
Facebook and Instagram allow stickers within 24 hours of the customer's last message; after that the tab cannot be clicked
Using saved replies
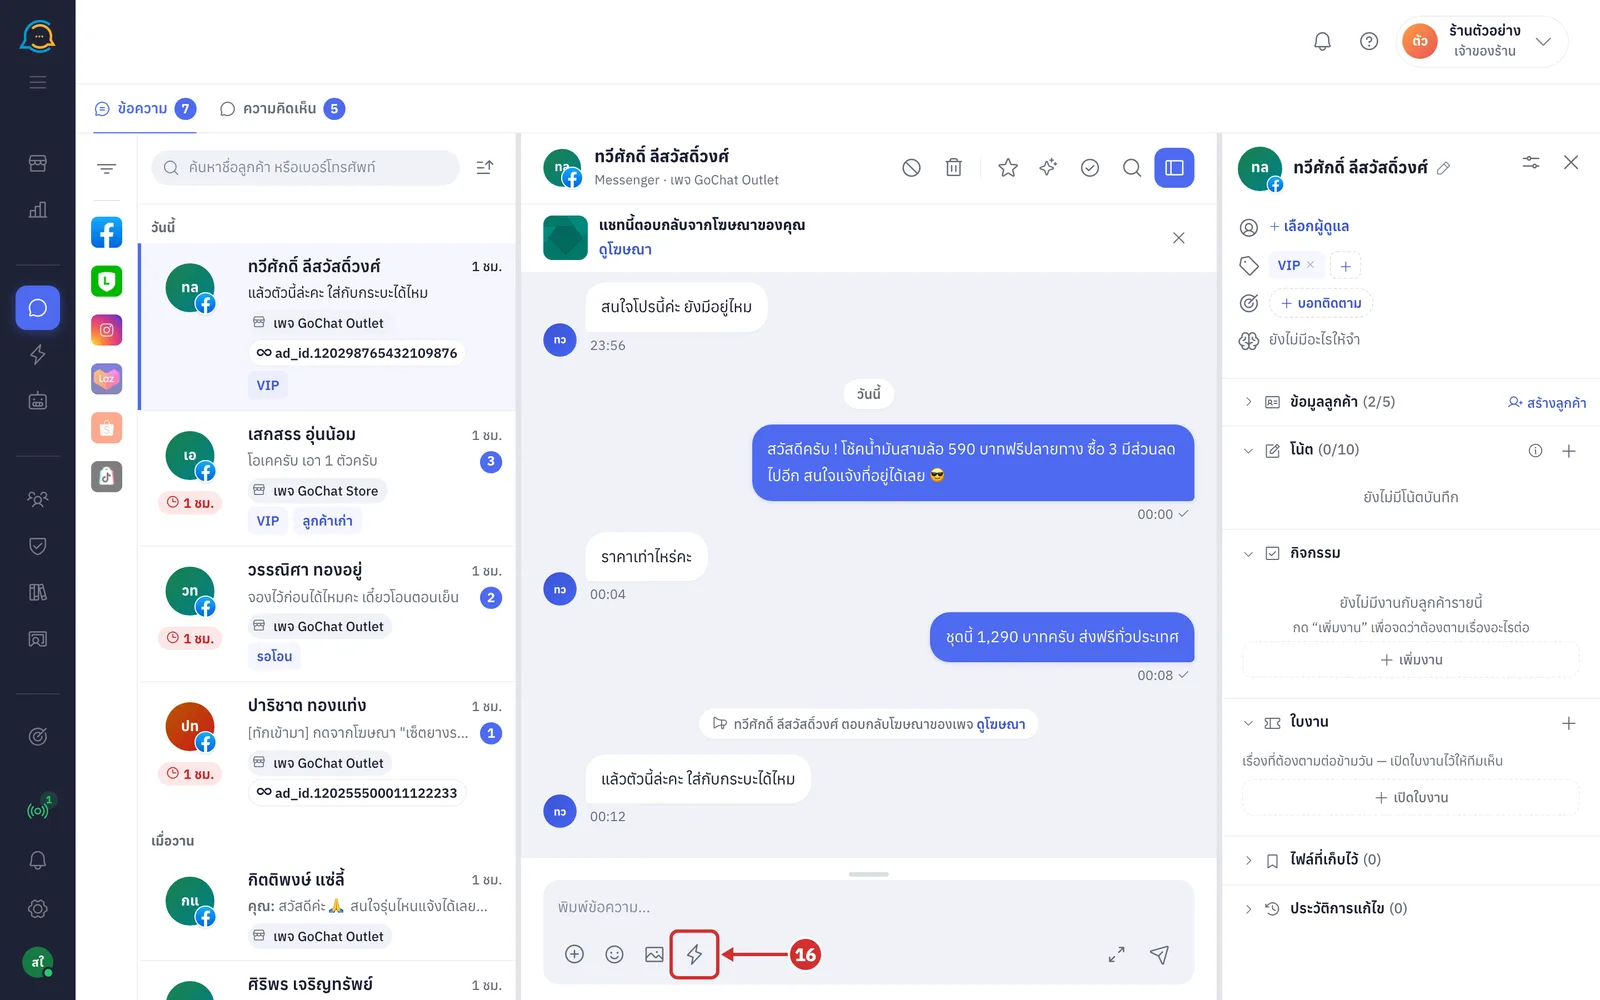
Click ข้อความที่ใช้บ่อย (Saved replies — the lightning icon)
In the ข้อความที่ใช้บ่อย (Saved replies) window, search in ค้นหาหัวข้อหรือเนื้อหา (Search title or content) or click หมวด (Category) to see one category, then click the card you want (each card shows the title, text, attached images and how often it was used, such as ยังไม่เคยใช้ (Never used) · you can also pick with the arrow keys and Enter · press Esc or X to close)
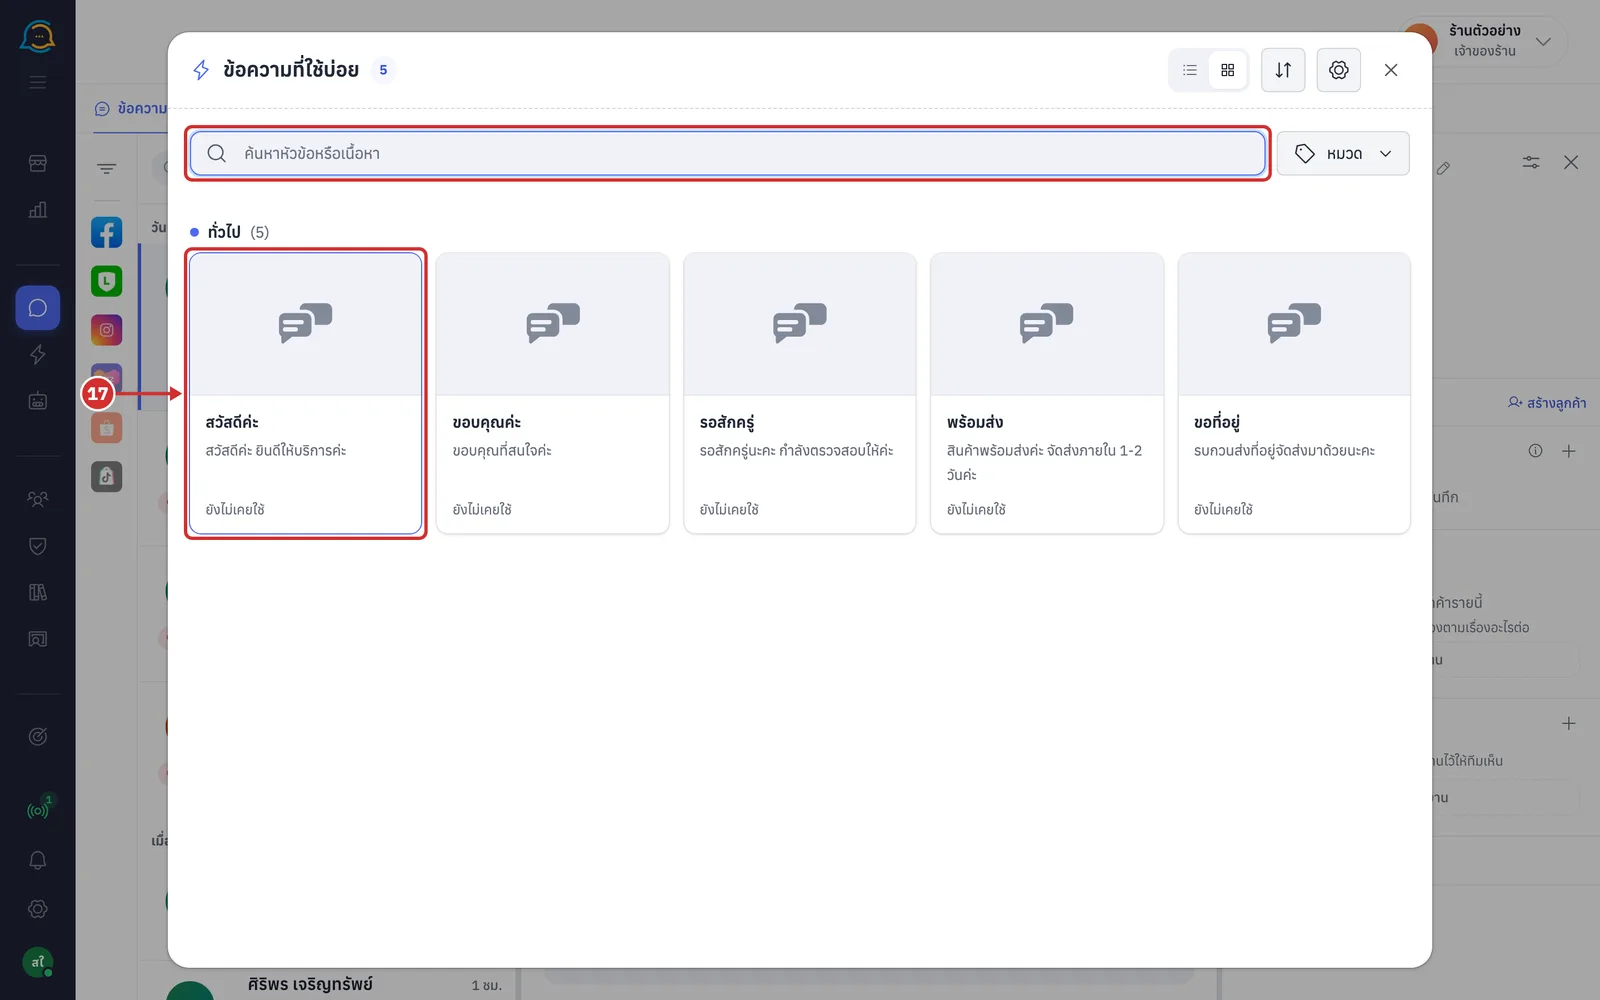
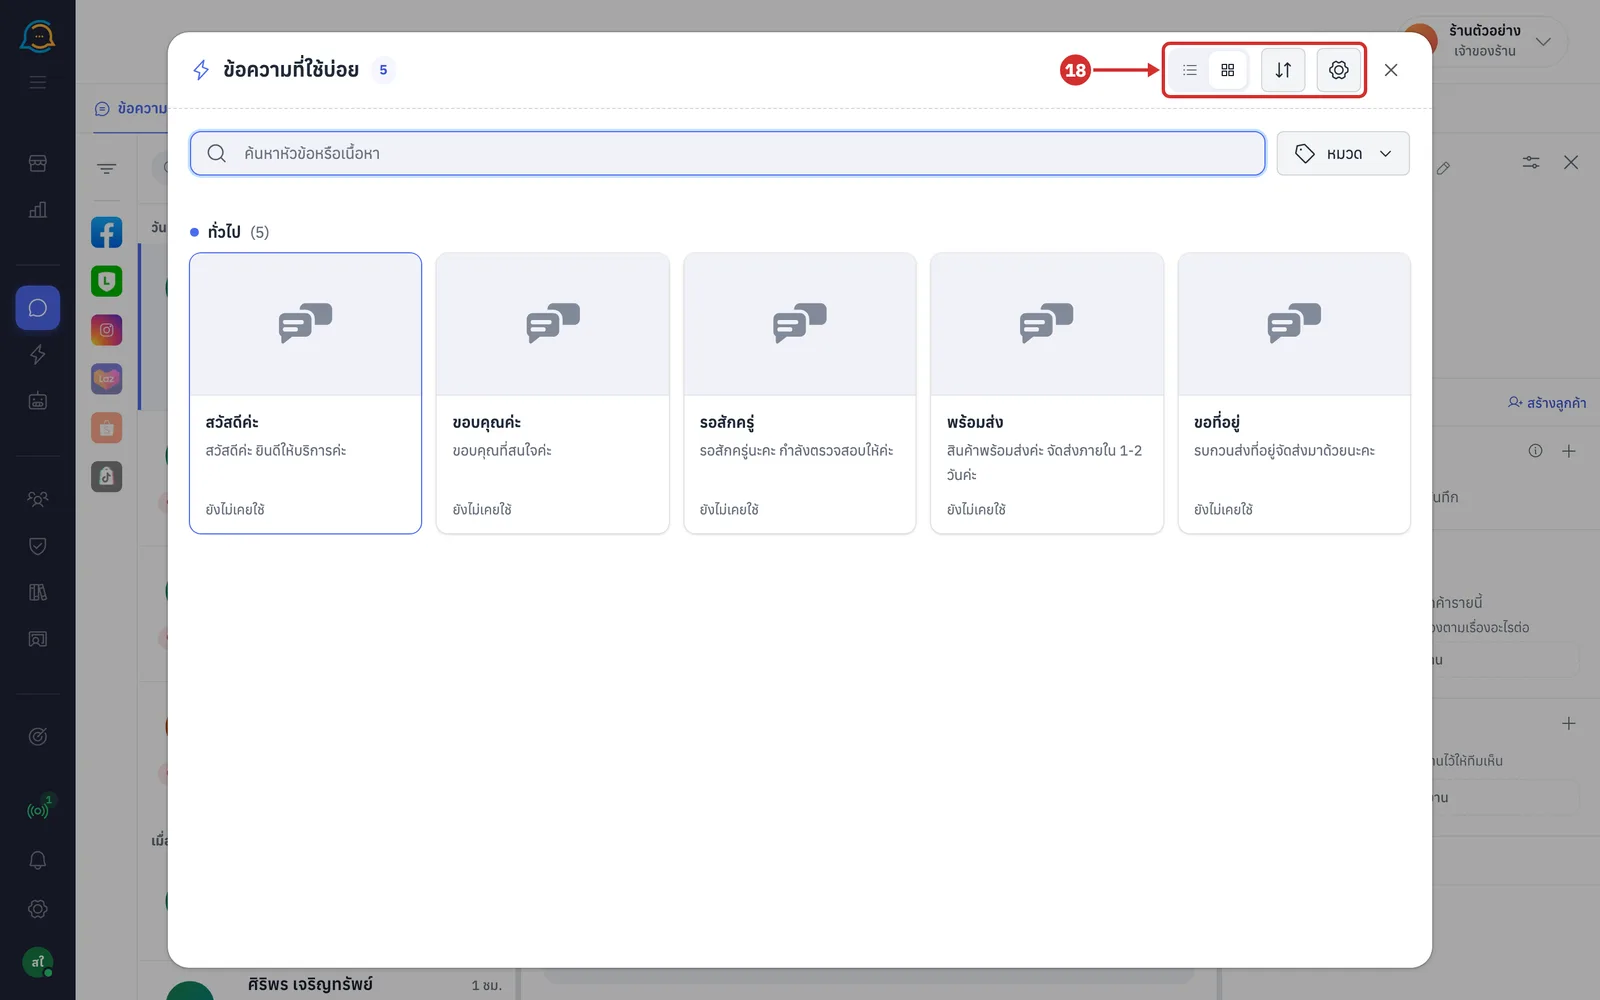
The top of the window has these buttons, from left to right
มุมมองรายการ (List view) / มุมมองการ์ด (Card view) — show the replies as a list or as cards
The up-down arrow button, จัดลำดับข้อความ (Reorder) — change the order of the replies in this window; click again to leave
The gear button, จัดการข้อความ (Manage) — add, edit or delete saved replies right in this window
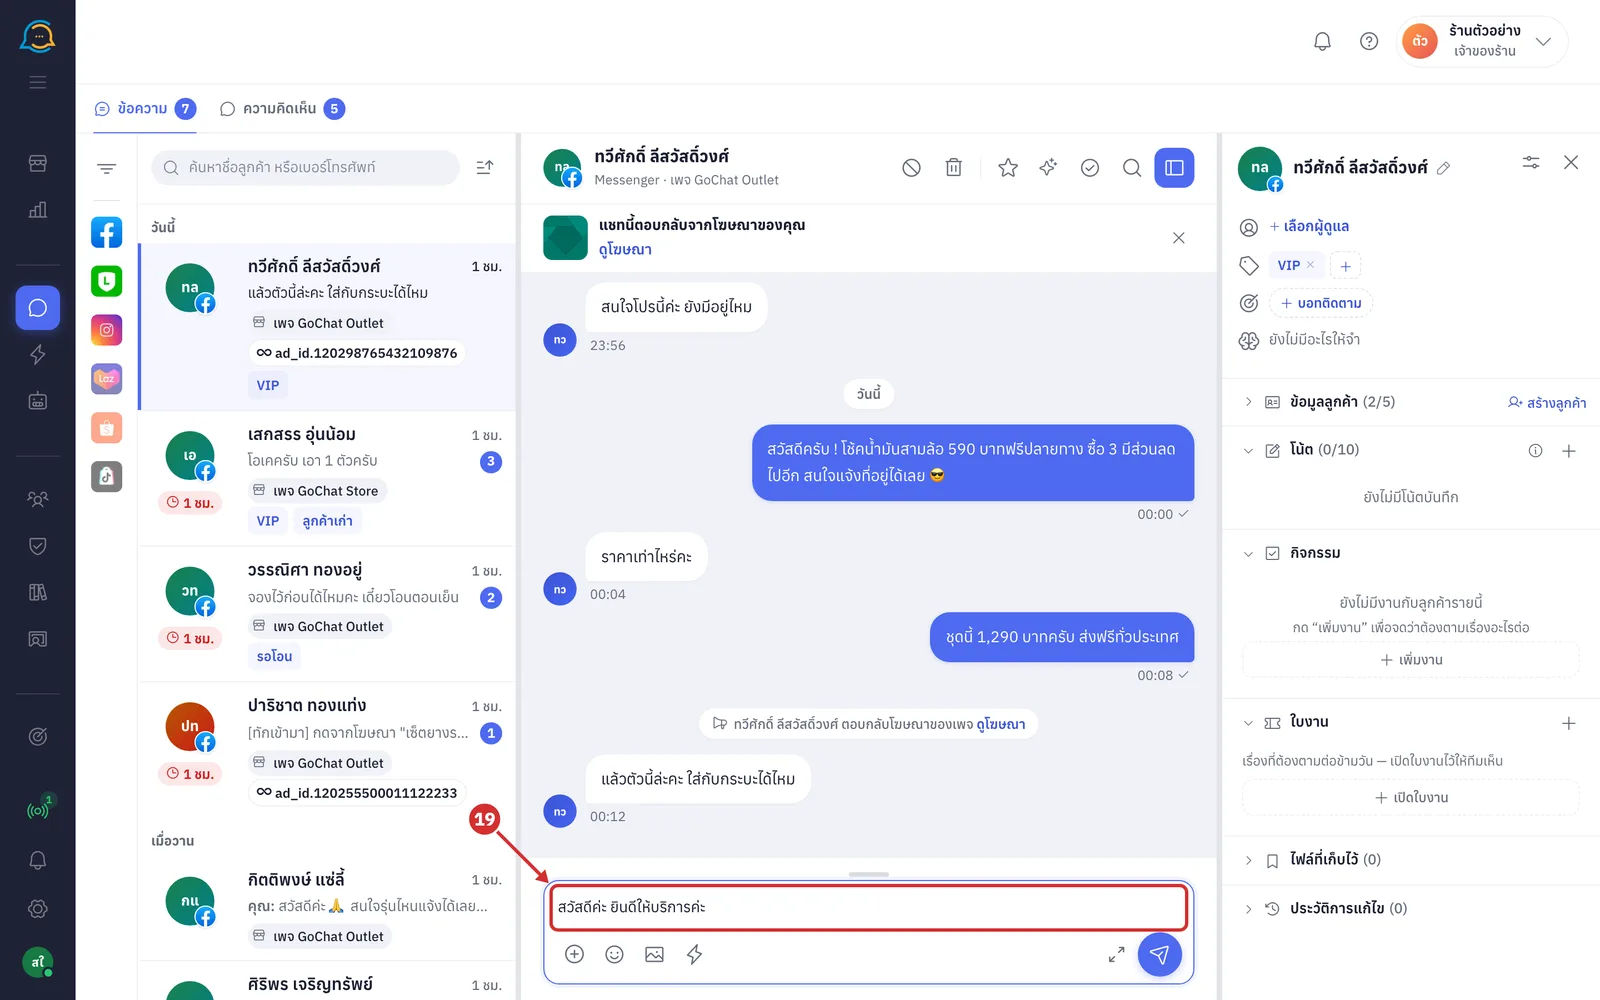
The reply you picked goes into the message box for you to edit first; it is not sent yet. Then send as usual ({{ชื่อลูกค้า}} (customer name) and {{ชื่อร้าน}} (shop name) in the text are replaced with the real names · in LINE group chats the system asks whose name to use · images attached to the reply go into the message box too)
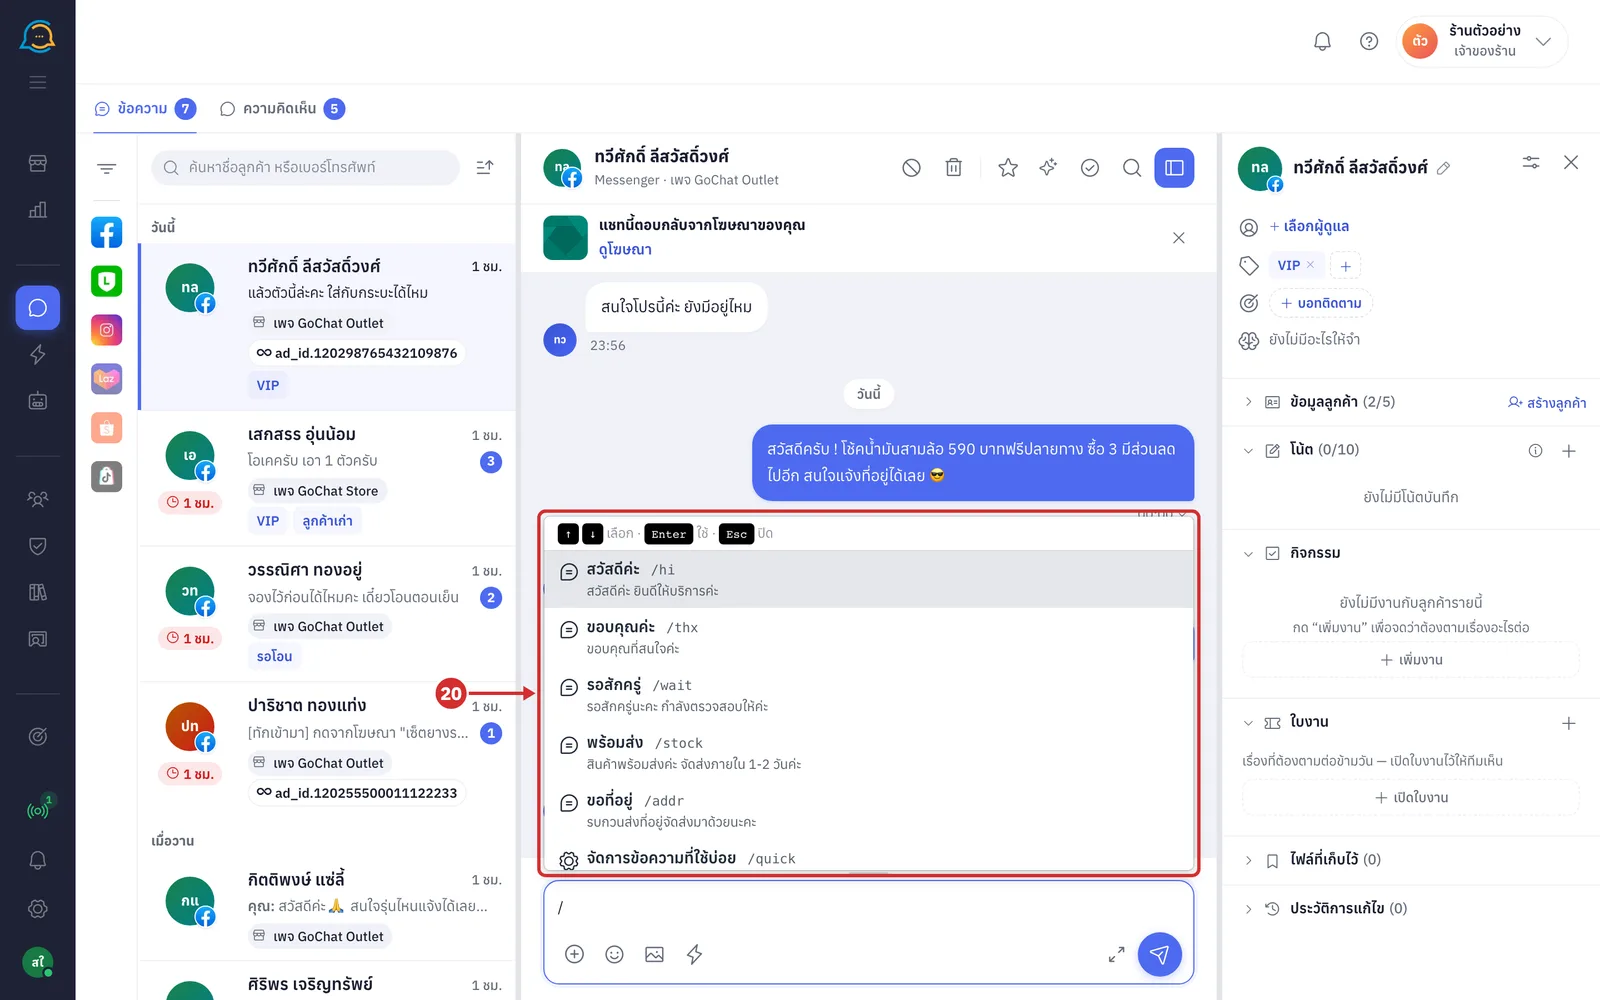
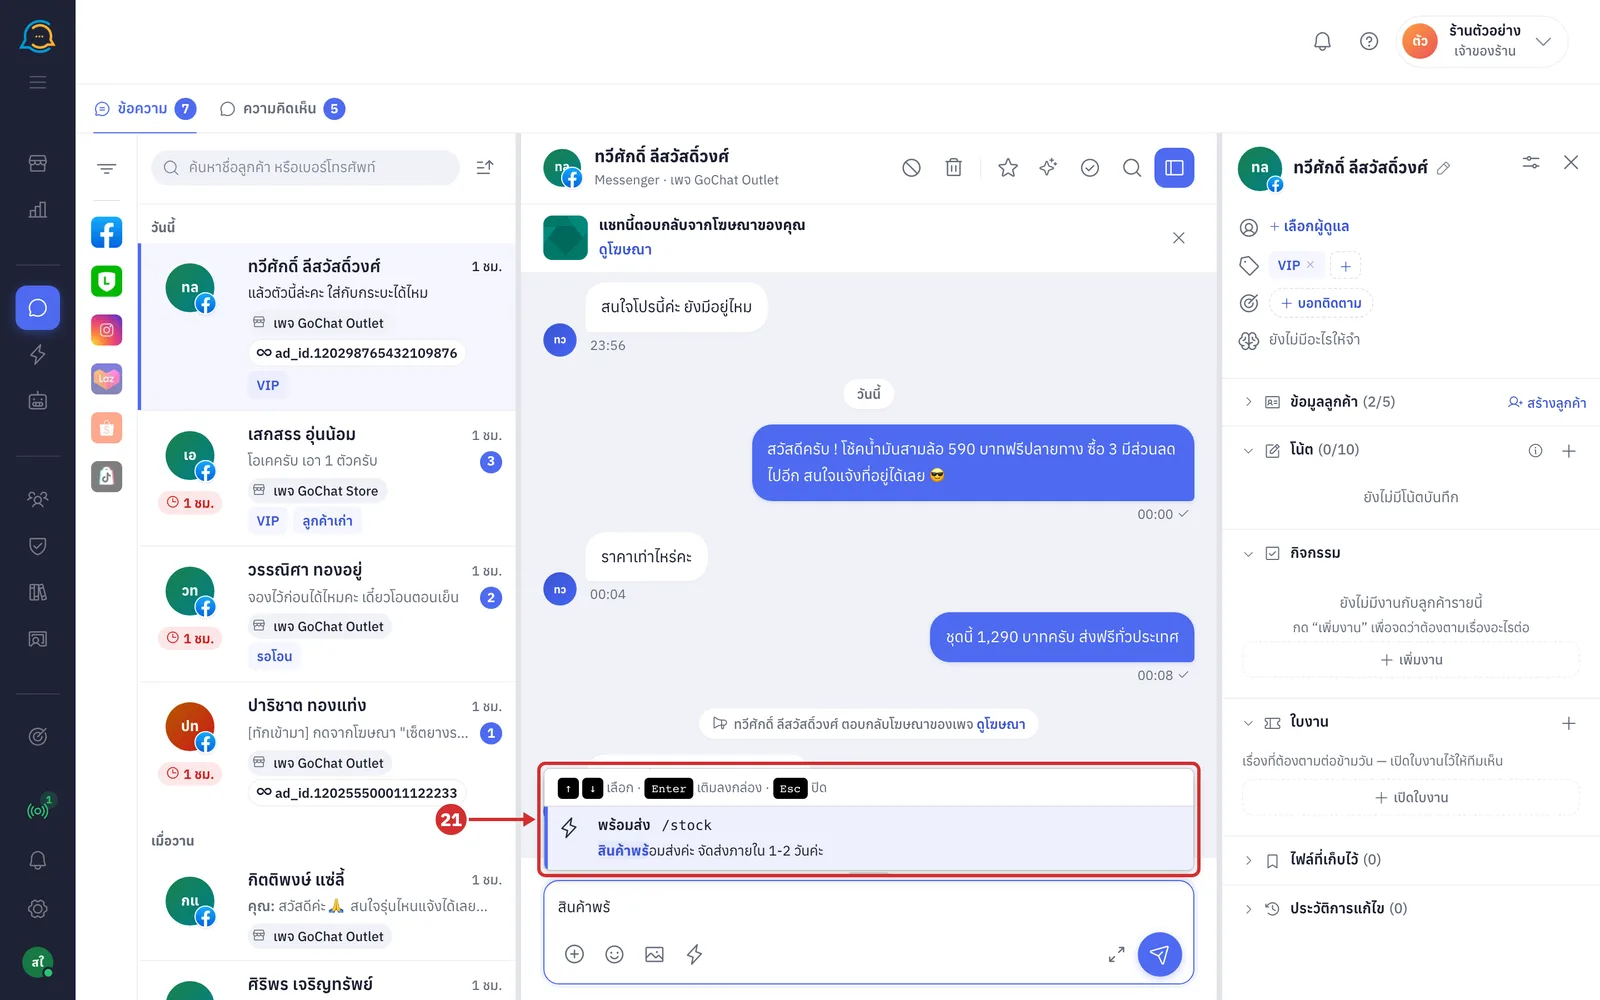
Type / in the message box to open the list of saved replies with their shortcuts. Keep typing to filter, use the arrow keys to choose, then press Enter to insert it or Esc to close (type a full shortcut such as /hi followed by a space and the text is replaced straight away · the last item, จัดการข้อความที่ใช้บ่อย (Manage saved replies), opens the saved replies settings page)
When what you type matches the start of a saved reply's text, title or shortcut for at least 3 characters, a suggestion pops up above the message box. Press Enter to fill that reply into the box, or Esc to close it
Replying to Facebook and Instagram chats past the reply time
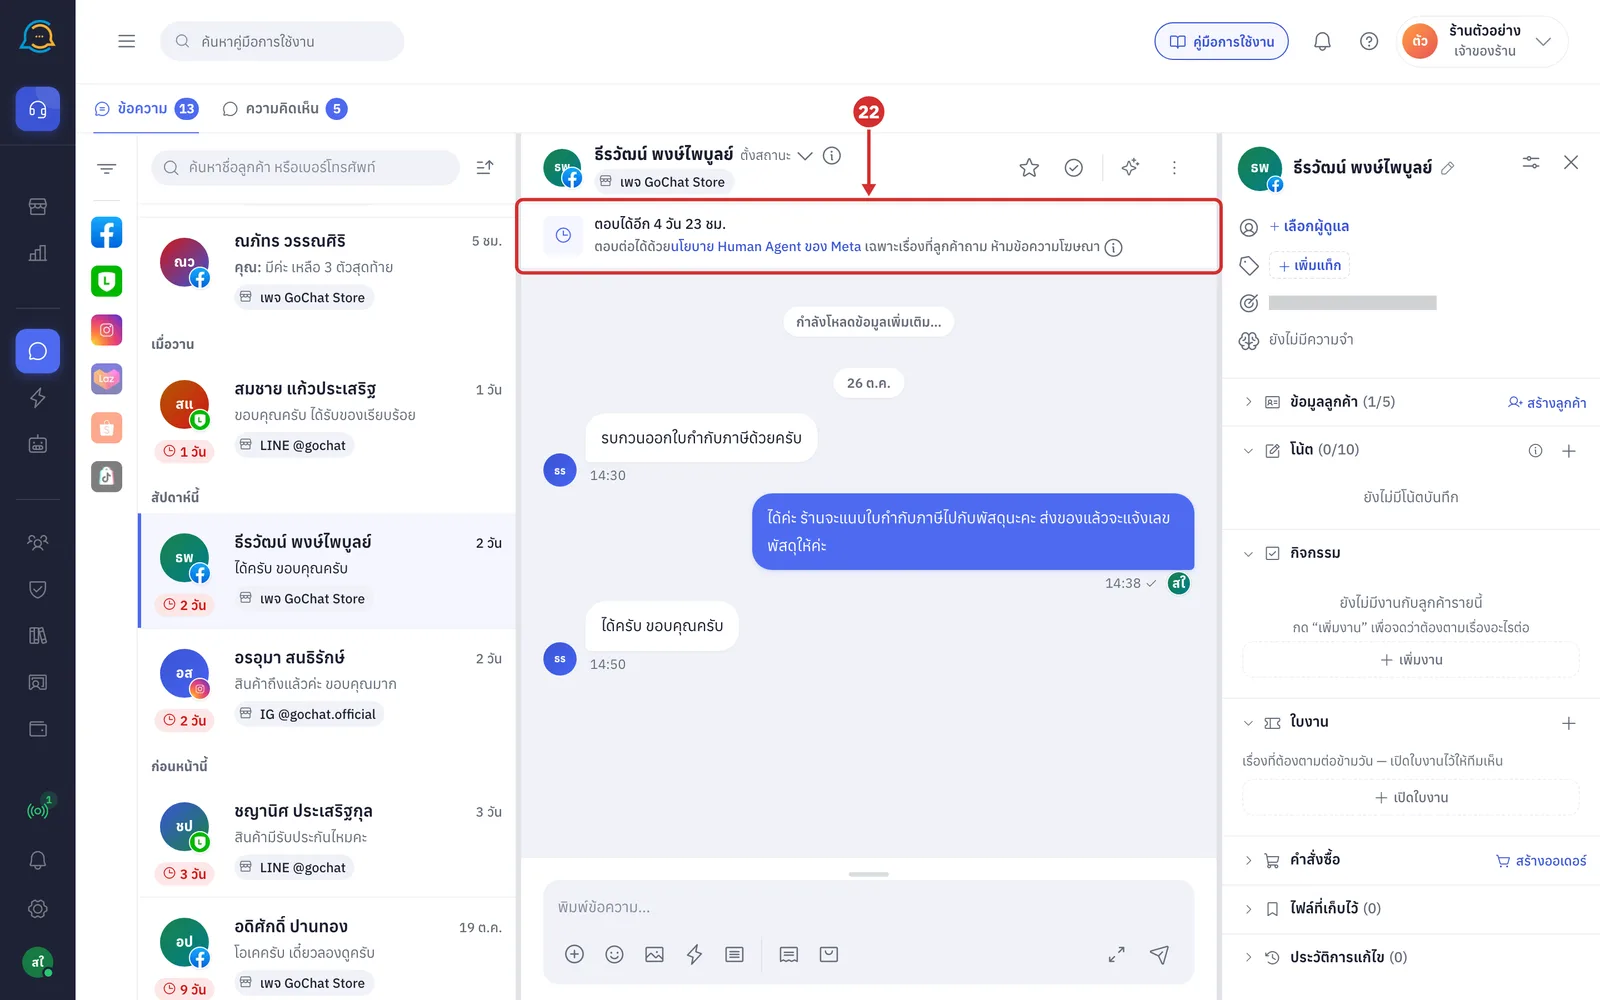
Facebook and Instagram limit how long a shop can reply, counted from the customer's latest message. You can type replies for up to 7 days, while stickers and reactions only work within 24 hours. When the time is running out or has passed, a bar under the chat header tells you in advance (LINE · Shopee · Lazada · TikTok have no such limit).
With less than 12 hours left, the bar reads เหลือเวลาตอบอีก … (… left to reply). After 24 hours it changes to เลยเวลาตอบแบบปกติแล้ว — พิมพ์ตอบได้อีก … (Past the normal reply time — you can type replies for another …) with the date and time it ends (you can type replies for up to 7 days after the customer's last message, but stickers and reactions no longer work, and the message must be a real person answering the customer, not a promotion · with less than 6 hours left the bar reads เหลือเวลาพิมพ์ตอบอีก … (… left to type a reply))
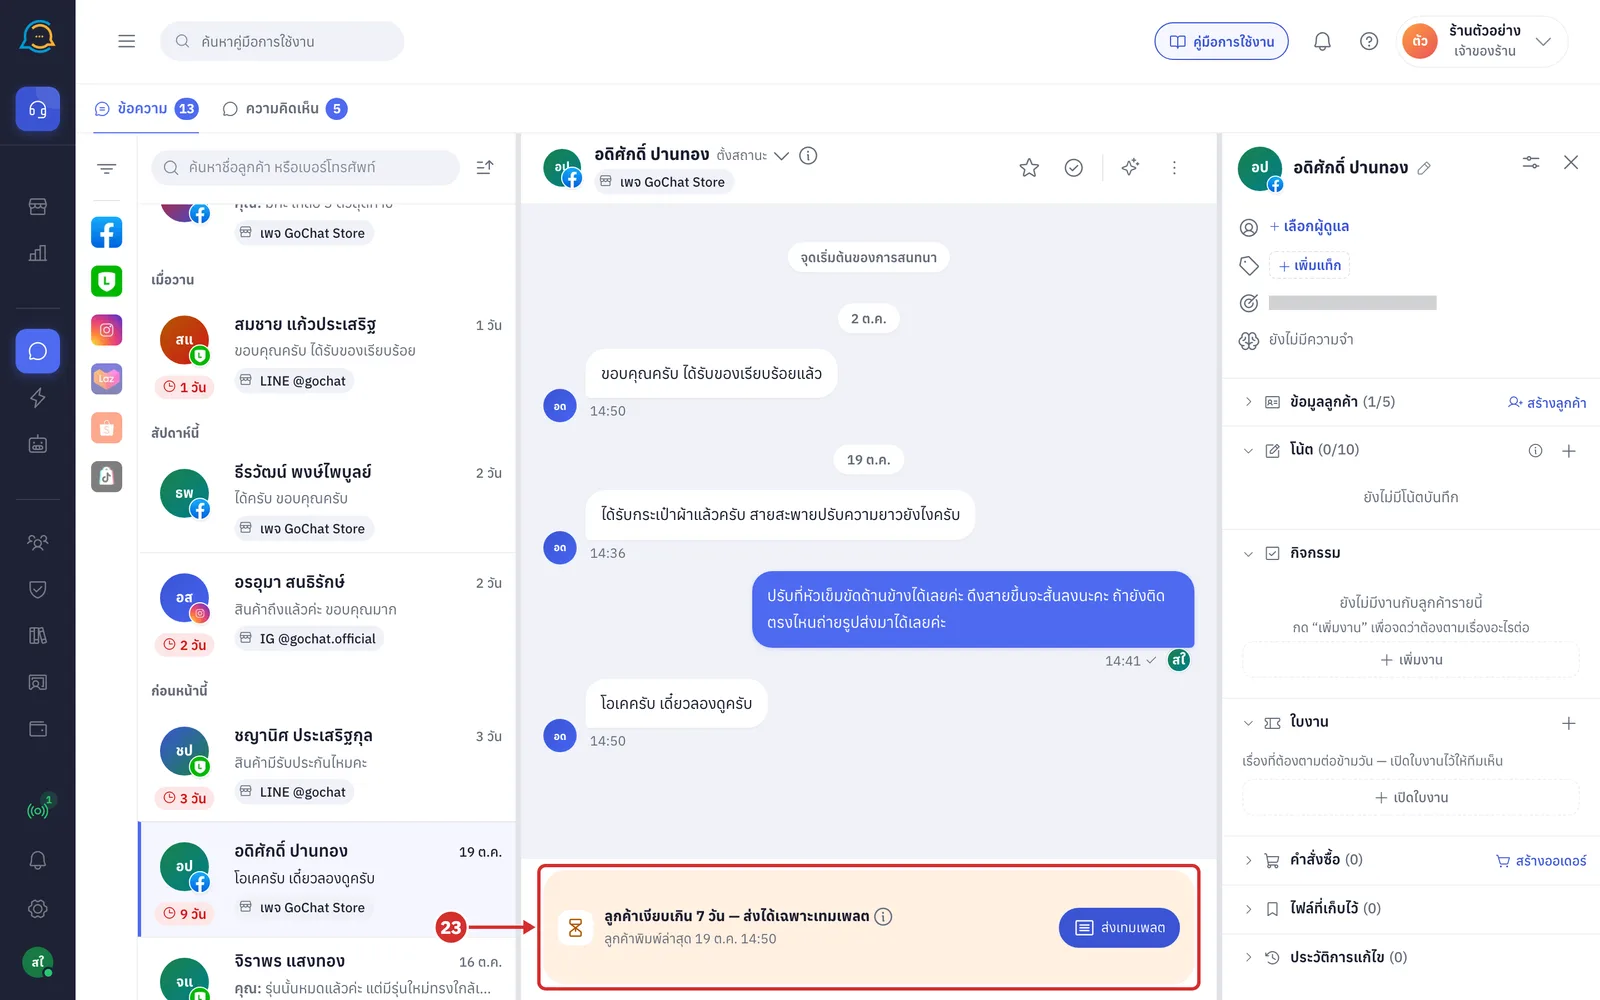
After 7 days the shop can no longer type replies in that chat
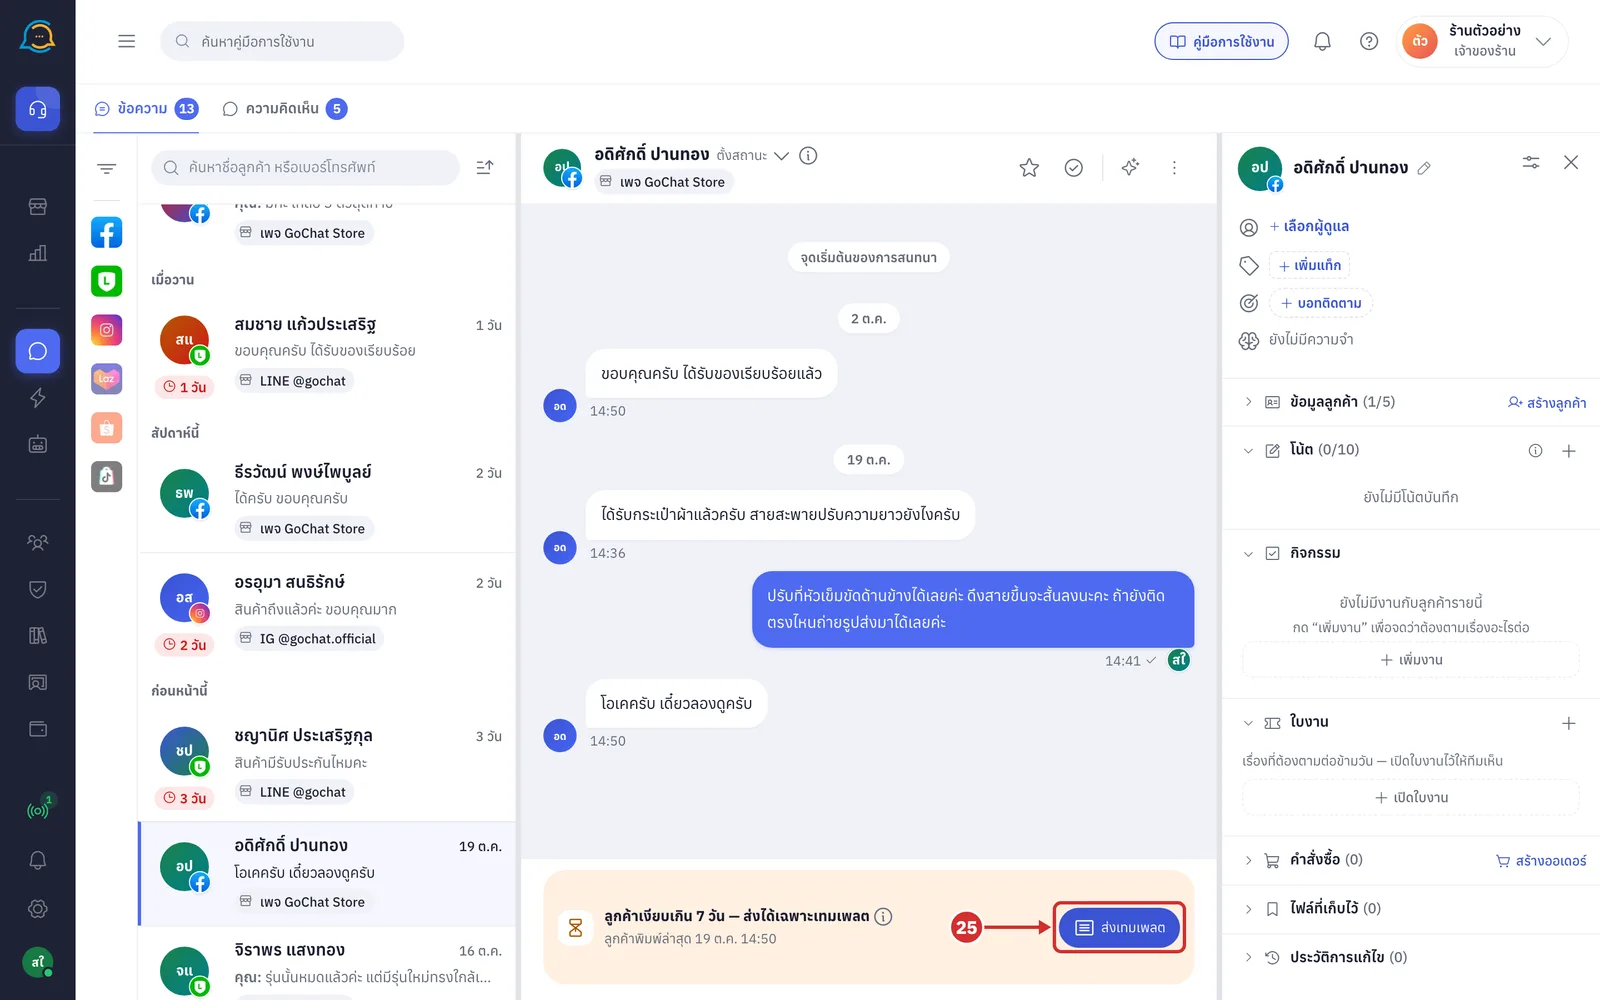
Facebook (one-to-one chats): the message box becomes the bar ลูกค้าเงียบเกิน 7 วัน — ส่งได้เฉพาะเทมเพลต (Customer quiet for more than 7 days — only templates can be sent) with when the customer last wrote. Only customer notification messages approved by Meta can be sent (see the next section)
Instagram: the bar reads ส่งข้อความไม่ได้แล้ว — ต้องรอให้ลูกค้าทักเข้ามาก่อน (Messages can no longer be sent — wait for the customer to write first). The shop cannot send in this chat until the customer writes again
Either way, older messages can still be read, and once the customer writes, you can reply as usual
Sending customer notification messages in a chat
In a Facebook chat where the customer has been quiet for more than 24 hours, you can send customer notification messages approved by Meta, such as a shipping notice or an amount due (create them in the ข้อความแจ้งเตือนลูกค้า (Utility) (Customer notification messages) menu; see การใช้ข้อความแจ้งเตือนลูกค้า)
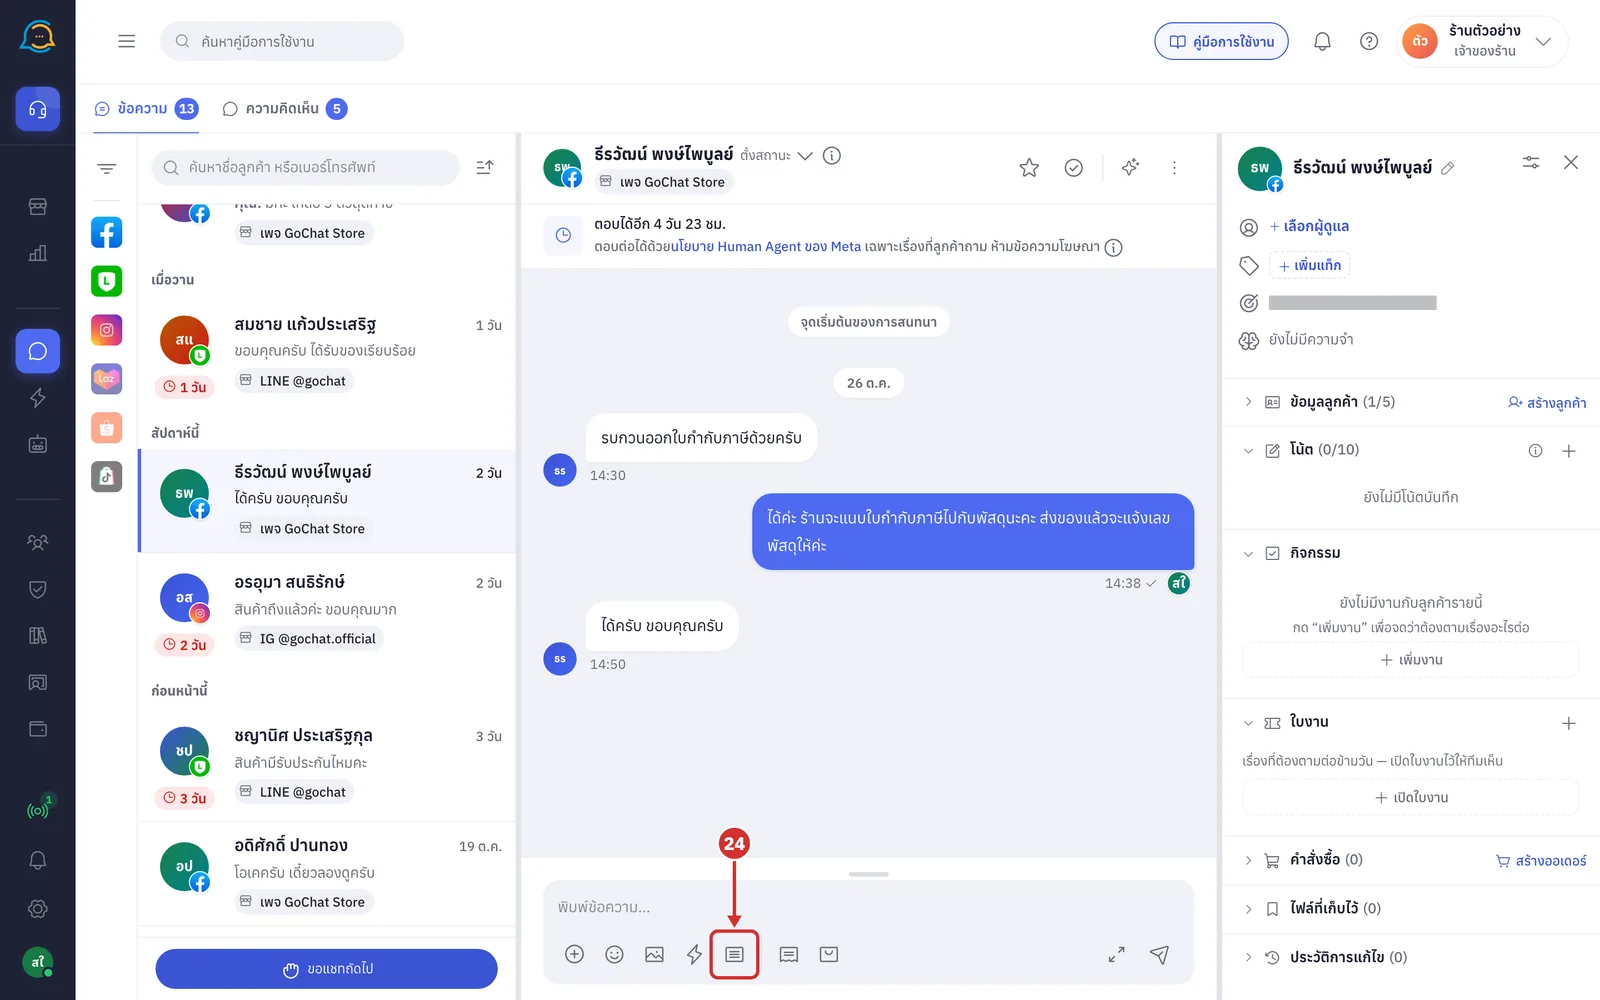
In a chat where the customer has been quiet between 24 hours and 7 days, you can still type replies, and there is a ส่งเทมเพลต (Send template — document icon) button in the toolbar next to the saved replies button. Click it to open the send template window
In a chat where the customer has been quiet for more than 7 days, click ส่งเทมเพลต (Send template) in the bar that replaces the message box
If the page does not have permission to send customer notification messages yet, the bar reads ลูกค้าเงียบเกิน 7 วัน — ส่งข้อความไม่ได้ (Customer quiet for more than 7 days — messages cannot be sent) and says the page has no permission. The shop owner clicks เชื่อมเพจใหม่ (Reconnect page) to request it (see การเชื่อมต่อช่องทาง Facebook)
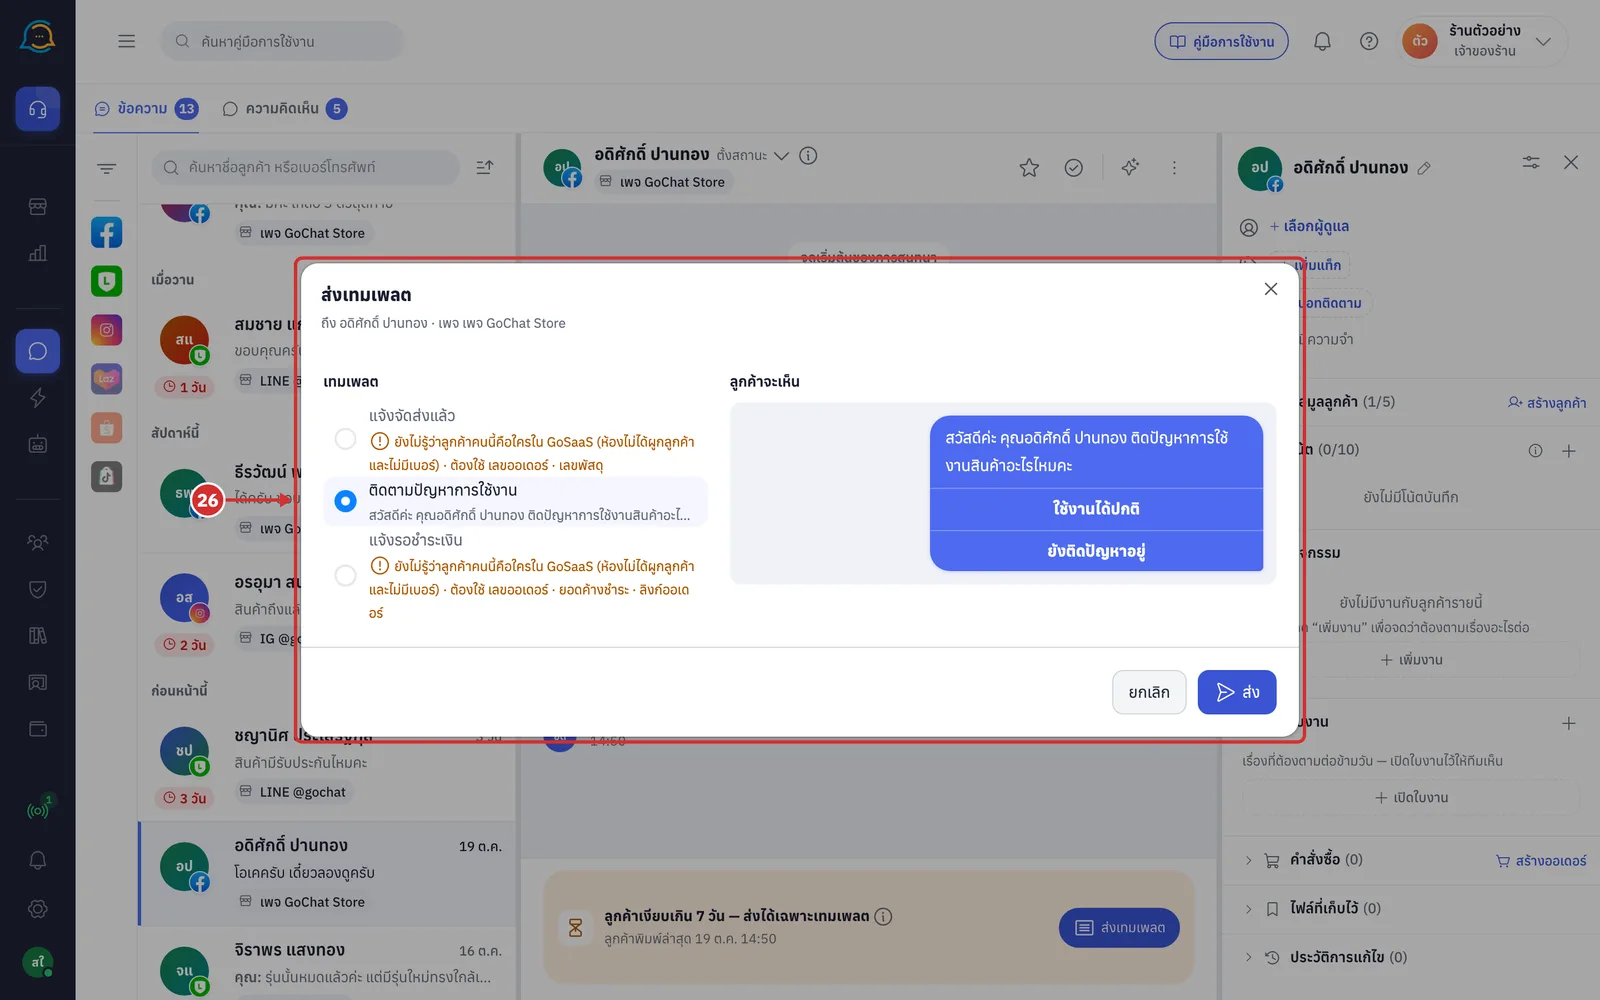
In the ส่งเทมเพลต (Send template) window (it shows the customer and the page it sends from), choose a message from the เทมเพลต (Template) list and check what the ลูกค้าจะเห็น (Customer will see) below
Only messages Meta approved on this page are listed
For a message that uses order data, choose the order in ออเดอร์ (Order); the system fills in that order's values
A message with missing data cannot be chosen, and the reason is shown under its name, such as ยังไม่รู้ว่าลูกค้าคนนี้คือใครใน GoSaaS (We don't know who this customer is in GoSaaS — the chat is not linked to a customer in the order system) or the order has not been paid, along with the variables it needs
If the page has no approved messages yet, the window shows เพจนี้ยังไม่มีเทมเพลตที่ Meta อนุมัติ (This page has no templates approved by Meta yet) with a สร้างเทมเพลต (Create template) button
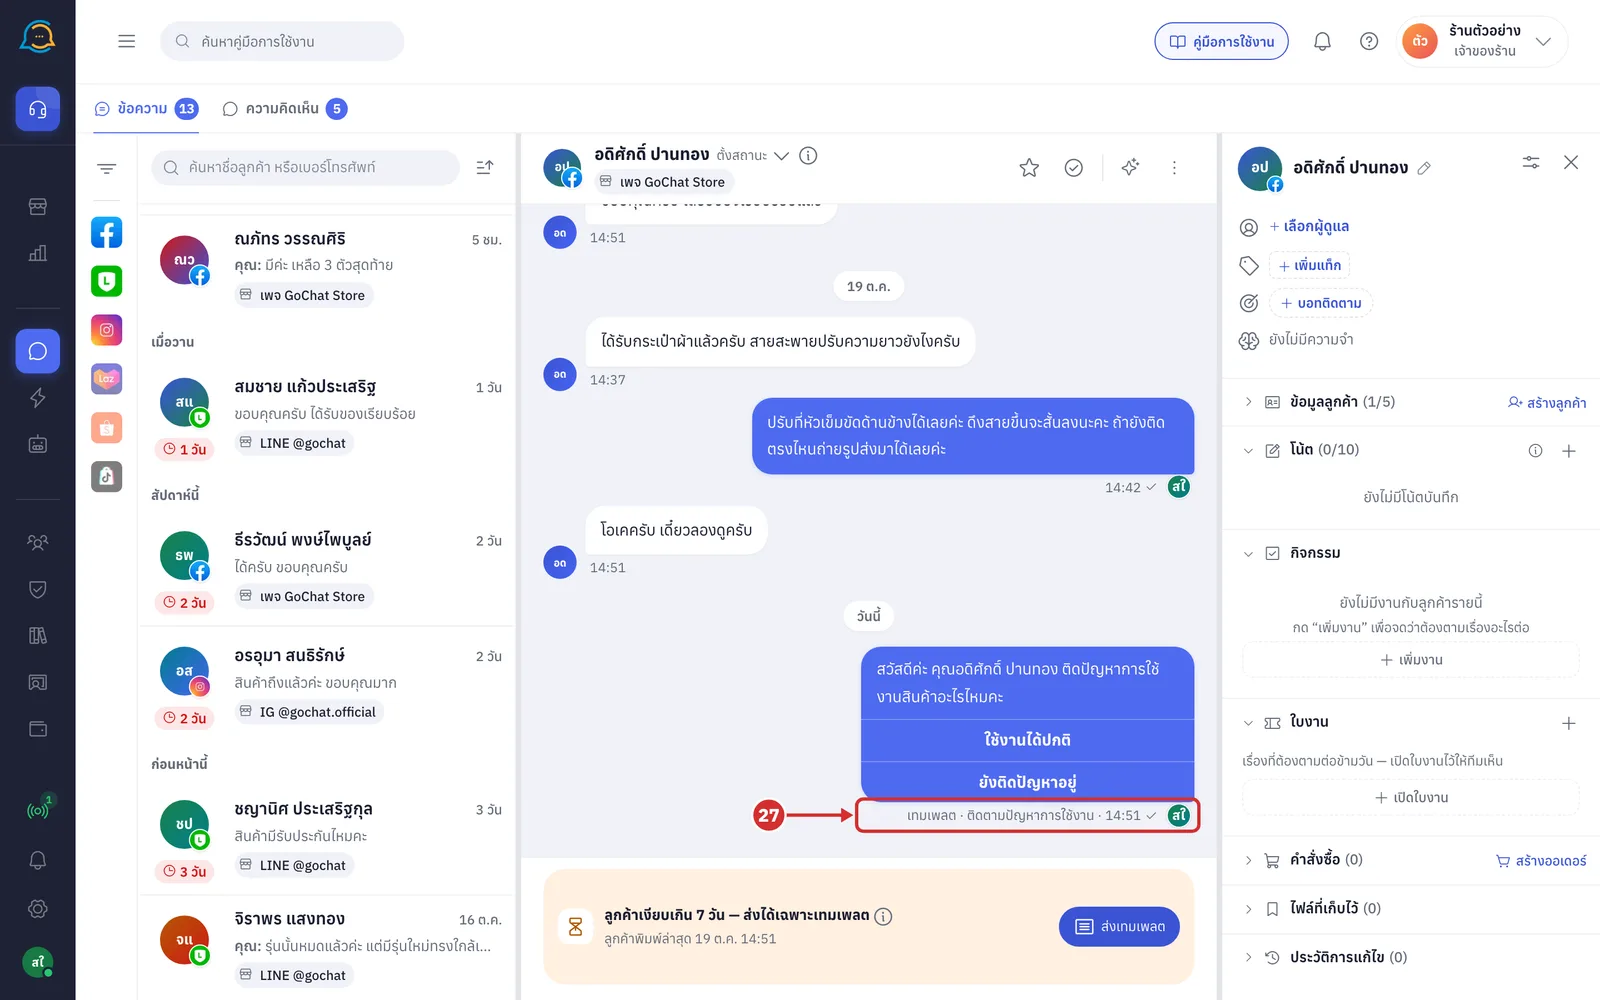
Click ส่ง (Send). The message appears in the chat with the label เทมเพลต · message name (Template · message name) under it, showing which customer notification message was sent (you can close the window while it sends · if sending fails, the system says why, such as ส่งไม่สำเร็จ — ขาดการเชื่อมต่อ ลองใหม่เมื่อออนไลน์ (Failed to send — connection lost, try again when online))
Other parts of the Messages page
Read how to use the rest of the ข้อความ (Messages) page
Searching and filtering chats — search, sort and filter the chat list, and what the labels on each row mean
Using the chat header tools — the buttons on the chat header, such as follow, close and search in chat
Using the customer panel — owner, tags, notes and customer details in the right panel
Managing messages in a chat — the buttons on a message, such as reply, copy, note and react