

Managing customers
The ลูกค้า (Customers) page lists the people your shop has added as customers, not everyone who has ever messaged you. People who message you are not customers until someone in your shop clicks สร้างลูกค้า (Create customer) in the chat or adds them from this page (shops that create orders from chats get customers added automatically, labelled จากออเดอร์ (From order)). Everyone in your shop can view, add and edit customers equally. Customers do not see anything on this page.
Opening the Customers page
Under Management, choose ลูกค้า (Customers) in the left menu bar
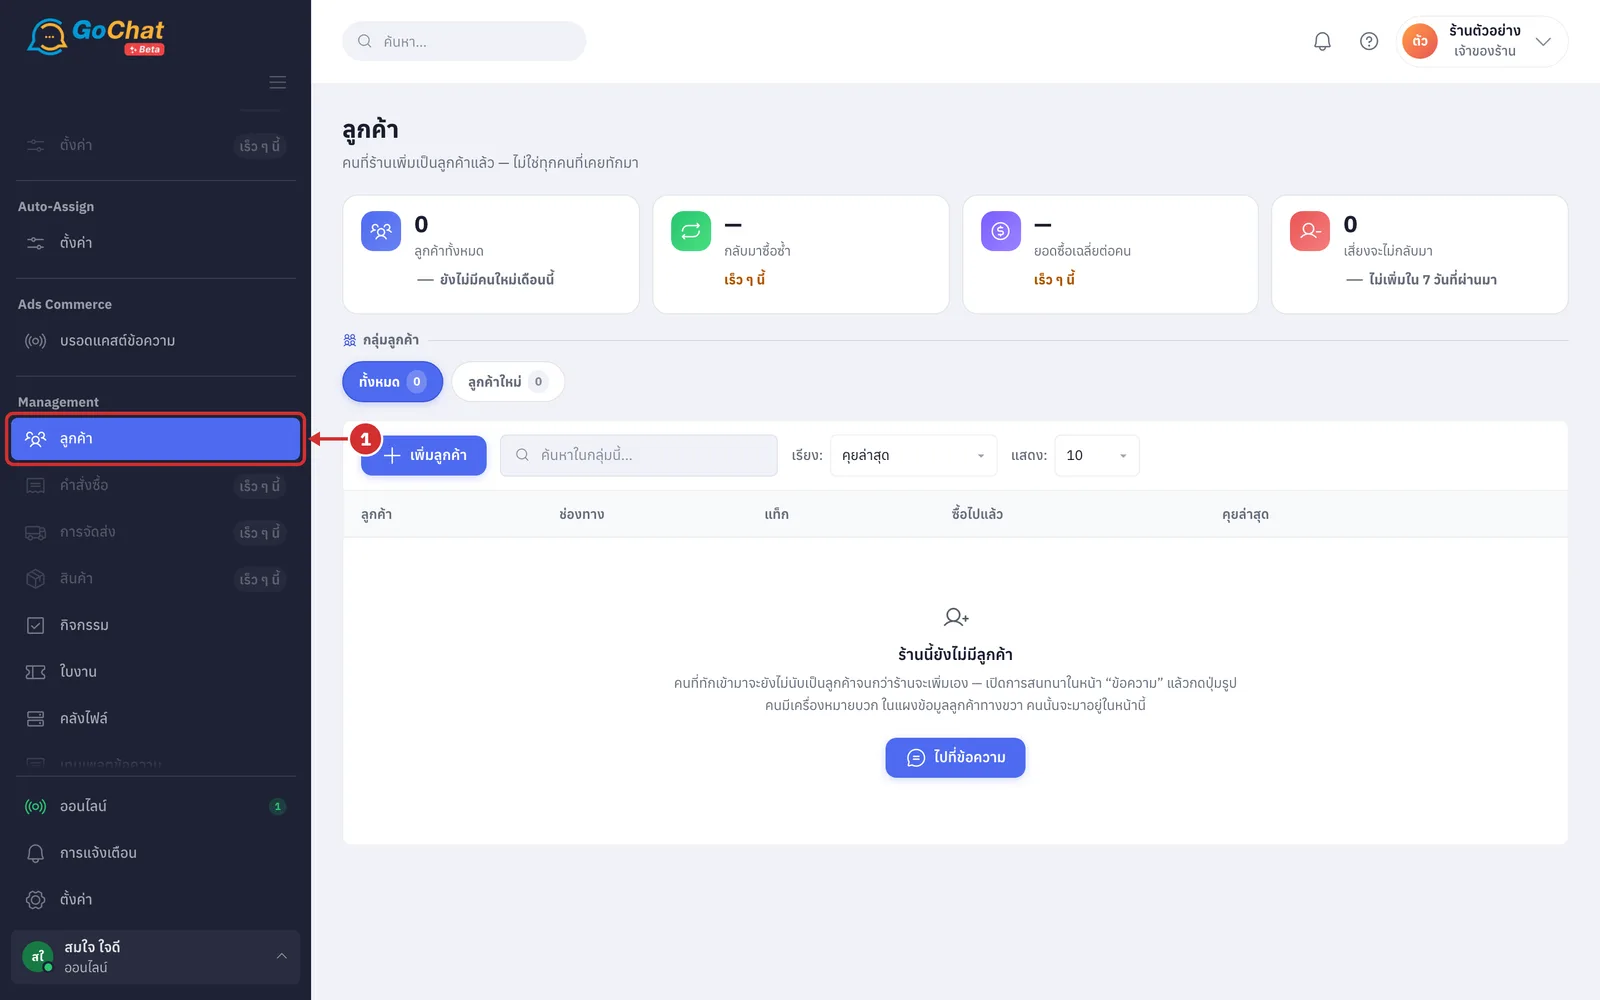
Reading the summary cards and customer groups
Look at the 4 summary cards at the top. The numbers count every customer in your shop, regardless of your search or selected group
ลูกค้าทั้งหมด (All customers) — how many customers your shop has; the line below shows how many were added since the 1st of this month, such as +3 คนเดือนนี้ (+3 this month) (none shows ยังไม่มีคนใหม่เดือนนี้ (No new customers this month))
กลับมาซื้อซ้ำ (Repeat buyers) and ยอดซื้อเฉลี่ยต่อคน (Average spend per customer) do not show numbers yet (a dash) and cannot be clicked
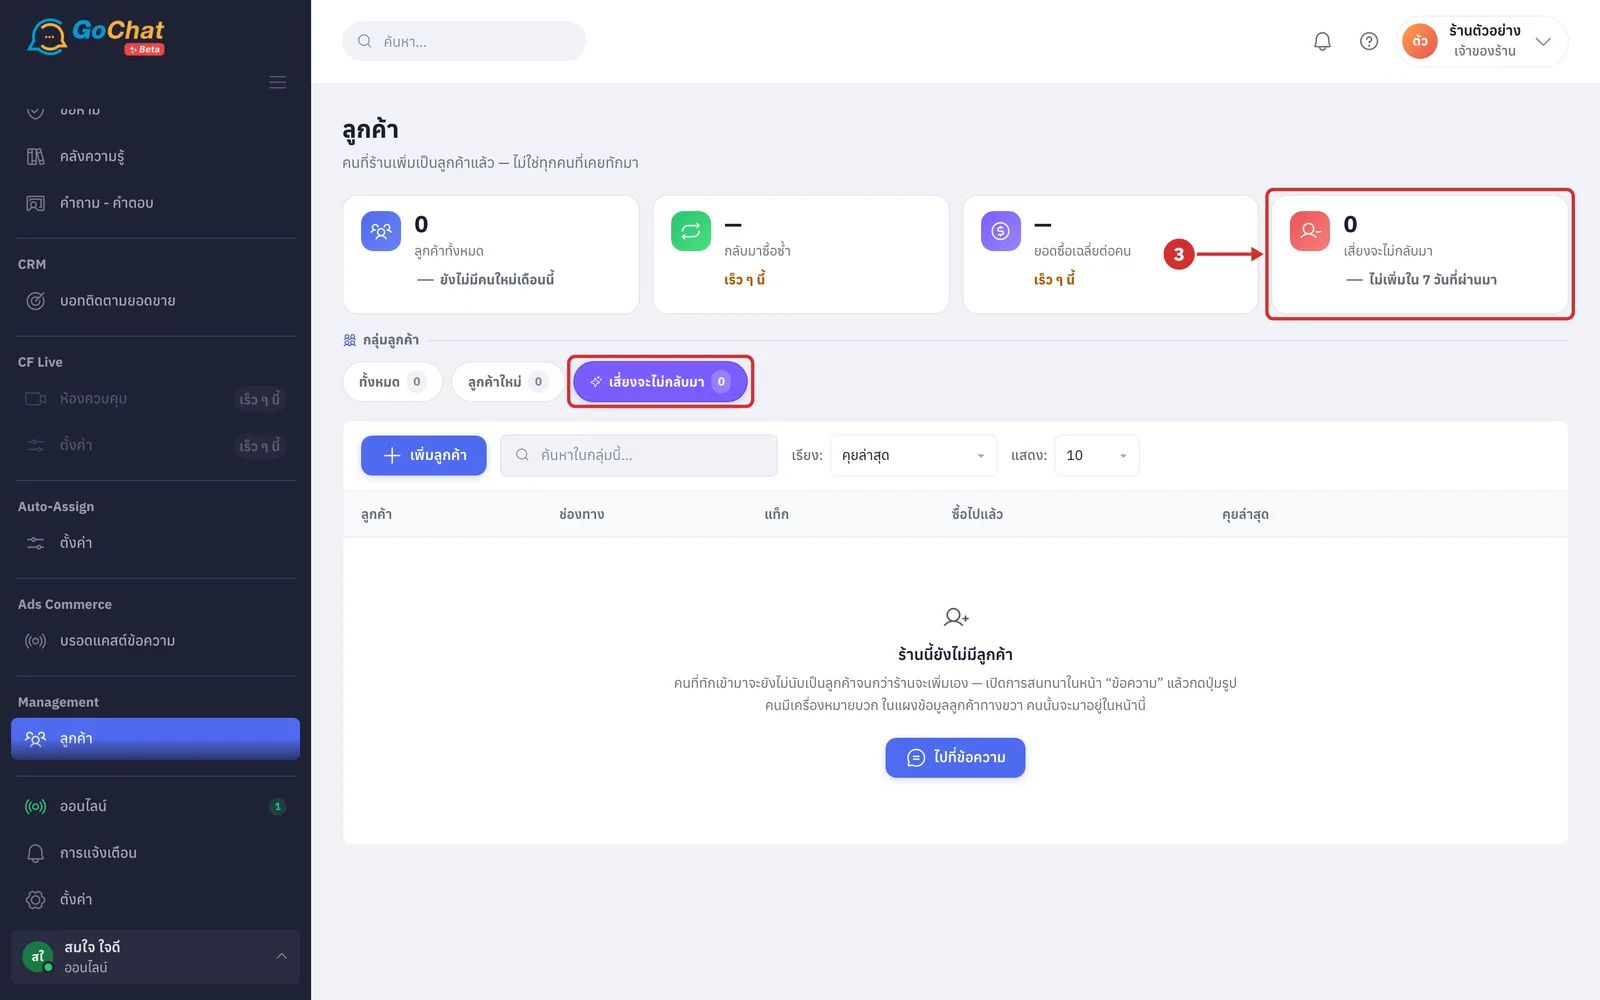
เสี่ยงจะไม่กลับมา (At risk of not returning) — customers with no message for more than 60 days, or who have never chatted; the line below shows how many joined this group in the past 7 days, such as +2 คนใน 7 วันที่ผ่านมา (+2 in the past 7 days)
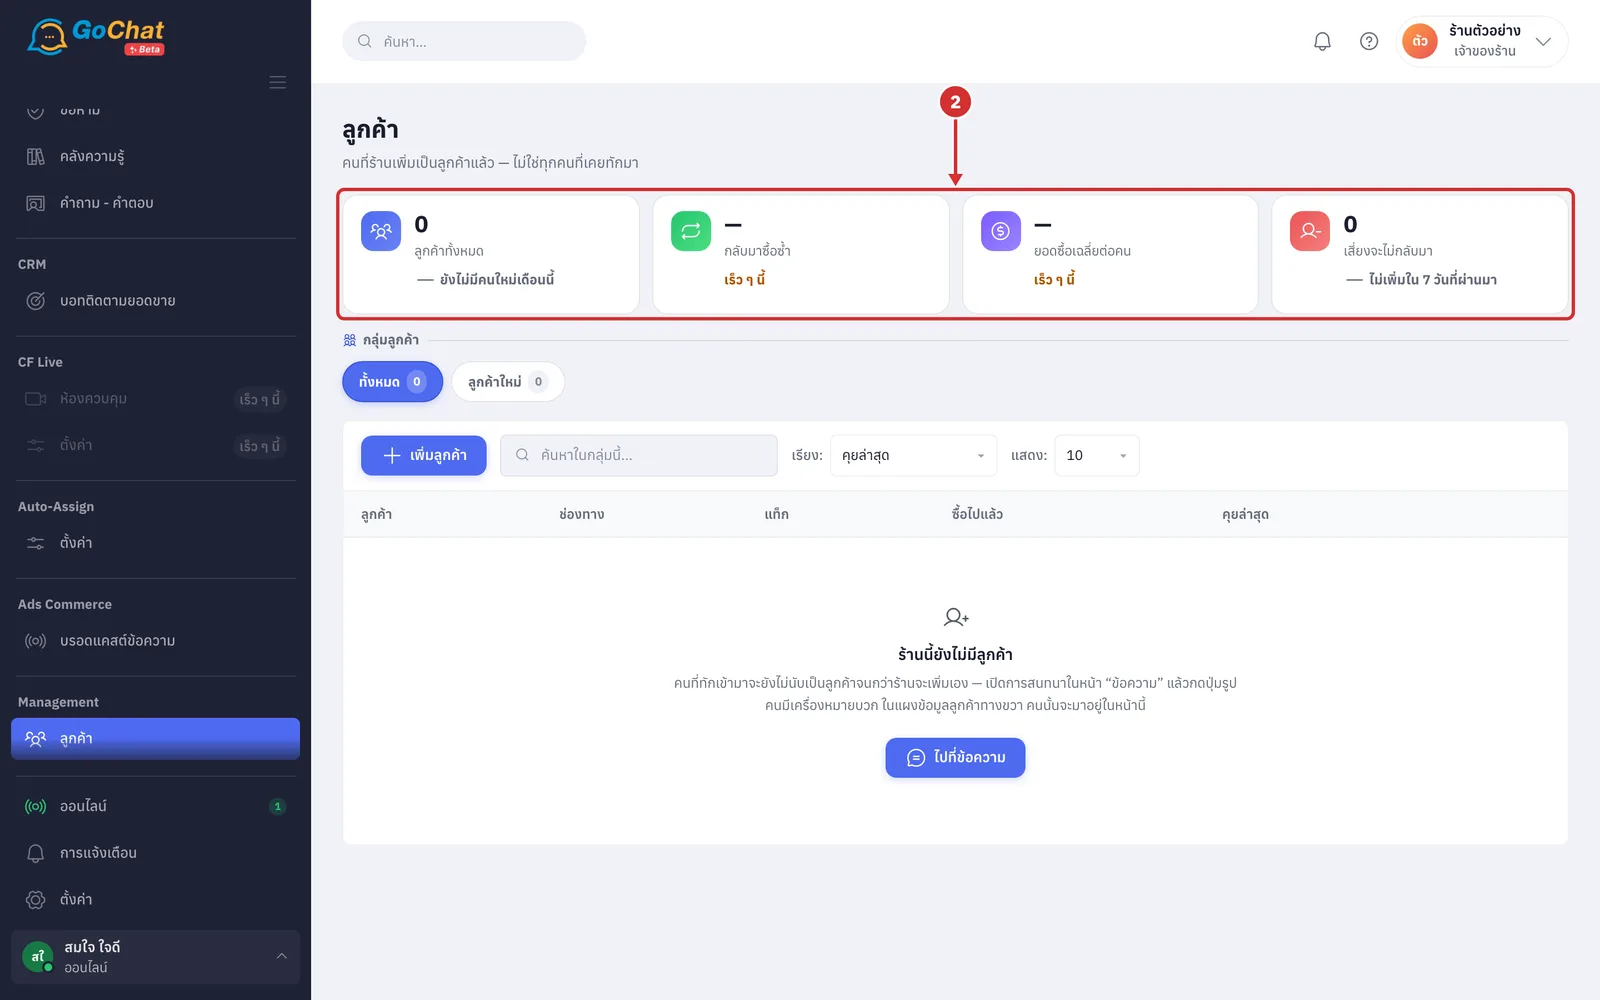
Click the ลูกค้าทั้งหมด (All customers) or เสี่ยงจะไม่กลับมา (At risk of not returning) card to filter the table to that group. A chip for the selected group appears under กลุ่มลูกค้า (Customer groups) so you can see what you are filtering by
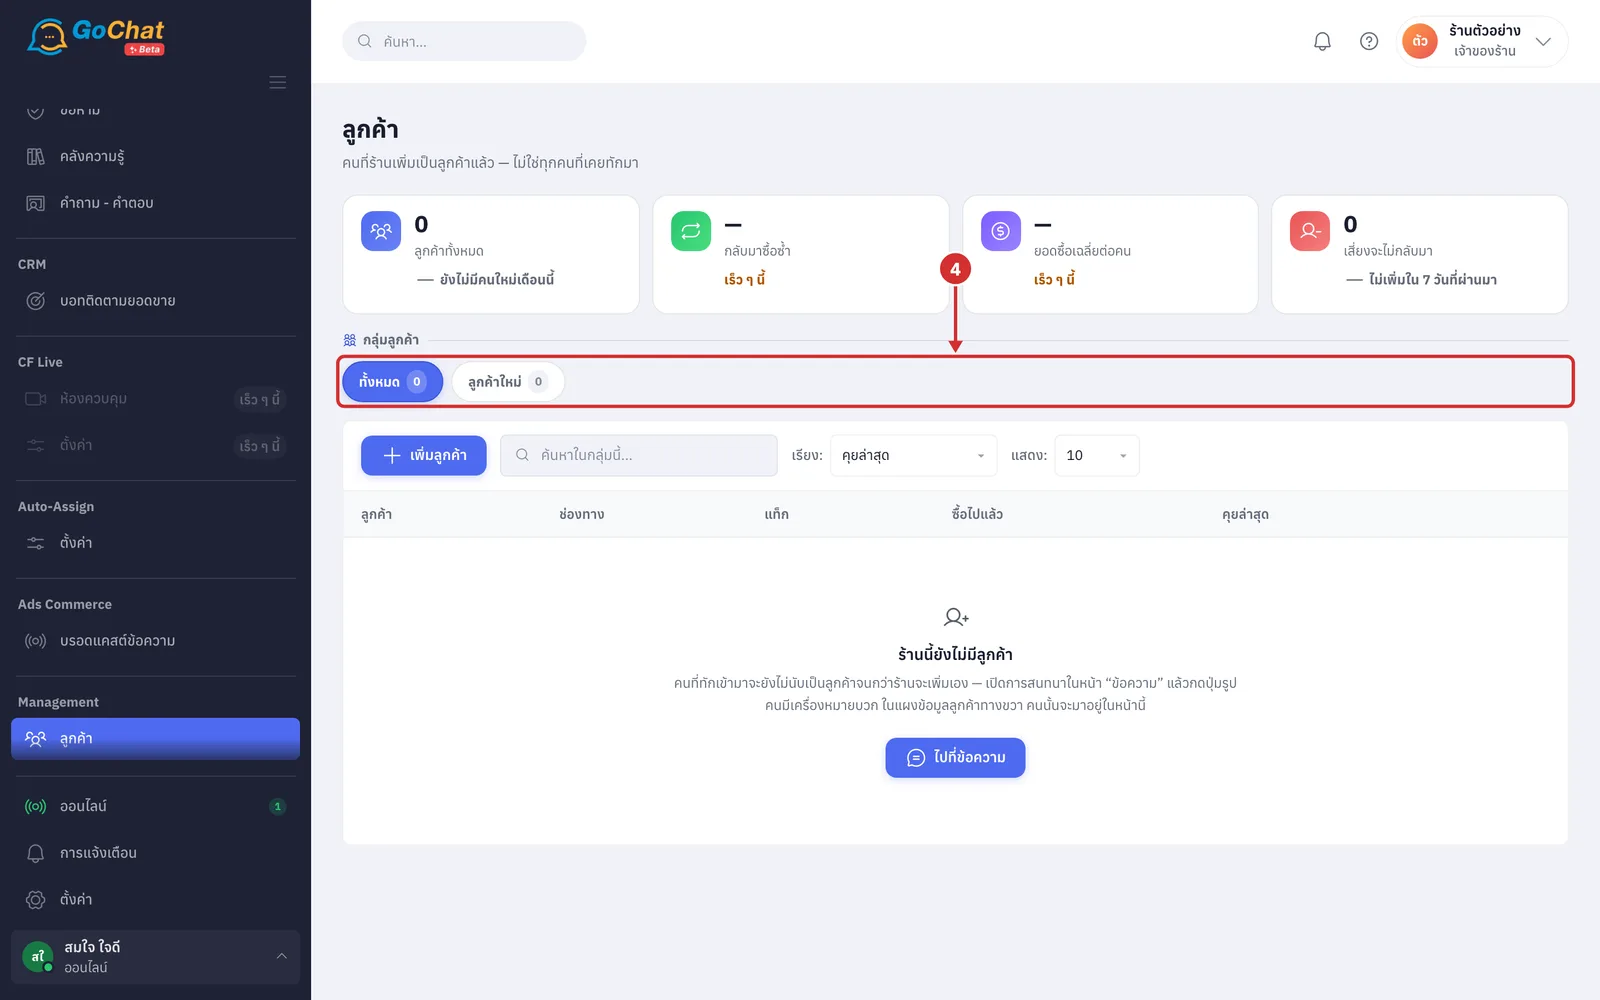
Under กลุ่มลูกค้า (Customer groups), click ทั้งหมด (All) or ลูกค้าใหม่ (New customers) to choose the group to view. The number in each chip is how many people are in it (ลูกค้าใหม่ (New customers) are people who first messaged within 30 days · changing the group clears your search)
Adding a customer
Use this for customers who did not message you in a chat, such as walk-in customers or people who order by phone. For people who message you, click สร้างลูกค้า (Create customer) on the customer panel in the chat (see Using the customer panel).
Click เพิ่มลูกค้า (Add customer) on the toolbar above the table. The เพิ่มลูกค้า (Add customer) window opens
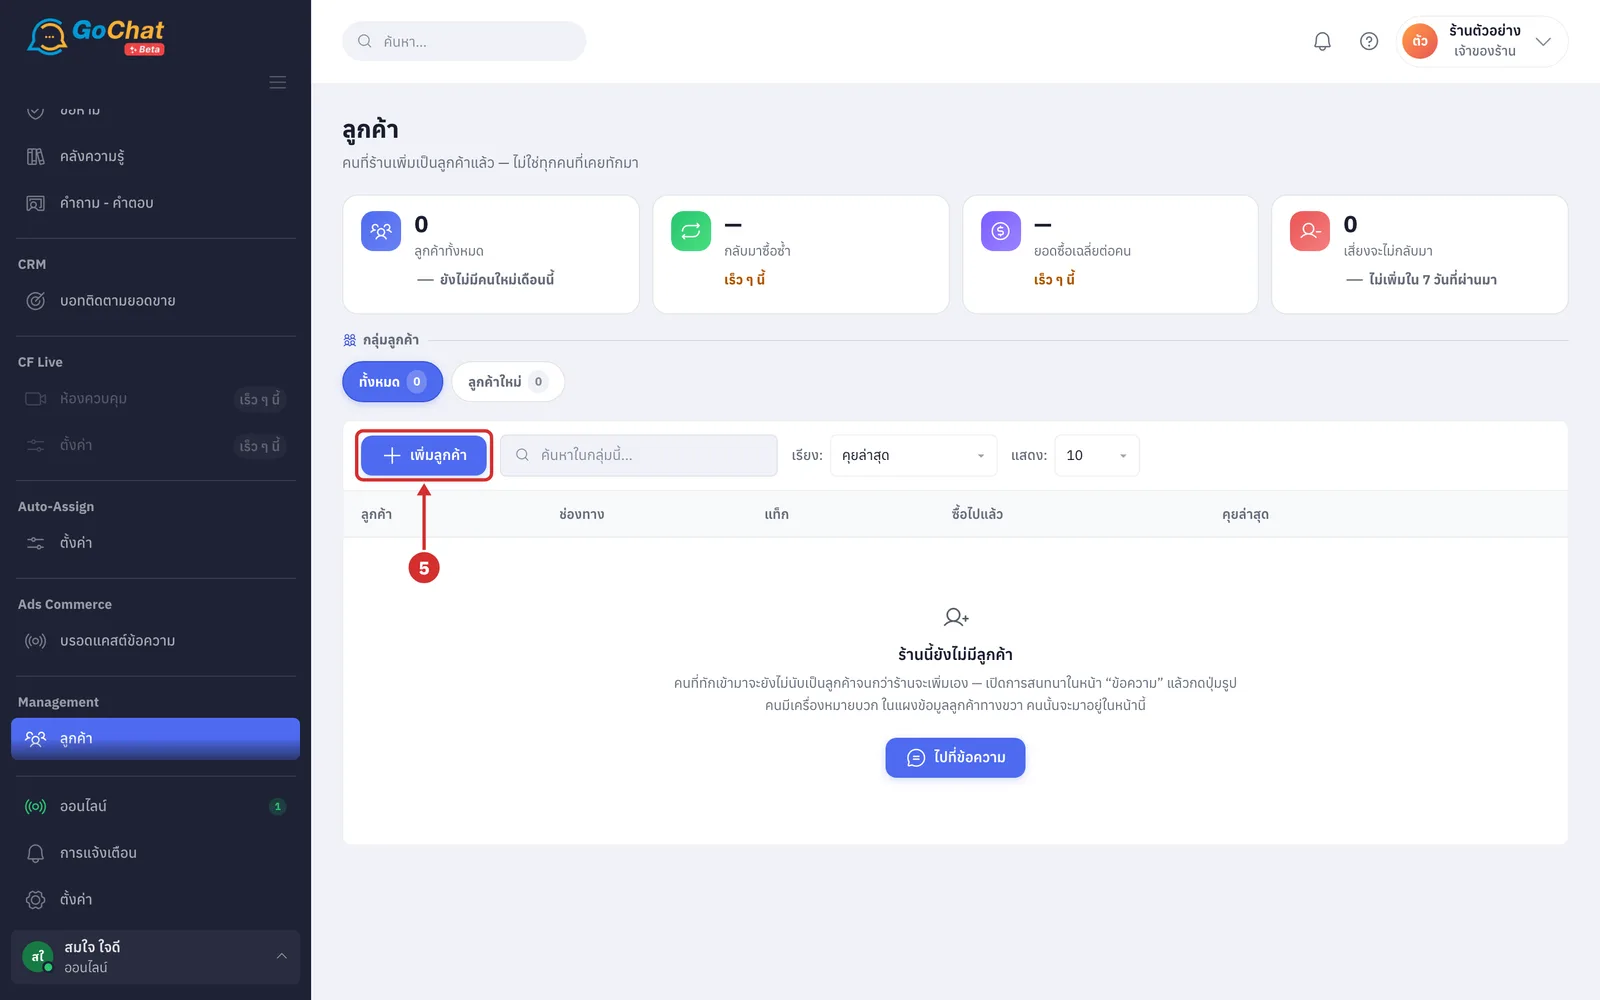
In ชื่อ (Name), enter the customer's name (required, up to 120 characters · if you leave it empty and save, ใส่ชื่อก่อนบันทึก (Enter a name before saving) appears under the field)
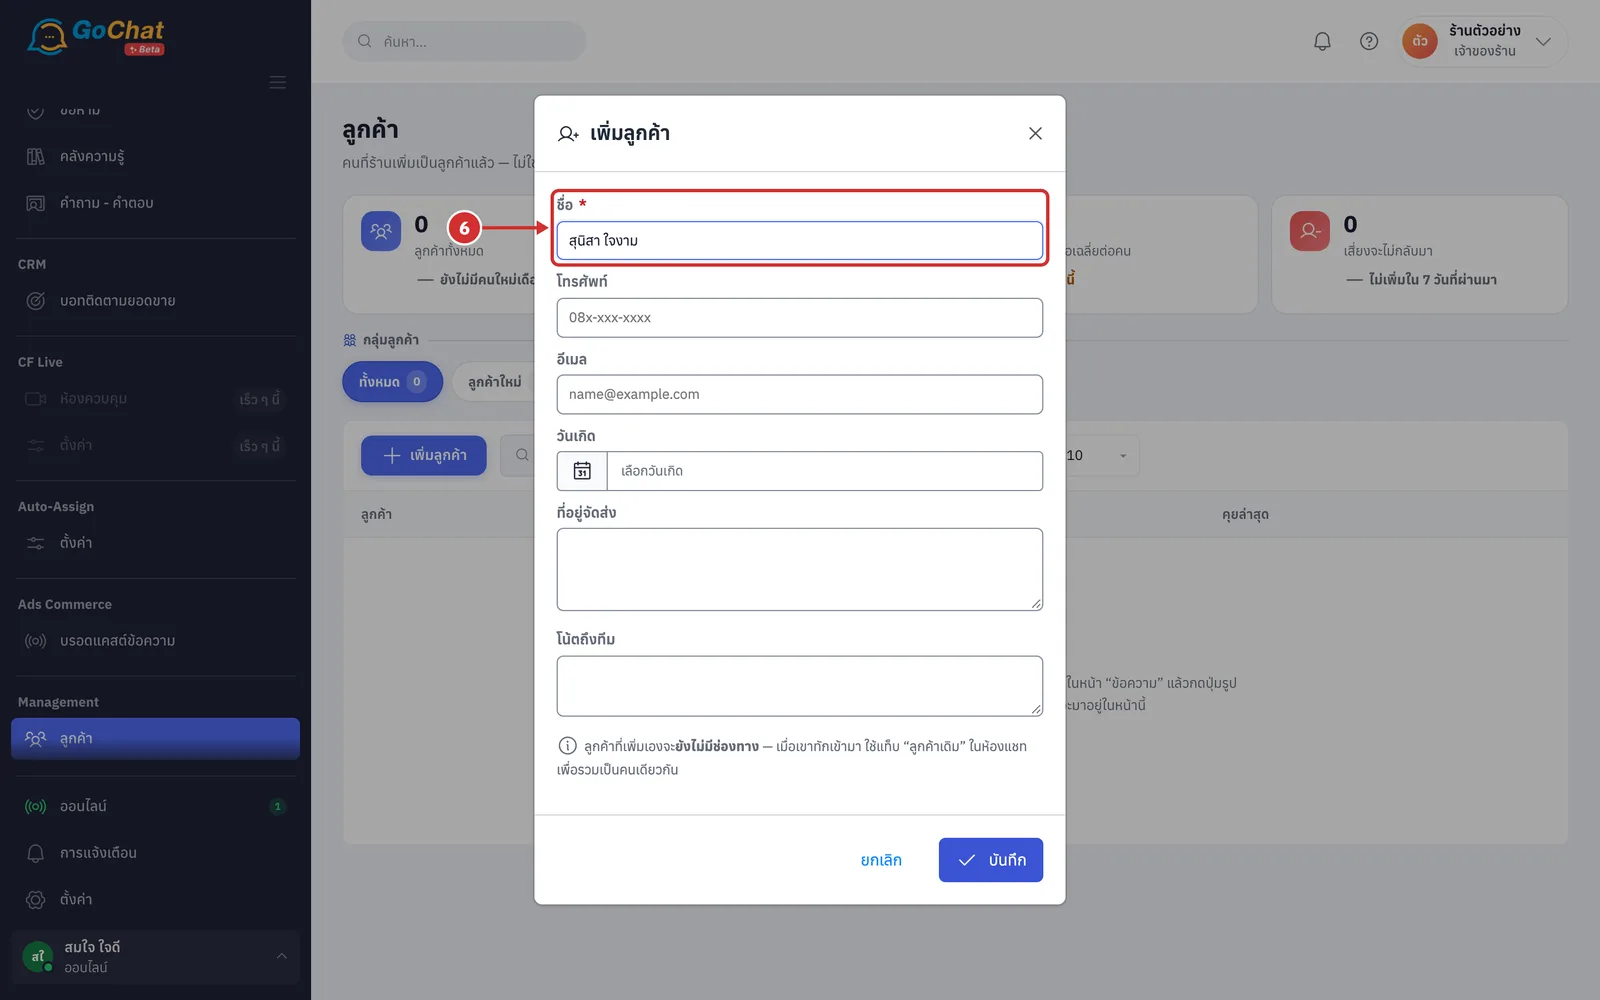
In โทรศัพท์ (Phone), enter the customer's phone number (optional, up to 40 characters)
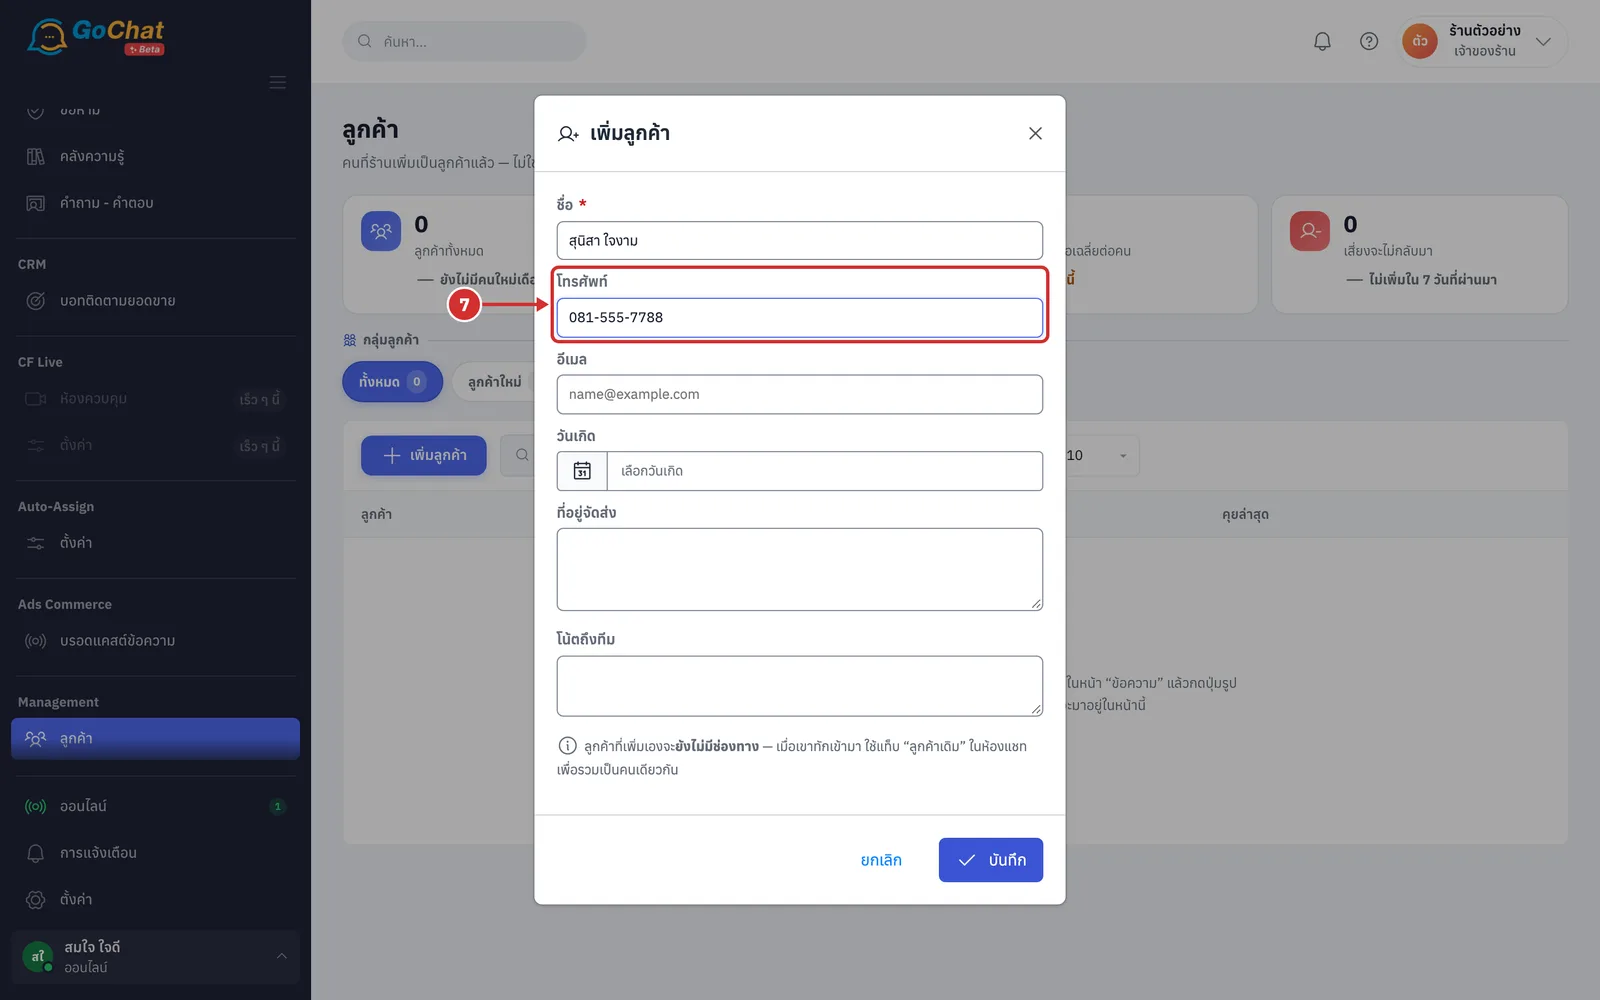
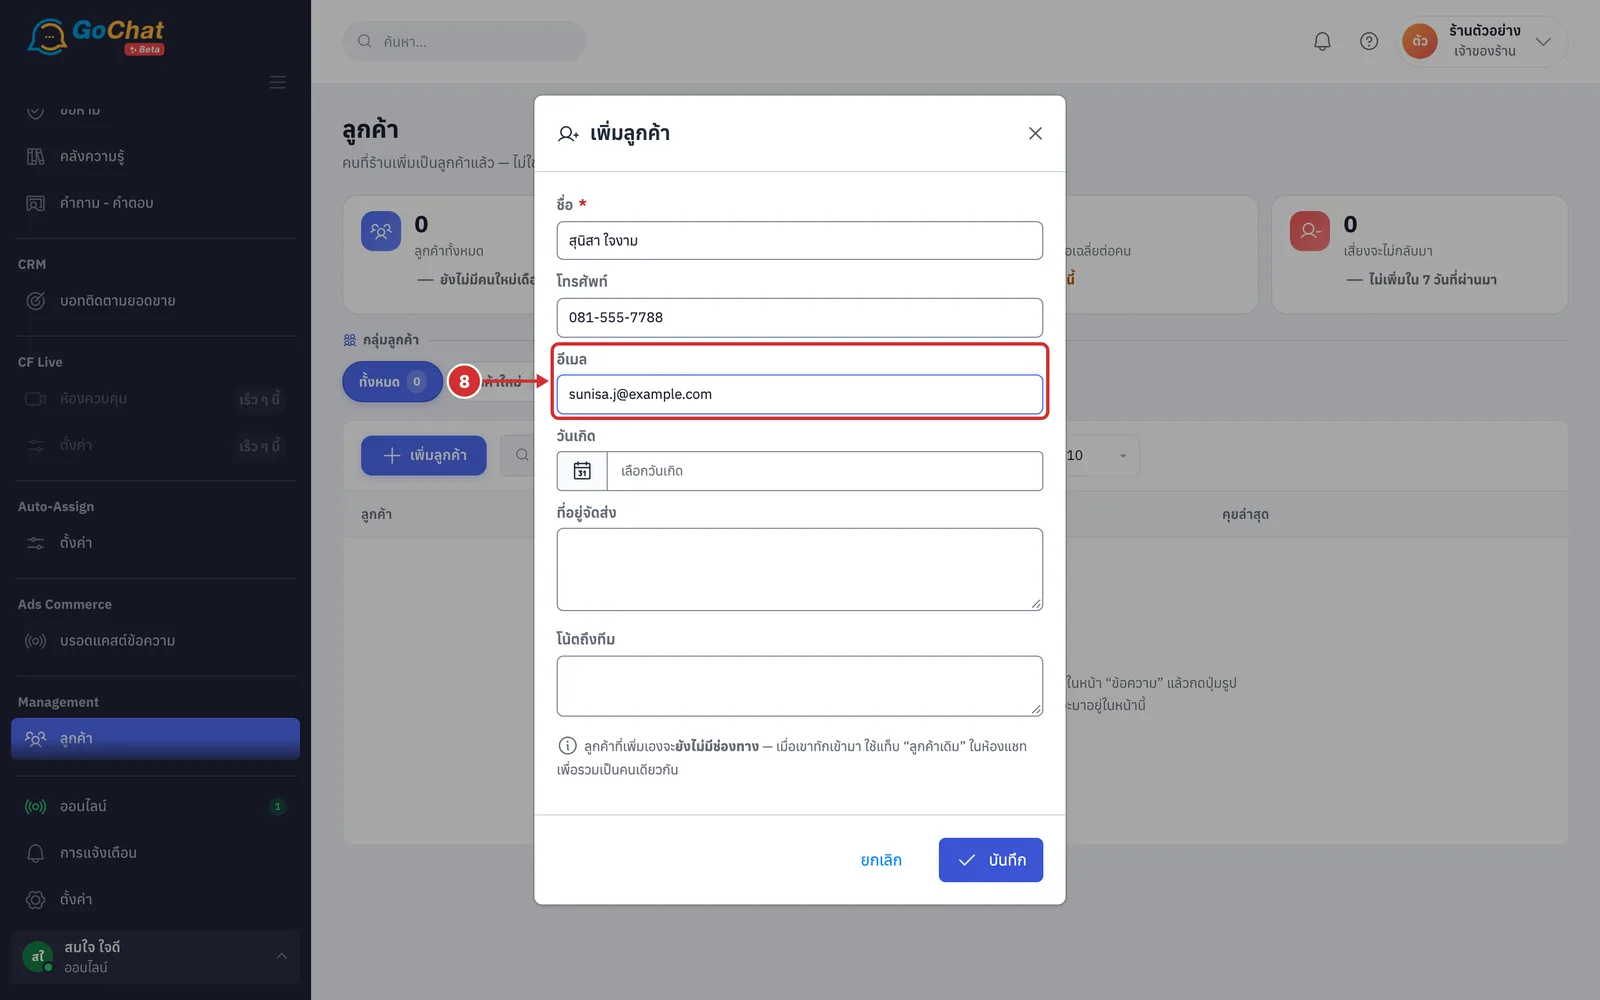
In อีเมล (Email), enter the customer's email (optional, up to 200 characters · it must look like an email address, otherwise รูปแบบอีเมลไม่ถูกต้อง (Invalid email format) appears)
In วันเกิด (Birthday), click the field and pick the year, month and day from the calendar (optional · future dates cannot be chosen)
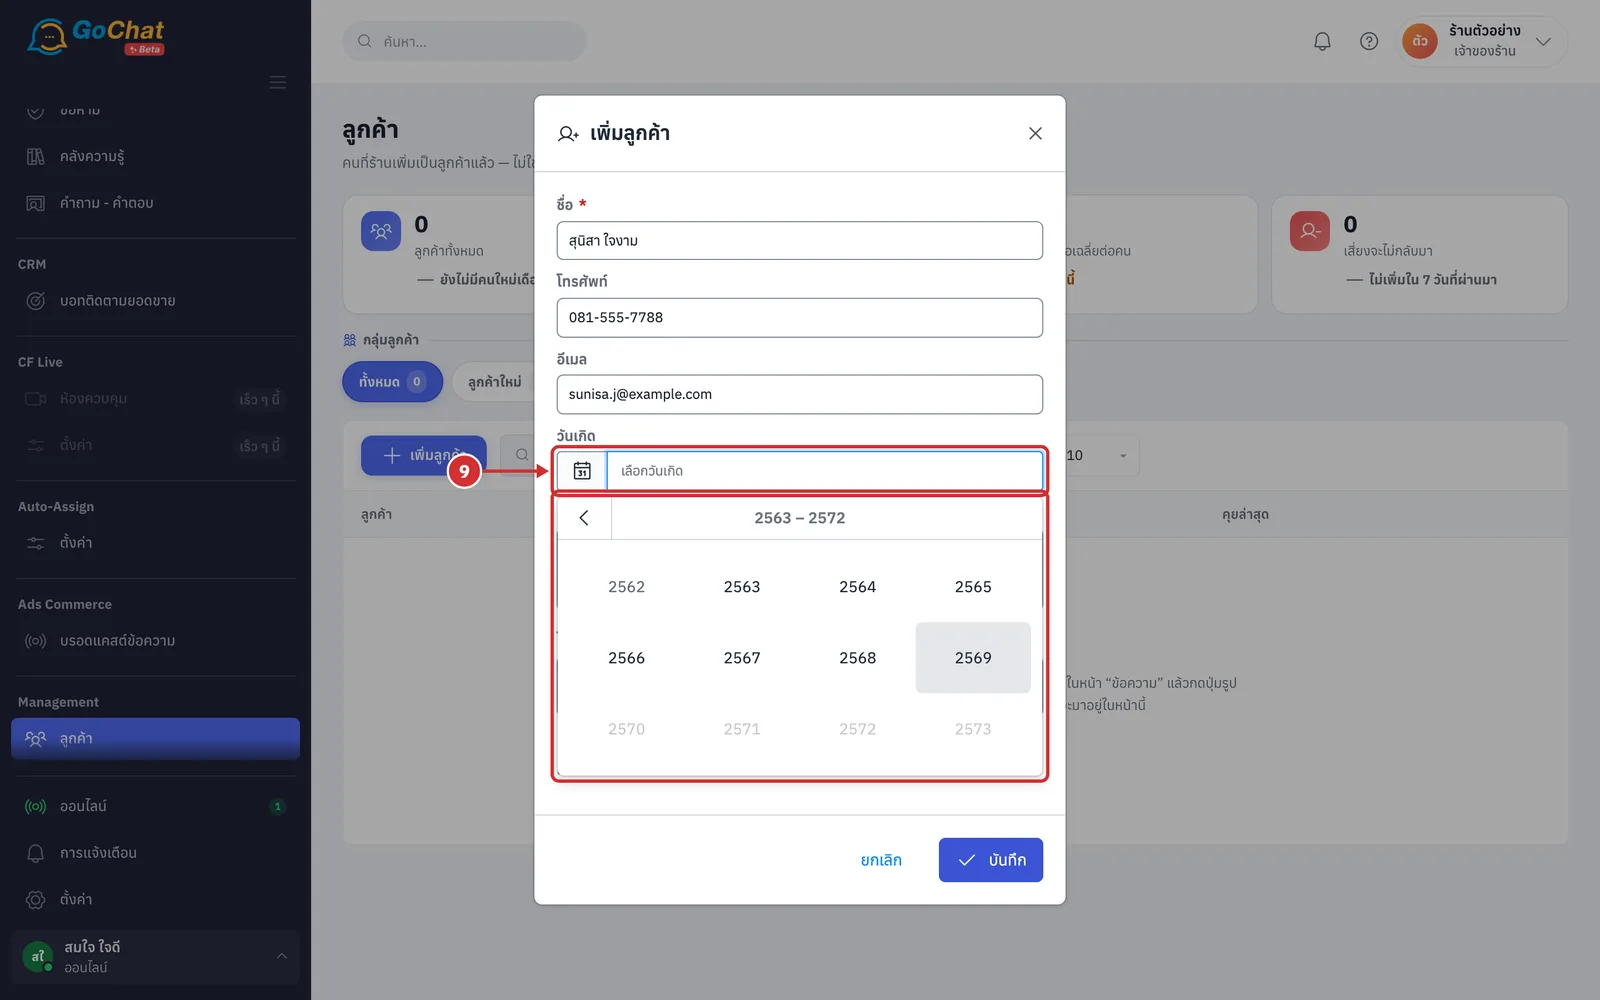
In ที่อยู่จัดส่ง (Shipping address), enter the delivery address; it can be several lines (optional, up to 500 characters)
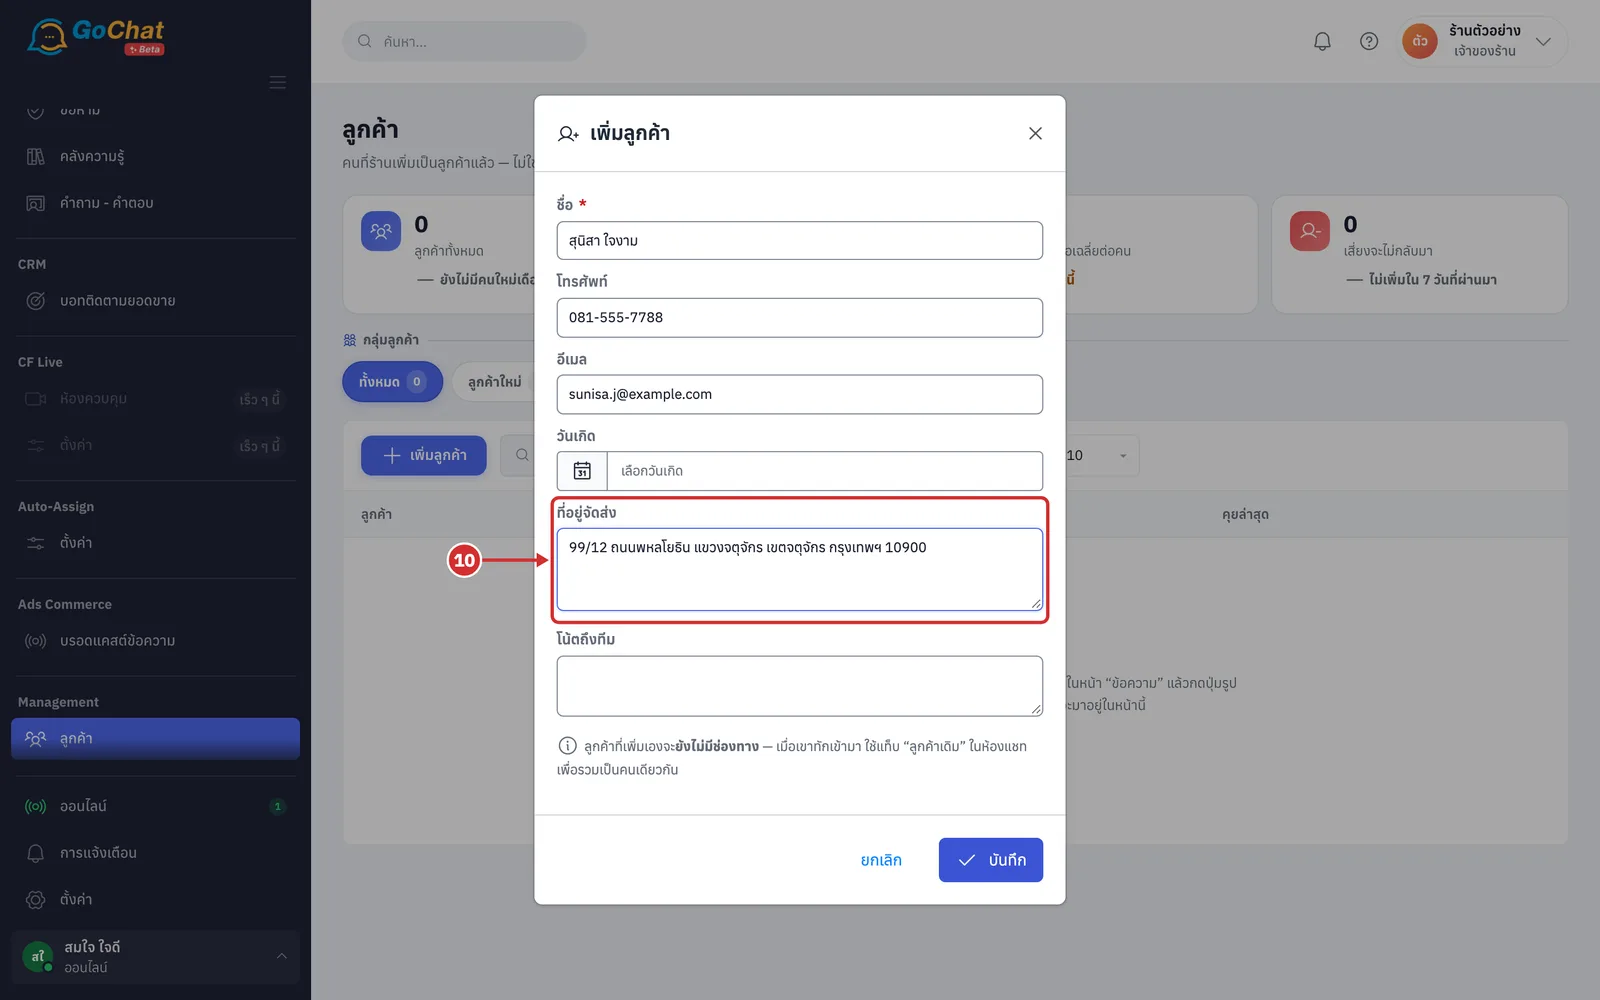
In โน้ตถึงทีม (Note to the team), write what the team should know about this customer (optional · the note goes to the โน้ตของทีม (Team notes) tab of the customer profile; customers do not see it)
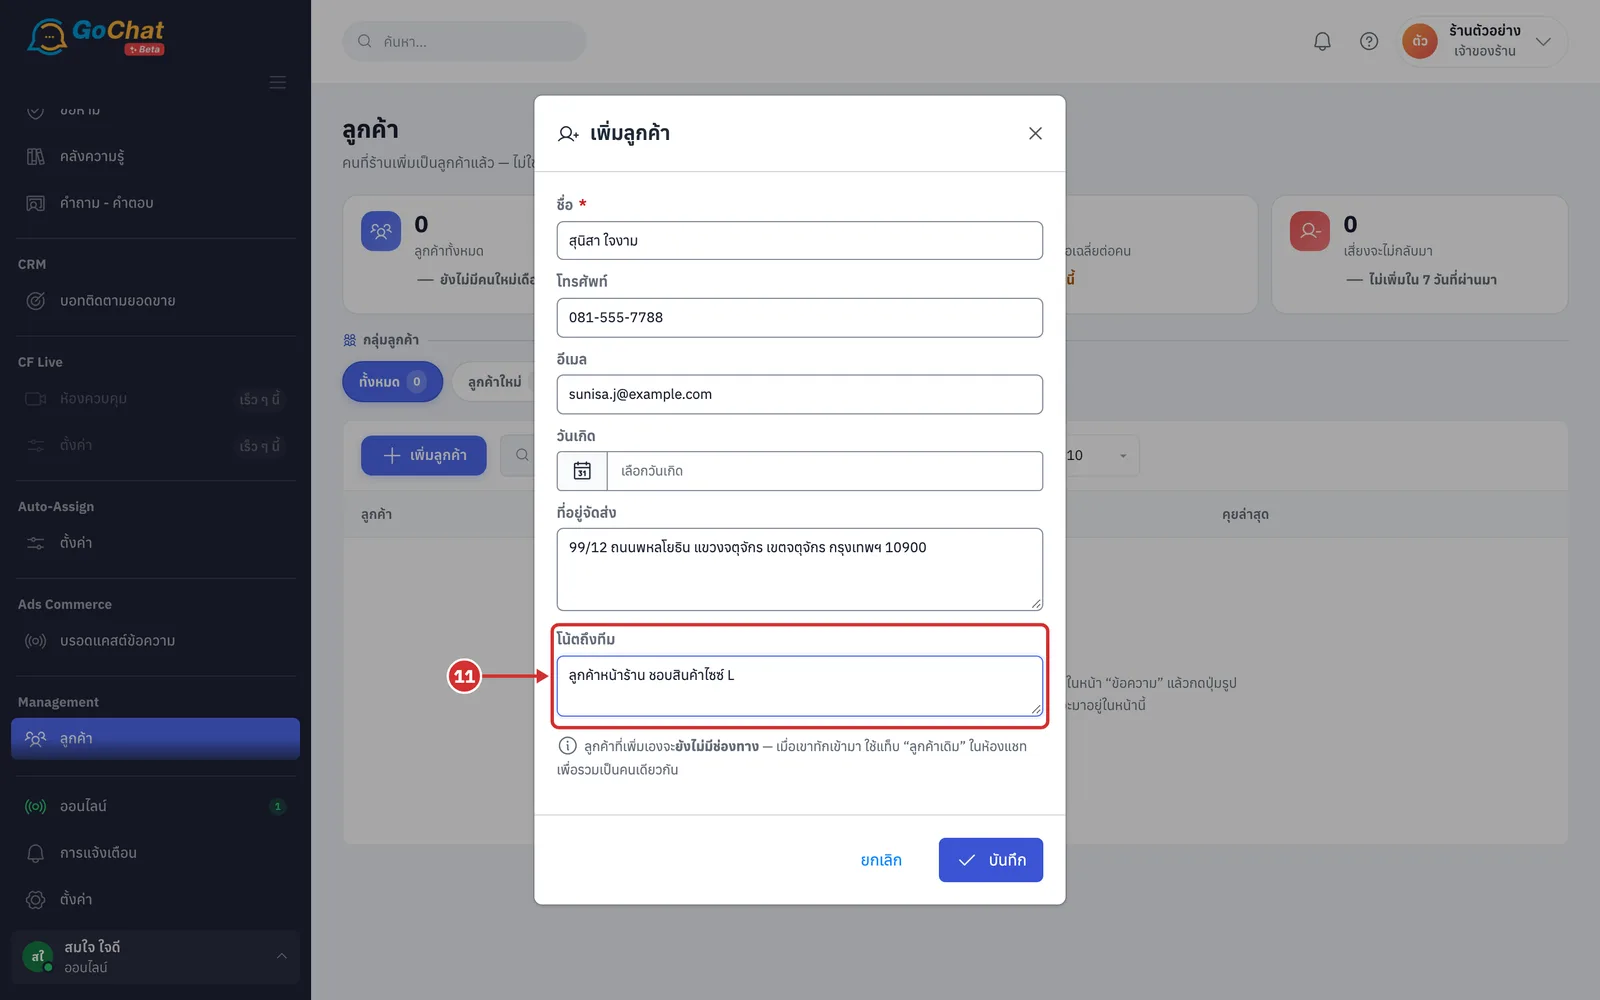
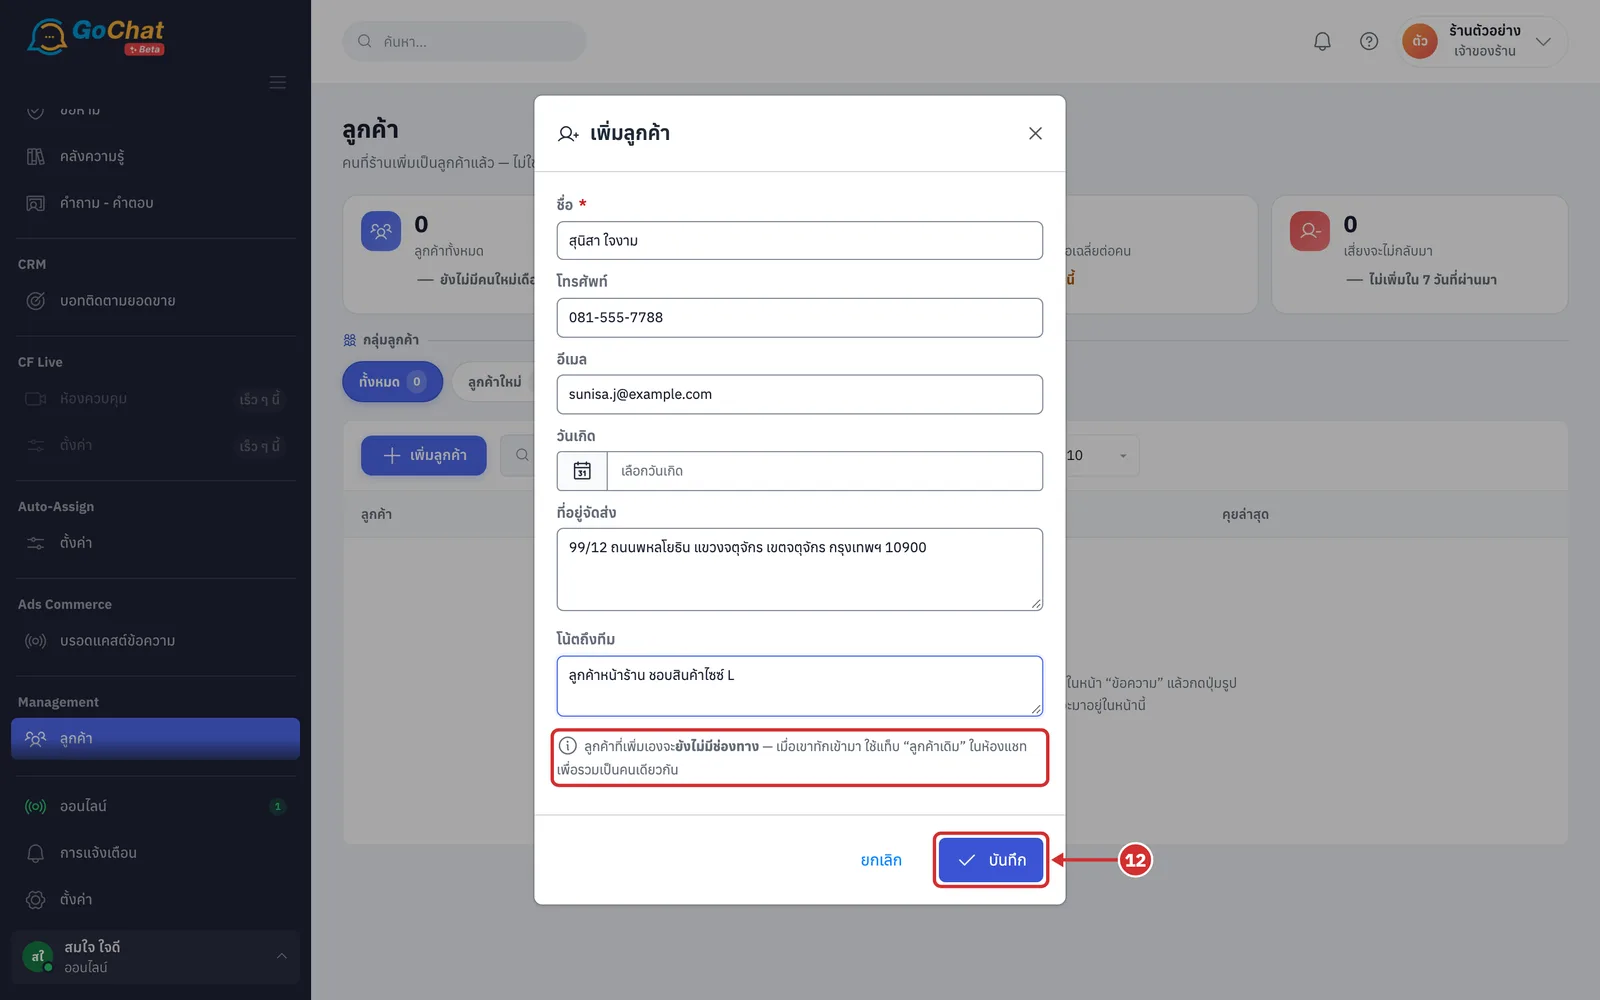
Click บันทึก (Save) (customers you add yourself have no channel yet; when they message you, use the ลูกค้าเดิม (Existing customer) tab in the chat to merge them into the same person · the system does not check whether the name matches an existing customer · click ยกเลิก (Cancel) to close without saving)
The system shows เพิ่ม “customer name” แล้ว (“customer name” added) at the bottom right with a ดูโปรไฟล์ › (View profile ›) link, and the customer appears in the table
Searching and sorting the list
In ค้นหาในกลุ่มนี้... (Search this group...), type what you are looking for. It searches only the selected group, by customer name, page name, tag and the Last chat column (you cannot search by phone or email)
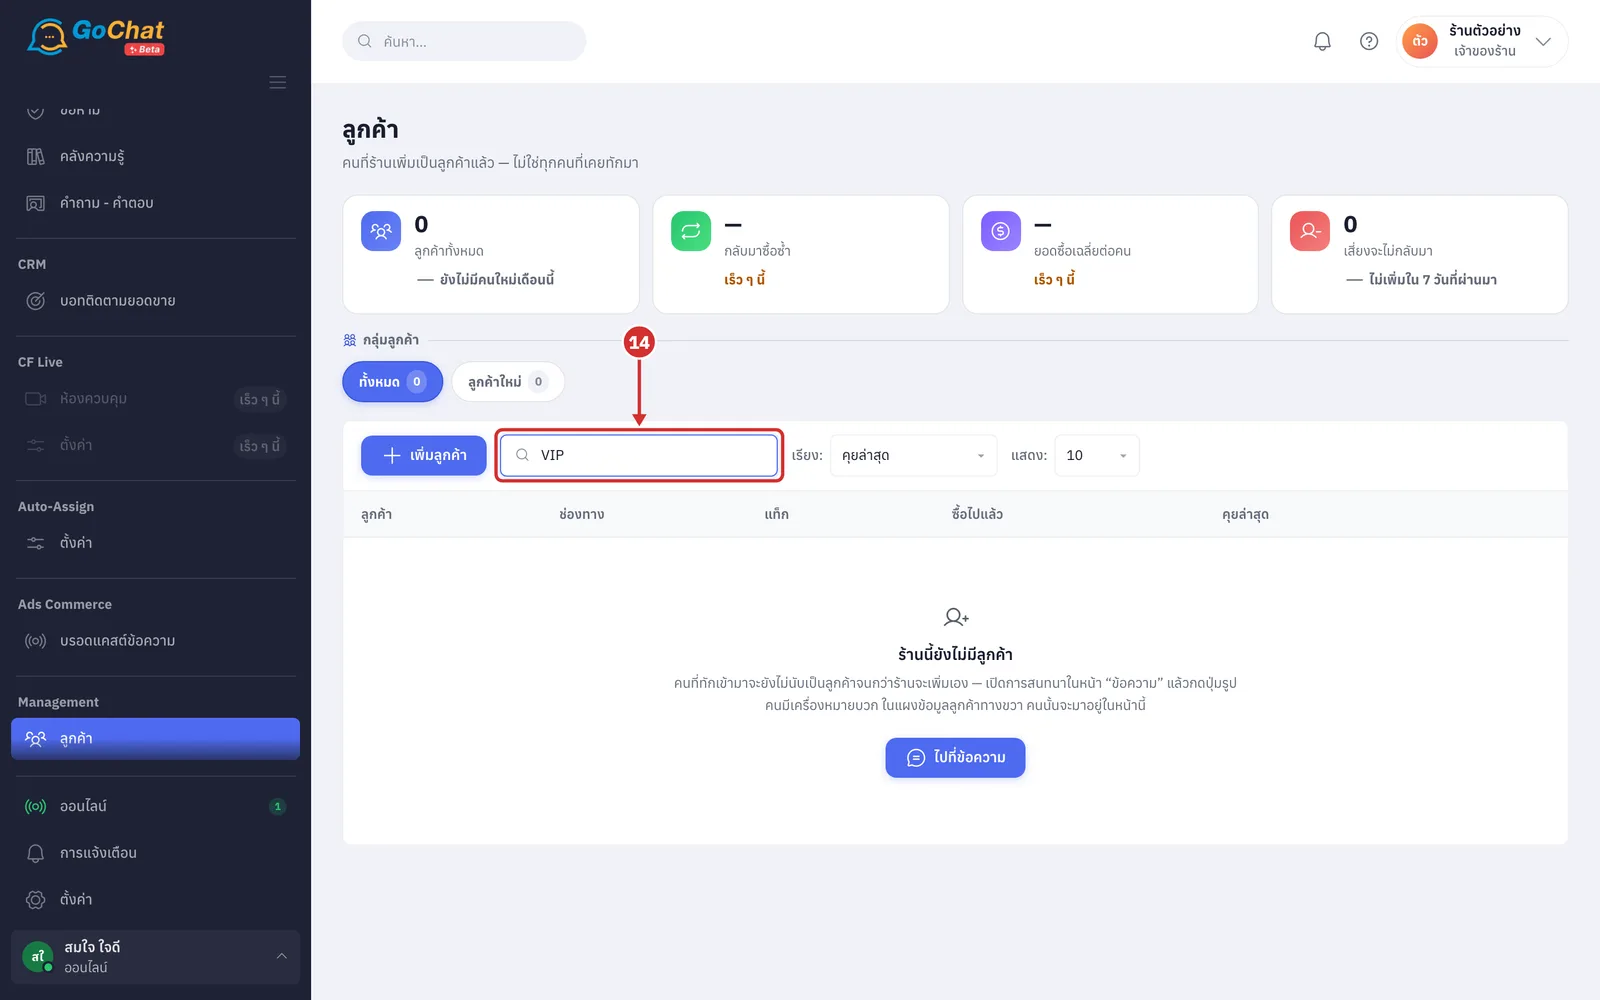
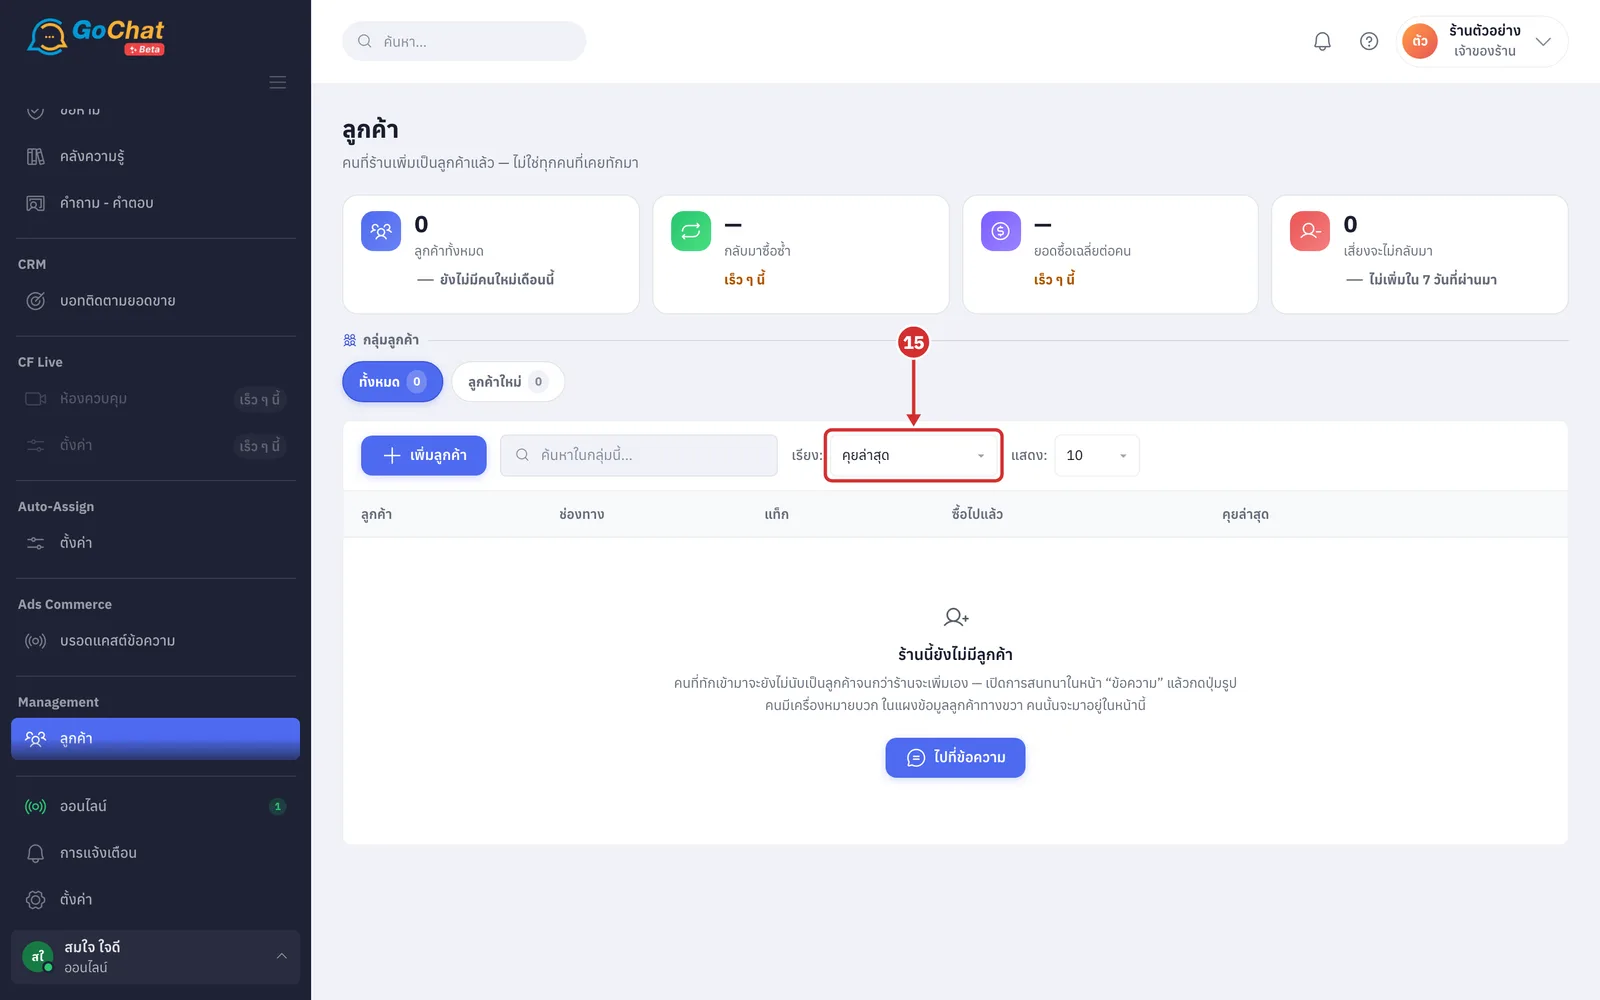
In เรียง: (Sort:), choose คุยล่าสุด (Latest chat) (the default · most recent messages first) or หายไปนานสุด (Quiet the longest) (people who have been quiet longest first). Greyed-out options cannot be chosen
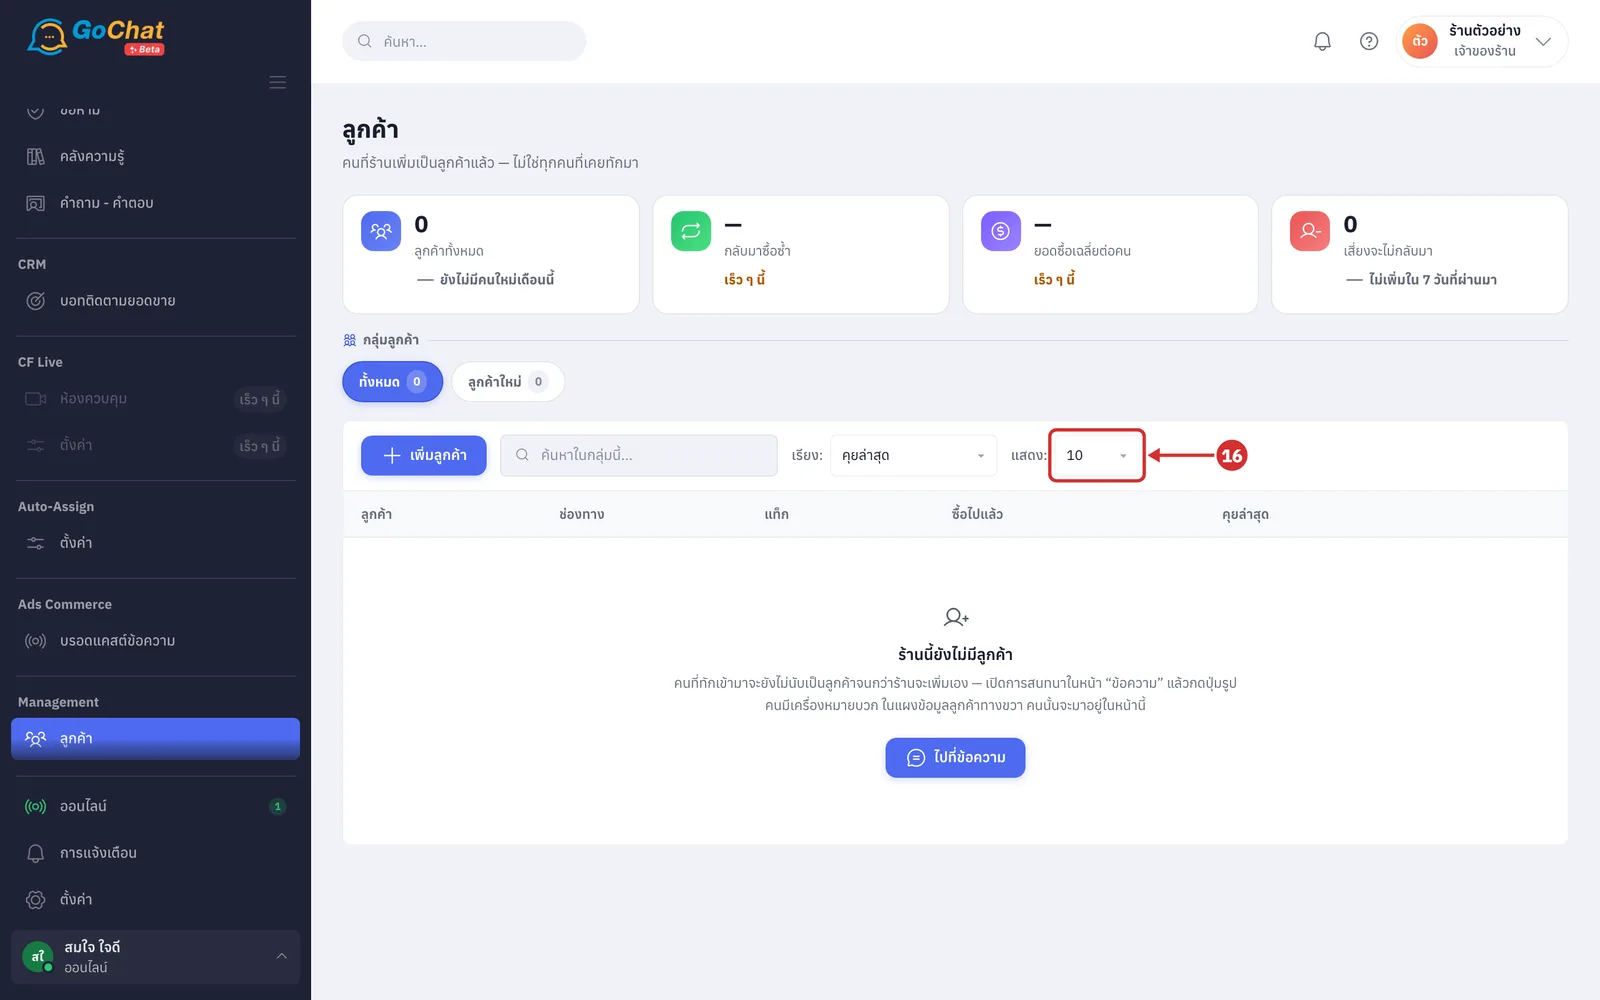
In แสดง: (Show:), choose how many rows per page: 10, 25, 50 or ทั้งหมด (All) (when there is more than one page, the bottom of the table shows page numbers and arrows with a line such as แสดง 1–10 จาก 24 คนที่กรองได้ (กลุ่มนี้มี 24 คน) (Showing 1–10 of 24 filtered people (this group has 24)) · changing the group, search or sort takes you back to the first page)
Reading the customer table
Read the list in the table; each row is one customer (a shop with no customers shows ร้านนี้ยังไม่มีลูกค้า (This shop has no customers yet) with a ไปที่ข้อความ (Go to Messages) button · a search or filter with no match shows ไม่พบลูกค้าที่ตรงกับเงื่อนไข (No customers match) with a ล้างตัวกรอง (Clear filters) button)
ลูกค้า (Customer) — picture and name; the line below is the page or account the customer messaged (customers you added yourself show ยังไม่ผูกช่องทางไหน (No channel linked)), plus a จากออเดอร์ (From order) label for customers the system added when an order was created
ช่องทาง (Channels) — logos of every channel this customer has messaged from; up to 4 circles, with the last one showing +N beyond that
แท็ก (Tags) — tags from all of this customer's chats combined
ซื้อไปแล้ว (Purchased) — total spend and number of orders from GoSaaS, not counting cancelled or returned orders (อย่างน้อย (at least) in front means not everything could be fetched · without a number, the line below gives the reason, such as ยังไม่เคยซื้อ (Never purchased), ร้านยังไม่เชื่อม GoSaaS (Shop not connected to GoSaaS), ยังไม่รู้ว่าลูกค้าคนไหน (Customer not identified yet) or ดึงไม่สำเร็จ (Could not fetch))
คุยล่าสุด (Last chat) — when the latest message was, such as today, yesterday or 3 days ago (red text when quiet for more than 60 days · never chatted shows ยังไม่เคยคุย (Never chatted))
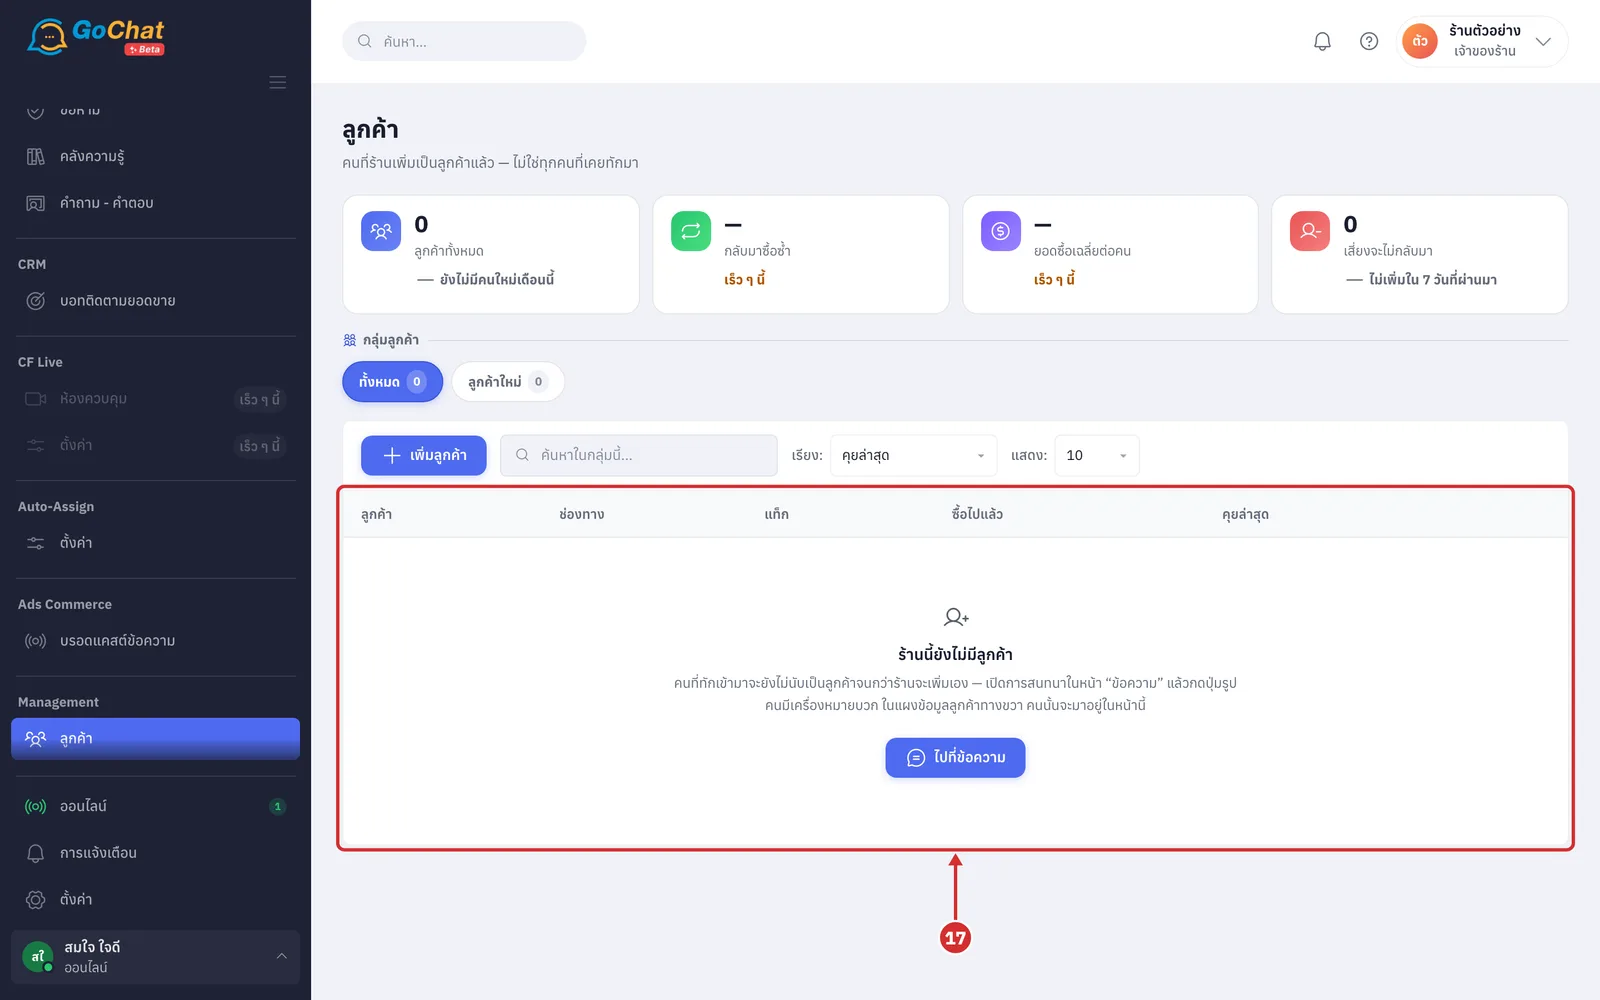
Click a customer's row, or the โปรไฟล์ (Profile) button at the end of the row, to open that customer's profile, or click เปิดการสนทนา (Open conversation) to go to the customer's latest chat on the ข้อความ (Messages) page
Viewing and editing a customer profile
In the profile header, click เปิดแชท (Open chat) to go to the ข้อความ (Messages) page, or click แก้ไขข้อมูล (Edit details) to edit contact details (click the left arrow before the customer's name to go back to the customer list)
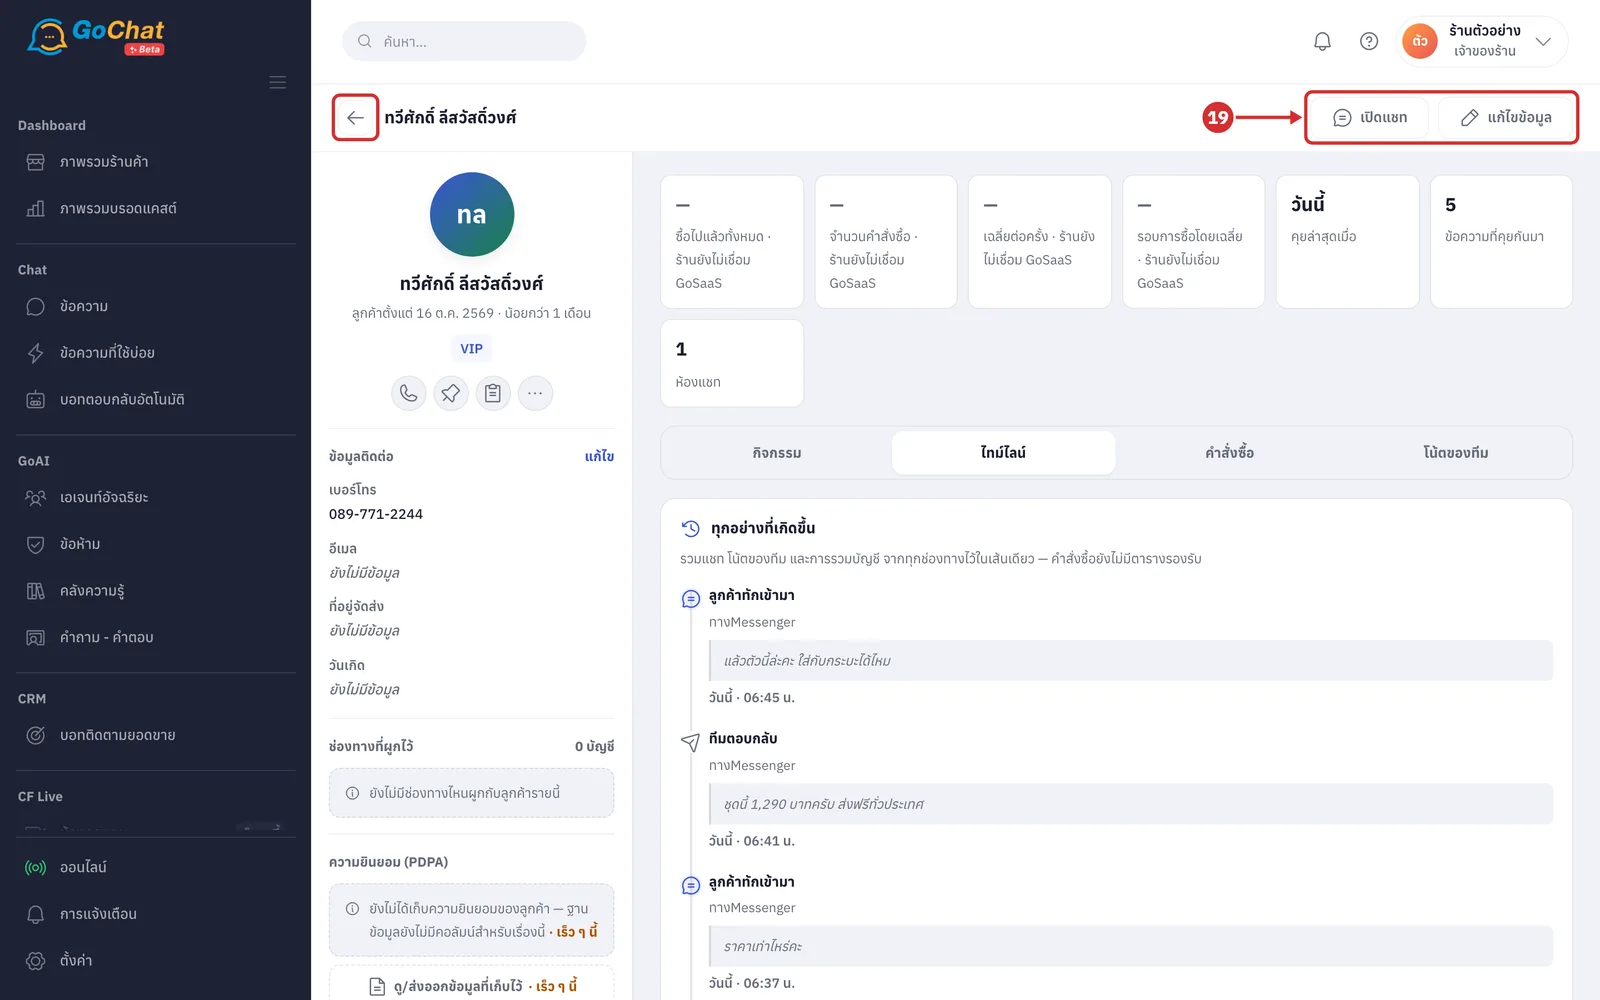
Look at the top-left box: the customer's picture and name, the ลูกค้าตั้งแต่ … (Customer since …) line (counted from their first message, with how long, such as 1 year 2 months), their tags, and a phone button you can click to call the customer when there is a number (greyed-out buttons in that row cannot be clicked)
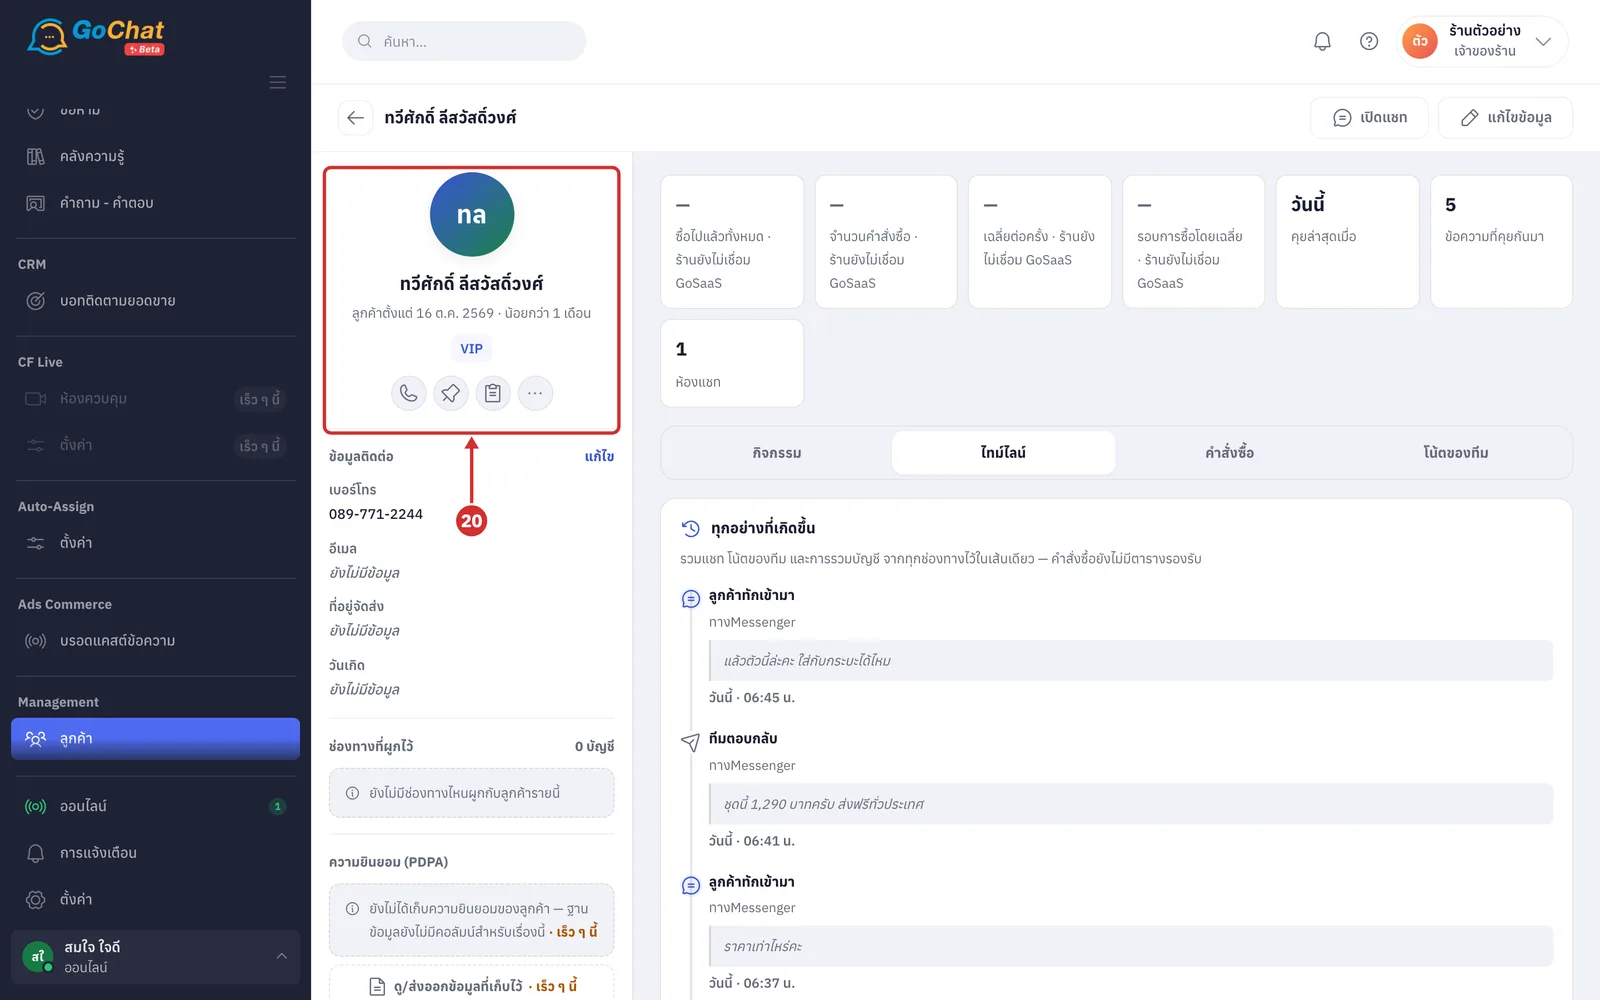
Under ข้อมูลติดต่อ (Contact details), click แก้ไข (Edit) (or แก้ไขข้อมูล (Edit details) at the top), then edit the fields you need
ชื่อที่ทีมกรอกเอง (Name entered by the team) — the customer's real name, up to 120 characters (left empty, the system uses the name from the channel)
เบอร์โทร (Phone) up to 40 characters · อีเมล (Email) up to 200 characters
วันเกิด (Birthday) — pick from the calendar · the shipping address cannot be edited here (edit it on the customer panel in the chat)
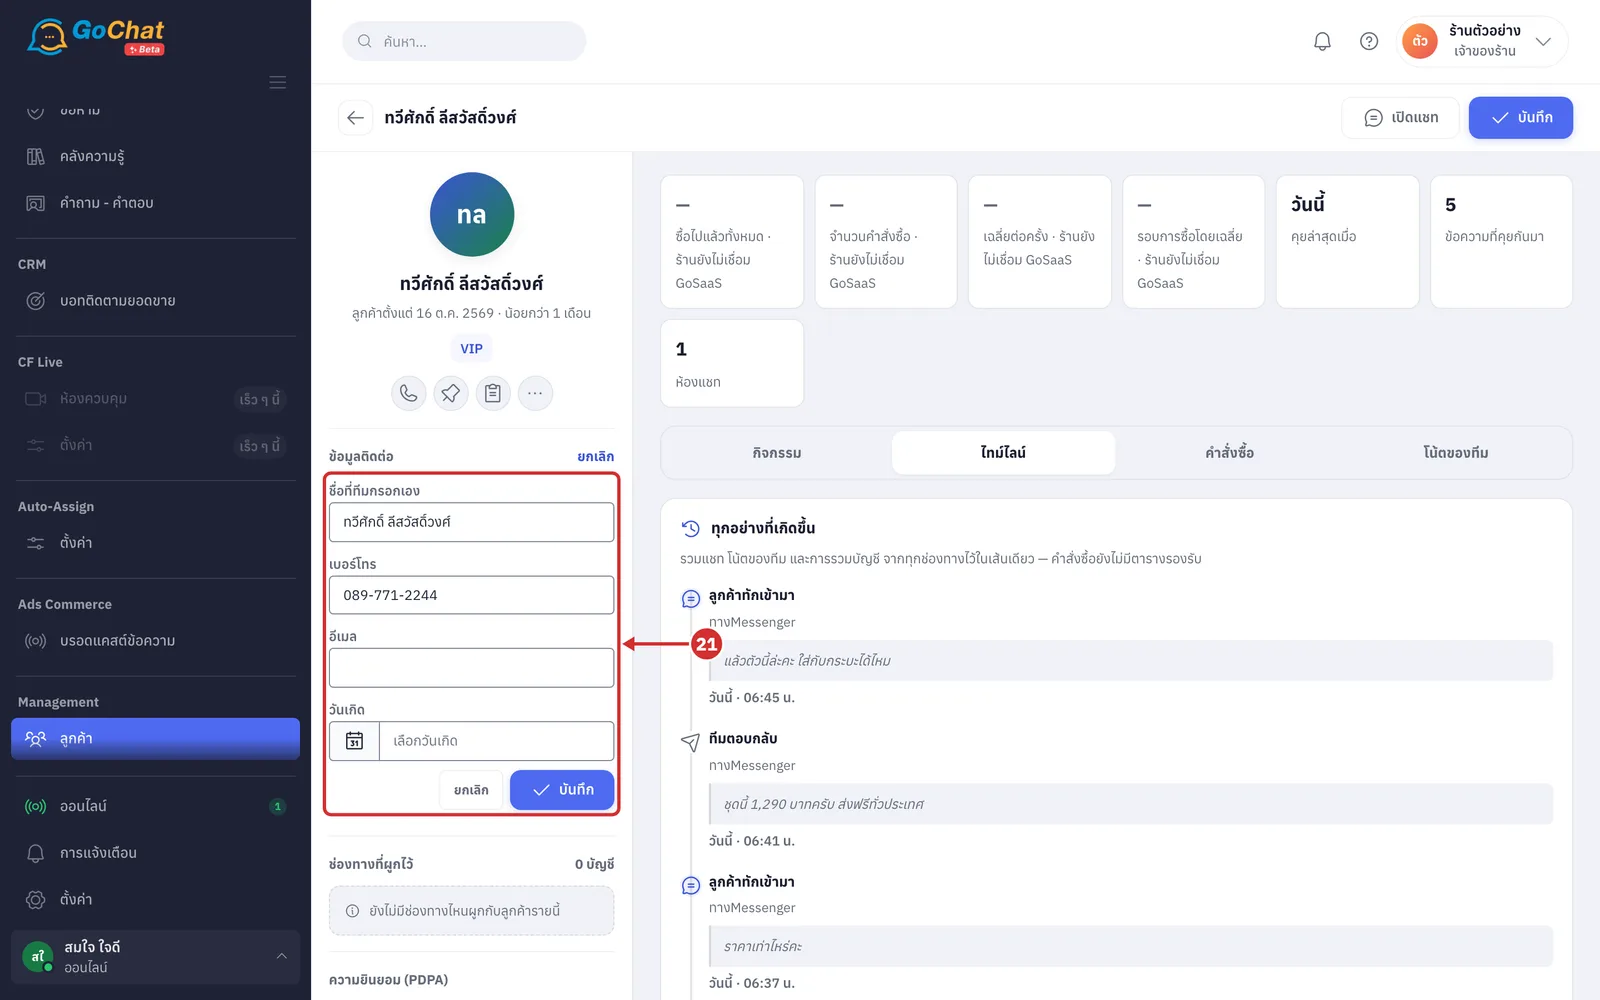
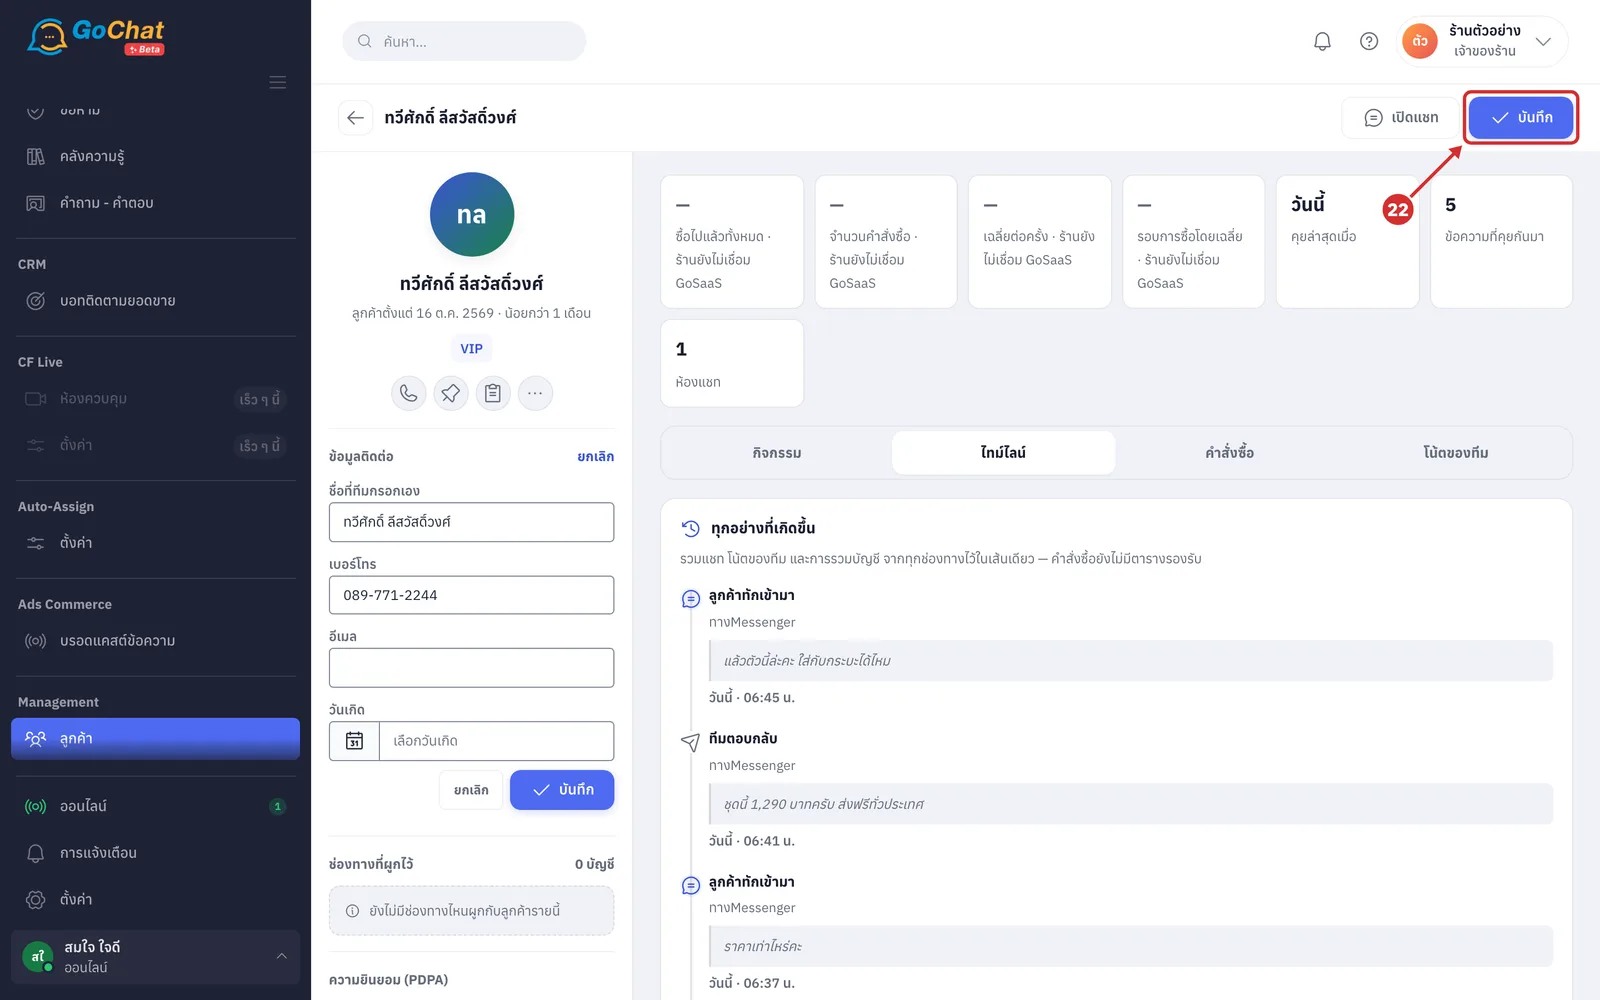
Click บันทึก (Save). The system shows บันทึกแล้ว (Saved) under the contact details (click ยกเลิก (Cancel) to leave without saving · if a field is wrong, such as รูปแบบอีเมลไม่ถูกต้อง (Invalid email format), the message appears in the same place and the form stays open so you can fix it)
Look at ช่องทางที่ผูกไว้ (Linked channels): the number of accounts and a card for each channel the customer messaged from (channel logo, page name and last chat date · none shows ยังไม่มีช่องทางไหนผูกกับลูกค้ารายนี้ (No channel is linked to this customer yet))
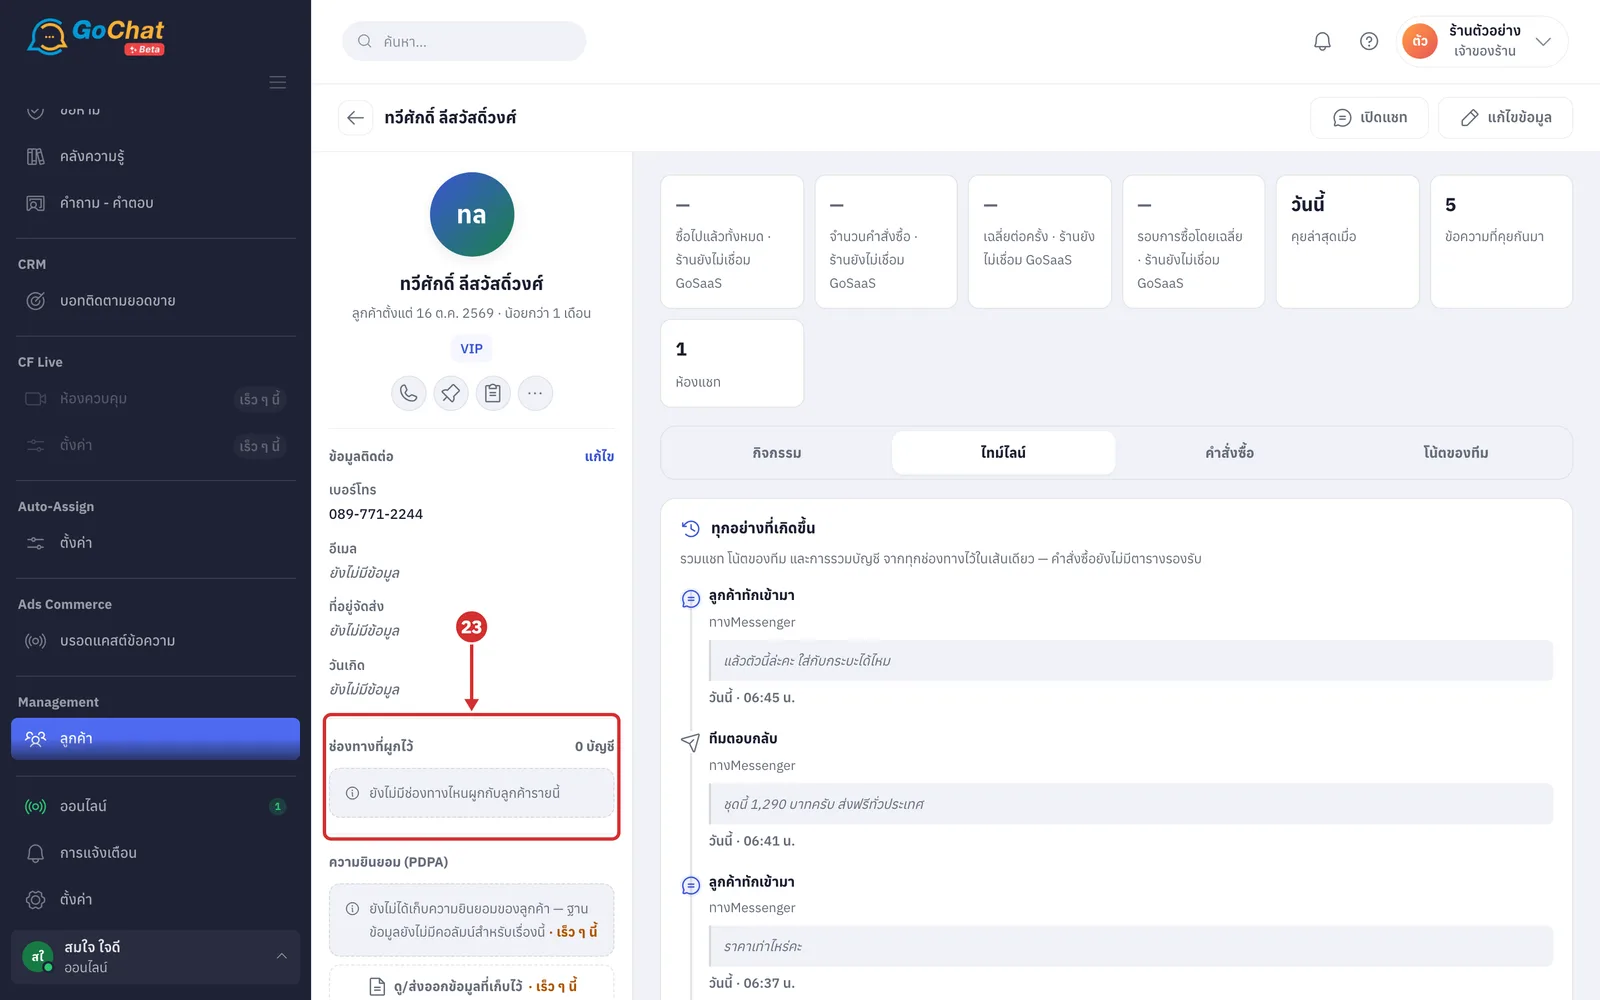
Look at the customer's figures: ซื้อไปแล้วทั้งหมด (Total purchased), จำนวนคำสั่งซื้อ (Number of orders), เฉลี่ยต่อครั้ง (Average per order), รอบการซื้อโดยเฉลี่ย (Average buying cycle) (from GoSaaS orders, not counting cancelled or returned ones · without a number, the reason follows the label), คุยล่าสุดเมื่อ (Last chatted), ข้อความที่คุยกันมา (Messages exchanged) and ห้องแชท (Chats)
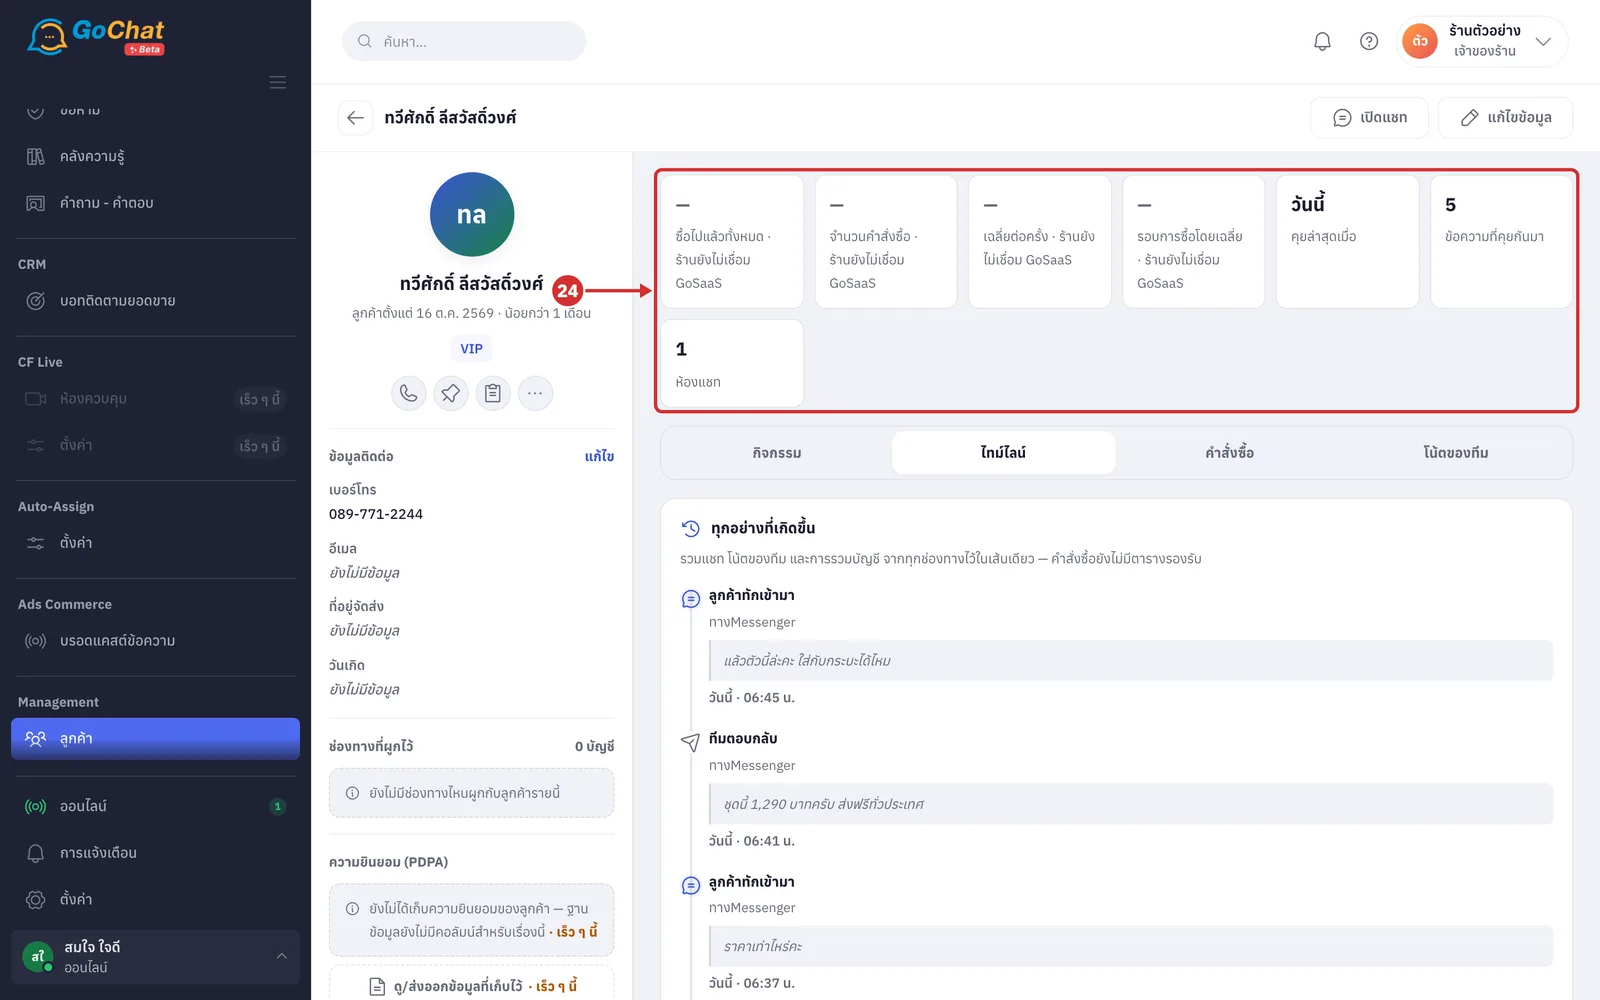
The ไทม์ไลน์ (Timeline) tab (opens first) puts the latest 10 messages from every channel, plus team notes and account merges, on one line, such as ลูกค้าทักเข้ามา (Customer messaged), ทีมตอบกลับ (Team replied), ทีมเขียนโน้ตไว้ (Team wrote a note) and เริ่มเป็นลูกค้า (Became a customer), with the message and time (click a picture from the chat to open it full size)
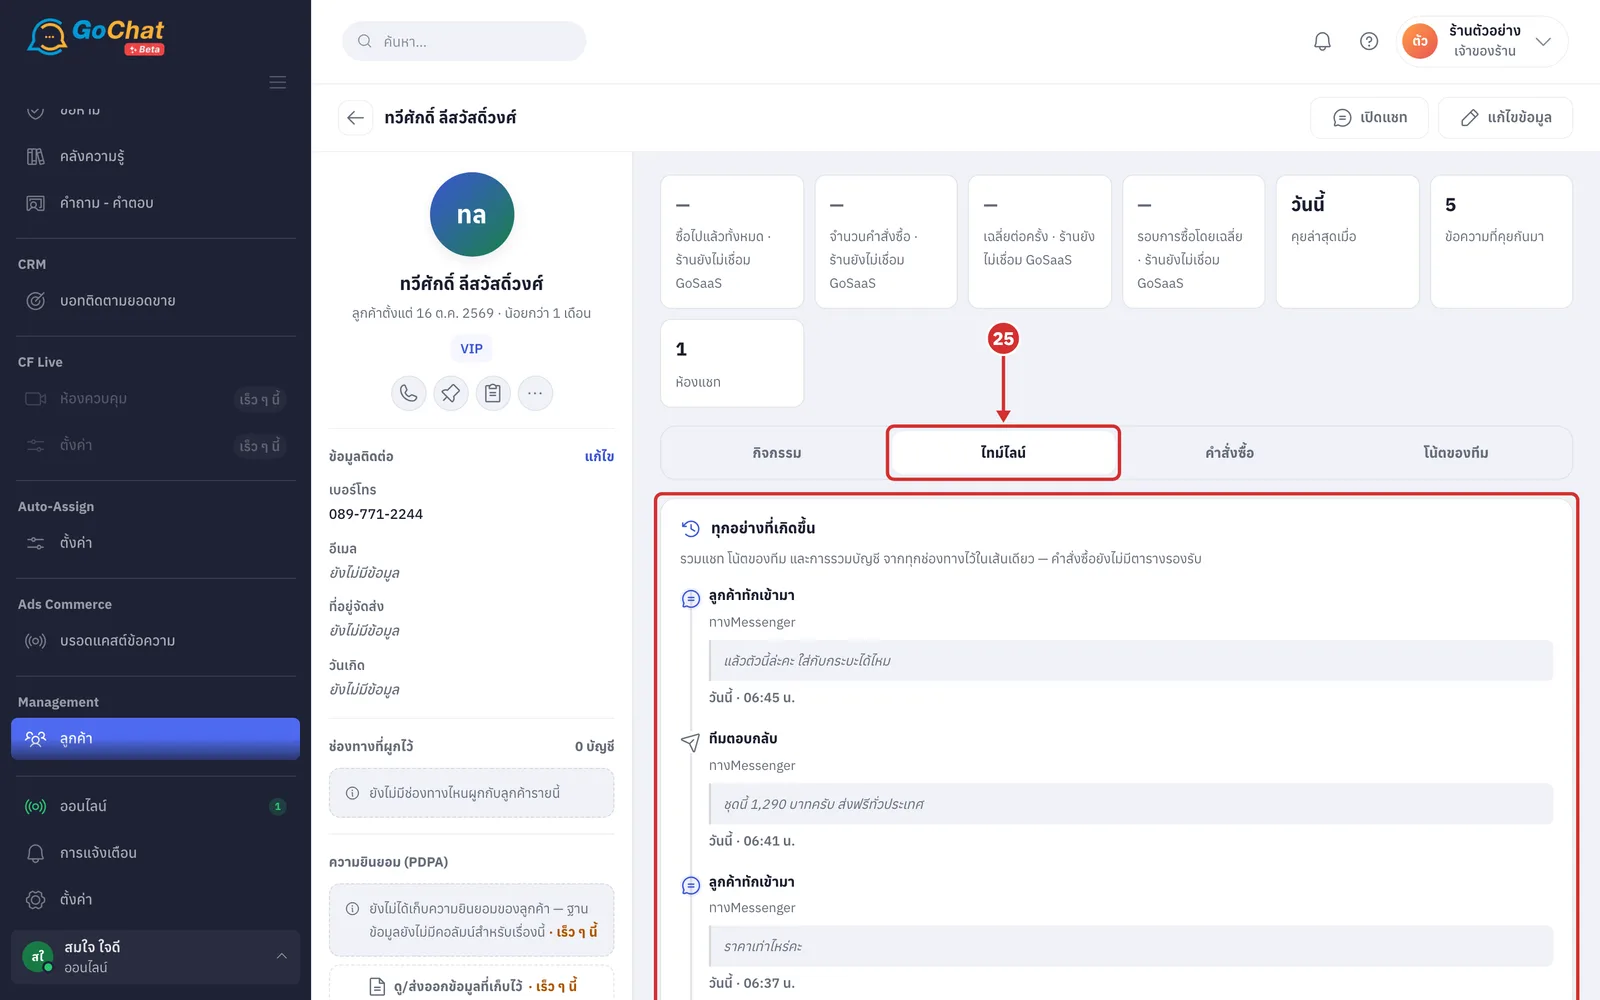
Click the กิจกรรม (Activities) tab to see งานที่ต้องทำกับลูกค้าคนนี้ (Tasks for this customer), split into ที่ต้องทำ (To do) and ทำไปแล้ว (Done) (the same tasks as the กิจกรรม (Activities) section of the customer panel in the chat, also shown on the Activities page · the number on the tab is how many tasks are not done · none shows ยังไม่มีงานที่ต้องทำกับลูกค้าคนนี้ (No tasks for this customer yet))
Each task shows the date, subject, kind and due time, such as พรุ่งนี้ · 09:00 น. · name (Tomorrow · 09:00 · who does it) (overdue tasks show เลยกำหนดมา N วัน (N days overdue))
Click ทำแล้ว (Done) and choose ผลเป็นยังไง (How did it go): ติดต่อได้ · สนใจต่อ (Reached · still interested), ไม่รับสาย (No answer), ขอให้ติดต่อใหม่ (Asked to be contacted later), ไม่สนใจแล้ว (No longer interested) or ข้าม (Skip) · click เลื่อน (Snooze) to move the time · click แก้ (Edit) to change the task
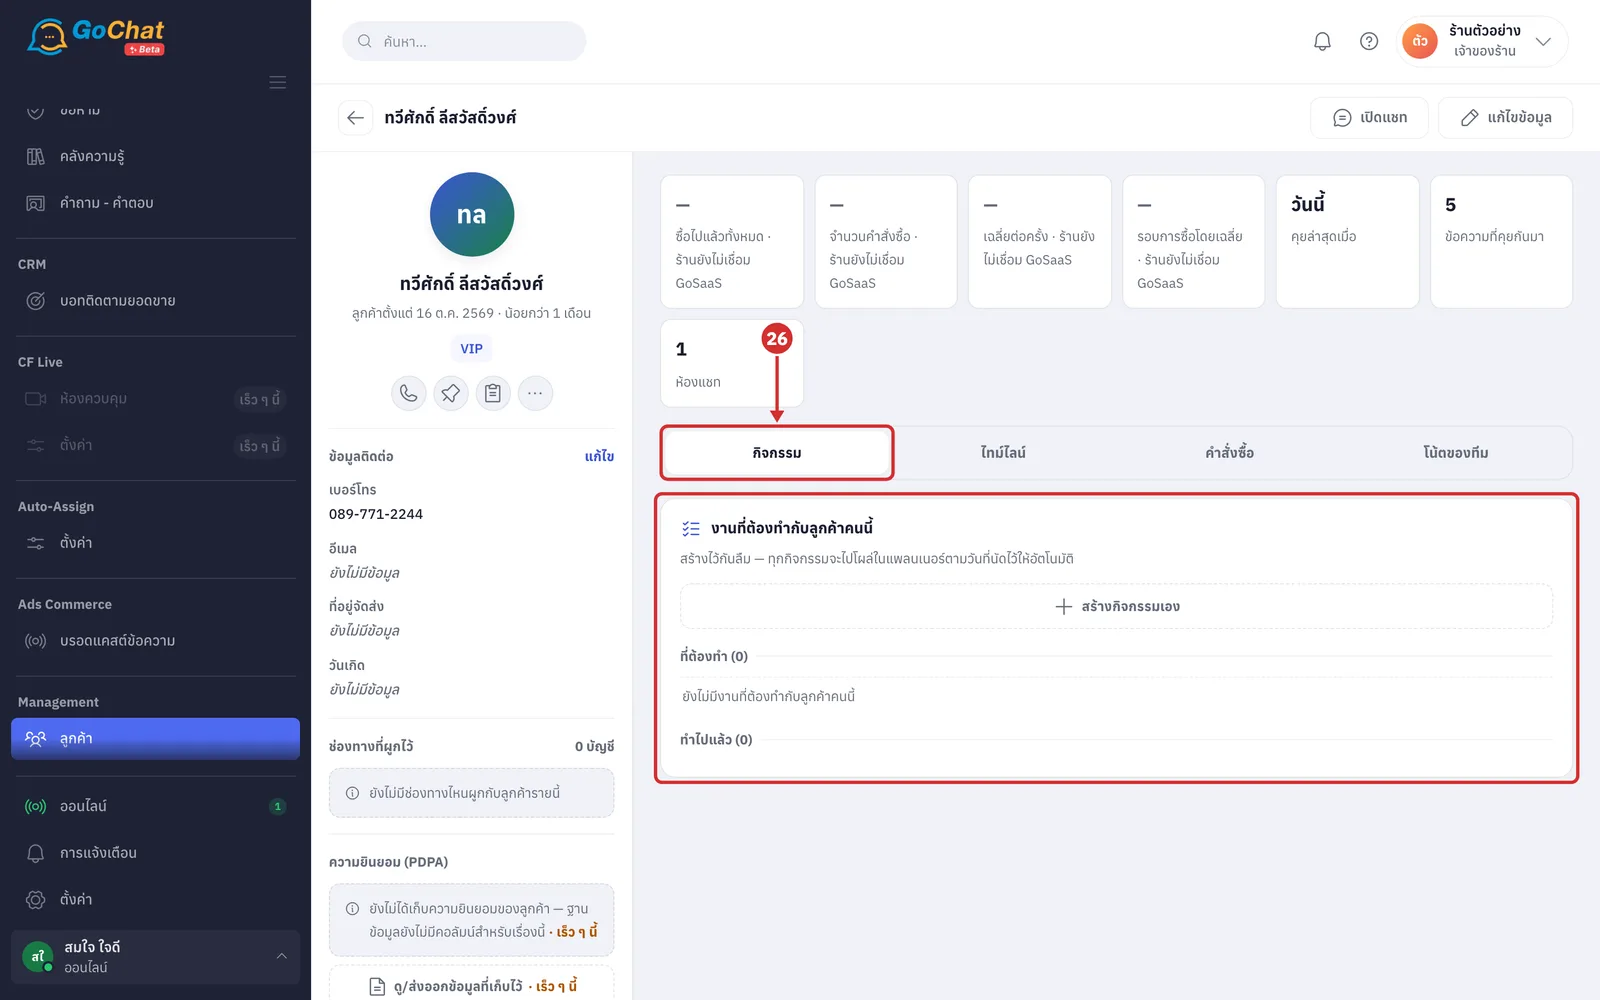
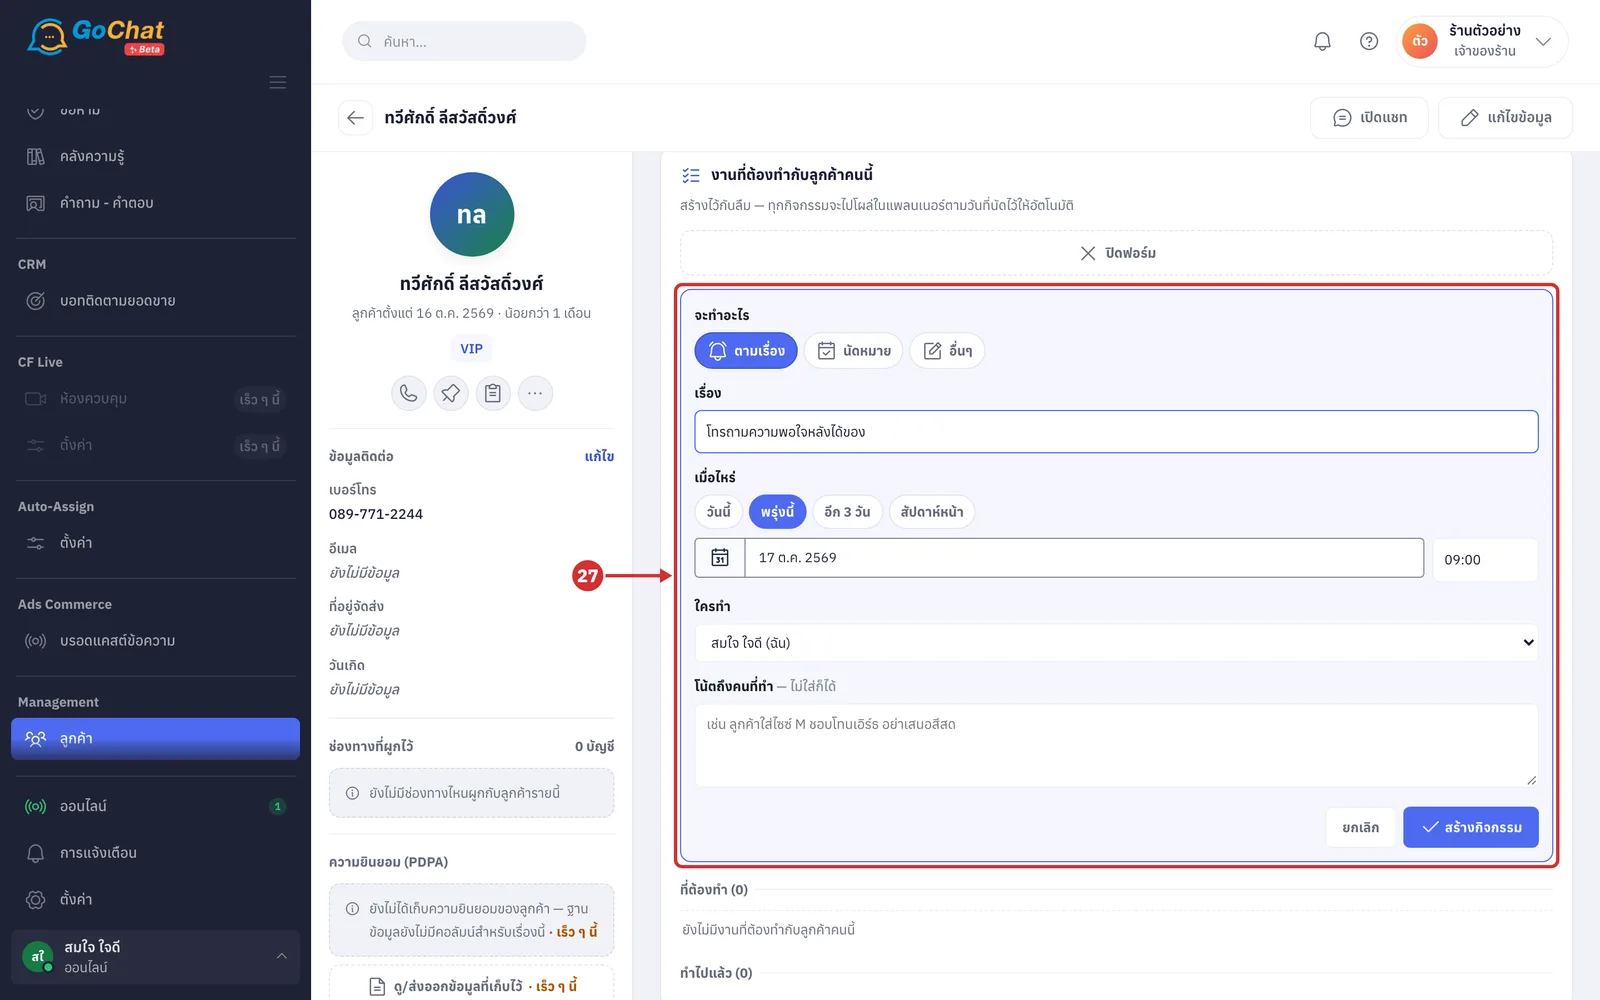
Click สร้างกิจกรรมเอง (Create an activity) to add a new task, fill in each field, then click สร้างกิจกรรม (Create activity) (click ยกเลิก (Cancel) or ปิดฟอร์ม (Close form) to leave without saving · customers without a chat cannot get tasks from here)
จะทำอะไร (What to do) — choose ตามเรื่อง (Follow up), นัดหมาย (Appointment) or อื่นๆ (Other)
เรื่อง (Subject) — what needs doing, up to 200 characters (required, otherwise ใส่เรื่องก่อน (Enter a subject first) appears)
เมื่อไหร่ (When) — click วันนี้ (Today), พรุ่งนี้ (Tomorrow), อีก 3 วัน (In 3 days), สัปดาห์หน้า (Next week) or pick a date from the calendar, then type a time such as 20:00 (clear the time = an all-day task)
ใครทำ (Who does it) — pick someone in your shop (you by default) · โน้ตถึงคนที่ทำ (Note for the person doing it) is optional, up to 1,000 characters
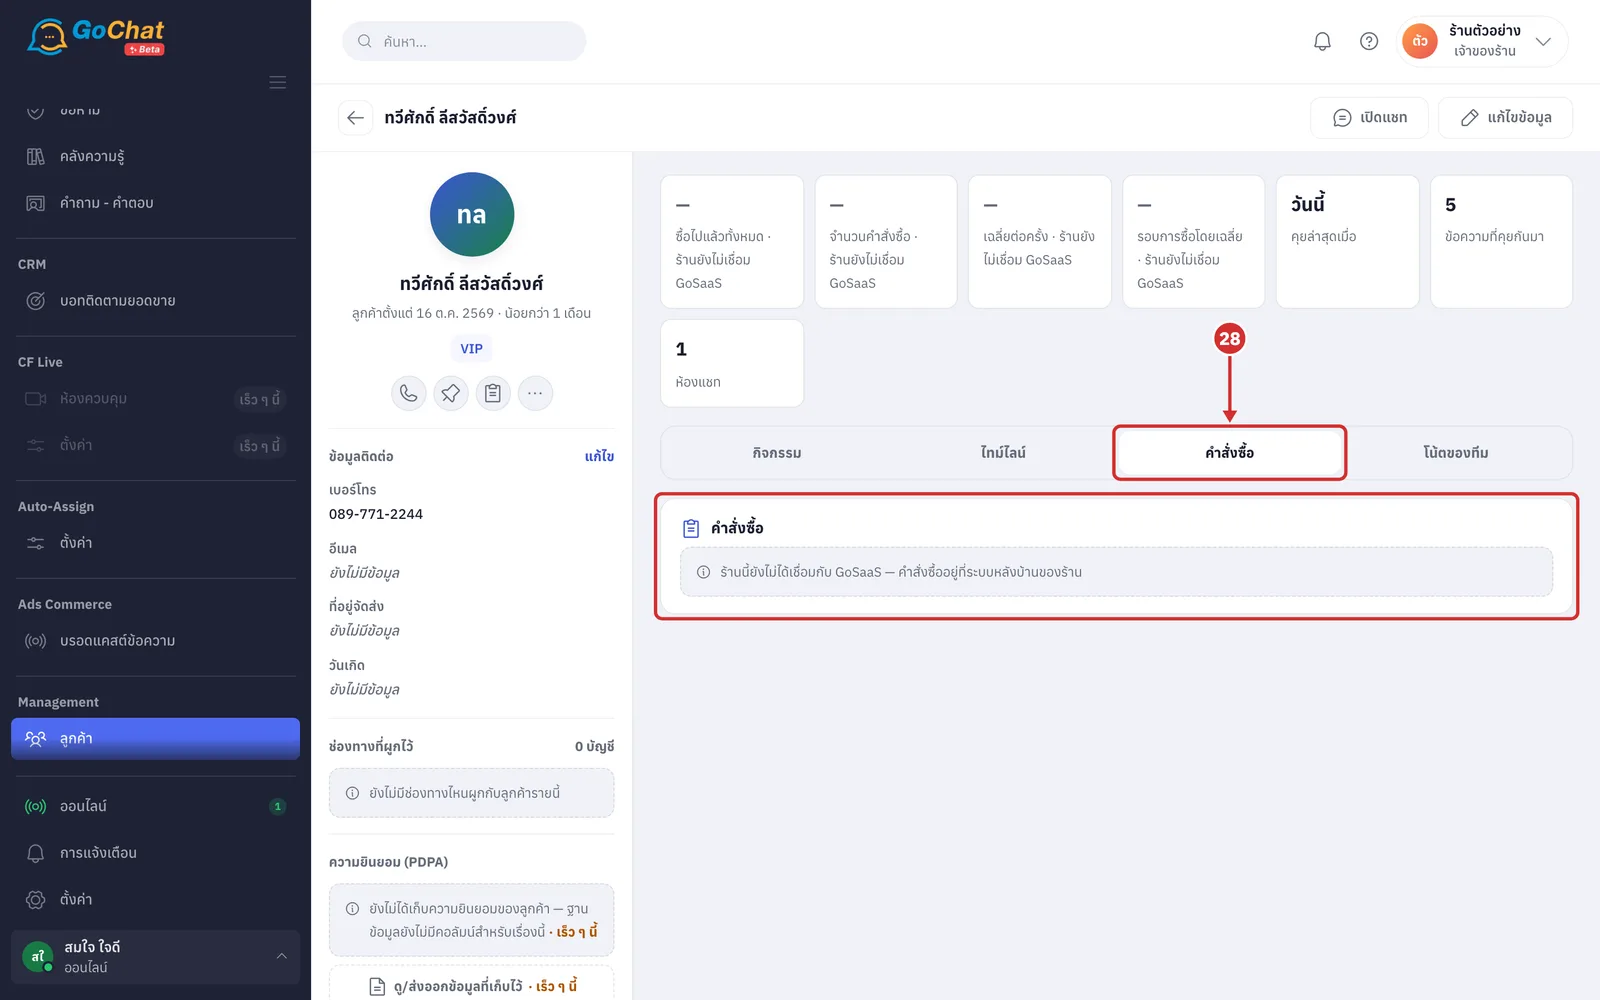
Click the คำสั่งซื้อ (Orders) tab to see the customer's GoSaaS orders, newest first. The first 5 are shown; click ดูอีก N รายการ (See N more) for the rest, and click an order to open the full order in a new tab (cancelled orders show a struck-through price · if the system cannot find the customer in GoSaaS yet, it tells you to add a phone number or create the first order from the chat)
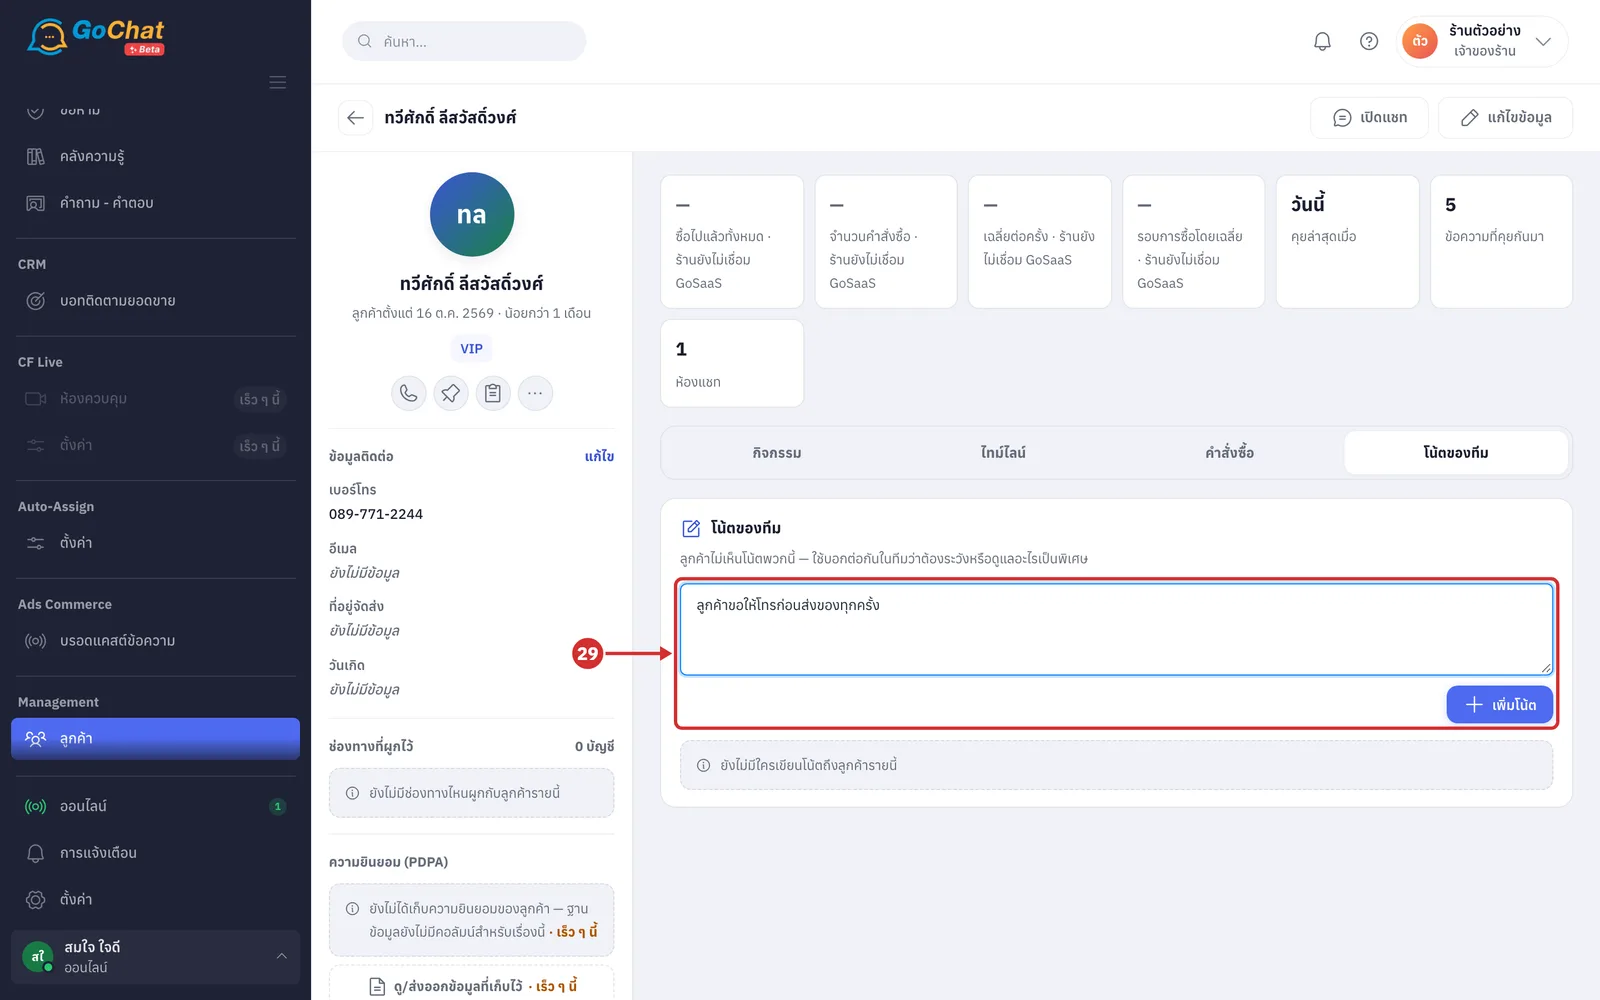
Click the โน้ตของทีม (Team notes) tab, type a note to the team, up to 2,000 characters, then click เพิ่มโน้ต (Add note). The system shows บันทึกโน้ตแล้ว (Note saved) (customers do not see notes · these are the same notes as the ones written in the chat · click the trash icon on a note to delete it; it is deleted immediately without asking again)
Merging duplicate customers
If the same customer messages you from another channel, open the chat from the new channel, click สร้างลูกค้า (Create customer) on the customer panel, then choose the ลูกค้าเดิม (Existing customer) tab to merge them into the existing customer (full steps in Using the customer panel)
If the profile shows มีอีก N รายที่ชื่อจากช่องทางตรงกัน — ตรวจและรวมได้ที่หน้ารายชื่อจริง (N others have the same channel name — check and merge on the full list page) under the linked channels, click it. Under อาจเป็นคนเดียวกัน (May be the same person), check the other person's name, channels and last chat date, choose ใช้ชื่อไหนเป็นชื่อหลัก (Which name to keep), then click ใช่ คนเดียวกัน (Yes, same person). The merged person moves to รวมมาจากลูกค้ารายอื่น (Merged from other customers), and the customer's timeline gets a รวมบัญชี “…” เข้ากับคนนี้ (Merged account “…” into this person) line (the system only compares channel names; if the name is common in your shop, it warns you to open both chats before deciding)
On the same page, รวมมาจากลูกค้ารายอื่น (Merged from other customers) lists the people already merged in, with who merged them and when. Click แยกกลับ (Separate) to split them back into two; that person disappears from this list
Note: The list shows up to the 500 customers with the latest chats · customers you added yourself who have never chatted count as เสี่ยงจะไม่กลับมา (At risk of not returning) until their first message · customers added by others in your shop appear in the table when you reload the page